
Do you find it difficult to manage large amounts of data? Do you find it hard to navigate files on your PC?
If it is so& then this article is for you!
Storing and managing data is a matter of great concern ever since the introduction of technology. You might face issues in managing large amounts of data. Well& there are several services available in this regard.
In this article& you can learn about the OneDrive feature of Microsoft that was launched in 2007 to grant ease in the storage facility to the users. To use this feature& all you need to have is a Microsoft account. OneDrive is an Internet-based storage platform where you get a significant amount of free storage. A 5GB of space is provided free to every user. You can also have more space by buying the premium package according to your need. This feature allows you to make a space for your files or folders on the internet. You can access these files or folders with your Microsoft account.
Another plus point of this feature is that it comes by default with Windows 10. As we all know& Windows 10 is the most used operating system for PCs. So& to access your files on OneDrive& all you need to do is to open the OneDrive folder in the File Explorer. In this article& you will also learn how to upload files to OneDrive.
Table of Contents
Part 1: How to upload files and folders to OneDrive?
OneDrive is the best means of storing files and folders you can ever have! What's better than a platform where you can securely store your files and folders on the internet? Based on your requirements& you can choose to upload selective files or multiple files on OneDrive.
Given below are the procedures to upload a file to OneDrive in two ways.
1.1 Selectively Upload
What if you don't want to upload all the files on OneDrive? You might think that if you use OneDrive& then you will have all your files and folders uploaded on it. Surprisingly& it is not so!
If you want to upload some selected folders or files on OneDrive& you can easily do that. Here is a simple step by step procedure to upload selective documents on OneDrive:
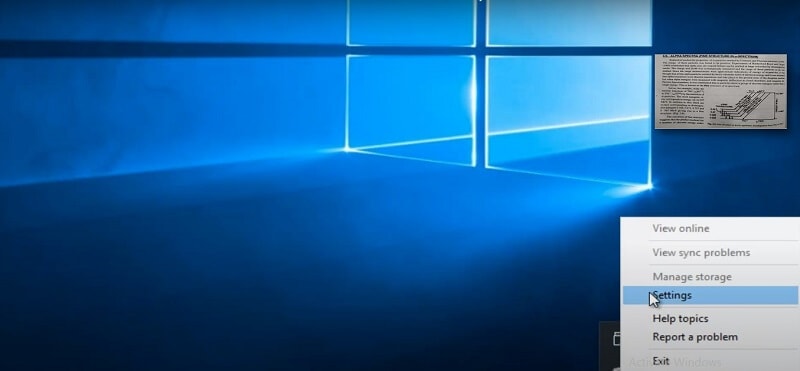
Step 1: When you find the One-Drive option on your screen& click on it to reveal a drop-down menu.
Step 2: In the several options listed in the drop-down menu& go for the ‘Settings’.
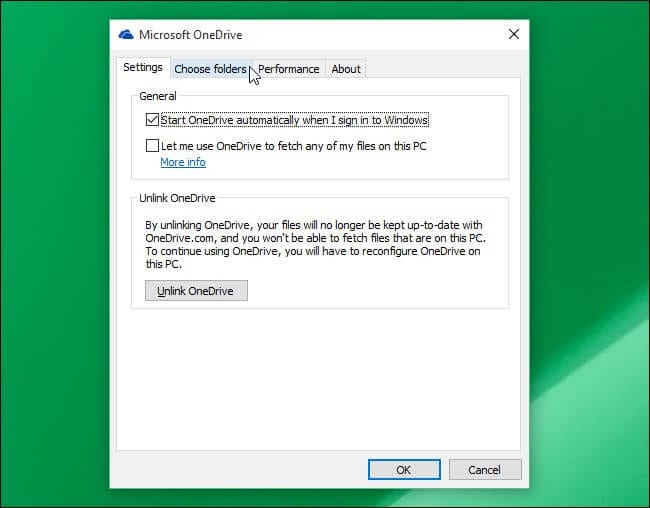
Step 3: The settings window will appear on the screen. On the top& you will find the ‘Choose Folder’ option. Click on it.
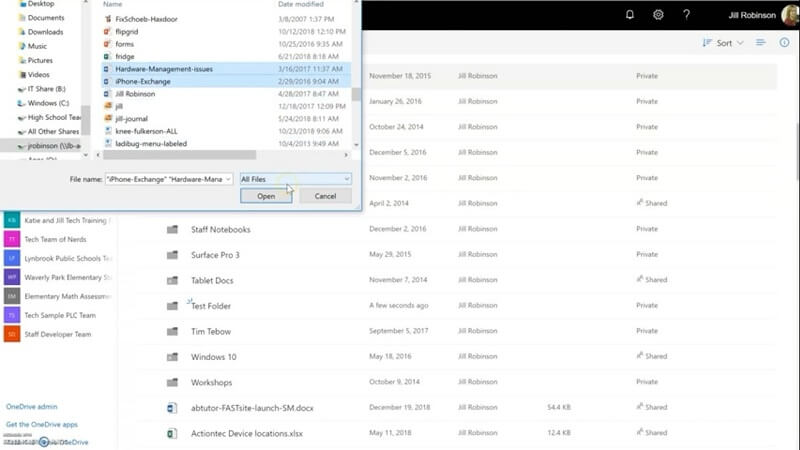
Step 4: All the folders that are present in your PC/Laptop will be listed on the screen. From this collection& select the ones that you want to upload. Click on ‘Next’.
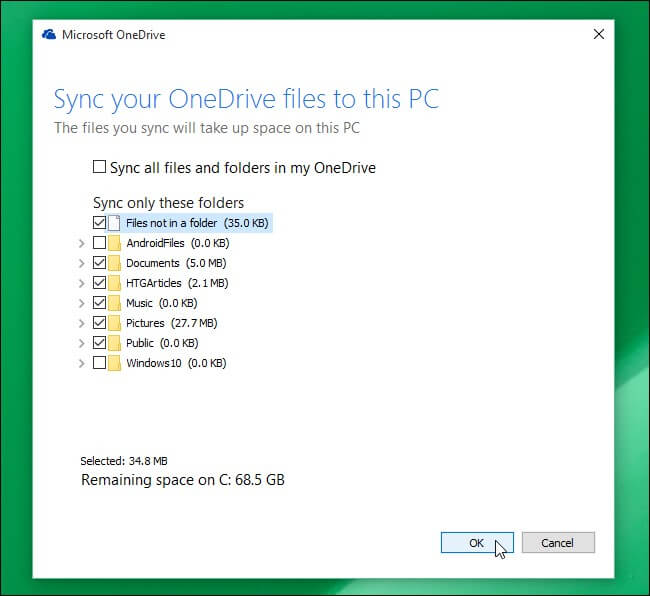
Step 5: Whatever files you’ve selected will sequentially start to upload/sync to the One-Drive
You can also selectively upload or migrate files from one drive to another drive using the Wondershare InClowdz. This is how you do it -
Migrate, Sync, Manage Clouds Files in One Place
- • Migrate cloud files such as photos, music, documents from one drive to another, like Dropbox to Google Drive.
- • Backup your music, photos, videos in one could drive to another to keep files safe.
- • Manage all cloud drives such as Google Drive, Dropbox, OneDrive, box, and Amazon S3 in one place.
- • Sync clouds files such as music, photos, videos, etc., from one cloud drive to another.
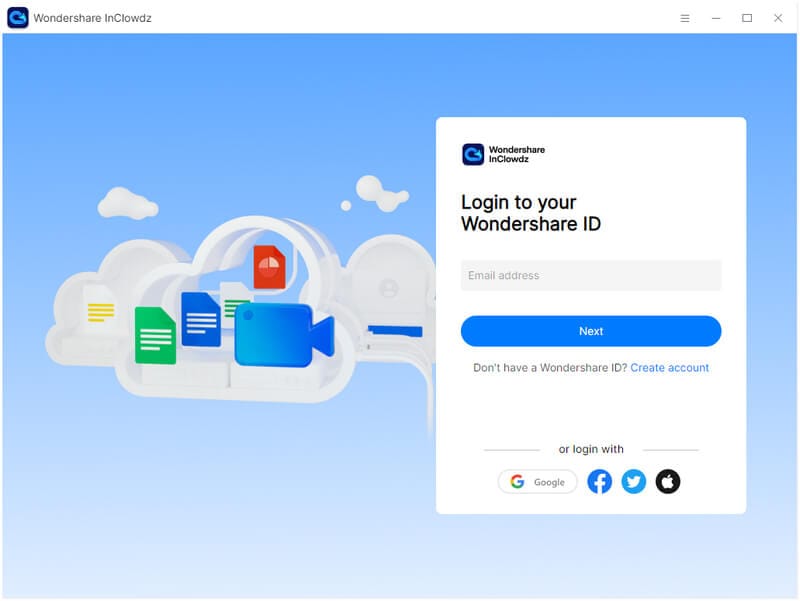
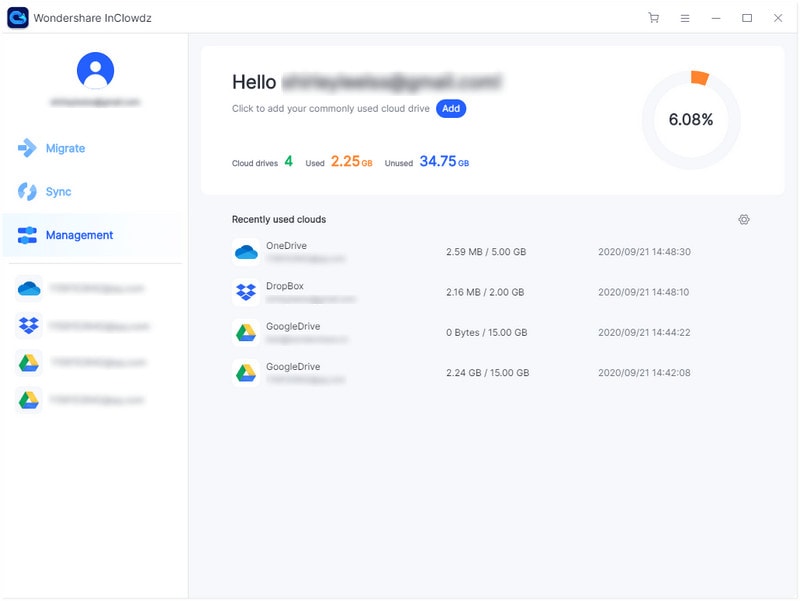
Step 1 - If you already have an InClowdz account& then Log In or make a new account and Sign In.
Step 2 - In the 'Management' option& choose the ‘Add Cloud Drive’ option and select the ‘Source Cloud Drive’ and ‘Target Cloud Drive’& so that you can upload files from Source to Target.
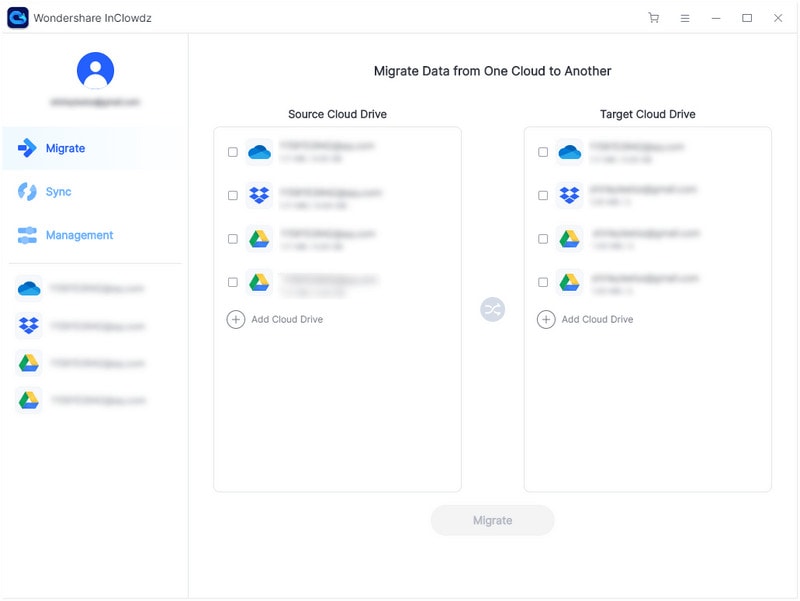
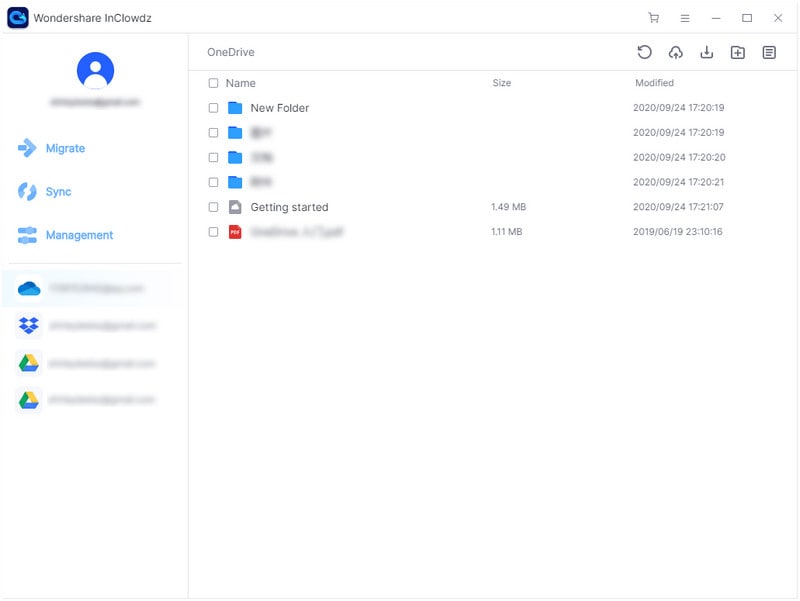
Step 3 - Click and choose the specific file that you want to send to target.
1.2 Multiple Upload
The best thing about OneDrive is that you can upload the documents according to your need. You can easily upload multiple files or folders to OneDrive. To do this& there are two methods. One is a simple drag and drop method which you might be familiar with. You simply select your files and drag them to the OneDrive window.
In the other method& there are a few steps that you can follow to make an upload:
Step 1: Start off by selecting the One-Drive option on your desktop/ PC.
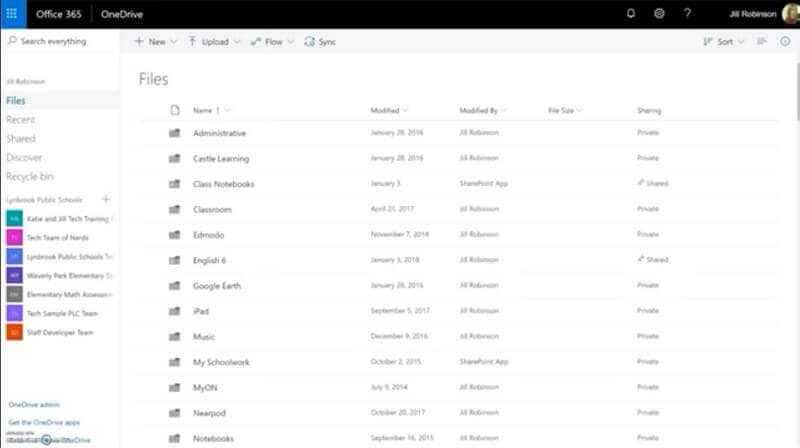
Step 2: The One-Drive window will open and the upper side will have the ‘Upload’ option. Click on this one. You will be prompted to select the files or folders that you want to upload. If your files are scattered& you can bring them under one folder and then go for the upload of that specific folder or simply choose ‘Files’.
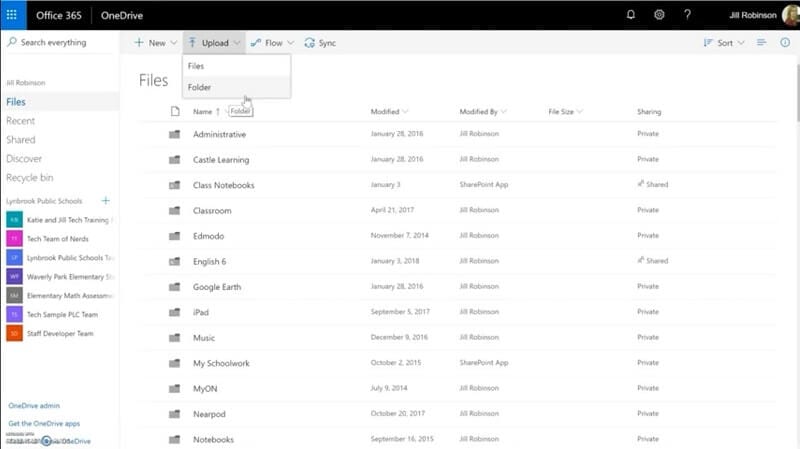
Step 3: Depending on your choice of going for file or folder upload& click the suitable files/folders from the box that opens.
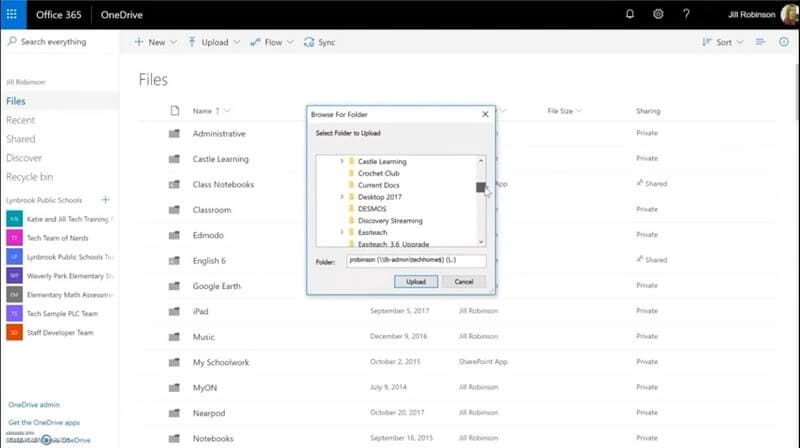
Step 4: After choosing the files or folders& click on ‘Upload’ that’s on the bottom end of the box. Immediately& your files/folder will start to sync with one-drive.
Step 5: If you don’t have a folder in place& you can select multiple files with the help of ‘Ctrl’ key on the keypad/keyboard and all of them will sync. Remember to choose the ‘File’ option in Step 2.
You can also make Multiple Uploads or migrate files from one drive to another drive using the Wondershare InClowdz. This is how you do it -
Migrate, Sync, Manage Clouds Files in One Place
- • Migrate cloud files such as photos, music, documents from one drive to another, like Dropbox to Google Drive.
- • Backup your music, photos, videos in one could drive to another to keep files safe.
- • Manage all cloud drives such as Google Drive, Dropbox, OneDrive, box, and Amazon S3 in one place.
- • Sync clouds files such as music, photos, videos, etc., from one cloud drive to another.
Step 1 - If you already have an InClowdz account& then Sign In to your account or you will be prompted to make a new account.
Step 2 - In the ‘Migrate’ option& Go for the ‘Add Cloud Drive’ option and select the ‘Source Cloud Drive’ and ‘Target Cloud Drive’& so that you can upload multiple files from Source to Target.
Step 3 - The ‘Choice box’ option in front of the cloud allows you to completely upload all the files from source to the target. This way you can opt to upload multiple files to the new target.
Step 4 - Select the target location from the Target Drive and ‘Migrate’ option will help you upload your multiple uploads to the new location.
Part 2: How to automatically upload to OneDrive?
You may find it uneasy about uploading files each time you use your PC. You might wonder what to do if you want your files to automatically save on one drive.
Well& you can automatically save files on OneDrive using the 'folder protection' feature. This feature ensures that all the documents on a PC get automatically stored in Microsoft's cloud service. All you need to do is enable this feature in your OneDrive.
Follow these steps to automatically save files on OneDrive:
Step 1 - Start off by clicking on the One-Drive icon and go to settings from the Drop Down Menu. There you have to enable the ‘folder protection’.
Step 2 - After this& find your way to the ‘Autosave tab’ that is clearly displayed along with other options
Step 3 - Under the protect your important folders setting& you can choose all those crucial folders and update them serially.
Now& all the documents of your PC will automatically upload on the OneDrive& which you can access by logging in to your Microsoft account.
Part 3: How to achieve OneDrive remote upload?
What is OneDrive remote upload?
Sometimes& you want to upload a file by providing a URL for it. This is known as OneDrive Remote upload. Your file will upload directly from a remote server. In this way& OneDrive does not have to upload the file's bytes.
Follow these simple steps to do OneDrive remote upload:
Step 1 - Click on the One-Drive icon on your PC screen ad go for the Settings option from the drop-down menu that appears.
Step 2 - Another Pop-up menu appears immediately after this and has the upload URL option. Go for that.
Step 3 - Paste the specific URL link in the type box and click on ‘OK’.
In this way& you can upload your file directly from the internet without downloading it first.
Part 4: How to stop OneDrive upload?
What if you longer want your files to be stored on OneDrive? Well& again& it is a very simple process by which you can stop the upload of your documents.
Follow this simple procedure to stop OneDrive upload on your device:
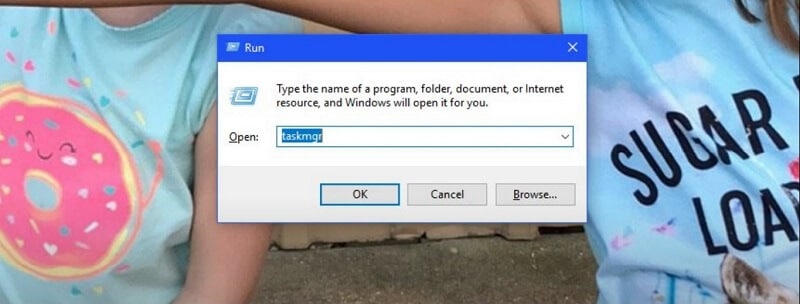
Step 1: From the Start button on your taskbar& select the ‘Run’ option and a dialogue box will appear.
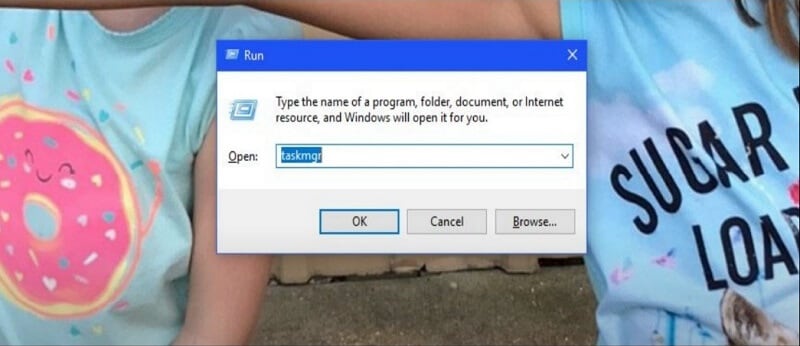
Step 2: Here& type ‘taskmgr’ without any spaces and no change in the sequence or capitalization of the text. Click on OK.
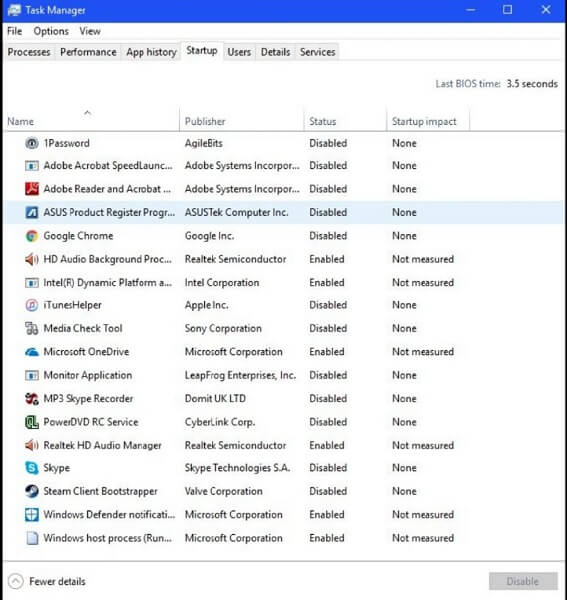
Step 3: The task manager window will pop up on the screen. From here& select ‘Startup’
Step 4: Navigate through the files and stop when you find Microsoft One-Drive
Step 5: Place the cursor over the option& right-click& and then go for the ‘Disable’ option.

Conclusion
Hopefully& this was of great help. OneDrive is a very trusted and easy way to store your documents. All you need to have is a Microsoft account for this purpose. You can very easily upload files to OneDrive. These files and folders are easily accessible. You can access them from anywhere and at any time. You can follow the simple procedures to make a desirable upload on OneDrive. You can upload selective folders also according to your need.
Share


 100% Secure