
All in One & One for All
Dr.Fone takes over
all
your phone management problems with a
one-stop
solution.


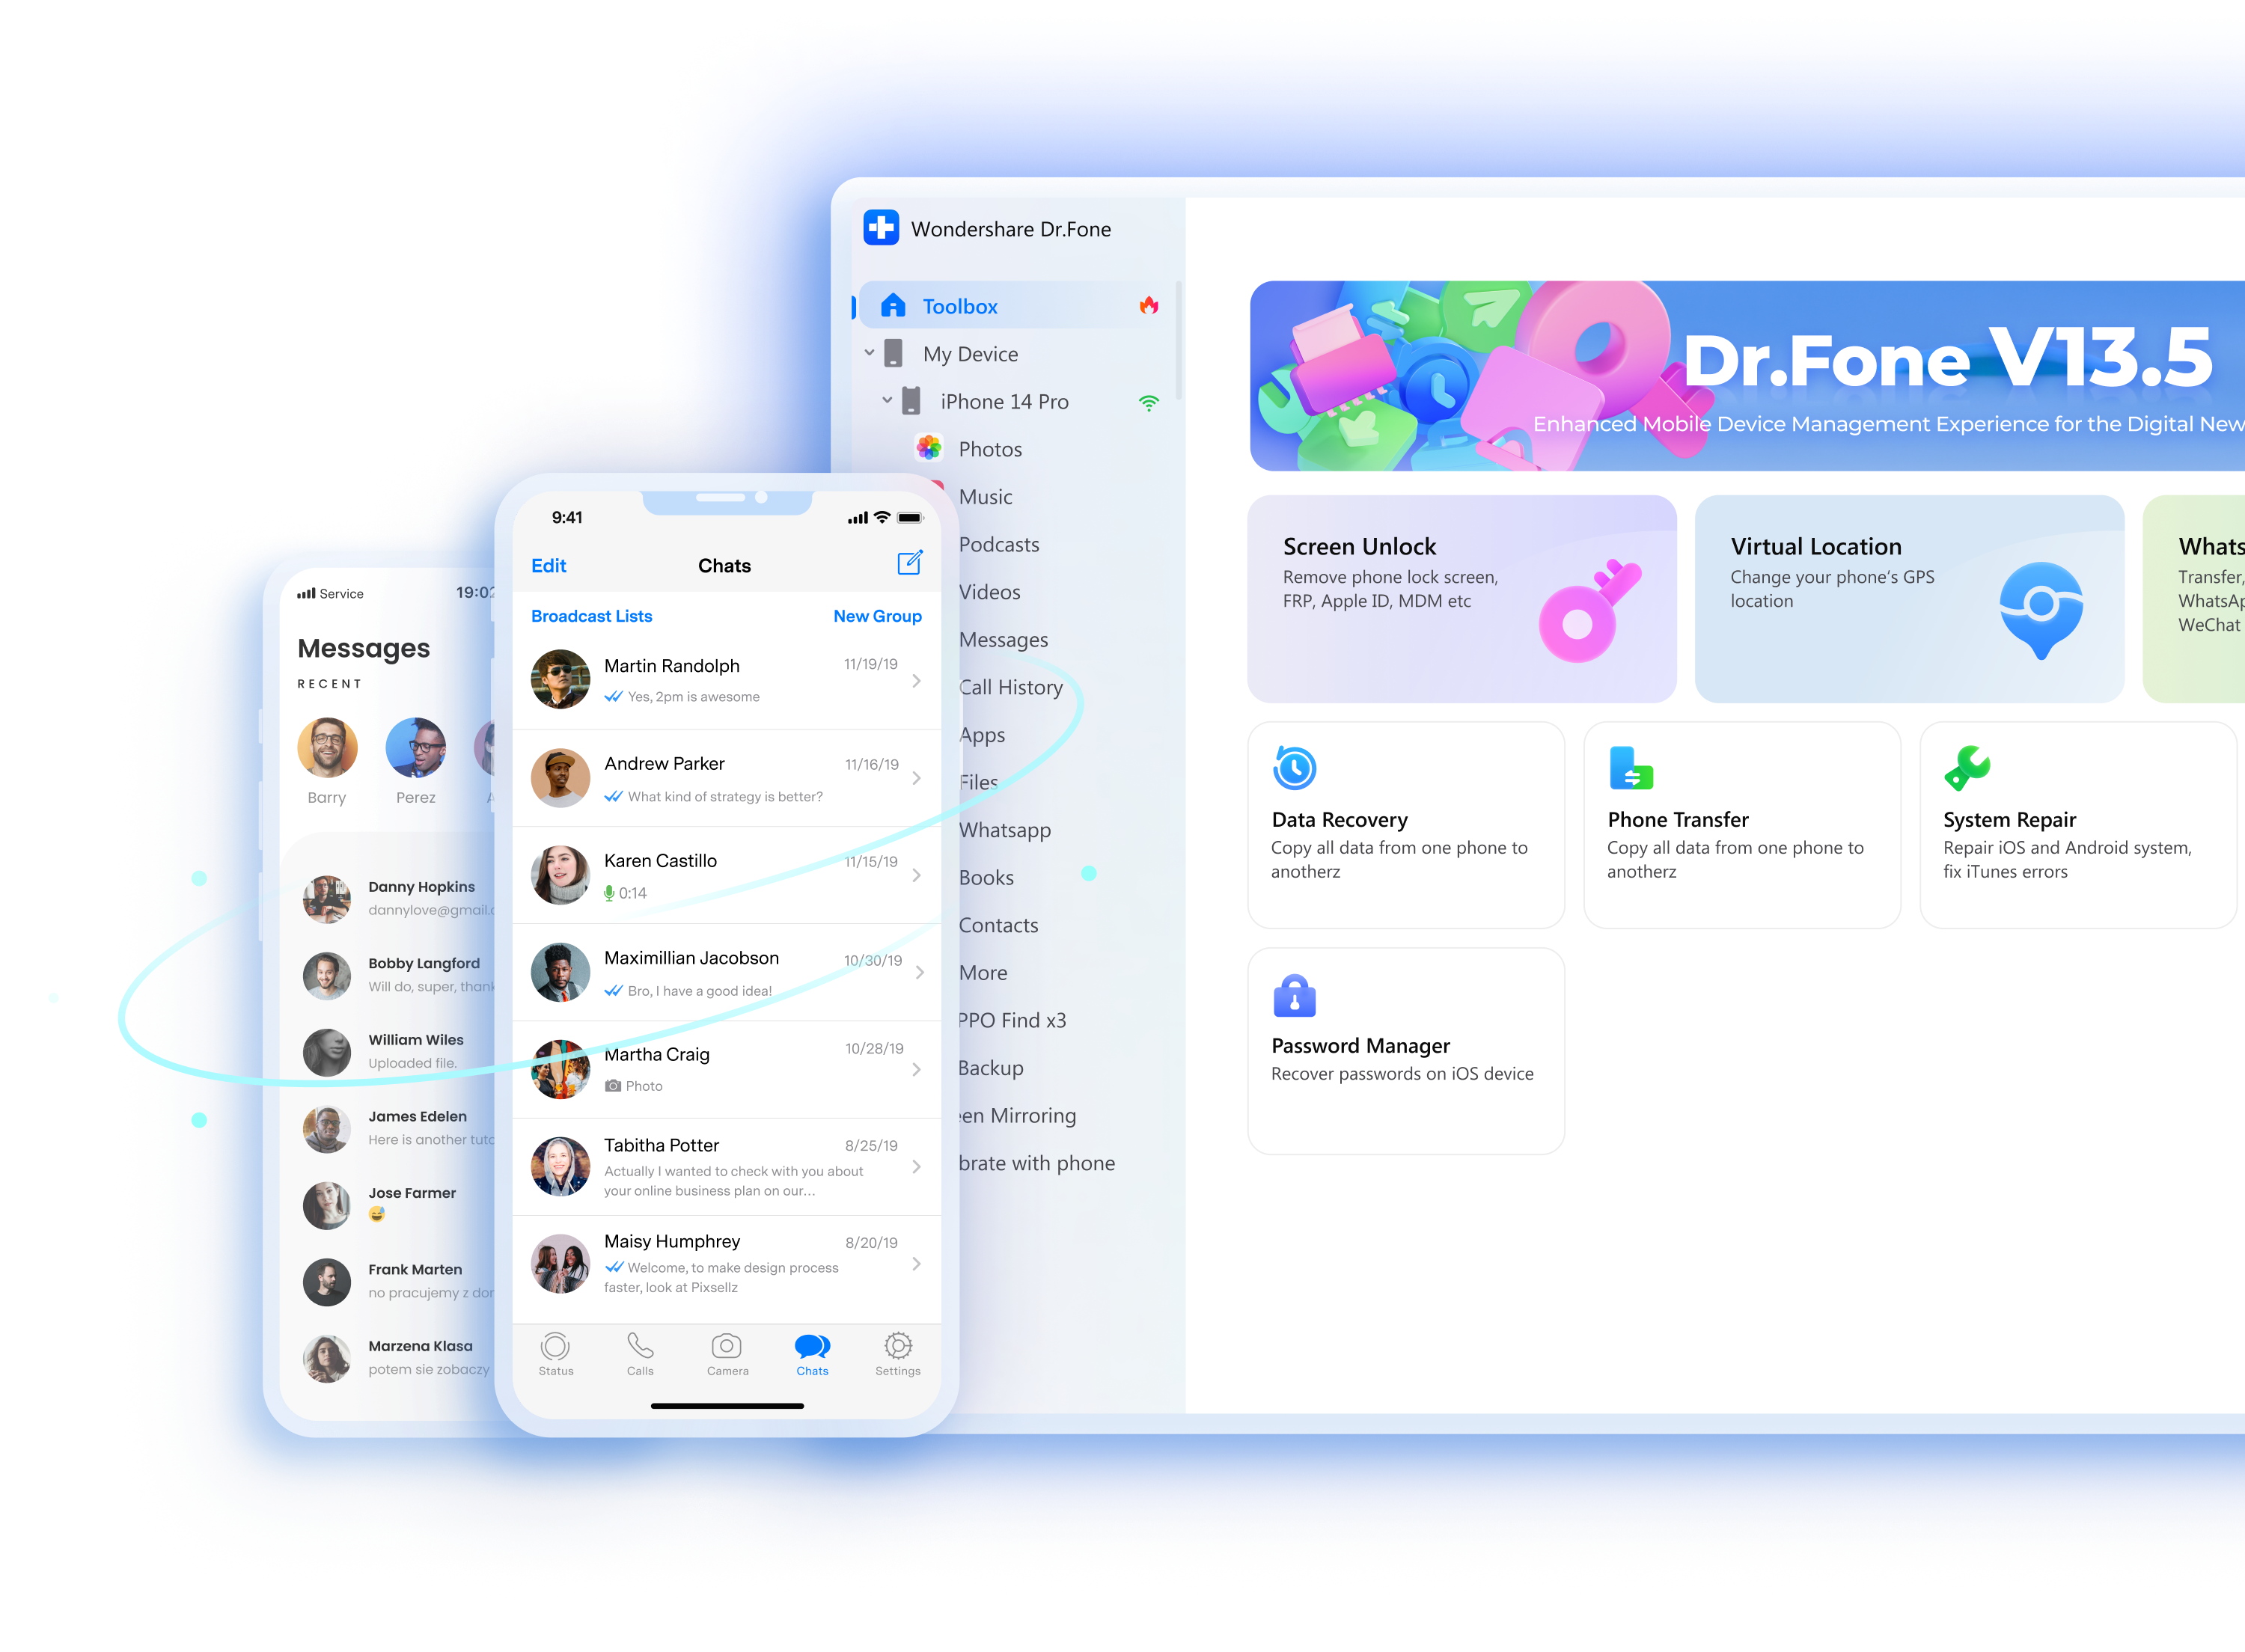
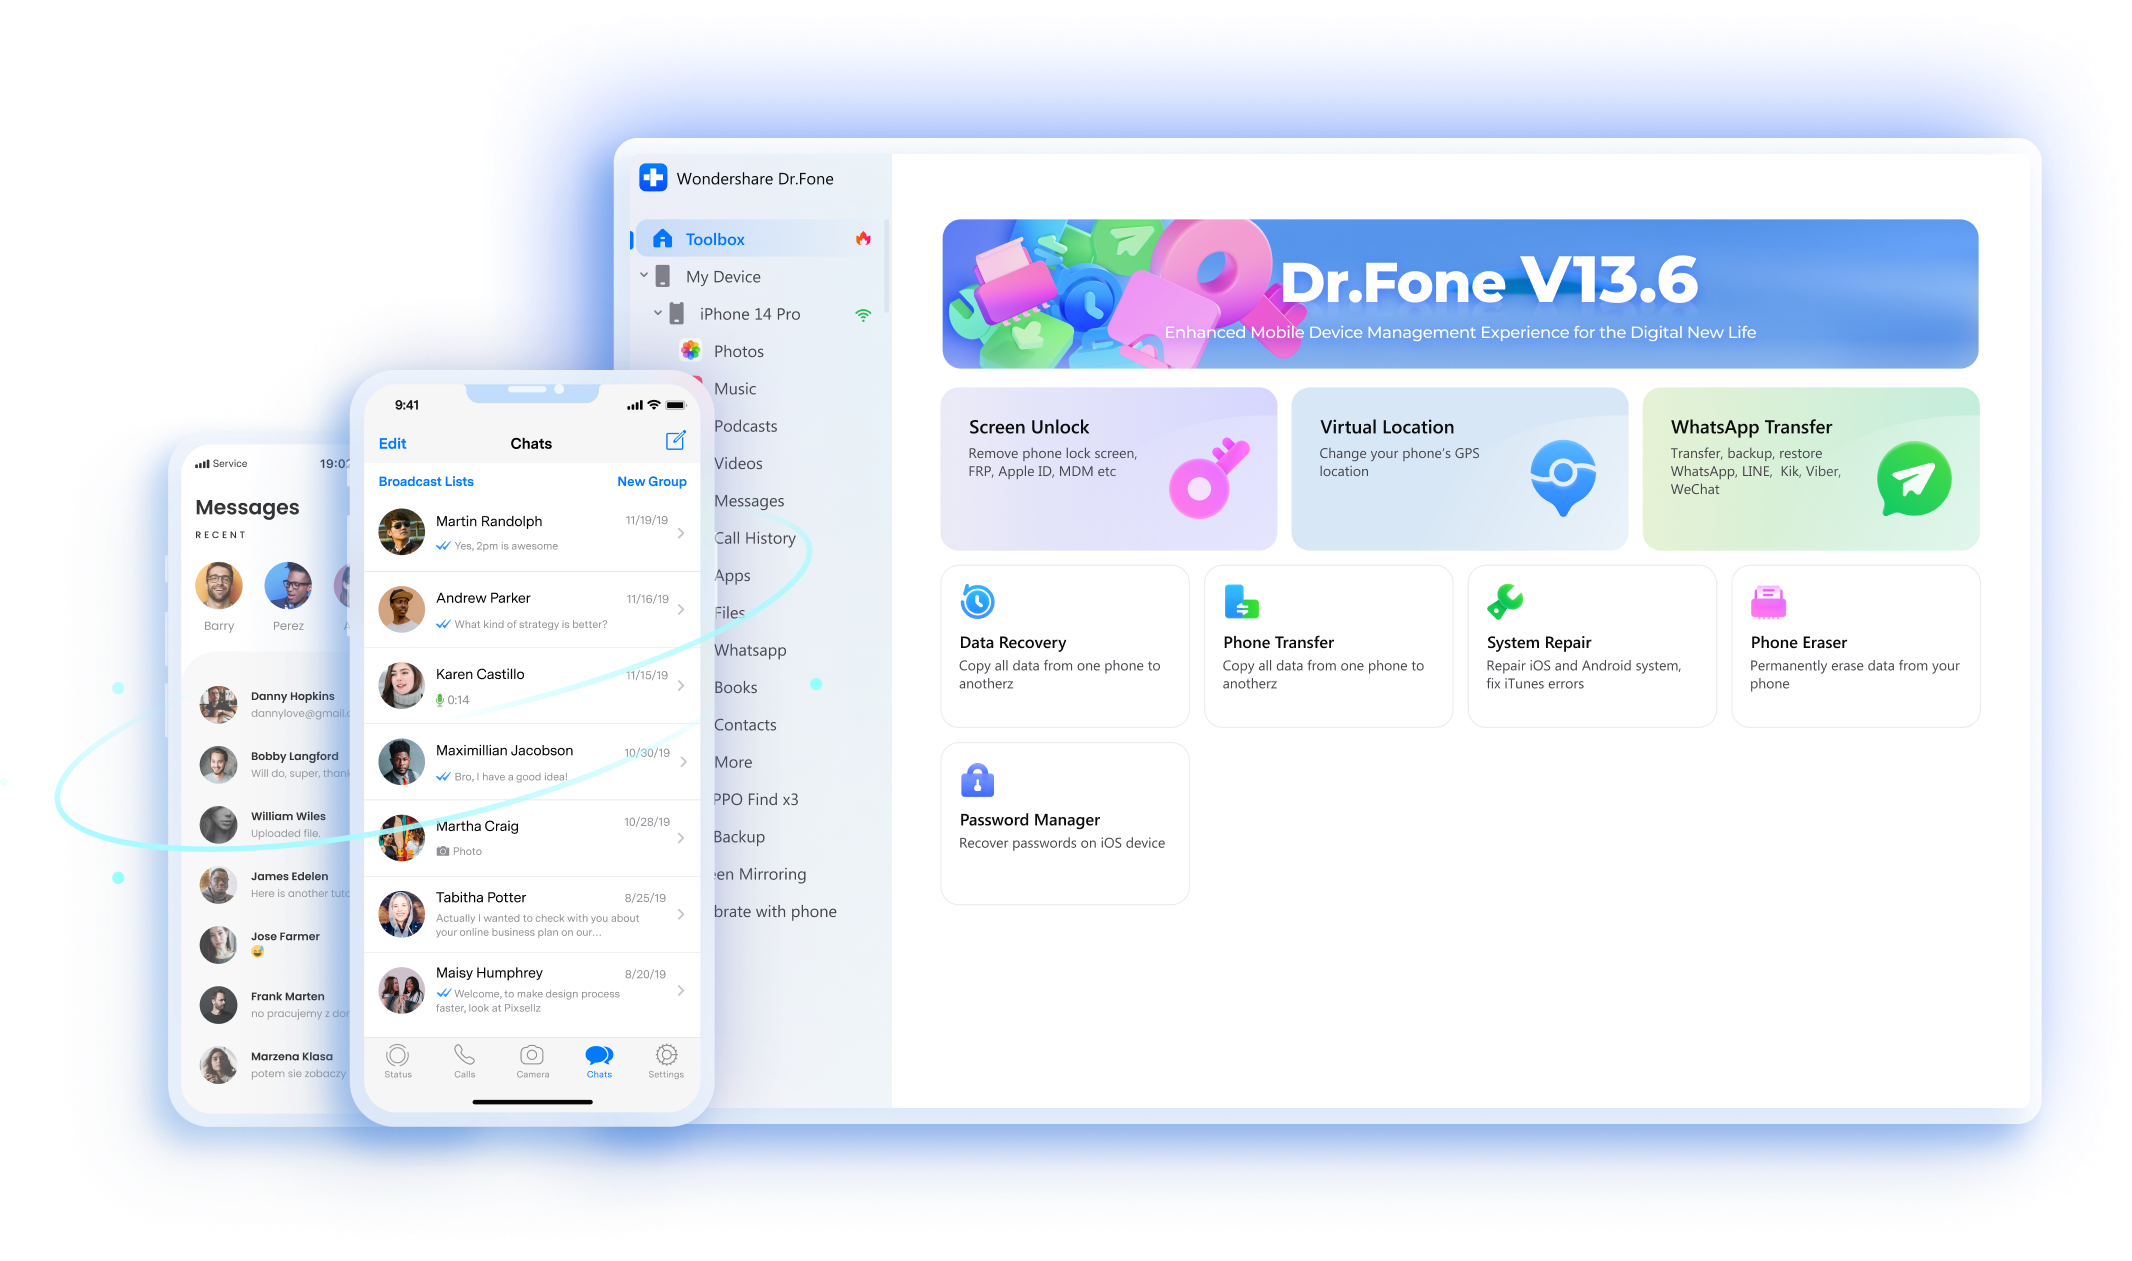
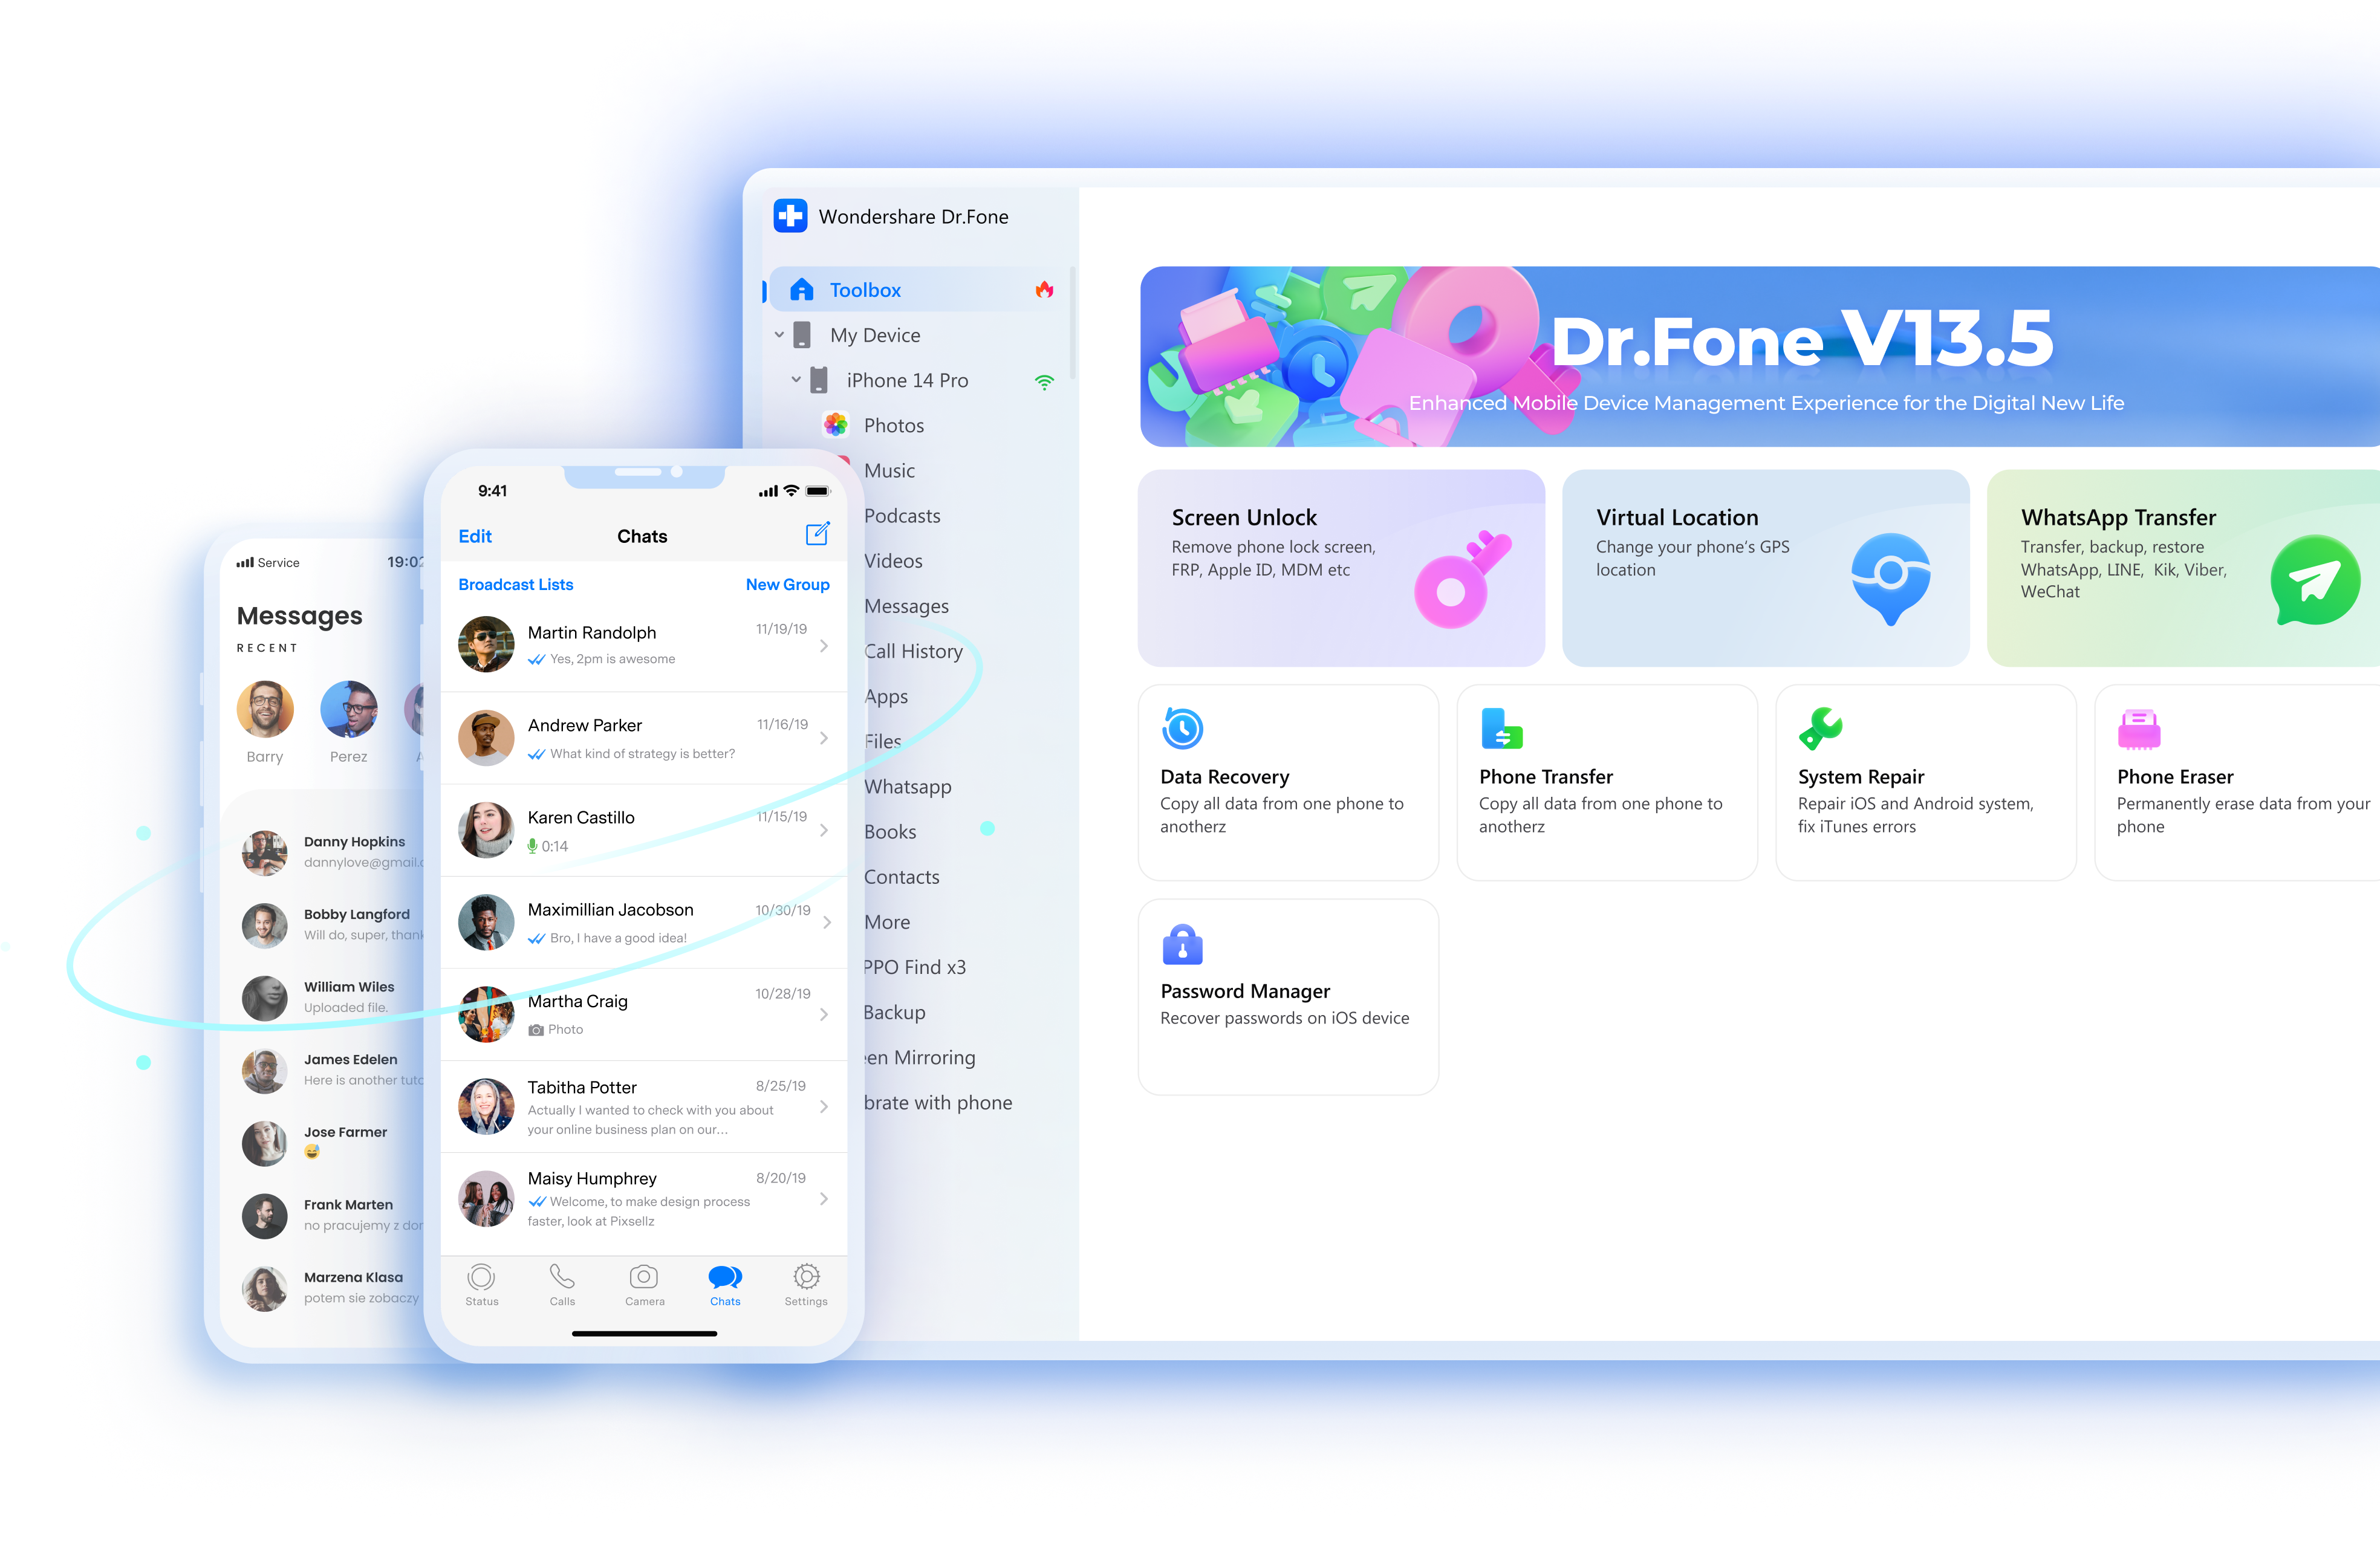
Manage your phone, repair your system, recover your data, transfer your files, and so on. Whatever you need, Dr.Fone is at your service.
WhatsApp Transfer
Transfer, backup, and restore WhatsApp messages, files and chats.*
WhatsApp Transfer
Transfer, backup, and restore WhatsApp messages, files and chats.*

Phone Transfer
Transfer local files or cloud backup between iOS/Android with one click.
Tired of switching screens to organize your phone? Dr.Fone is here to help. Overview photos, music, videos, messages, call history, all your data on one surface. Import, export, organize, now you’re the one in charge.
Wireless backup releases you from all the cables, simply connect with Dr.Fone, and enjoy various data backup types up to 24. Incremental backup only copies the new-added or lately-changed, phew, what a big relief for your space and time.
Mirror your screen to PC or Mac, zoom in on the details, and dive into the vibe. Capture the moments with real-time recording or high-quality screenshots. Operate on your PC or Mac, and witness the changes on your phone without delay.
Show you a verification report with all details, system version, storage condition, battery life, etc., and a valid score. Knowing better with your phone, and increasing credibility in the used device market, starts from here.
Write your own ringtones, and design a special wallpaper with clicks? Fly your imagination, Dr.Fone makes it come true. The brand-new AI-powered ringtone maker, AI wallpaper, and more handy tools are waiting for you to discover.
Offer a complete set of solutions for your phone. All-rounded, so pro.
Get up to 28% offYour best phone butler for data management and backup. Use it, sorted.
Save up to 28% OffManage, transfer, and mirror your phone whenever you need. Wireless, worry less.
Try It OnlineVirtual Location
Teleport your GPS location anywhere you want. Explore the world with your fingertips.
MobileClean - Phone Cleaner
Clean up redundant copies of photos or contacts. Free up space for more important things.
Data & Photo Recovery
Recover data and photos from Android devices. Quickly, safely, effortlessly.
Dr.Fone takes over all your phone management problems with a one-stop solution.


“Well, to be very honest, till now, my experience using this software has been brilliant. I purchased to transfer whatsapp data of 14GB from Android to iOS, which has been done smoothly and did exactly what I was looking for. I recommended it to my friend, and he did not face any issues as well, so I would probably go five stars for my experience.”
—— Oscar Cerna
“I have never seen a support team putting so much effort into resolving my issue. My Samsung tablet has been screen-locked for years, and I have been trying every tool without success. The wondershare engineer literally remotely controlled my computer to remove the lock screen from my Samsung tablet. I found all my family pictures inside without a data loss. I cannot thank them enough.”
—— Badrimadrid
“I bought a new iPad, forgot my password, and was instantly locked out. I phoned Apple to get it sorted out, and they told me I had to bring it to an Apple store to unlock it. Living in Mexico made this impossible. It effectively worked because the crew at the company stuck with me on a daily basis through email, giving me so much help and suggestions. I cannot emphasize enough how much I appreciated their kind approach to my very frustrating situation. Thank you so much.”
—— Aneel Rasheed