How to Retrieve Deleted Line Chat History on Android

Jul 12, 2024 • Filed to: Manage Social Apps • Proven solutions
There are various recovery applications which help recover lost data. With the smart phones of today being highly capable of storing all kinds of information and even those that are highly important and sensitive, the vulnerability of putting all important data to risk also increases. If the information is lost or deleted, no chance of getting them back, really? No. But, how to retrieve deleted line messages?
There are various applications which can recover data or information lost with few steps. We use many applications for communication and in the Google Play Store. While we use such applications, it automatically happens that the chat data takes some space in the device storage. This invariably puts the data in risk of getting lost. Line is one such instant messaging and calling application. Being a messaging and calling app, the chat definitely takes some space. So, there are chances of the chat data getting deleted. This is where android data backup and restore applications come into play. In case of Line, the chat history can be backed up and restored whenever required.
There are various such data backup and restore applications which can be used to backup and restore Line chat history. Below are some ways android data can be recovered using Dr.Fone:
- Part 1: How to Retrieve Line Chat History with Dr.Fone - Data Recovery (Android)
- Part 2: Backup Line Chat History For Android Devices
- Part 3: Backup Line Chat History on iOS Devices
- Part 4: Restoring the Line backup files on iOS
Part 1: How to Retrieve Line Chat History with Dr.Fone - Data Recovery (Android)
First of all download and launch Dr.Fone on the computer for Android.
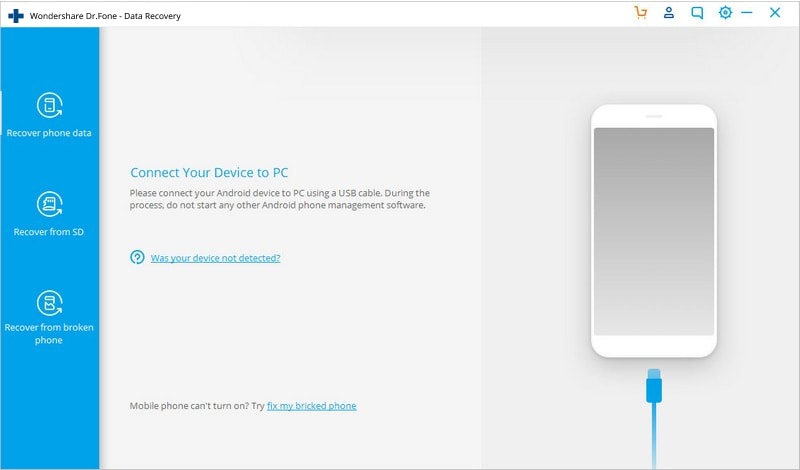
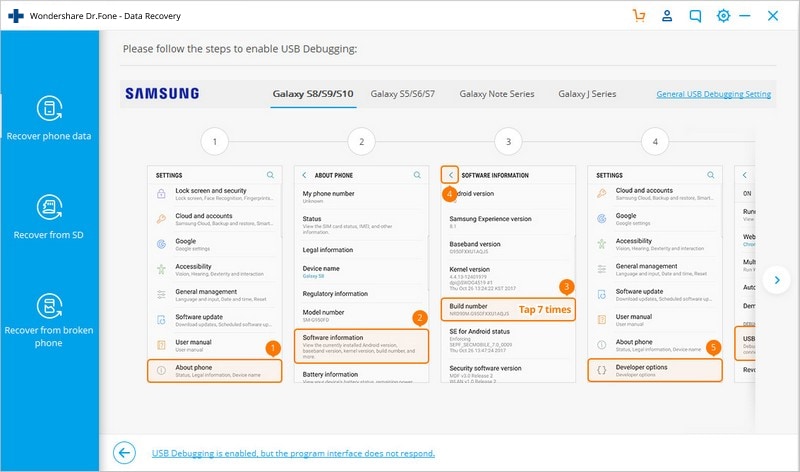
After launching Dr.Fone, connect the Android device with the computer using a USB cable. Make sure that the USB debugging feature is enabled on the Android device, if not, while connecting the Android device, a message will pop-up where the USB debugging can be enabled.
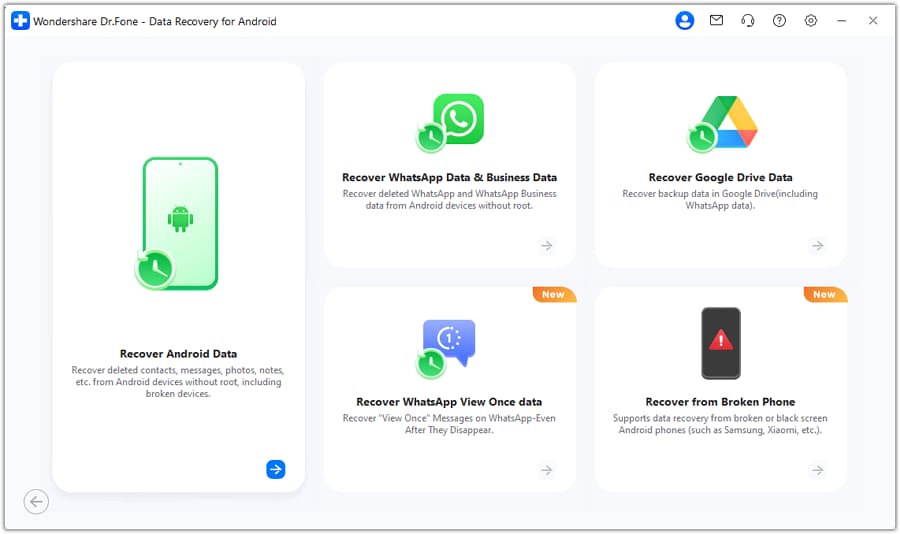
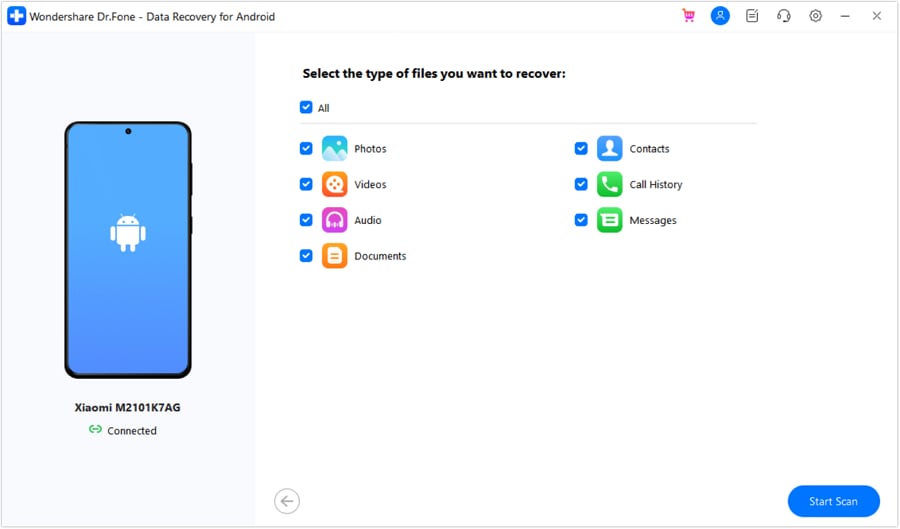
After the device has been properly connected and detected by the program, it's time now to select the file types to be scanned. So, select the type of data to be recovered.
Click on "Next" to continue with the data recovery process.
Scan the Android device for any lost data by clicking on “Start” to begin. This will begin analyzing and scanning device for any lost data which is to be recovered.
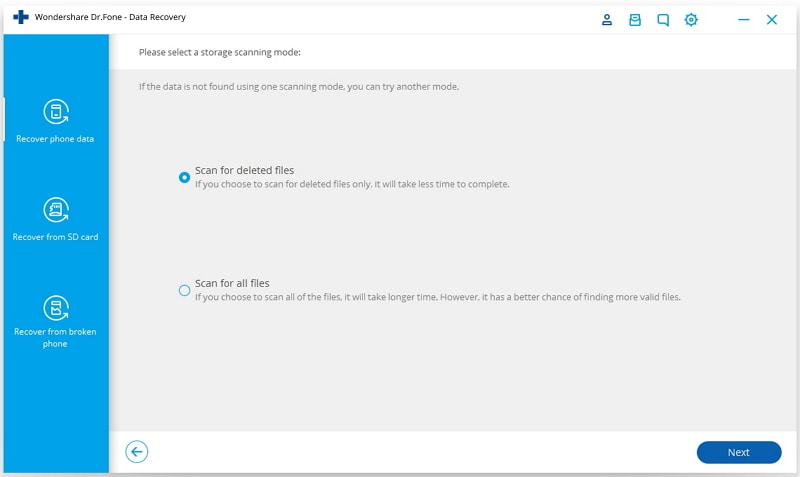
There are two modes here. Looking at the description, either “Standard Mode” or “Advanced Mode” can be chosen based on the requirement. Ideally it is better to go for the “Standard Mode” as it works faster. “Advanced Mode” can be chosen if the “Standard Mode” does not work.
Now, the scanning process will take few minutes depending on the quantity of the lost data before the program recovers deleted data.
A Super User authorization might flash on the screen of the device. Click on “Allow” to confirm.
After the program is done with scanning the device for lost data, the found data can be previewed one by one. Now, check the items by previewing them, which need to be recovered.
Click on “Recover” so that the recovered items are saved on the computer.
Part 2: Backup Line Chat History using Dr.Fone - Backup & Restore (Android)
With Wondershare Dr.Fone’s Android data backup and restore feature, Android data can be backed up with great ease. This program helps backing up data and then selectively restoring data whenever needed.
First of all, launch the program and select the option of “Backup & Restore”.
After launching the program, connect the Android device to the computer using USB cable and let Dr.Fone detect the device.

Now after the device is connected, select the file types to be backed up using the program. Dr.Fone supports many different file types and Line Chat History being one of the application data, select application data as the type to be backed up. You can even choose other file types together to be backed up as in the picture shown below.

But, one thing must be noted that backing up app data on the Android device would require the device to be rooted.
After having selected the data types, click on “Backup” to start the process. The process will take a few minutes depending on the size of data to be backed up.

After the backup is complete, click on “View the Backup” which is present at the lower left corner.
The backup content can now be viewed by clicking on “View”.
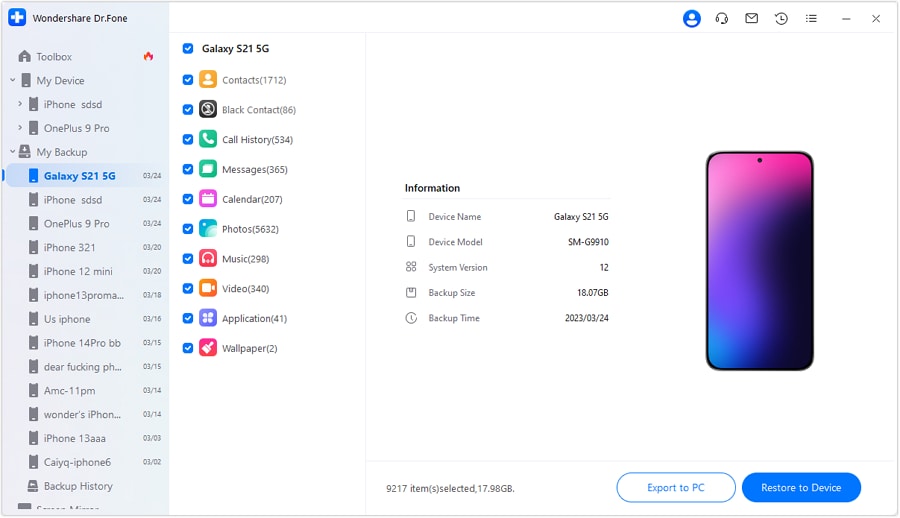
You can now selectively restore the backed up content when needed.
Click on “Restore” and choose from the backup file which is present on the computer. You can choose the data which is to be restored. Click on “Restore” after the data type and files to be restored have been selected.
The program would require authorization during the process of restoration. Click on “OK” after allowing authorization to continue.
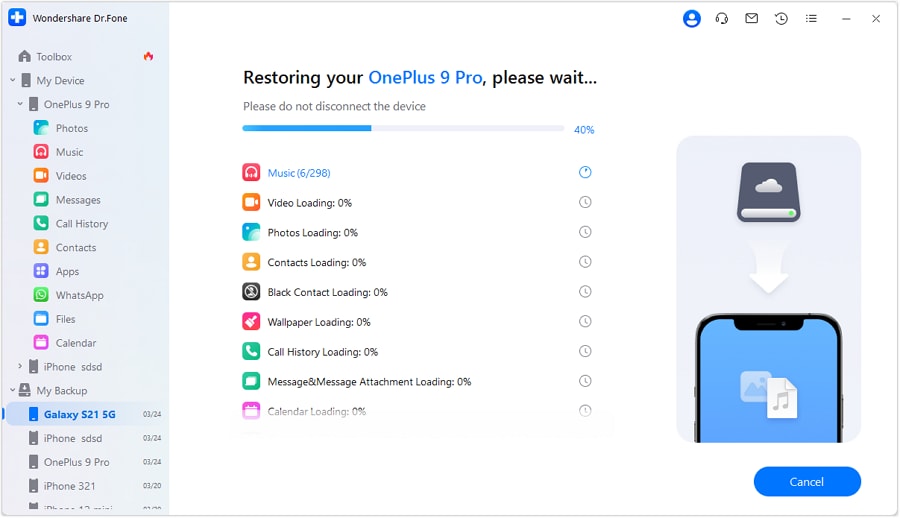
The whole process would take another few minutes.
This program does not retrieve or recover the chat history which is cleared. The chat data has to be backed up using this program to prevent any further loss as the backup file can be used anytime if the chat history gets deleted.
Part 3: iOS Line Backup & Restore
Launch Dr.Fone and click on “Backup & Restore”. This will show a list of tools as shown in the picture below.
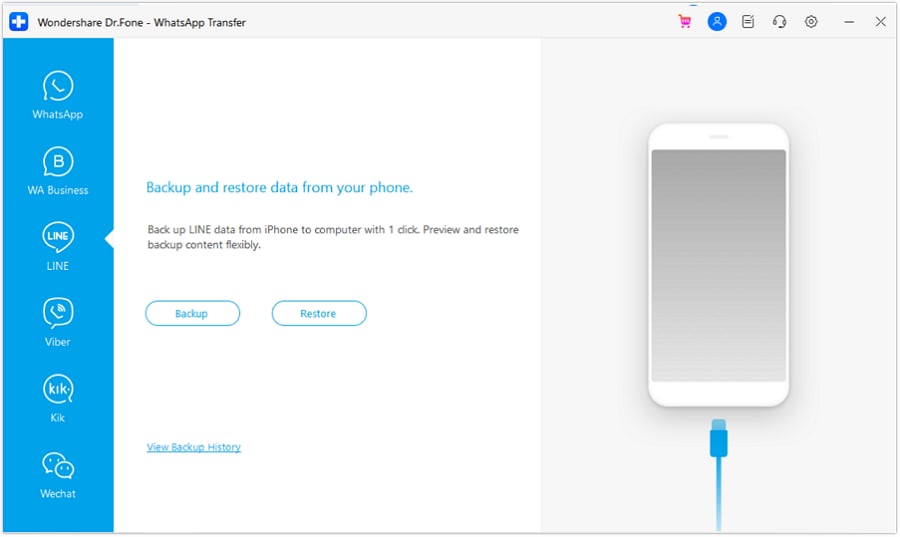
Select “iOS LINE Backup & Restore” from the list of tools. Connect the iPhone to the computer using a USB cable and allow it to be detected automatically by Dr.Fone.
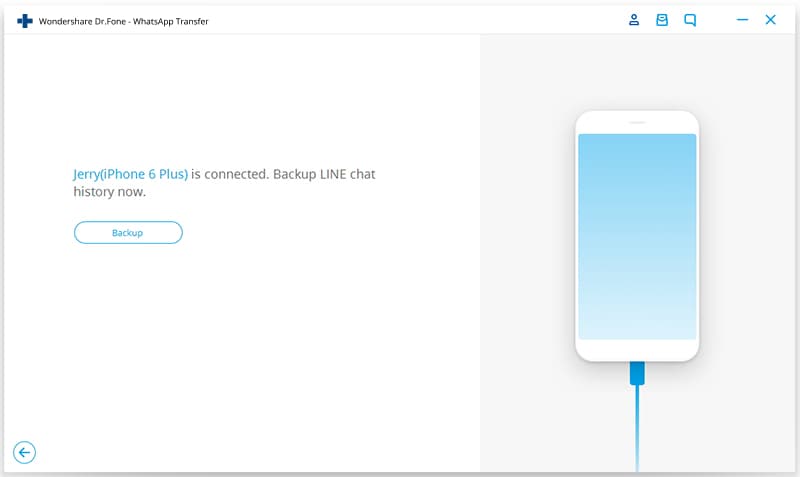
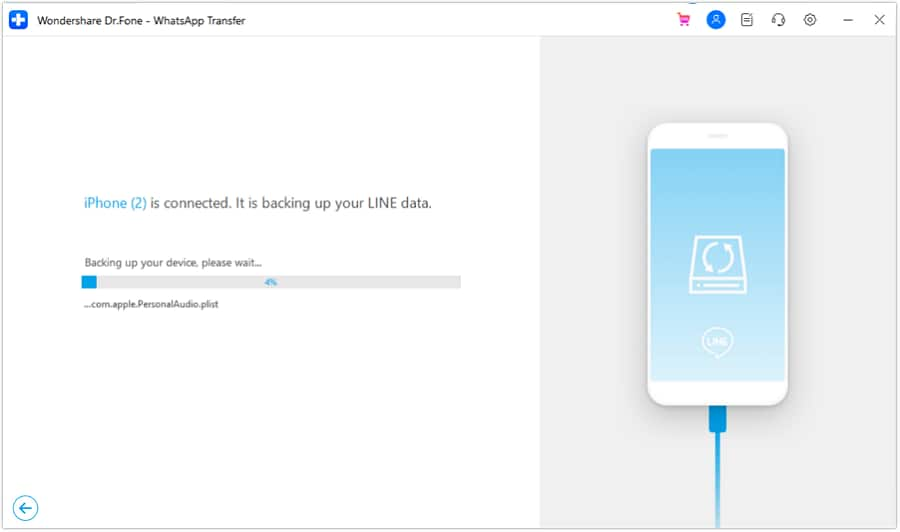
Click “Backup” to start the backup process after the phone has been recognized.
You can click on “View it” to preview the backup files.
Now, after the backup process is done, restoring the backup files can be done whenever needed.
Part 4: Restoring the Line backup files
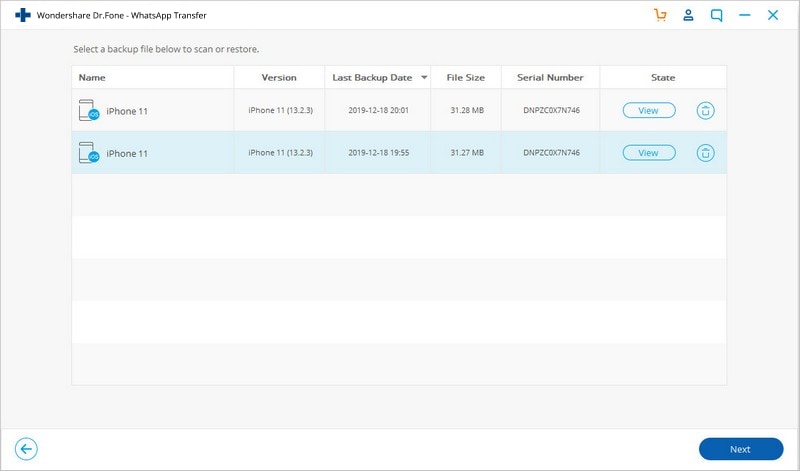
Click on “To view the previous backup file>>” to check the line backup file.
The list of Line backup files can be seen, chosen and viewed on tapping on “View”.
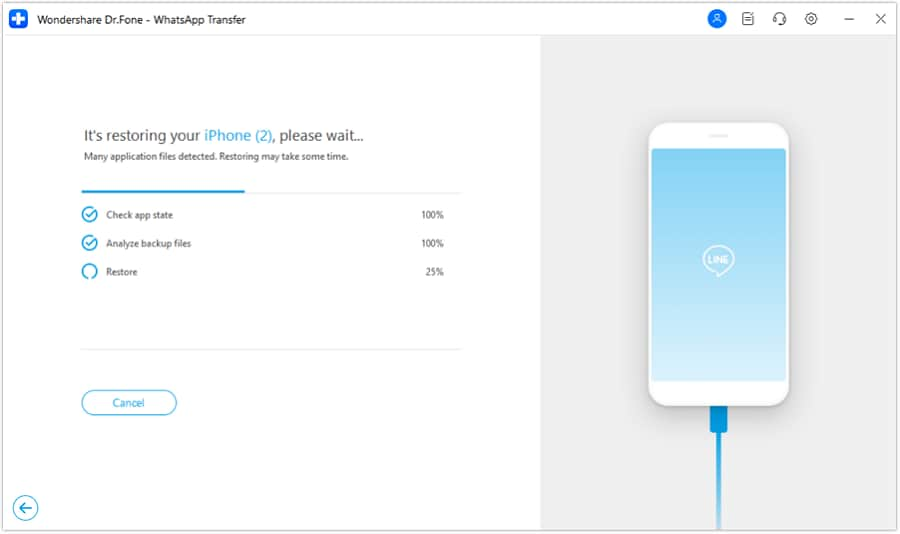
After the scanning is done, all line chat messages and attachments can be viewed. Now, restore or export them by clicking on “Restore to Device”. This will export the data to PC.
Dr.Fone allows restoring or exporting the whole data and does not allow selectively choosing files to restore or export.
The whole process can be rolled back by restarting Dr.Fone and clicking on “Undo the Restore” option. Only the latest restore can be undone.
So, these are some of the ways how to recover line chat history through the retrieval of the data using programs on PC.


LINE Manage
- LINE Chat History
- 1. Import LINE LINE Chat History
- 2. Backup & Restore LINE Chat History
- 3. Recover Deleted LINE Chats Android
- LINE Tricks
- 1. Useful LINE Tips and Tricks
- 2. Create LINE Account on PC
- 3. Download Free Line Stickers
- 4. Change Chat Wallpaper on LINE
- 5. Fix Common LINE App Problems
- Other Social Apps Tips
- 1. Whatsapp from Android to iPhone
- 2. Retrieve Deleted WhatsApp Message
- 3. Backup WhatsApp to PC
- 4. Save Snapchats Secretively
- 5. Top 5 Instagram Password Crackers
- 6. Get Kik for PC Windows and Mac
- 7. Find Facebook Password
- 8. Facebook Dating Is Not Working
- 9. Record Viber Calls on PC / Mobile
- 10. Recover WeChat Account / History
- ● Manage/transfer/recover data
- ● Unlock screen/activate/FRP lock
- ● Fix most iOS and Android issues
- Manage Now Manage Now Manage Now
Selena Lee
chief Editor