Latest Guide: How to Move Photos to SD Card Fast

Jul 12, 2024 • Filed to: Manage Device Data • Proven solutions
In the digital age, smartphones have become an extension of our lives. Not only do we rely on them to communicate, but we also use them to capture precious memories in the form of photos and videos. As a result, our device storage is often filled to capacity.
Fortunately, most smartphones come with an option to expand storage using an SD card. Moving photos to an SD card is a quick and easy way to free up space on your device without losing any of your cherished memories.
In this article, we will provide you with a comprehensive guide on how to move photos to an SD card quickly and efficiently for both Android and iPhone users.
Part 1: How to Transfer Photos From Phone to SD Card
Whether you're looking to save space or to back up your photos, you might want to know how to transfer photos from phones to SD cards.
Here are some easy tricks for you, whether you are an Android user or an iPhone user.
How to Move Photos to An SD card from Android
Moving photos to an SD card from your Android device is a quick and easy process. However, the steps may differ depending on whether or not your Android device has an SD card slot.
If your Android device has an SD card slot, you can insert the SD card into the slot and open the “File Manager“ or “My Files” app on your Android device.
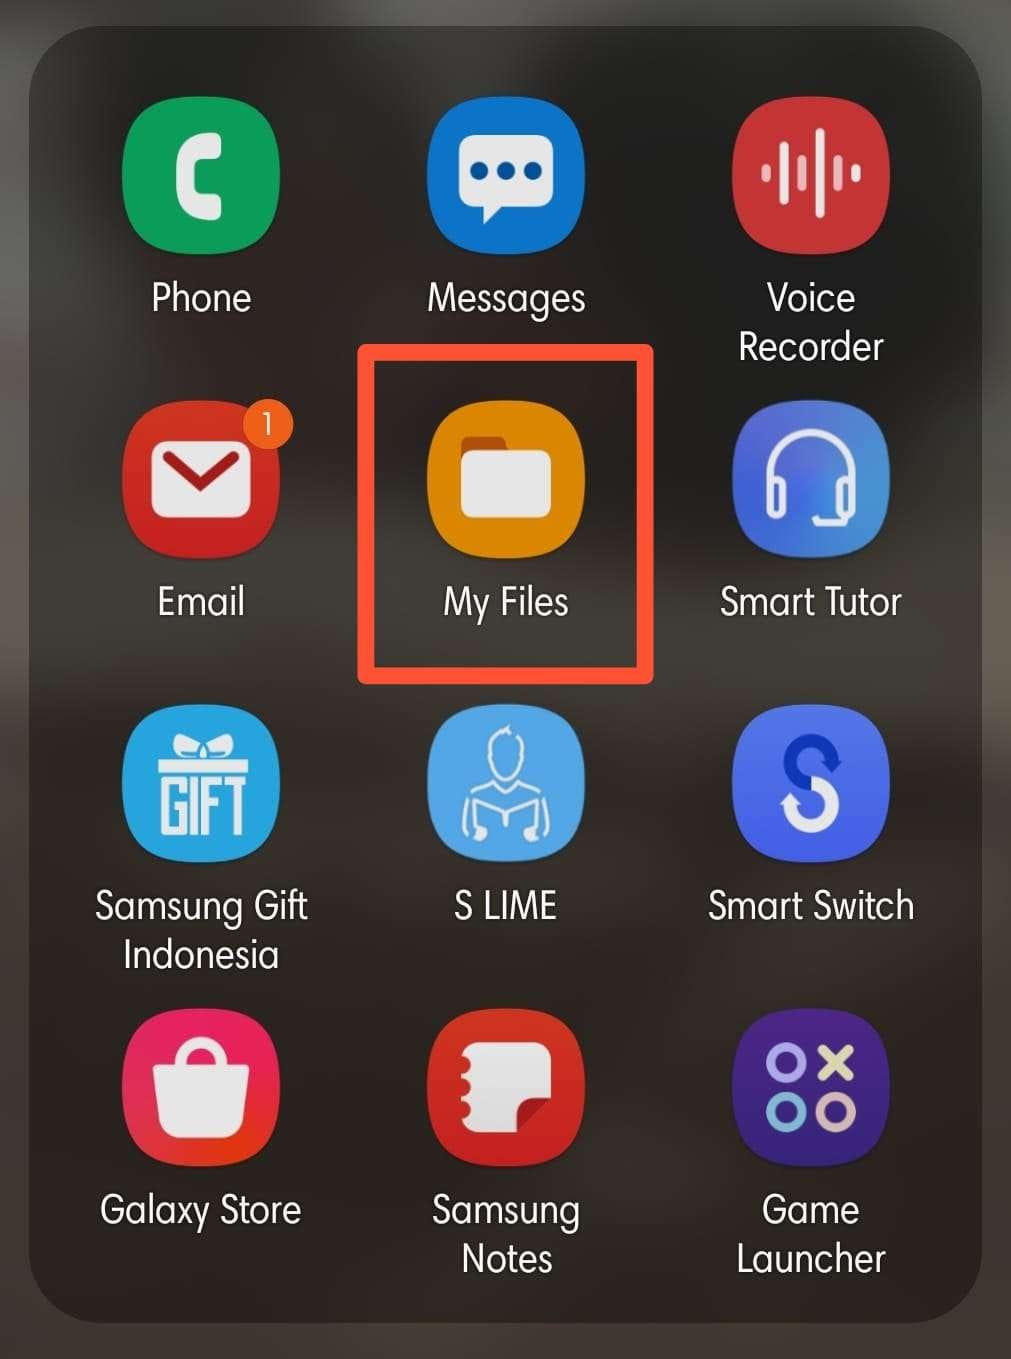
Once you’re in, continue the process by following these steps:
Step 1: Navigate to the folder where the photos you want to transfer are stored.
Step 2: Select the photos you want to transfer and tap the "Copy" button.
Step 3: Navigate to the SD card folder using the File Manager app and paste the photos into the SD card folder.
If your Android device does not have an SD card slot, you will need to use a USB cable to connect your Android device to your computer.
Then, you can follow these steps:
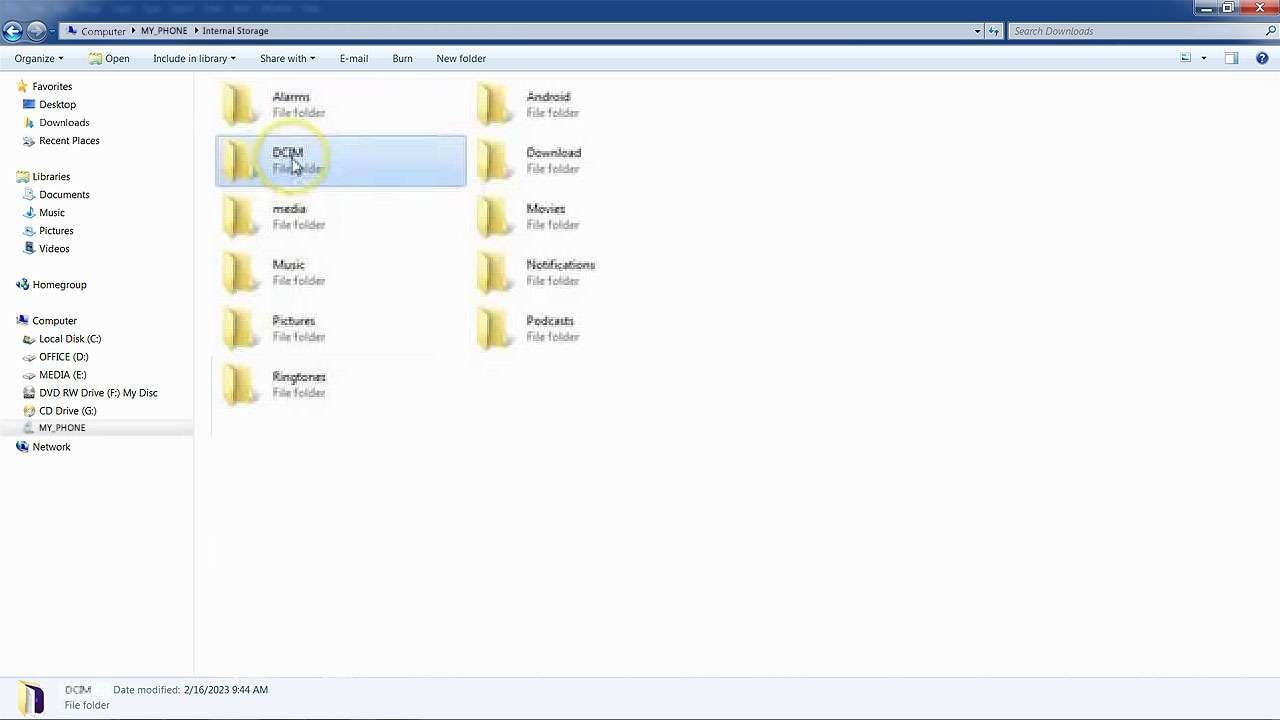
Step 1: On your computer, open File Explorer and locate your Android device. Navigate to the folder where the photos you want to transfer are stored.
Step 2: Select the photos you want to transfer and drag them to a folder on your computer.
Step 3: Plug the SD card to your computer then drag the photos from your computer folder to the SD card folder.
How to Move Photos to An SD Card from iOS
Unlike Android devices, iPhones do not support built-in SD cards. However, you can still transfer photos to an SD card by using your computer and a lightning cable.
Once you connect your iPhone to your computer, follow these steps:
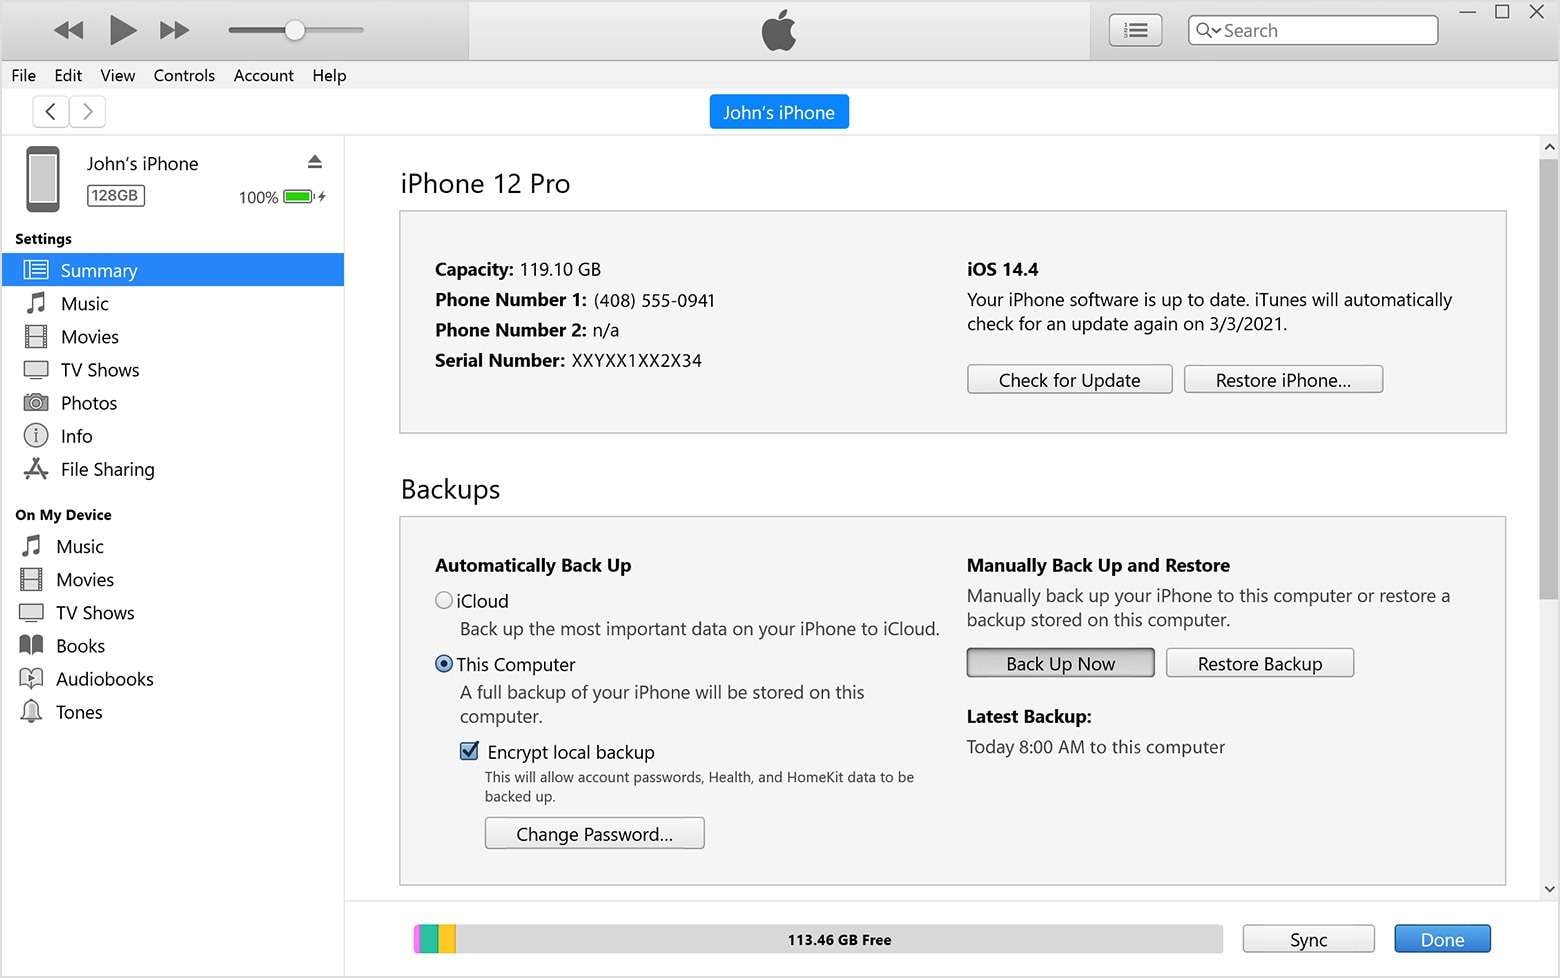
Step 1: Open iTunes on your computer and select your iPhone.
Step 2: Click on the "Photos" tab and select the photos you want to transfer.
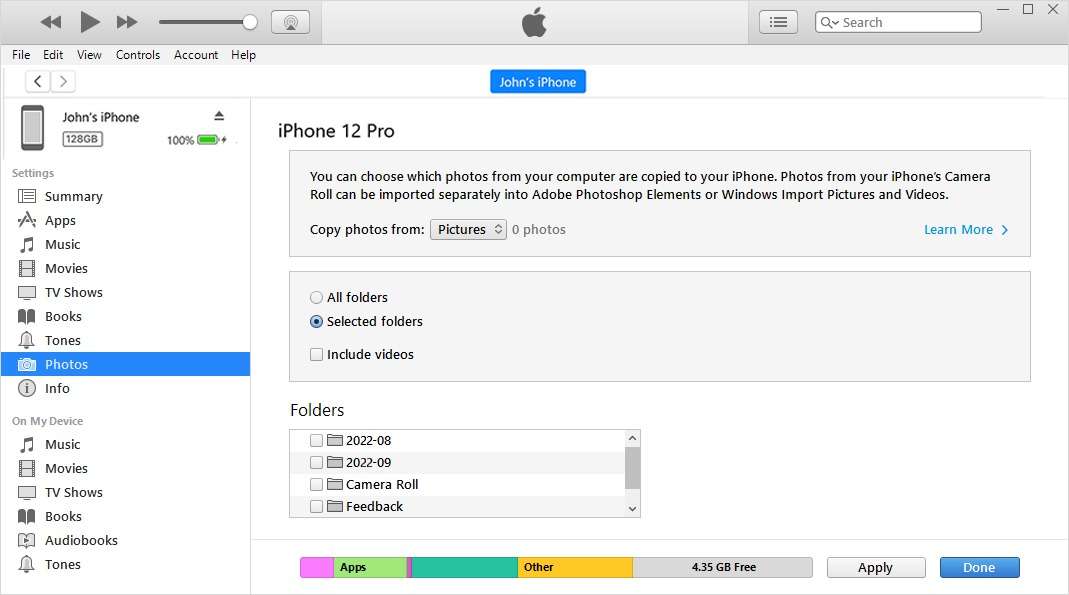
Step 3: Click on the "Import Selected" button to transfer the photos to your computer.
Step 4: Plug the SD card to your computer then drag the photos from your computer folder to the SD card folder.
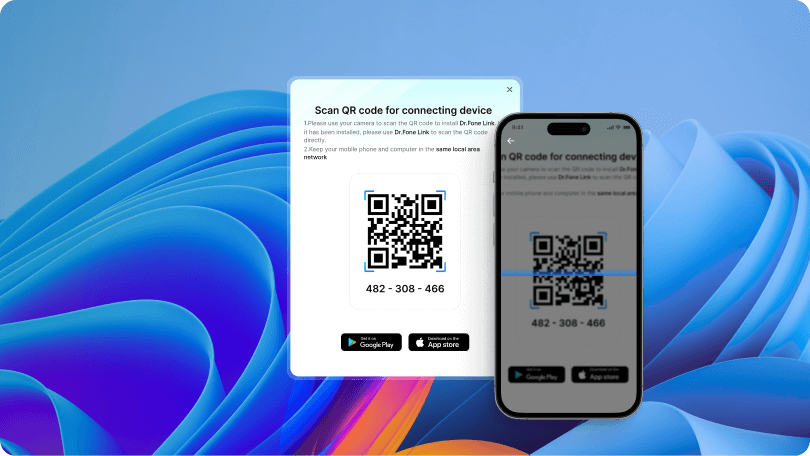
Alternatively, you can also use Dr.Fone, a great tool for iPhone users to transfer photos to their PC. Download and install Dr.Fone on your iPhone and computer for an even faster file transfer. Then, follow these easy steps:
Step 1: Make sure that your iPhone and computer are connected to the same Wi-Fi network. Open the Dr.Fone on your iPhone and scan the QR code on your computer screen.
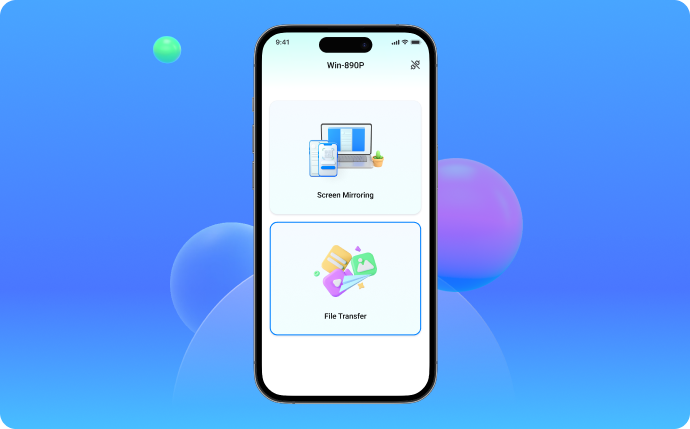
Step 2: Choose the File Transfer option. You’ll be prompted to select the photos you want to transfer. Then, click the "Export" button.
Step 3: Plug the SD card to your computer, then drag the photos from your computer folder to the SD card folder.
Part 2: How to Move Photos to An SD Card from PC
Moving photos to an SD card from your PC is a straightforward process and is pretty much the same for both Windows and Mac users. The process is similar to transferring data using flash drives. You will need a tool called SD card reader.
A card reader is a device that allows you to read data stored on a memory card, such as an SD card. It typically connects to your computer via USB, but some devices have them built-in.
Once the card is inserted into the slot, the reader allows you to access the data on the card as if it were a regular external drive connected to your computer.
These steps will teach you how to transfer photos to SD cards in no time:
Step 1: Insert the SD card into your computer's card reader, SD card slot, or external card reader.
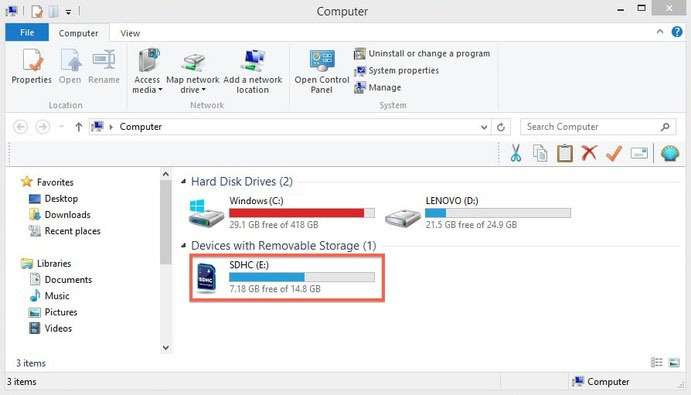
Step 2: Open the File Explorer or Finder app and navigate to the folder where the photos you want to transfer are stored.
Step 3: Select the photos you want to transfer. Click "Copy" from the context menu or use "Ctrl + C" or "Command + C."
Step 4: Navigate to the SD card folder and click "Paste" or use the keyboard shortcut "Ctrl + V" or "Command + V."
Part 3: Tips and Tricks for Faster Photo Transfer Speed
Transferring photos to an SD card can be time-consuming, especially if you have a large number of images to transfer. However, there are several tips and tricks you can use to speed up the process:
- Back up your photos before transferring
It's always a good idea to back up your photos before transferring them to an SD card. This ensures that your photos are safe in case something goes wrong during the transfer process. You can back up your photos to a cloud storage service or an external hard drive.
- Use a high-speed SD card
Using a high-speed SD card can significantly improve transfer speeds. Look for SD cards with fast read and write speeds, such as UHS-I or UHS-II cards.
- Close unnecessary programs
Closing unnecessary programs on your computer can free up system resources, which can improve transfer speeds.
- Use a USB 3.0 port
If your computer has a USB 3.0 port, use it instead of a USB 2.0 port. USB 3.0 is faster and can improve transfer speeds.
- Transfer photos in batches
Instead of transferring all your photos at once, try transferring them in smaller batches. This can help avoid errors and speed up the process.
By following these tips, you can transfer your photos to an SD card faster and more efficiently.
Conclusion
Transferring photos to an SD card can be a simple and convenient way to free up space on your phone or computer. Whether you're an Android or iOS user, or using a Windows or Mac computer, the process is easy to follow. With just a few simple steps, you can move your photos to an SD card and free up space on your devices.
Additionally, if you're an iPhone user looking to transfer photos to your computer before moving them to an SD card, we recommend using Dr.Fone Air. This tool makes it easy to transfer your photos wirelessly and securely, without the need for cables or complicated setups.


Phone Transfer
- Get Data from Android
- Transfer from Android to Android
- Transfer from Android to BlackBerry
- Import/Export Contacts to and from Android Phones
- Transfer Apps from Android
- Transfer from Andriod to Nokia
- Android to iOS Transfer
- Transfer from Andoid to iPhone
- Transfer from Samsung to iPhone
- Samsung to iPhone Transfer Tool
- Transfer from Sony to iPhone
- Transfer from Motorola to iPhone
- Transfer from Huawei to iPhone
- Transfer from Android to iPod
- Transfer Photos from Android to iPhone
- Transfer from Android to iPad
- Transfer videos from Android to iPad
- Get Data from Samsung
- Transfer Data to Samsung
- LG Transfer
- Mac to Android Transfer
Daisy Raines
staff Editor