
iPhone Do Not Disturb Not Working? 9 Proven Fixes (2026)

Jun 30, 2026 • Filed to: Phone Repair Solutions • Proven solutions
 TL;DR:
To stop unwanted calls and notifications from bypassing Do Not Disturb on your iPhone, you must correctly configure Focus Mode restrictions, specifically disabling features that allow repeat callers or favorited contacts to override the silence.
● In your device settings, change the Silence section to "Always," toggle off the "Repeated Calls" option, and ensure "Allow Calls" is restricted to "No one" to prevent specific groups from breaking through.
● If the feature continues to fail or unexpectedly mutes alarms, using the "Reset All Settings" command will take 3 to 5 minutes to restore default preferences; this removes your saved Wi-Fi networks and alarms but safely preserves all media and documents.
● Persistent software bugs on iOS 15 and newer can be resolved by clearing low device storage that disrupts background processes, or by running Dr.Fone - System Repair in Standard Mode to fix system errors without data loss, whereas its Advanced Mode will completely erase the device.
Ask AI for a summary
 ChatGPT
 Perplexity
 Gemini
 Claude
 Grok
Grok
"I have an iPhone 14 Pro with iOS 16.4.1, and I still cannot get Focus/Do Not Disturb to actually work. It's turned on, yet every call still comes through. I tried resetting the settings on the phone, but that did nothing. I'm not sure how else to fix this, so as a last resort, I have to actually shut my phone off whenever I do not want to be disturbed and want all calls to go to voicemail, which is highly inconvenient. Anyone have any other suggestions?" --- from discussions.apple.com
The iPhone Do Not Disturb not working issue is a common problem that leaves many users frustrated when calls and notifications still break through during meetings, sleep, or focus time. While the Do Not Disturb feature on iPhone is designed to silence unwanted interruptions, glitches or incorrect settings often cause users to experience distractions when they expect quiet.
This comprehensive guide explores the common reasons behind the iPhone Do Not Disturb problem and provides quick fixes for users in a hurry. If you're short on time, try these solutions first:Restart your iPhone to refresh system settings.
- Check and adjust Do Not Disturb settings in Focus Mode.
- Update iOS to the latest version to fix potential bugs.
- Reset all settings to clear misconfigurations.
- Use Dr.Fone - System Repair (iOS) for deeper system fixes.
For a detailed walkthrough, keep reading! and provides step-by-step solutions to fix it. Whether the issue is due to incorrect settings, iOS bugs, or system glitches, this article will help restore the feature’s functionality. Additionally, we introduce Dr.Fone - System Repair (iOS) as an effective solution for fixing deeper system issues.
- Part 1. Common Reasons Why Do Not Disturb Is Not Working on iPhone
- Part 2. Step-by-Step Solutions to Fix Do Not Disturb Not Working on iPhone
- Solution 1:Check your Do Not Disturb Settings
- Solution 2: Turn Off Repeated Calls
- Solution 3: Disable or Adjust Do Not Disturb Schedule
- Solution 4: Change Contact Status
- Solution 5: Change Incoming Call Settings
- Solution 6: Restart iPhone
- Solution 7: Reset All Settings
- Solution 8: Update your phone
- Solution 9: Fix iOS System Issues with Dr.Fone - System Repair (iOS)
- Part 3. Additional Tips to Optimize iPhone Performance
Why does my Do Not Disturb not work?
If iPhone Do Not Disturb not working is causing notifications to bypass your settings, several factors could be responsible. In this guide, we’ll cover the most common reasons why the Do Not Disturb feature on iPhone or iPad may fail and provide effective solutions to fix it quickly.
1. Do Not Disturb Settings Are Misconfigured
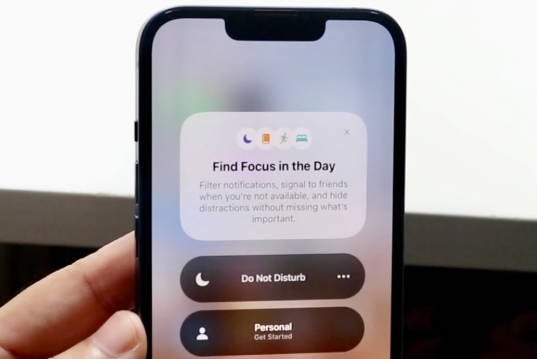
Many users overlook their settings, which may be incorrectly configured. With the introduction of Focus Mode (iOS 15 and later), traditional DND settings have changed, potentially causing confusion.
2. Scheduled Do Not Disturb Not Set Up Properly
If your iOS Do Not Disturb not turning on as expected, the scheduled mode might not be set correctly. Double-checking your scheduled settings can help resolve the issue.
3. iOS Bugs or Software Glitches
Occasionally, iOS updates introduce bugs that may affect Do Not Disturb mode iPhone not working as intended. A system-level issue may require a software repair tool.
4. App Notifications Bypassing Do Not Disturb
Certain apps have permissions that allow them to bypass Do Not Disturb. These settings should be reviewed to ensure notifications are properly silenced.
5. iPhone Storage Issues Affecting Performance
Low storage can lead to performance problems, including iPhone notifications coming through Do Not Disturb. Clearing unnecessary files and optimizing storage can help maintain smooth operation.
Tip: Use Dr.Fone App for iOS to quickly clear iPhone storage and optimize performance.
Dr.Fone App - Smart Clean (iOS)
1-Click iPhone Storage Cleanup: Free Up Space Effortlessly
- Smart scan for albums, contacts, and calendars.
- Clean duplicate screenshots, photos/videos, contacts, and expired calendars.
- Choose items to clean freely.
- Fast & user-friendly.


Part 2. Step-by-Step Solutions to Fix Do Not Disturb Not Working on iPhone
Solution 1: Check your Do Not Disturb Settings
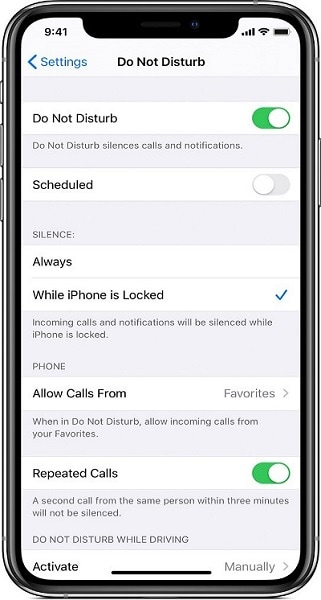
When you lock your smartphone, Do Not Disturb on iOS will mute your incoming calls and alarms. Here's how to use the function that allows you to mute all notification alerts while using your phone.
- Step 1. Open the Settings > Do Not Disturb menu (Settings > Do Not Disturb).
- Step 2. Select Always in the Silence section.
If Do Not Disturb doesn't muffle incoming calls while you're using your iPhone or while it's locked, go on to the next alternative.
Solution 2: Turn Off Repeated Calls
When Do Not Disturb is on, phone calls, texts, and other app alerts are muted, but individuals may still contact you if they call several times. Yes, your iPhone's Do Not Disturb option may be overridden by repeated calls (from the same individual).
- Turn off Repeated Calls in your device's Do Not Disturb settings to avoid this from occurring.

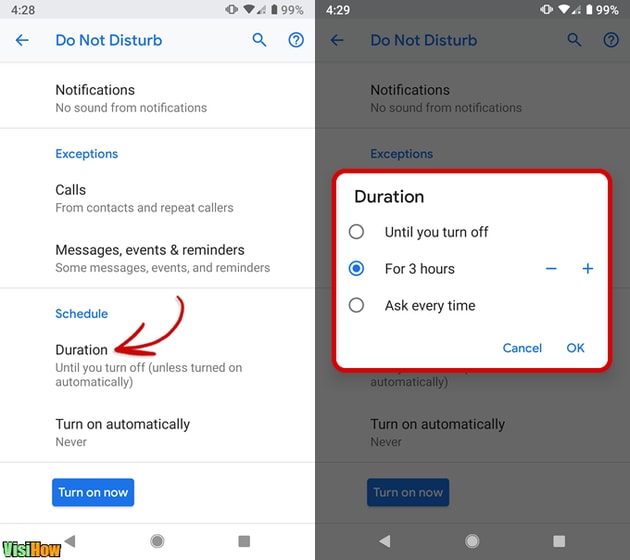
Solution 3: Disable or Adjust Do Not Disturb Schedule
If you observe that Do Not Disturb only works at certain times of the day, double-check that you haven't accidentally created a Do Not Disturb schedule. Make sure the Schedule option is turned off in Settings > Do Not Disturb.
If you do create a Do Not Disturb schedule, double-check that the quiet hours (start and finish times) are set appropriately. Check the chosen hours as well as the meridian designation (i.e., A.M and P.M).
Solution 4: Change Contact Status
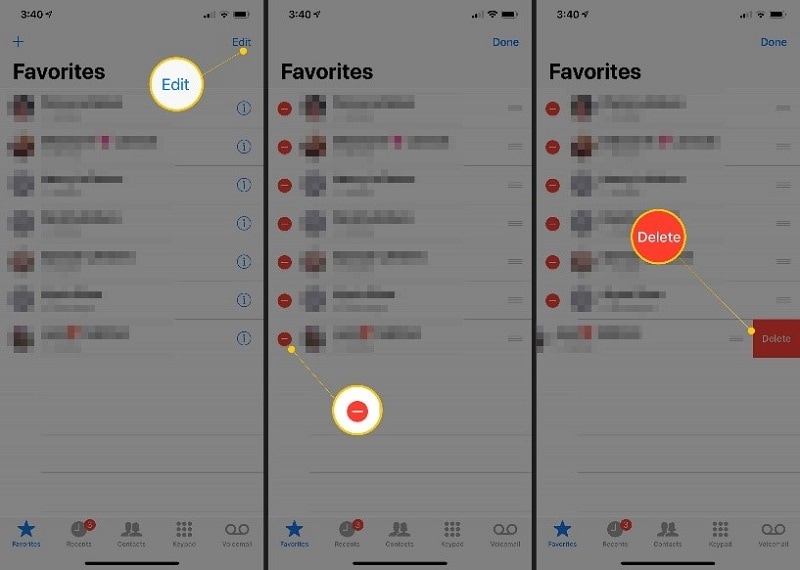
Your "favorite" contacts, might override your iPhone's Do Not Disturb settings. When you mark a contact as favorite on your iPhone, that individual may contact you at any time of day or night (by phone call or text), even if Do Not Disturb is turned on.
So, if you're receiving calls from a random contact when Do Not Disturb is turned on, be sure you haven't accidentally marked the contact as a favorite. To check your favorite contacts on your iPhone or iPad, follow the instructions below. We'll also teach you how to remove a contact from your favorites list.
- Step 1. Tap Favorites in the bottom-left corner of the Phone app. Cross-reference the contacts on the list and keep an eye out for any odd or unfamiliar names.
- Step 2. Tap Edit in the top-right corner to unmark a contact.
- Step 3. Press and hold the red minus (—) button.
- Step 4. Finally, pick Done to save the change and touch Delete to remove the contact from the list.
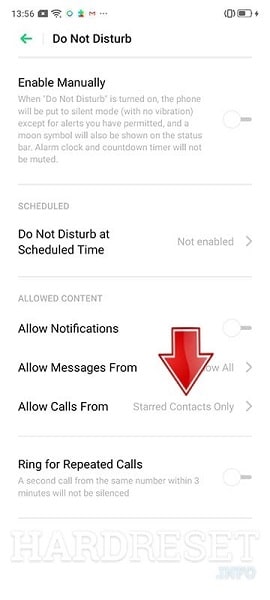
Solution 5: Change Incoming Call Settings
When Do Not Disturb is enabled on your iPhone or iPad, does it fail to hush incoming calls? It's possible that this is because you've enabled Do Not Disturb to accept all incoming calls. Select Allow Calls from the Do Not Disturb menu.
Make sure either ‘Favorites’ or ‘No one’ is selected. If you want just incoming calls from unknown numbers to be silenced when on Do Not Disturb, you may choose All Contacts.
Solution 6: Restart iPhone
One quick fix for the iPhone Do Not Disturb not working issue is to simply restart your device. Power off your iPhone, wait a few seconds, and turn it back on. After rebooting, double-check that the Do Not Disturb settings on iPhone are enabled and properly configured to match your preferences.
Solution 7: Reset All Settings
Normally, Do Not Disturb on iPhone silences calls, messages, and app notifications but does not affect alarms or reminders. However, some users experiencing the iPhone Do Not Disturb not working problem report that it occasionally interferes with alarm sounds. If this happens, try resetting your iPhone settings to restore default preferences. Keep in mind that this reset will remove saved alarms along with network and notification settings.
Note that: resetting the settings on your iPhone or iPad will not delete your media files or documents.
To reset all settings, go to Settings > General > Reset > Reset All Settings and input your phone's passcode.
This will take 3–5 minutes, during which time your device will turn off and on. After that, turn on Do Not Disturb and set a fake alarm. Check to see whether the alarm goes off at the scheduled time.
Solution 8: Update your phone
Sometimes the iPhone Do Not Disturb not working issue can be linked to iOS bugs or glitches. Since outdated software may cause certain features to malfunction, it’s important to keep your device updated. To check for the latest iOS version, go to Settings > General > Software Update on your iPhone or iPad and install any available updates.
Solution 9: Fix iOS System Issues with Dr.Fone - System Repair (iOS)
If the iPhone Do Not Disturb not working issue still persists after trying all the basic fixes, the problem might be deeper within the iOS system itself. In such cases, advanced tools like Dr.Fone - System Repair can help you resolve software glitches safely without data loss. This is especially useful for users of the latest iPhone 17, where Apple has introduced enhanced notification controls and smarter Focus modes.
Dr.Fone - System Repair
Fix iPhone Problems without Data Loss.
- Only fix your iOS to normal, no data loss at all.
- Fix various iOS system issues stuck in recovery mode, white Apple logo, black screen, looping on start, etc.
- Fixes other iPhone error and iTunes errors, such as iTunes error 4013, error 14, iTunes error 27,iTunes error 9, and more.
- Works for all models of iPhone, iPad, and iPod touch.
- Fully compatible with the latest iOS version.

- Step 1. From Dr. Fone's main window, choose "System Repair".

- Step 2. To fix the iPhone Do Not Disturb not working issue with Dr.Fone, connect your iPhone, iPad, or iPod touch to your computer using the lightning cable. Once detected, you can choose between Standard Mode (repairs most iOS issues while keeping your data) or Advanced Mode (erases data but resolves more serious system problems). If Standard Mode doesn’t solve the issue, switch to Advanced Mode for a deeper fix.

- Step 3. The program recognizes your iDevice's model form and displays the iOS framework models that are accessible. To continue, choose a version and click "Start".

- Step 4. After that, you may download the iOS firmware. The procedure may take some time due to the size of the firmware we need to download. Ascertain that the network is not disrupted throughout the procedure. If the firmware does not update properly, you may still download it using your browser and then use "Select" to restore the downloaded firmware.

- Step 5. The tool starts validating the iOS firmware after the upgrade.
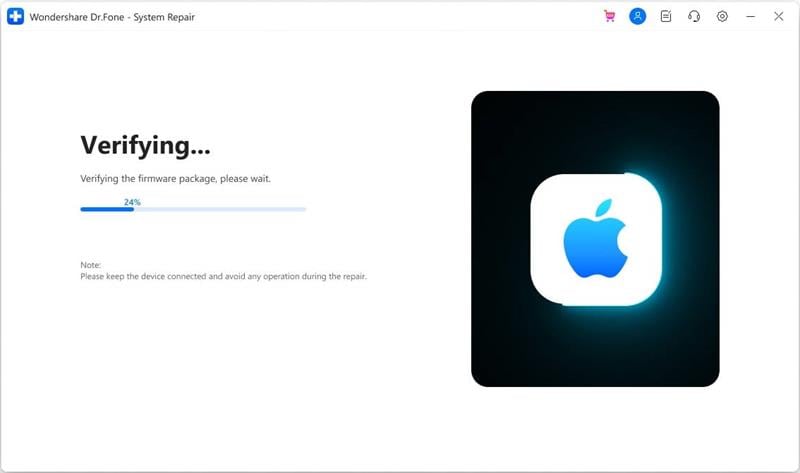
- Step 6.In a couple of minutes, your iOS system will be fully functional. Simply take the computer in your hands and wait for it to start up. Both of the iOS device's issues have been rectified.

Part 3. Additional Tips to Optimize iPhone Performance
1. Clear iPhone Storage to Prevent Performance Issues
ow storage can sometimes cause the iPhone Do Not Disturb not working issue by slowing down system performance and disrupting background processes. When your device is nearly full, features like Do Not Disturb may not work correctly, resulting in notifications slipping through. Even with the advanced performance and expanded storage options on the new iPhone 17, running low on space can still trigger similar glitches. Regularly clearing unused files and managing storage helps ensure Do Not Disturb and other system functions run smoothly on your iPhone 17.
Using Dr.Fone App for iOS can help optimize your device:
Key Features of Dr.Fone App - Smart Clean (iOS)
- Easily unlock various locks on your iOS devices, including iPhone, iPad, and iPod touch.
- Identify similar photos on your iPhone with 100% accuracy, making it easy to manage and organize your photo library.
- Merge and organize the Contacts app effectively, removing duplicates and keeping your contacts up-to-date.
- Clean up devices in just a few taps with the Smart Cleaning feature, freeing up storage space and improving performance.
- Manage subscriptions across iDevices, including iPhone, iPad, and Mac, providing a centralized view of your active subscriptions.’
- Step 1. Download Dr.Fone App for iOS.
- Step 2. Open the app and scan for junk files.
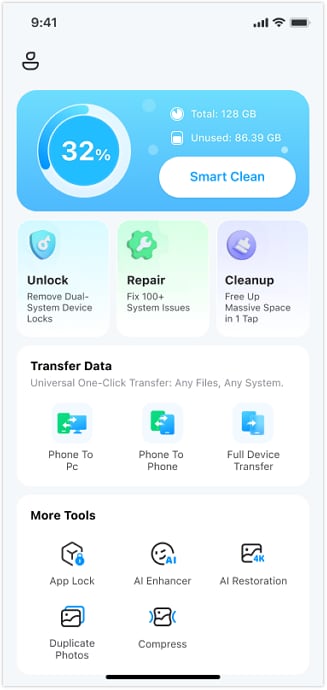
- Step 3. Delete unnecessary files to free up space.

2. Enable and Configure Focus Mode Correctly (iOS 15 & Later)
If you’re using iOS 15 or later, Focus Mode replaces the traditional DND:
- Step 1. Open Settings > Focus.
- Step 2. Choose Do Not Disturb and set up customized options.
Conclusion
We have explored why Do Not Disturb not working on iPhone occurs and provided step-by-step solutions. If basic troubleshooting does not work, consider using Dr.Fone - System Repair (iOS) to fix iOS Do Not Disturb not turning on due to system errors. Additionally, clearing storage with Dr.Fone App for iOS ensures smooth performance.
By following these methods, you can restore Do Not Disturb mode iPhone not working and enjoy uninterrupted peace when needed. If you found this guide helpful, feel free to share it with others facing the same issue!
4,624,541 people have downloaded it


Alice MJ
staff Editor
Generally rated4.5(105participated)