How Can I Backup iPhone Messages To PC With Ease?
iPhone Messages
- Back Up iPhone Messages
- 1. Back up Messages on iPhone
- 2. Save Text Messages on iPhone
- 3. Back up Viber messages
- 4. Back up WhatsApp Data to Computer
- 5. Export WhatsApp Message from iOS
- Delete iPhone Messages
- 1. Delete iMessages on iPhone and iPad
- 2. Delete Snapchat Messages on iPhone
- 3. Delete WA for Everyone
- 4. Delete WA Message Permanently
- 5. Delete Text Messages from iPhone
- 6. Tips about WhatsApp Delete Message
- 7. Undelete Messages on iPhone
- 8. View Deleted iMessage History on PC
- Recover iPhone Messages
- 1. Recover iPhone Deleted Text Messages
- 2. Recover Deleted Viber Messages
- 3. Recover Messages on iPhone 13
- 4. Recover Deleted Message on iPhone 8
- 5. Recover Deleted Message iPhone 6
- 6. Transfer from iPhone to iPhone
- 7. Recover WhatsApp Messages Online
- 8. Restore 1-Year-Old WhatsApp Chats
- Restore iPhone Messages
- 1. Restore Kik Messages from iPhone
- 2. Restore Text Messages on iPhone
- 3. Restore Viber Messages Selectively
- 4. Restore Kik Messages to iPhone
- Transfer iPhone Messages
- 1. Transfer from Android to iPhone
- 2. Transfer from iPhone to iPhone
- 3. Transfer from iPhone to Computer
- 4. Transfer from Android to iPhone XS
- 5. WhatsApp from Android to iOS
- 6. Transfer from Android to iPhone 13
- 7. WhatsApp from iPhone to PC
- 8. Download Text Messages from iPhone
- 9. Sync iMessage between iPhone and Mac
- iPhone Messages Problems
- 1. iMessage Not Working
- 2. iMessage Keeps Crashing
- 3. iMessage Not Syncing on a Mac
- 4.iPhone won't send or receive texts
- 5. Message Blocking Is Active
- 6. Why Are My iPhone Messages Green
- iPhone Message Tricks
- 1. Export Messages from iPhone to PDF
- 2. Read Others WA Messages
- 3. iPhone Message Tips and Tricks
- 4. Access iMessage Online
- 5. Extract Text Messages from iPhone
- 6. Forward Text on iPhone and Android
- 7. Print Text Messages from iPhone
- 8. View iPhone Messages on PC/Mac
- 9. Tell If You Are Blocked on iMessage
Oct 24, 2025 • Filed to: Backup & Restore Solutions • Proven solutions
Dr.Fone Basic:
Better Control for Your Phone
Manage, transfer, back up, restore, and mirror your device
Smartphones are essential nowadays, storing valuable information, including text messages. iPhone is among the most used smartphones worldwide and offers features like iMessage. If you're wondering how to back up iPhone messages to a computer, you've come to the right place. In this article, we will guide you through simple methods to back up your iPhone messages to your PC.
By following these easy steps, you can ensure the security of your messages. In the process, you will create a reliable iPhone SMS backup that you can access whenever you need. Continue to read the article to discover how you can back up your iPhone messages to your PC with ease.
- Part 1: Understanding the Potential Differences Between iMessages and Simple Messages
- Part 2: How To Backup iPhone Text Messages Through iCloud?
- Part 3: How To Backup iPhone Text Messages Using iTunes?
- Part 4: How To Transfer iPhone Text Messages Using Samsung Smart Switch?
- Part 5: How To Backup iPhone Message to Computer Using Wondershare Dr.Fone?

- Part 6: How To Back Up iPhone Messages to Android Device
Part 1: Understanding the Potential Differences Between iMessages and Simple Messages
It is important to understand the differences between iMessages and simple messages. Apple offers diverse technologies for communication. Knowing these significant differences can help you make the right decision. It especially matters in regard to backing up your iPhone messages. This section will explore the potential variations between iMessages and simple messages.
It will also highlight their unique features and functionalities. With it, you'll be better at choosing the right backup method. iMessage and simple messages serve as two primary forms of communication. They operate on different platforms and use distinct protocols.
For once, iMessage is only available on Apple devices. In comparison, simple messages or SMS are available on a wide range of devices. Another major difference is what you can send through iMessage and simple messages.
In this regard, simple messages only support short text messages. iMessage, in contrast, lets you send photos, videos, documents, and more. You also need an active internet connection for iMessages. The same is not true for simple messages which can be sent without the internet. Given below is a table highlighting the difference between iMessage and simple messages:
| Feature | iMessage | Simple Messages |
| Platform Compatibility | Exclusive to Apple devices | Compatible with various devices |
| Internet Connection | Requires an active internet connection | Can be sent without an internet connection |
| Cost | No additional charges if connected to the internet | Standard carrier charges may apply |
| Supported Data Types | Texts, photos, videos, and other media | Text-only messages |
Part 2: How To Backup iPhone Text Messages Through iCloud?
Now that you have understood the differences between iMessages and simple messages, let's focus on backing them up. One of the convenient methods to back up your iPhone text messages is using iCloud. It provides a seamless way to store your messages in the cloud.
This ensures that you can access them from any Apple device. Given below is the step-by-step process of backing up your iPhone text messages using iCloud:
- Step 1: On your iPhone, go to "Settings" and tap on your name at the top of the Settings menu. Here select "iCloud," and on the following screen, press "Show All."

- Step 2: In the "Show All" list of apps using iCloud, navigate to "Messages." On the next screen, enable "Sync this iPhone" to back up your iPhone text messages to iCloud.

Part 3: How To Backup iPhone Text Messages Using iTunes?
While iCloud offers a convenient way to back up your iPhone text messages, another option is iTunes. It provides a comprehensive backup solution to backup iPhone messages to PC. Along with messages, it also back up all other data on your iPhone. This section will guide you through backing up your iPhone text messages using iTunes. Follow the instructions given below to create an iPhone SMS backup via iTunes:
- Step 1: Install the latest version of iTunes on your computer and launch it. Now, use a USB cable to connect your iPhone to the PC. Once your iPhone is connected, you should see its icon appear in the iTunes interface. Next, press the iPhone icon to select your device. Here, navigate to the "Summary" tab.

- Step 2: In the "Summary" tab of iTunes, under the "Backups" section, click "Back Up Now." To ensure the backup is created on the PC, select "This Computer" before clicking "Back Up Now."

Part 4: How To Transfer iPhone Text Messages Using Samsung Smart Switch?
In the case of a recent transfer from an iPhone to a Samsung Galaxy device, you will need to transfer your iPhone text messages to your new device. Samsung offers a tool called Smart Switch, which allows you to transfer data, including messages. With it, you can transfer messages from your old iPhone to your new Samsung Galaxy device. Follow the steps listed below to transfer messages using Smart Switch:
- Step 1: Open Smart Switch on your Samsung device, tap “Continue” and “Allow” all the required permissions. On the next Smart Switch screen, press “Receive Data” and choose “iPad/iPhone” in the source.

- Step 2: Now connect your iPhone and Samsung Galaxy device together using a USB cable. Afterward, tap “Trust” on the iPhone. After trusting the device, press "Next" and choose messages as the data to “Transfer.” Once it is transferred, tap “Done.”

Part 5: How To Backup iPhone Message to Computer Using Wondershare Dr.Fone?
If you're looking for a straightforward and efficient method to back up iPhone text messages, Wondershare Dr.Fone offers a reliable solution. With its Phone Backup feature, Wondershare Dr.Fone allows you to back up your iPhone messages and other data to your computer with ease. It allows you to back up over 24 types of data using a single-click procedure.
After backing up your data, you can preview it any time you want. It enables you to create comprehensive backups of your iPhone data, including messages, contacts, photos, and more.
Key Features of Wondershare Dr.Fone
- Wondershare Dr.Fone allows you to schedule auto-backups for your iPhone.
- The auto-backups happen wirelessly when your iPhone and computer are connected to the same network.
- You can restore your iPhone backup selectively after previewing the backup data.
Steps To Backup iPhone Message to Computer via Wondershare Dr.Fone
The process to back up your iPhone messages is straightforward in Wondershare Dr.Fone. Here is how you can back up iPhone messages to a PC via Dr.Fone:
- Step 1: Access the My Backup Tool
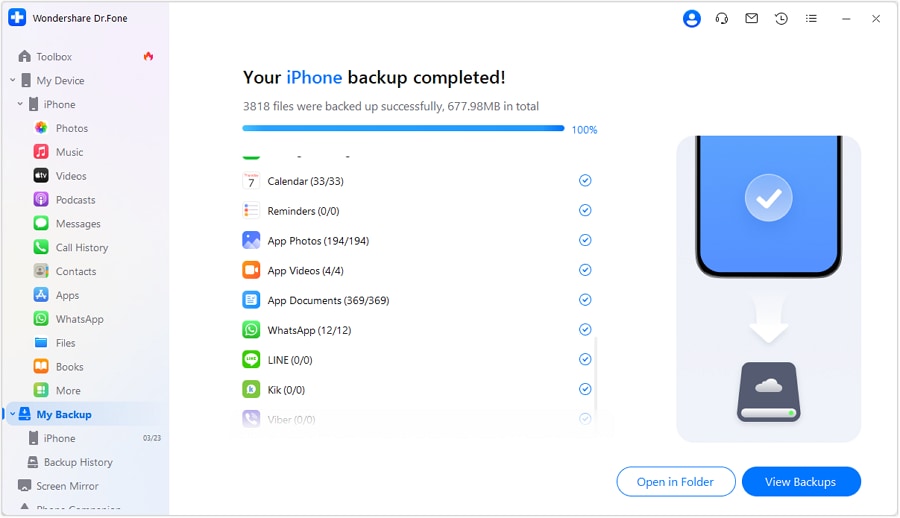
On your PC, launch Wondershare Dr.Fone and connect your iPhone to the computer. Now navigate to the "My Backup" tab from the left panel. In this tab, click “Back Up Now” to initiate the backup process.

- Step 2: Complete the Backup Process of Your iPhone
After pressing the “Back Up Now" button, wait patiently for the backup process to complete. Once it is complete, press “View Backups” to view your created backups.

Part 6: How To Back Up iPhone Messages to Android Device
Want to back up your iPhone messages to an Android device? In that case, Wondershare Dr.Fone offers a convenient solution. Dr.Fone's Phone Transfer feature allows you to transfer and back up your iPhone messages to your Android device. With it, you can transfer data like photos, videos, messages, and more from one device to another.
The phone transfer works perfectly with over 8000 smartphone devices across all platforms. Moreover, it also supports over 13 types of data for phone-to-phone transfer.
Prominent Features of Wondershare Dr.Fone
- Wondershare Dr.Fone offers the highest transfer speed when it comes to phone transfer.
- It supports the simplest process for phone transfer requiring only one click.
- The phone transfer of Wondershare Dr.Fone is compatible with iOS 16 and Android 13.
Steps To Back Up iPhone to Android Device Using Phone Transfer of Wondershare Dr.Fone
Transferring your messages from iPhone to Android is an easy and quick process. The detailed process to transfer your messages and other data from iPhone to Android via Dr.Fone is given below:
- Step 1: Launch Dr.Fone and Connect Your Devices
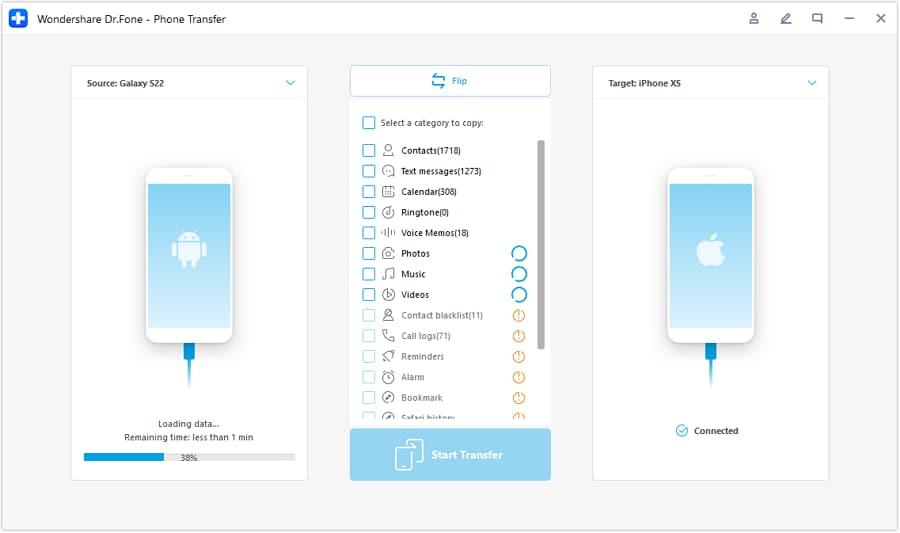
To begin, open Wondershare Dr.Fone on your computer and navigate to the "Toolbox" tab. From there, select the "Phone Transfer" option. Connect both your devices, iPhone and Android, to the computer using USB cables.

- Step 2: Correctly Place the Device Onto Their Positions
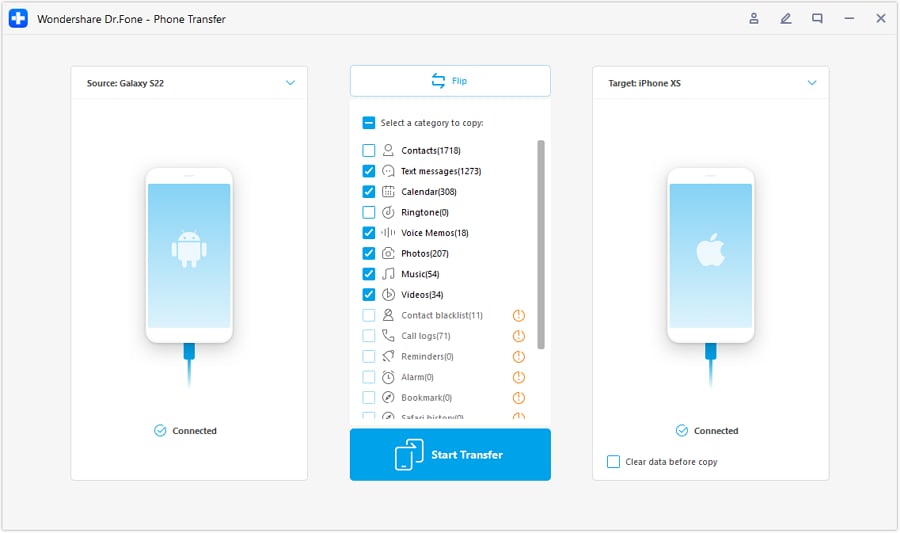
Once the devices are connected, make sure to assign them their respective positions. Your iPhone should be designated as the "Source" device. Conversely, the Android device to which you want to transfer data should be assigned the "Destination" position. You can use the "Flip" button to interchange the positions if needed.

- Step 3: Select Messages and Complete the Phone Transfer
After ensuring that the devices are in their correct positions, choose the Messages and other data you want to transfer. Once your selection is complete, click on the "Start Transfer" button to initiate the transfer process.

Conclusion
To conclude, when it comes to backing up iPhone messages to a PC with ease, Wondershare Dr.Fone emerges as the ideal choice. Dr.Fone is the ideal iMessage backup app with its intuitive interface and powerful features. Whether you prefer the convenience of iCloud or iTunes or the versatility of transferring to Samsung Galaxy or Android devices, Dr.Fone offers comprehensive solutions for all your backup needs.
You can securely back up your iPhone messages directly to your computer by utilizing Dr.Fone's Phone Backup feature. Its one-click transfer functionality and data integrity preservation set it apart as a reliable and efficient solution.
Dr.Fone Basic:
Better Control for Your Phone
Manage, transfer, back up, restore, and mirror your device


Alice MJ
staff Editor