 Teleport your device anywhere instantly with one click.

 100% Security Verified | No Subscription Required | No Malware

 :
: 
 ChatGPT
 Perplexity
 Gemini
 Claude
 Grok
Grok
Life360 works best when it stays with you. Your phone provides the GPS, motion data, network access, and background activity that keep your location current. But sometimes a larger PC screen is easier. You may wish to check a family circle while working, browse the map without your phone, or maintain Life360 alongside other Windows apps.
The problem is that Life360 for PC isn't officially available as a standard Windows program. Life360 says desktop and laptop computers are not supported devices.
However, there are practical solutions. You can use an Android emulator or mirror Life360 to a computer from a compatible Android phone. This guide explains both methods, their limits, and another option for managing GPS location on a mobile device.
In this article
- Part 1: Is There Really a Life360 Desktop App for Windows?
- Part 2: Why Would You Want Life360 on a Computer?
- Part 3: How to Run Life360 on Windows PC with BlueStacks
- Part 4: How to Mirror Life360 to Computer from Android
- Part 5: Where Life360 for Windows Falls Short
- Bonus: Manage Life360 Location More Flexibly with Dr.Fone - Virtual Location
Part 1: Is There Really a Life360 Desktop App for Windows?
Life360 is a mobile location-sharing service. Members of the same Circle can share their location and see where other members are. However, the service's success depends on supported mobile devices reporting location data.
At present, no Windows Life360 desktop app is officially available. Life360 is compatible with iPhones running iOS 17.4 and later and all Android devices that run Android 10 and later. Desktop computers, laptop computers, iPads, and other tablets aren’t supported devices.
So, you cannot install Life360 on Windows as a Windows application. There is also no verified official browser app that offers the full Circle experience on a PC.
That leaves two practical workarounds:
| Option | How It Works | Main Catch |
|---|---|---|
| Android emulator | Runs the Android app inside Windows | Not officially supported by Life360 |
| Phone mirroring | Displays the real Android app on a PC | The phone must remain connected |
An emulator also needs extra care. While using Life360, it does limit you to one active device per account; hence, signing into the same account inside an emulator may log you out.
So anyone who wants Life360 on PC should use Windows access as a workaround, not a replacement for the mobile app.
Part 2: Why Would You Want Life360 on a Computer?
A computer does not make Life360 tracking more accurate, but it can make the map easier to view and check. Life360 still depends on each member’s phone for GPS and location updates.
Using Life360 on a computer can still be useful when you want to:
- See the map more clearly: A larger screen gives Circle locations and map details more room than a phone display.
- Check Life360 while working: Keeping the map visible beside other Windows apps saves repeated phone checking.
- Review trips more comfortably: Life360 provides driving and location history where available, which can be easier to inspect on a larger mirrored screen.
- Manage familiar places: Life360 Places mark areas such as home or school and can send arrival or departure alerts.
- Use easier controls: A mouse, keyboard, and larger display may be more comfortable for users who find a small phone screen difficult to navigate.
Part 3: How to Run Life360 on Windows PC with BlueStacks
An Android simulator is one practical way to run mobile apps on a PC. It generates a virtual Android environment inside Windows, allowing Android apps to function on the PC.
Out of the choices, the most popular one and also the easiest to set up is BlueStacks. You can utilize it as a Life360 emulator and install the application via the Google Play Store.
Here is how to set it up:
-
Step 1 Get BlueStacks
Visit the official BlueStacks website and click the download option.
-
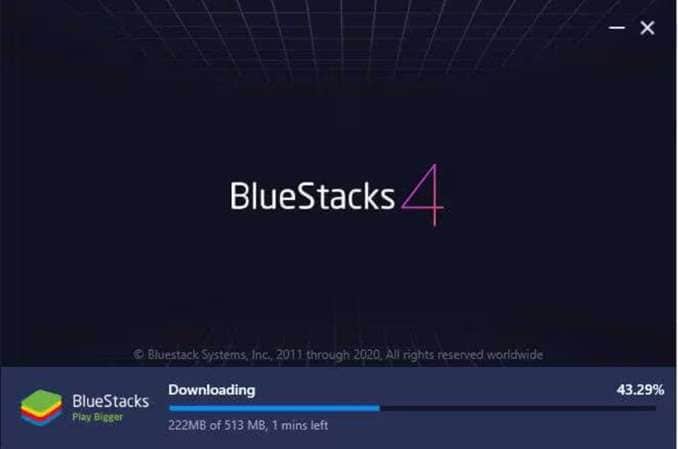
Step 2 Run Installer
Once it is downloaded, open the installer and begin the installation procedure on your computer.
-
Step 3 Start BlueStacks
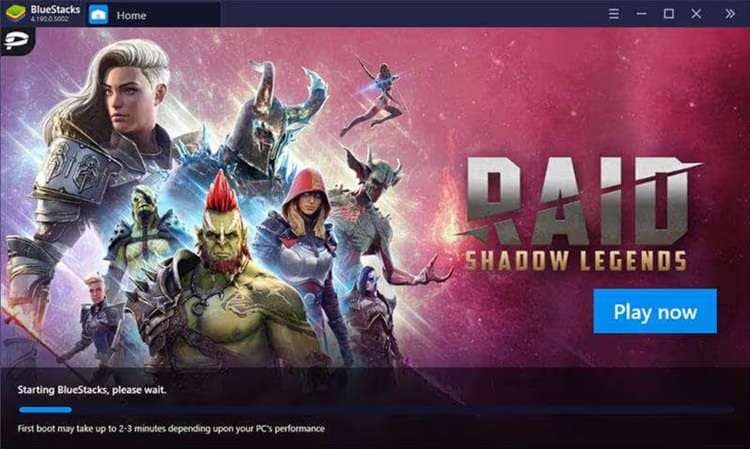
Open BlueStacks after the installation is finished. Depending on how well your machine performs, the initial launch can take longer.
-
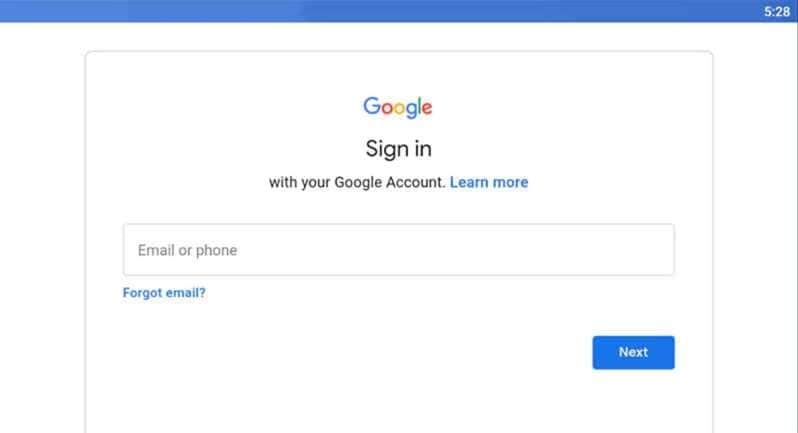
Step 4 Log in to Google Play
Launch the Google Play Store from the BlueStacks home screen. When asked, sign in with your Google account.
-
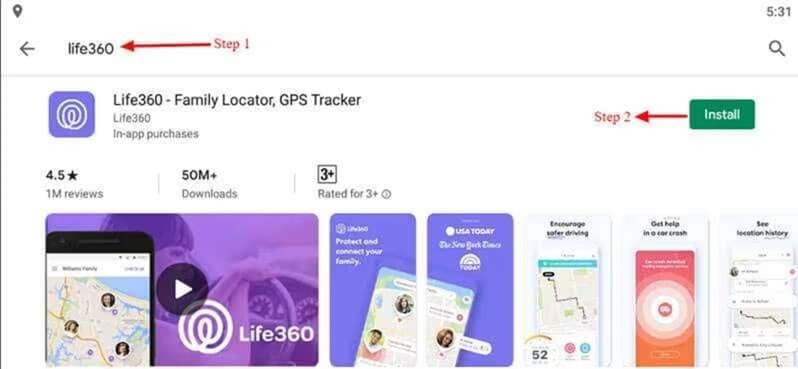
Step 5 Install Life360
Look up Life360 on the Play Store. After choosing the application, click Install.
-
Step 6 Launch Life360
Launch Life360 after installation and input your account information. You can then access the Android app through BlueStacks on your computer.
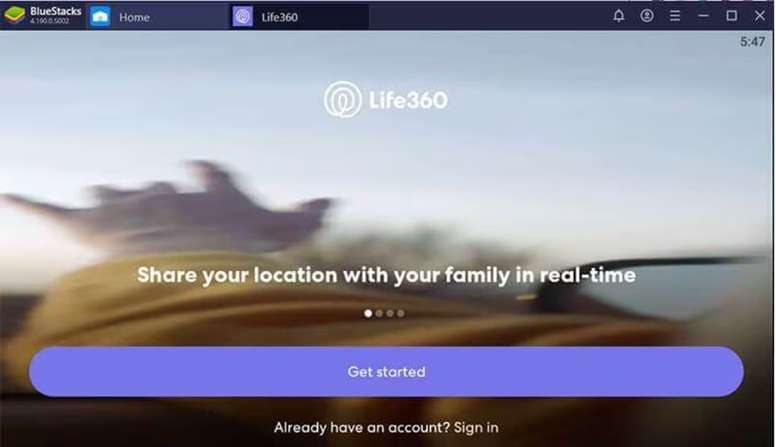
BlueStacks gives you a separate Android environment for Life360 on your computer. If you would rather keep Life360 running on your actual phone and simply view it on Windows, screen mirroring offers another approach.
Part 4: How to Mirror Life360 to Computer from Android
BlueStacks can help you access Life360 on a PC, but an emulator may feel heavy on a computer with limited hardware. If it loads slowly, Android screen mirroring offers a simpler alternative.
With mirroring, Life360 keeps running on your Android phone while the phone’s screen appears on Windows. This lets you view Life360 on your computer without running a separate Android environment.
Here is how to set it up:
-
Step 1 Turn on Bluetooth
Make sure Bluetooth is enabled on both your Android phone and Windows PC.
-
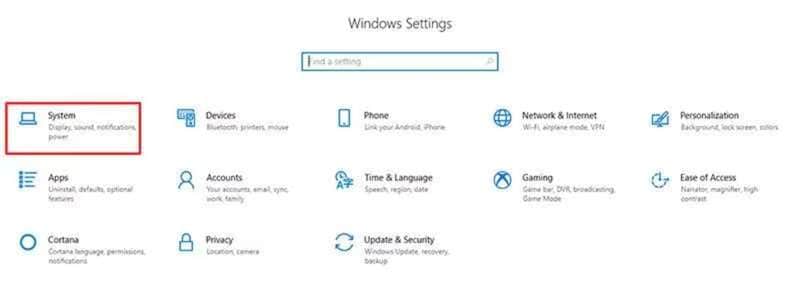
Step 2 Open Windows Settings
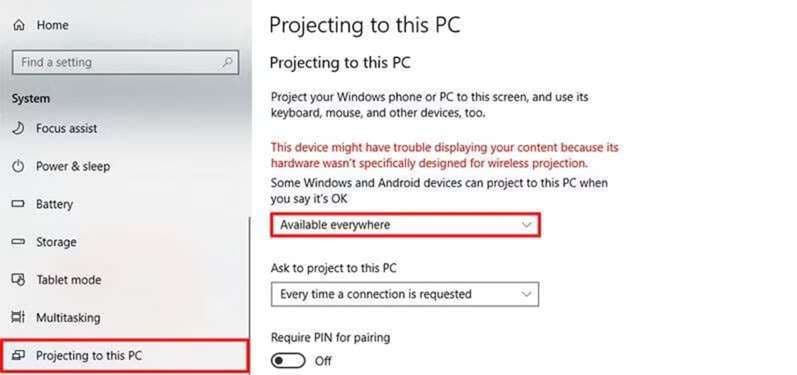
On the PC, open Settings and select System.
-
Step 3 Enable Projection
Choose Projecting to this PC from the menu. Set the available connection option to Available Everywhere.
-
Step 4 Start Casting from Android
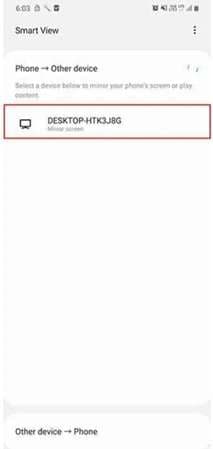
On an Android device running Android Pie or later, open the notification panel. Select Smart View or Cast, depending on your phone. When your PC appears in the device list, select it.
-
Step 5 View Life360 on Windows
Allow the devices to connect. Once mirroring starts, your Android screen will appear on the computer. Open Life360 on the phone to display it on the larger PC screen.
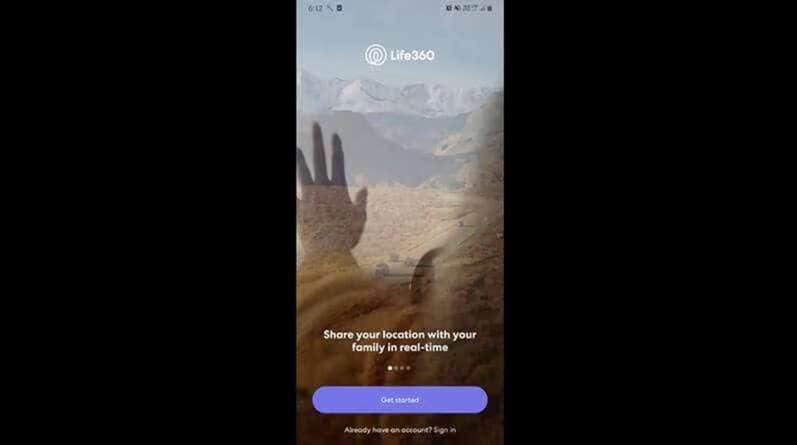
Unlike an emulator, this method does not move the app itself to Windows. You still use your Android phone to control Life360, and each action on the phone appears on the mirrored screen.
That makes screen mirroring useful for easier viewing, but the phone remains essential—a limitation that becomes more important when considering Life360’s tracking and other mobile-based functions.
Part 5: Where Life360 for Windows Falls Short
Although PC workarounds may make Life360 viewing easier, they do not turn Windows into a Life360-supported device. Compatible phones are essential for accurate location and other safety features.
Key limitations include:
- No official PC support: Life360 does not support desktop or laptop computers, according to its official site.
- Sensors Phone Still Matter: Drive Detection Needs GPS, Accelerometer, Gravity Sensor, and Gyroscope. A normal PC cannot provide the same mobile sensor setup.
- Location permissions are essential: Precise location, background access, mobile data, Wi-Fi, and physical-activity permissions help Life360 update location correctly.
- One account, one active device: You cannot stay signed in on multiple devices simultaneously with the same account on Life360. Signing in to another device may log out your previous device.
- Mirroring is only a display: When you mirror Life360 to a computer, the phone still runs the app and supplies its location data.
If you want more than just viewing and want to control the GPS location reported by your mobile phone, a special virtual-location tool does the trick.
Bonus: Manage Life360 Location More Flexibly with Dr.Fone - Virtual Location
The methods above can help you view or access Life360 from Windows, but they offer limited control over the GPS location reported by your phone. If you need to change that location on your own device for privacy, testing, or other legitimate purposes, Dr.Fone - Virtual Location provides a more flexible option.
Dr.Fone changes the GPS position of a connected iPhone or Android device. Wondershare lists Life360 among the location-sharing apps that can work with its virtual GPS feature. It also states that supported devices can change location without rooting Android or jailbreaking iOS.
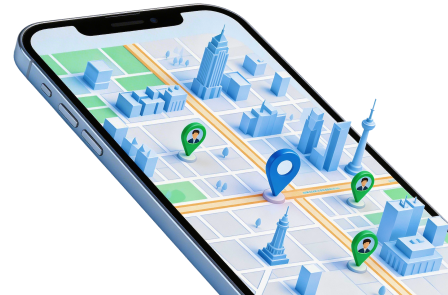
 Set your map route to simulate GPS movement.
- Set your wanted movement speed.
- HD and large map view to check location.
- Fake GPS location to anywhere.
What Dr.Fone - Virtual Location Can Do
- Teleport to another location: Enter a place and move the phone's reported GPS position there.
- Simulate a route: One-Stop Route can create movement between two points with adjustable speed and trip settings.
- Create multi-stop movement: Add several points to build a longer simulated route.
- Control movement manually: The joystick lets you change GPS direction in real time.
- Restore the real location: Wondershare says restarting the connected device restores its actual GPS location after virtual-location use.
How to Change or Simulate Your Phone's Location with Dr.Fone
-
Step 1 Open Virtual Location and connect your phone
Launch Dr.Fone on the computer, open Virtual Location, and connect your supported iPhone or Android device.
-
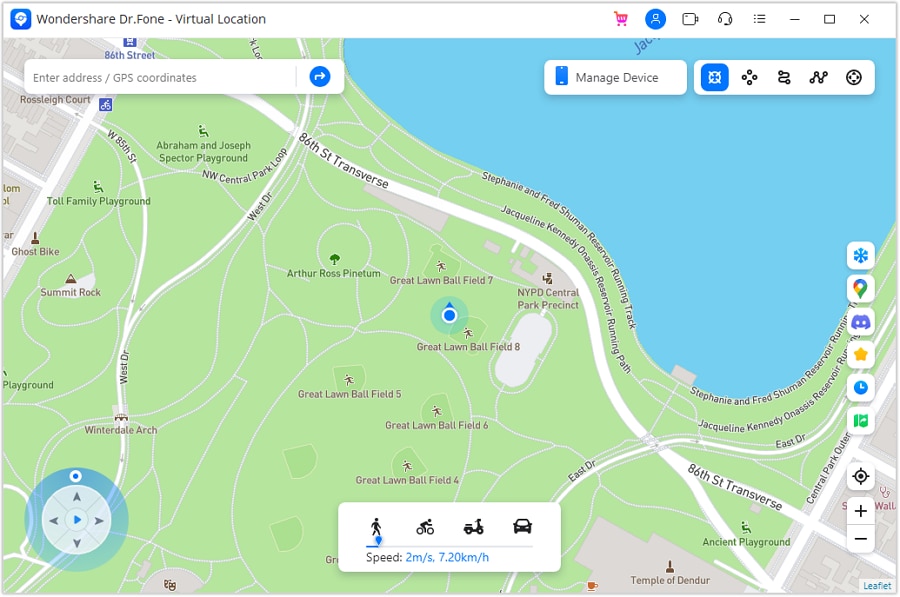
Step 2 Choose Teleport Mode
Select Teleport Mode from the upper-right menu. Use the search box to enter the place or coordinates you want to use.
-
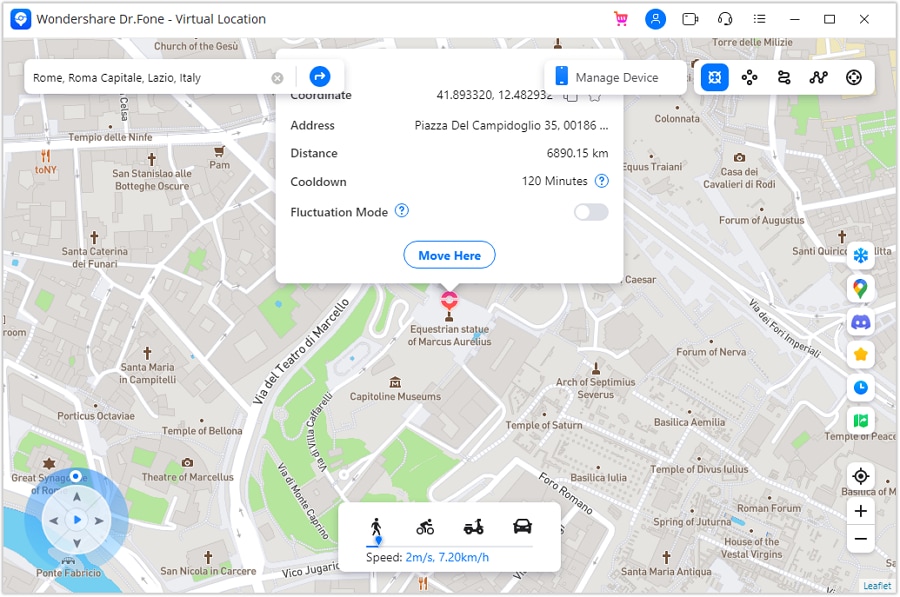
Step 3 Set the new GPS location
Check the selected point on the map and click Move Here. Dr.Fone then changes the phone's reported location to that point.
-
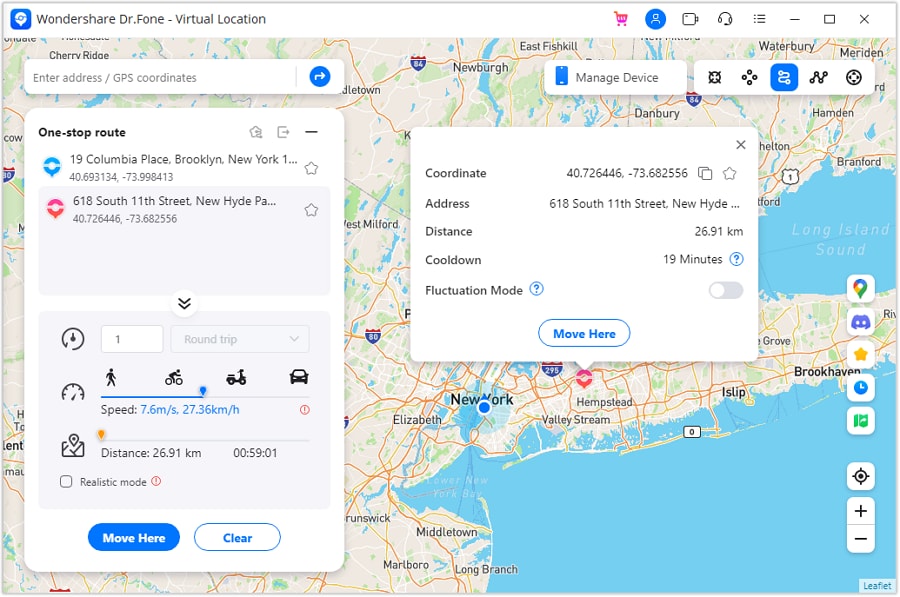
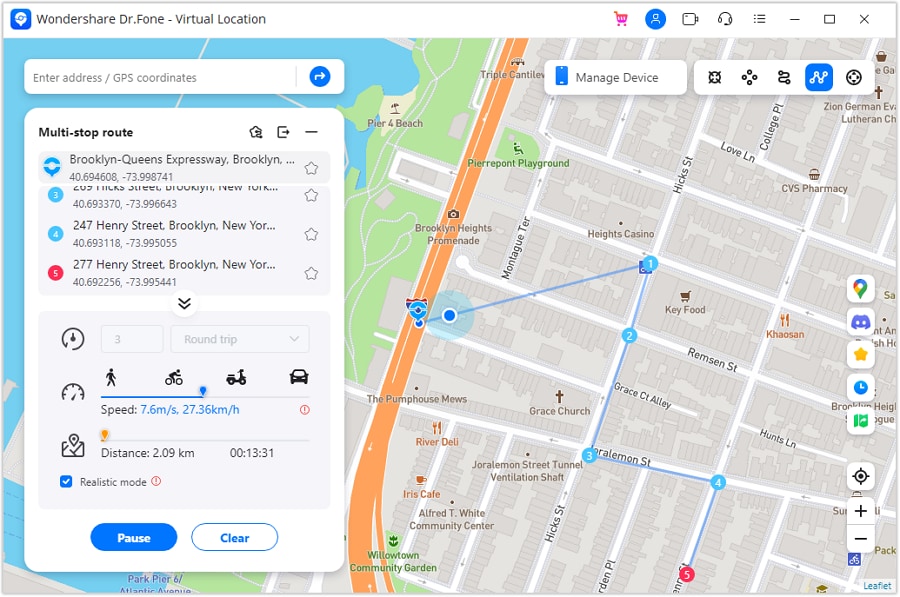
Step 4 Simulate movement if needed
For a moving location, switch to One-Stop Route or Multi-Stop Route. Choose the destination or route points, set the speed and trip options, and start the simulation.
-
Step 5 Return to your real location
When finished, close Virtual Location and restart the phone to restore its actual GPS position, as recommended by Wondershare.
Unlike a Life360 emulator or screen mirroring, this approach does not try to turn Life360 into a desktop app. Instead, it works with the mobile device's GPS location that location-based apps rely on. Use it only on devices and accounts you are authorized to control, since changing a shared location can affect what other Circle members see.
Conclusion
Life360 does not have an official Windows application, so you will have to use a workaround to use Life360 for PC. BlueStacks is an application allowing users to run other Android apps inside Windows. Unlike this app, screen mirroring allows you to view Life360 on your computer without moving the app away from your phone.
Both options are useful for a larger display, but your mobile device remains essential for GPS, sensors, permissions, and reliable tracking. If you also need more control over the location reported by your own phone, Dr.Fone - Virtual Location offers teleport and route-simulation tools for supported devices. Use any location-changing feature responsibly and only on devices you control.




FAQS.
-
1. Can I install Life360 directly on Windows 11?
A Life360 desktop app is unavailable for Windows 11. Life360 currently lists desktop and laptop computers as unsupported devices. -
2. Can I use Life360 on PC with BlueStacks?
Test the Android version via BlueStacks. Life360 does not endorse desktop or laptop users, so do not expect same full functionality. -
3. Is using a Life360 emulator the same as using Life360 on my phone?
No. An emulator creates a virtual Android device. It does not provide the same physical GPS and motion sensors as your real smartphone. -
4. Can I mirror Life360 to computer without installing it twice?
Yes, on compatible Android phones. Microsoft Phone Link can display supported Android apps on Windows while the actual app continues running on the phone. -
5. Does Life360 need my phone's GPS?
Yes. Life360 states that a Circle member's phone must have location/GPS services enabled for their location to appear correctly. -
6. Can Dr.Fone change the location shown by location-based apps?
Dr.Fone Virtual Location changes the GPS location reported by a supported connected phone. This can affect location-based apps, but app behavior can vary after updates. It should not be viewed as guaranteed Life360 compatibility.
 Add Wondershare Dr.Fone as a preferred source on Google



