[Fixed] How to Enter & Exit DFU Mode On iPhone 7 Series?

Aug 30, 2023 • Filed to: Mobile Repair Solutions • Proven solutions
If your iPhone 7 or iPhone 7 Plus isn't functioning correctly and you have tried all the obvious solutions, you can take the help of DFU mode. Putting the device in DFU mode can bring your iPhone to its normal operable condition. DFU mode is an advanced fix for several software-related issues on the iPhone 7 or iPhone 7 Plus.
In this article, you will learn the steps on how to enter DFU mode on iPhone 7 and exit DFU mode on iPhone. Plus, you will learn the fixes to resolve the issue of iPhone 7 or iPhone 7 Plus being stuck in DFU mode. But first, let's understand what iPhone 7 DFU mode is. And the scenarios where entering the DFU mode on iPhone 7 is applicable.
Part 1. What is DFU Mode?
Device Firmware Update, popularly known as DFU Mode, allows you to recover your iPhone or iPad on iOS 7 using a computer.
If your iPhone 7 has experienced a software failure or is not functioning correctly, you can use the DFU mode to restore the device to its normal operating state. While there are many reasons to put the iPhone 7 Plus into DFU mode, it is used to resolve software-related problems on the iPhone.
Entering the DFU mode on iPhone 7 or iPhone 7 Plus is relatively simple, given that you must press a couple of buttons. Once you enter the DFU mode on iPhone 7 or iPhone 7 Plus, you can reinstall the current OS or conduct other rescue operations.
Part 2. When to Enter iPhone 7/7 Plus DFU Mode?
DFU mode is an advanced recovery mode that can resolve several issues on the iPhone. However, the primary reasons you should consider entering the iPhone 7 DFU mode are:
- You want to downgrade the iPhone firmware or OS version from the current version to an earlier version.
- You want to Jailbreak the iPhone 7 or iPhone 7 Plus device.
- iPhone gets stuck on the Apple logo, and you cannot exit the logo using the Recovery mode.
- You want to Restore your iPhone, but iTunes cannot recognize the iPhone 7 or iPhone 7 Plus device.
- Your iPhone 7 or iPhone 7 Plus is stuck in restarting loop, and you cannot exit it.
- You can also use the DFU mode to resolve the other software-related issues that cannot be resolved using a normal restart or Recovery mode restart.
These are the primary reasons you should consider entering the DFU mode on the iPhone 7 or iPhone 7 Plus.
Part 3. How to Put iPhone 7/7 Plus into DFU Mode?
To enter the DFU mode, you will need the latest version of iTunes or Finder on the computer. It is important to note that all the data on the iPhone will be lost once you enter the Recovery mode, so ensure to back up the iPhone data. You can choose between iTunes Backup or iCloud backup. After backing up the iPhone 7/ 7 Plus data, follow the subsequent steps to put the iPhone 7 Plus into DFU mode.
Here's How to Put iPhone 7 and iPhone 7 Plus into DFU Mode:
Step 1. Connect the iPhone and the computer using a lightning cable.
Ensure to download the latest version of iTunes or Finder on the computer before connecting the iPhone and the computer.
Step 2. Press and hold the Power and Volume down buttons for 8-10 seconds.
The iPhone 7 or iPhone 7 Plus screen will go black if you successfully enter the DFU mode. If not, repeat the above steps again.

Now release the Power button while holding the Volume Down button. Release the Volume Down button once you see the "iTunes has detected an iPhone in recover mode. You must restore this iPhone before it can be used with iTunes" pop-up on the computer.
- Click OK.

Step 3. Click on the Restore iPhone button on iTunes on the computer. Once you click on the Restore iPhone option, you will see the "Hello" option on the iPhone.

Once the iPhone 7/7 Plus Restore is complete, you will see the option to Restore the iPhone with iCloud or backup. That's how simple it is to enter the DFU mode on the iPhone 7 and iPhone 7 Plus.
Part 4. How to Exit DFU Mode on iPhone 7, iPhone 7 Plus?
You can exit the DFU mode on iPhone 7 and iPhone 7 Plus easily as long as there are no issues. Follow these simple steps to learn how to exit the iPhone 7 DFU mode.
Step 1. Hold the Volume Down and Power buttons simultaneously for up to 10 seconds.

Step 2. Release holding both the buttons once you see the Apple logo on the iPhone 7 or iPhone 7 Plus screen.

Step 3. Wait for the Apple device to boot and exit the DFU mode. You will have to enter the passcode to access the iPhone 7 or iPhone 7 Plus device.

There you go! That's how to exit DFU mode on iPhone 7 and iPhone 7 Plus.
Note: iTunes will recognize that you have exited the DFU mode and will ask you to restore it using the backup. In case you still see the "Connect to iTunes" message, iPhone 7 or iPhone 7 Plus is still in DFU mode. You can repeat the entire process again and try to exit DFU mode on iPhone 7 again.
Part 5. How to Fix iPhone 7 Stuck in DFU Mode?
DFU mode is considered an excellent fix for many software-related issues on the iPhone, but it is the ultimate fix. It is critical to understand that the DFU mode is a sophisticated means to solve advanced software-related problems of the iPhone and restore it to its normal operating condition.
But sometimes, the iPhone 7 or iPhone 7 Plus can be stuck in the DFU mode. If you're facing a similar issue, follow on to learn about the different methods to fix an iPhone 7 or iPhone 7 Plus stuck in DFU mode.
Method 1. Force Restart Your iPhone 7/7 Plus
Unlike the normal restart on the iPhone 7 or iPhone 7 Plus, a Force restart is a deliberate method to force your device to cut down the power from the iPhone's battery to the hardware and shut it down. A Force Restart, otherwise known as the Hard Reset, is used whenever the iPhone 7 or iPhone 7 Plus freezes or isn't operable. So, you can use this method to fix the software-related issues that caused your iPhone 7 or iPhone 7 Plus to get stuck in DFU mode.
Follow these three simple steps to force restart an iPhone 7 or iPhone 7 Plus:
Step 1. Press the Volume Down and Power buttons simultaneously.

Step 2. You must keep pressing the buttons for up to 10 seconds until the iPhone screen darkens. After that, the Apple logo appears on the iPhone screen.
Step 3. Release both buttons after seeing the Apple logo and wait for the iPhone 7 or iPhone 7 Plus to restart.
You have to understand that there are many downsides to force restarting your iPhone device. For instance, a Force Restart on the iPhone 7 or iPhone 7 Plus abruptly shuts down all the processes. As a result, all the background processes on the iPhone shuts down instantly. This can result in corrupted files on the iPhone. Still, given the iPhone 7 is in DFU mode, a force restart can be the fix.
Method 2. Restore Your iPhone 7/7 Plus with iTunes or Finder
This method is only viable if the iPhone is disabled and you see the "Connect to iTunes" message on the iPhone 7 or iPhone 7 Plus screen.
Moreover, it is essential to note that all the data stored on the iPhone will be erased once you follow the subsequent steps. If you do not want any data loss, skip to the next step, i.e., fixing the iPhone 7 stuck in DFU mode using Wondershare's Dr.Fone - System Repair (iOS) tool.
Here's How to Restore the iPhone 7 or iPhone 7 Plus by using iTunes or Finder:
You can download iTunes on both Windows and Mac devices. However, you must use the Mac device to restore the iPhone 7 stuck in DFU mode using Finder. First, let's learn how to fix the iPhone 7 using iTunes and then how to fix the same issue using Finder.
Using iTunes:
Step 1. Connect the iPhone 7 with the computer on which the latest version of iTunes is installed.
Step 2. On the computer, click on the Device icon on the iTunes window.

Step 3. On the next screen, click on Summary from the left pane of the iTunes interface.
iTunes will automatically detect the iPhone 7 or iPhone 7 Plus and display the "Restore" option. Click on the Restore option.

There you go! That's how to restore the iPhone 7 or 7 Plus stuck in DFU mode using the iTunes program.
Using Finder:
You can use the Finder on the latest Mac devices to restore the iPhone 7 or iPhone 7 Plus stuck in DFU mode.
Step 1. Open the Finder app on the Mac and connect the iPhone 7 to the Mac using the lightning cable.
Step 2. Choose the connected iPhone 7 device from the left pane. Click on the Restore iPhone option.

Wait for the Restore process to complete. Once you see the iPhone screen, it means the iPhone 7 has come out of the DFU mode. If this does not work, you can use a third-party tool to repair the software-related problems on the iPhone.
Method 3. Repair with a Professional iOS Repair Software
There are times when the iPhone 7 or iPhone 7 Plus gets stuck in the DFU mode because of system issues. Of course, there isn't a clear way to learn why the iPhone 7 isn't exiting the DFU mode. However, you do not even have to know about the issue to resolve it. Instead, you can use an iPhone system repair tool like Dr.Fone - System Repair (iOS) to deal with the issue.
Dr.Fone - System Repair (iOS)

Wondershare Dr.Fone - System Repair (iOS) allows you to resolve all the DFU mode errors without even losing the data stored on the iPhone device. Designed to deal with over 150 system-related issues on the iPhone, Dr.Fone - System Repair (iOS) tool is a beginner-level tool that is simple to use and allows you to bring the iPhone 7 and iPhone 7 Plus into their normal condition. There are three different methods to repair the iPhone 7 or iPhone 7 Plus.
The Standard mode allows you to resolve iPhone issues without any data loss, and it is what you have to use to fix the iPhone 7 or iPhone 7 Plus that is stuck in DFU mode. This means you do not get rid of the iPhone data to fix the issue, which is the case when you use iTunes or Finder. But there are also other modes of recovery, which you can use for advanced repair or before selling the device.
All in all, Dr.Fone - System Repair (iOS) is a simple tool that allows you to fix the DFU mode without any data loss. The best thing about Dr.Fone - System Repair (iOS) is it will enable even the least tech-literates to fix the iPhone 7 DFU mode issues.
Key Features:
- Three recovery modes to deal with over 150 system-related issues on the iPhone. The Standard Mode can resolve most of the system errors and does not cause any data loss.
- You can downgrade the iPhone version to an earlier version without any data loss.
- You can repair over 150+ iOS system issues like the white Apple logo, boot loop, 1110 error, etc.
- The simple interface allows even the tech neophytes to deal with iOS system issues.
- It supports all iOS versions, including the latest iOS 16 version.
- The program is available for both Windows and Mac devices.
How to Use the Dr.Fone - System Repair (iOS) to Fix the iPhone 7 Stuck in DFU Mode issue:
Step 1. Download and Install the Dr.Fone - System Repair (iOS) tool on the computer.
The program is available for both Windows and Mac devices, so ensure to download the correct tool for the respective operating systems.
- After installing the Dr.Fone - System Repair (iOS) tool, open it. Choose the System Repair option from the list of options on the main interface of the program.

Step 2 Set up the device to fix the iPhone 7 or iPhone 7 Plus DFU mode with Dr.Fone.
- Connect the iPhone 7 or iPhone 7 Plus to the computer. And choose iOS on the next interface of the Dr.Fone - System Repair tool.

- Choose iOS Repair on the next screen. There are other options like Downgrade iOS and so on, which you can use in the future to perform the respective function on your iPhone 7 or iPhone 7 Plus device.

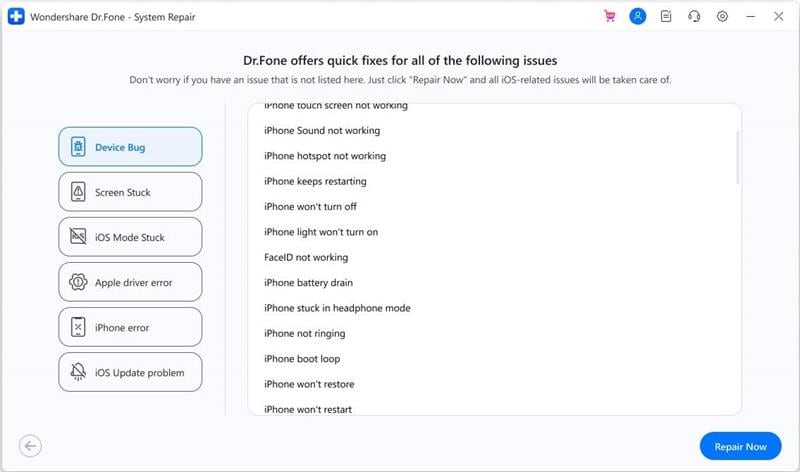
- From the left pane of the screen, you will find several options. Search for the iPhone stuck in DFU mode from the right pane under each repair condition. After selecting the correct System Repair issue, select the Repair Now button from the bottom-right of the Dr.Fone pane.
Step 3. Choose the Repair mode.
- On the next screen, you will see two different modes of recovery. For fixing the DFU mode issue, choose Standard Repair.
You do not have to worry about data loss, as Standard Repair does not cause any data loss on the iPhone whatsoever.

Note: The Standard Repair mode allows you to fix the DFU mode issue, so do not choose Advanced Repair mode. Using the Advanced Repair issue will cause data loss, so you should move to Advanced Repair only when the Standard Repair does not work on the first try.
Step 4. Enter the Recovery Mode.
- Now you have to put the iPhone into Recovery Mode. So, tap on the iPhone message saying: the "Trust" option on the screen. Follow the on-screen instructions shown in the Dr.Fone - System Repair interface on how to enter Recovery Mode conveniently.
- If you cannot enter the Recovery Mode, choose Guide to Recovery Mode This will help you learn how to enter Recovery Mode on iPhone 7 or iPhone 7 Plus models that are stuck and aren't responding.

Step 5. Follow the instructions to enter the Recovery mode and wait for Dr.Fone to connect with iPhone after it is put into Recovery mode.
Step 6. Dr.Fone - System Repair (iOS) will download the adequate firmware required to repair the DFU mode issue. Wait for it to downloading process to complete and click on Download.

- After the firmware is downloaded, wait for Dr.Fone - System Repair to install it on the iPhone 7 or iPhone 7 Plus device and resolve the DFU mode problems.
- Click on Repair Now once the firmware package is read.

Once you click on the Repair Now option, Dr.Fone - System Repair will take some to install the firmware package on the iPhone 7 or iPhone 7 Plus. Once finished, you will see the Done option on the interface. Click on the Done option, and you will be able to access the iPhone 7 or iPhone 7 Plus like before.
Conclusion
As mentioned, there are many issues that can be resolved using iPhone 7 DFU mode. Yes, it is not the ultimate fix to all the issues of the iPhone 7, but it is useful in cases when you want to downgrade the device or repair system-related issues.
You can enter DFU mode on iPhone 7 or iPhone 7 Plus conveniently and exit it. However, sometimes the DFU mode can create additional issues, and your iPhone 7 cannot exit from it.
In such cases, you can use iTunes or Finder to restore the iPhone 7 or iPhone 7 Plus back to its normal condition. However, using iTunes or Finder to fix the DFU mode issues will erase all the data on the iPhone 7 or iPhone 7 Plus. The same is the case when you use the Force Restart method to resolve the DFU mode errors.
However, if you do not want any data loss or looking for a method that works 100% of the time, you should use the Dr.Fone - System Repair (iOS) tool. As shown, it is the most convenient option to fix all the system-related issues on iPhone 7 or iPhone 7 Plus.


Other Popular Articles From Wondershare
iPhone 7 to 8 Series
- iPhone 7 Problems
- 1. iPhone 7 Problems
- 2. Screen Record on iPhone 7
- 3. iPhone 6/7 Touch ID Not Working
- 4. Activate iPhone 7 Plus/7/SE(No SIM)
- 5. iPhone 6/7/8 Stuck On Apple Logo
- iPhone 7 Series Tips
- 1. Screen Mirroring iPhone 7/7 Plus
- 2. DFU Mode in Apple iPhone 7/7 Plus
- 3. Factory Reset iPhone 7/7 Plus
- iPhone 7 Transfer
- 1. Restore iCloud Backup to iPhone 7
- 2. Restore iTunes Backup to iPhone 7
- 3. Transfer from iPhone 7 to iPhone 8
- iPhone 7 Unlock
- iPhone 8 Problems
- 1. iPhone 6/7/8 Won't Turn On
- 2. iPhone 6/7/8 Black Screen
- 3. Siri Not Working On iPhone
- 4. Turn Off Find My iPhone
- iPhone 8 Series Tips
- 1. Delete Apps on iPhone 8
- 2. Enter & Exit DFU Mode On iPhone 8
- 3. Screen Mirror on iPhone 8/8 Plus
- 4. Screen Record on iPhone 8/8 Plus
- 5. Recover Deleted Message on iPhone 8
- 6. Sell iPhone 8/8 Plus
- 7. Hard/Soft/Factory Reset iPhone 8
- 8. iPhone 8 Tips and Tricks
- iPhone 8 Transfer
- 1. Transfer from iPhone 5S to iPhone 8
- 2. Transfer from iPhone 6 to iPhone 8
- 3. Back up iPhone 8
- 4. Back up Locked iPhone Data
- iPhone 8 Unlock
James Davis
staff Editor
Generally rated4.5(105participated)