Is Your iPhone 8/8 Plus Stuck in DFU Mode? Get It Fixed!
Aug 27, 2025 • Filed to: Phone Repair Solutions • Proven solutions
iPhones are premium smartphone devices providing extensive features, which makes them a preferable device among millions. While it stands among the best of the best, iPhones can counter multiple software issues. Although you try to resolve them with generic solutions, it makes things worse. If your iOS device is not restoring through simple means, it needs advanced remedies.
This article will introduce the DFU mode and how it helps iOS devices get back on track. However, the discussion is specific to the iPhone 8 DFU mode. To know more about how it operates, look through the article for a better understanding.

Part 1: What is DFU Mode for iPhone 8 and iPhone 8 Plus?
DFU mode stands for the short form of Device Firmware Update, which defines the state of the iOS device that puts it back in order. If your iPhone 8 or 8 Plus faces multiple issues, it can be put in DFU mode to discover a remedy. It operates similarly to the BIOS on Windows devices and Recovery Mode on a Mac.
As it takes the users below the levels of operating systems, it gives the user control over changing the software dynamics of the iOS device. While shifting to the mode does not change anything for the device, performing specific tasks while in the DFU mode might cost data loss.

Why Do You Need to Go Into DFU Mode?
What if you are confused about why DFU iPhone is required in the first place? If it is the case, we have outlined some important reasons for opting for the DFU mode for your iOS device:
- It proves effective for upgrading the firmware of an iOS device when other methods are not helping out.
- As it bypasses the normal boot process, you can install new firmware into an unresponsive iOS device.
- Devices that are stuck in a boot loop or other software problems can be restored by putting them into DFU mode.
- If you are comfortable jailbreaking your iOS device, you can install custom firmware into it with the help of iTunes after putting it in DFU mode.
Part 2: Does DFU Mode Erase My Data?
For users who intend to put iPhone 8 in DFU mode, they need to be aware of a few essential pointers. While trying to restore devices in DFU mode, the data within them will erase completely. If you intend to try using DFU mode on your iPhone 8, keep note that it will erase all the data in it. For that, it is best to keep a backup of all the data that is contained within the iOS device.
Conversely, if the iPhone is physically damaged, it will get unstable if you try restoring it with the DFU mode. Be sure about your iOS device before you enter the DFU mode for its restoration.
Part 3: How to Enter and Exit DFU Mode on iPhone 8 and iPhone 8 Plus?
Once you have learned about the DFU mode in specific, it is time to figure out how it processes. In this part, we will be working on how to enter and exit the iPhone 8 DFU mode easily. Look through the provided steps to know more about the process for its successful execution:
Entering the DFU Mode
Step 1: Turn off your iPhone device and continue to connect it to your desktop. Launch iTunes if you are using a Windows device, or open Finder if you have a Mac.
Step 2: Start the process by holding the "Side" button for three seconds. Continue to keep holding it and start pressing the "Volume Down" button. Hold both buttons for ten seconds and release the "Side" button after it.
Step 3: Continue to hold the "Volume Down" button for another five seconds and release it. If your iPhone 8 enters the DFU mode successfully, iTunes or Finder will display a notification while the screen remains blank.

Exiting the DFU Mode
Step 1: If you try to exit the DFU mode from your iPhone 8 after processing it, press the "Volume Up" button. Continue to press the "Volume Down" button following this.
Step 2: After that, hold the "Power" button on the side until the device starts to reboot.

Part 4: iPhone 8/8 Plus Stuck in DFU Mode? How to Fix?
Is your iPhone 8/8 Plus stuck in DFU mode while trying? If that is the case, there are some fixes that can be tried before you roll back to an expensive remedy. Trying these solutions might save you the heed of going to the stores for a resolution.
1. Why Do iPhones Get Stuck in DFU Mode?
There are multiple reasons involving the iPhone getting stuck in DFU mode. These reasons will help you determine which solution will fit more impressively in the type of problem your device is in:
- There can be an interruption in the firmware update that has caused it to fail. When it fails, the device gets stuck in DFU mode.
- Your device might have been compromised by a software bug that can make it stick within the DFU mode.
- If you tried using the wrong button combination within the DFU mode, there is a possibility that it might get stuck within the mode.
- A hardware issue can cause such complications with your iOS device.
2. How to Fix iPhone 8/8 Plus Stuck on DFU Mode?
There are multiple solutions that you can seek as a remedy for iPhone 8 stuck in DFU mode. Study these solutions carefully to find a perfect fit for a stuck DFU mode iPhone 8 device:
Method 1: Force Restart to Get Out of DFU Mode
The first thing that can be tried to resolve the issue of stuck DFU mode in iPhone 8 is force restarting the device. Doing so will help you get it out of the DFU mode. To process it, follow the steps prescribed below for executing the force restart:
Step 1: Start by pressing the "Volume Up" button and continue to press the "Volume Down" button.
Step 2: After pressing and releasing both buttons, continue to press and hold the "Power" button on the side of your iPhone 8/8 Plus. Once the Apple logo appears, leave the button to force restart the device successfully.

Method 2: Restore Your iPhone 8/8 Plus with iTunes or Finder (Data Loss)
The next thing that can be done while staying in the DFU mode is restoring the iOS device. While this is the process that will lead to data loss, it is inevitable to resolve your iPhone's status. To perform the procedure, look through the steps focused below:
For Finder
Step 1: As you are present in Finder, select your "iPhone" from the left panel and continue into the "General" tab within the window.
Step 2: Once the list of options appears on the window, continue to select the "Restore iPhone" option to restore the device successfully.

For iTunes
Step 1: With the device connected, select the "Device" button on the top left and continue to the "Summary section.
Step 2: As you find yourselves on the next screen, select the "Restore iPhone" option in the list and follow the instructions to restore the device successfully.

Important: Macs running macOS Catalina and later will use Finder. PCs and Macs running macOS Mojave or earlier will need iTunes.
Method 3: Repair With a Third-Party Recovery Software (Without Data Loss)
For some reason, if you cannot recover your device from the stuck DFU mode, it is best to have an option that can prove helpful in all ways possible. Wondershare Dr.Fone - System Repair (iOS) is the ultimate remedy for repairing your iOS device. Those who have their iPhone 8/8 Plus stuck in DFU mode can efficiently resolve it.
System Repair (iOS) associates hundreds of other errors with remedy. With it being a fast and straightforward solution, it does not require knowledge to be utilized properly. To know more about System Repair (iOS) and how it functions, look through the comprehensive feature set below:
- It easily resolves iPhone errors such as the white screen of death, frozen iPhones, and other problems.
- This particular fix does not delete the data and keeps it intact after the conclusion of the process.
- You can easily upgrade or downgrade your iOS device without using iTunes.
The following steps explain the process of repairing the iPhone 8 or 8 Plus with System Repair (iOS):
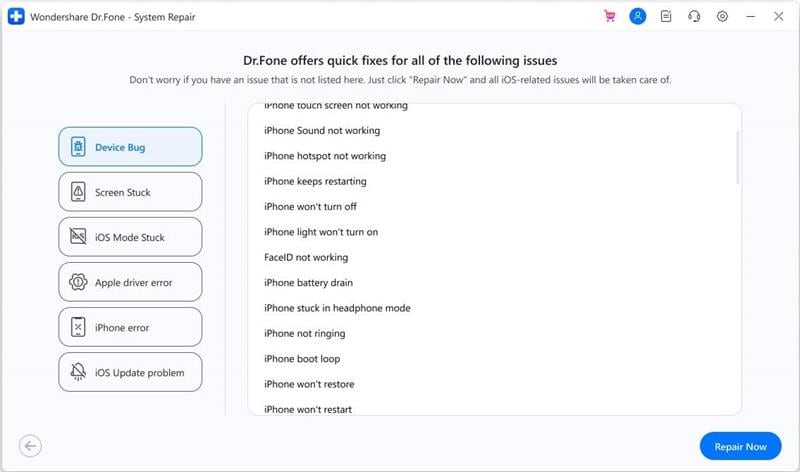
Step 1: Open System Repair
You must download and install Wondershare Dr.Fone on your computer and launch it. As it launches, continue to the "System Repair" section in the list.

Step 2: Select the iOS epair Option
Select "iOS" from the next screen and find yourselves in a list of repair options. Proceed into the "iOS Repair" option to exit the DFU mode. As you are on the next screen, select the "Repair Now" option.

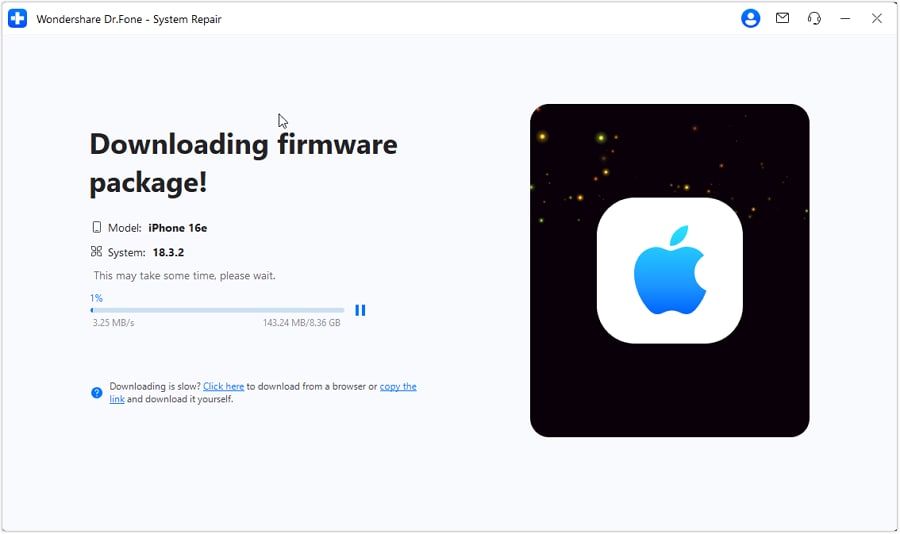
Step 3: Downloading Firmware Package
As the device is set into the Recovery Mode, you will see the list of different iOS firmware on the next window. To install any one of them, click "Download" to initiate the process.

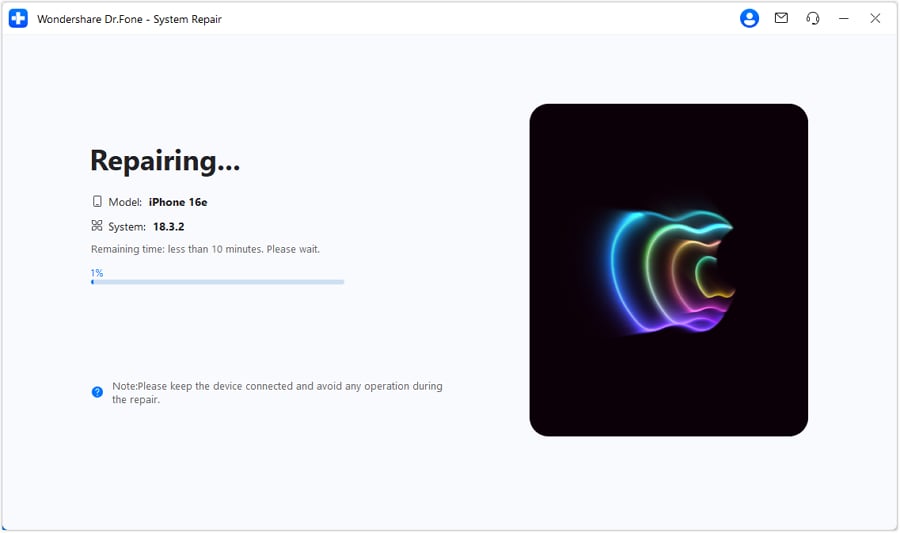
Step 4: Get the Device Out of DFU Mode
After the iOS firmware is verified, click on the "Fix Now" button to start the iOS system recovery process. The repair process is shown on the progress bar on the next screen. Wait for about 15 minutes, and you will successfully fix your iPhone 8/8Plus that is stuck in DFU mode stuck.

Method 4: Contact iPhone Repair & Service from Apple Support
If you still have issues with your iPhone 8 DFU Mode, the best thing to do is contact the Apple Support Center. Since it can be a hardware problem with your device, it is best to approach them for a remedy.

Conclusion
This article has provided a comprehensive overview of how a user can utilize the DFU mode on iPhone 8. We hope you have figured out how to enter and exit the iPhone 8 DFU Mode. Also, if you have been facing problems of being stuck in DFU mode, look through Dr.Fone - System Repair (iOS) as the absolute solution to your problem.
iPhone 7 to 8 Series
- iPhone 7 Problems
- 1. iPhone 7 Problems
- 2. Screen Record on iPhone 7
- 3. iPhone 6/7 Touch ID Not Working
- 4. Activate iPhone 7 Plus/7/SE(No SIM)
- 5. iPhone 6/7/8 Stuck On Apple Logo
- iPhone 7 Series Tips
- 1. Screen Mirroring iPhone 7/7 Plus
- 2. DFU Mode in Apple iPhone 7/7 Plus
- 3. Factory Reset iPhone 7/7 Plus
- iPhone 7 Transfer
- 1. Restore iCloud Backup to iPhone 7
- 2. Restore iTunes Backup to iPhone 7
- 3. Transfer from iPhone 7 to iPhone 8
- iPhone 7 Unlock
- iPhone 8 Problems
- 1. iPhone 6/7/8 Won't Turn On
- 2. iPhone 6/7/8 Black Screen
- 3. Siri Not Working On iPhone
- 4. Turn Off Find My iPhone
- iPhone 8 Series Tips
- 1. Delete Apps on iPhone 8
- 2. Enter & Exit DFU Mode On iPhone 8
- 3. Screen Mirror on iPhone 8/8 Plus
- 4. Screen Record on iPhone 8/8 Plus
- 5. Recover Deleted Message on iPhone 8
- 6. Sell iPhone 8/8 Plus
- 7. Hard/Soft/Factory Reset iPhone 8
- 8. iPhone 8 Tips and Tricks
- iPhone 8 Transfer
- 1. Transfer from iPhone 5S to iPhone 8
- 2. Transfer from iPhone 6 to iPhone 8
- 3. Back up iPhone 8
- 4. Back up Locked iPhone Data
- iPhone 8 Unlock


James Davis
staff Editor
Generally rated4.5(105participated)