How to Selectively Restore iCloud Backup Content to Your New iPhone 13
iCloud Backup
- Backup to iCloud
- 1. View Text Messages on iCloud
- 2. Backup/Extrac WhatsApp from iCloud
- 3. iCloud Drive, iCloud Sync & iCloud Backup
- Extract iCloud Backup
- 1. Access iCloud Backup Files
- 2. Retrieve Data From iCloud
- 3. Access and Download iCloud Backup
- 4. Top 6 Free iCloud Backup Extractor
- Restore from iCloud
- 1. Restore from iCloud Backup
- 2. Recover Photos from iCloud
- 3. Restore WhatsApp from iCloud
- 4. Restore iCloud Backup to iPhone
- 5. Restore Text Messages from iCloud
- 6. Restore Notes from iCloud
- 7. Restore WhatsApp from iCloud
- 8. Can't Restore an iCloud Backup
- 9. Retrieve Photos from iCloud Backup
- iCloud Backup Issues
- ● Manage/transfer/recover data
- ● Unlock screen/activate/FRP lock
- ● Fix most iOS and Android issues
- Start Backup Start Backup Start Backup
Oct 24, 2025 • Filed to: Data Recovery Solutions • Proven solutions
Dr.Fone Basic:
Better Control for Your Phone
Manage, transfer, back up, restore, and mirror your device
The iPhone 13 is coming to town!
If you are as excited as we are, you would already be busy prepping your current iPhone for the transfer---you would already be backing your phone's content up on iCloud. Transferring data to iPhone 13 is definitely straightforward if you want to restore EVERYTHING. However, can you selectively restore iCloud backup? For example, you want to restore pictures and videos on your new iPhone 13 but not messages received?
Part 1: Can you selectively restore iCloud backup content to your new iPhone 13?
The answer depends on who you ask.
If you ask someone from your local Apple store, the answer will be "No". Selective restore iCloud backup is out of the question if you use the official restoration process---it is all or nothing. There is no way for you to go around that when you restore from an existing iCloud backup file, everything will be uploaded into the new device.
If you ask us, the answer will be "Yes... provided that you have the right tools". Many of us are lucky that there are professionals who have developed dynamic recovery tools that cater to all your restoration needs. They basically take the iCloud backup file and open it just like you would a package to pick and choose the exact content you want. Therefore, if you are looking to restore iCloud backup selectively, having one of these handy softwares or programs will be super helpful.
Intrigued? Interested? Sounds like something that you would need once you get your hands on that new iPhone 13? Waste no more time and read on!
Part 2: How to seletively restore iCloud synced files to iPhone 13
Dr.Fone is a data recovery program developed by Wondershare to solve issues experienced by iOS and Android devices. It has one of the "highest iPhone data recovery rates" in the current market. With this program, users are exposed to a wide range of solutions for their devices. The Dr.Fone - Data Recovery (iOS) allows users to recover data from three resources: iOS, iTunes backup files and iCloud backup files. Users can be assured that the content (photos, videos, notes, remind, etc.) of their devices can be recovered in the event of accidental deletion, faulty device or corrupted software.

Dr.Fone - iPhone Data Recovery
World's 1st iPhone and iPad data recovery software
- Provide with three ways to recover iPhone data.
- Scan iOS devices to recover photos, video, contacts, messages, notes, etc.
- Extract and preview all content in iCloud/iTunes backup files.
- Selectively restore what you want from iCloud/iTunes backup to your device or computer.
- Compatible with latest iPhone models.
Did we mention that this software is easy to use? We kid you not---it literally takes three steps to help you selectively restore a backup from your iCloud. Here is how you can transfer data to iPhone 13 selectively:
Step 1: Choose Recovery Mode
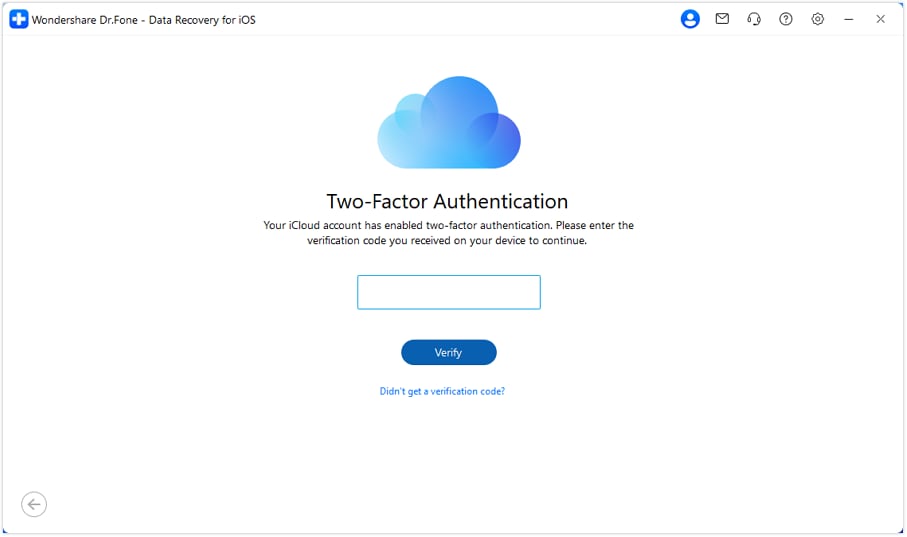
Connect your new iPhone 13 to your computer using a USB cable and launch the program. On the welcome window, select the "Recover from iCloud Synced Files" mode located in the left panel. You will be prompted to log into your iCloud account (refer to picture below).

Note: you will need to key in your login details but Dr.Fone will not keep a record of your Apple login details or the content of your iCloud storage during any session. Therefore, you can be assured that your privacy will not be compromised.
Step 2: Download the backup file from iCloud
Once you have cleared the login process into your iCloud account, the program will scan all available iCloud synced files in storage. Select the iCloud synced files that contains all the information you want to restore and click the "Download" button.

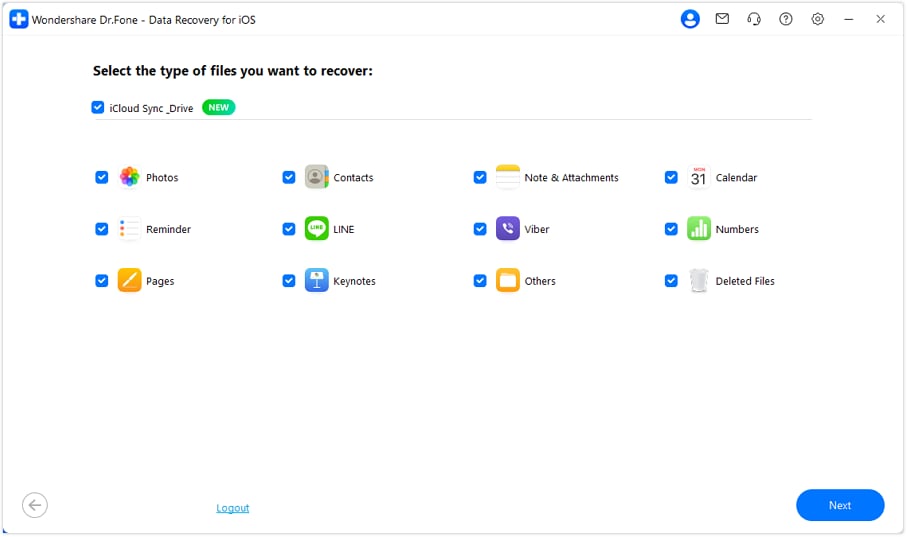
You will then be prompted to select the file types you would like to download from the iCloud synced files. This will be useful in reducing the download time of the iCloud synced files. Once you are happy with your selection, click the "Next" button to prompt the program to look for the relevant files. This will take a few minutes.

Step 3: Preview and recover data from the desired iCloud backup file
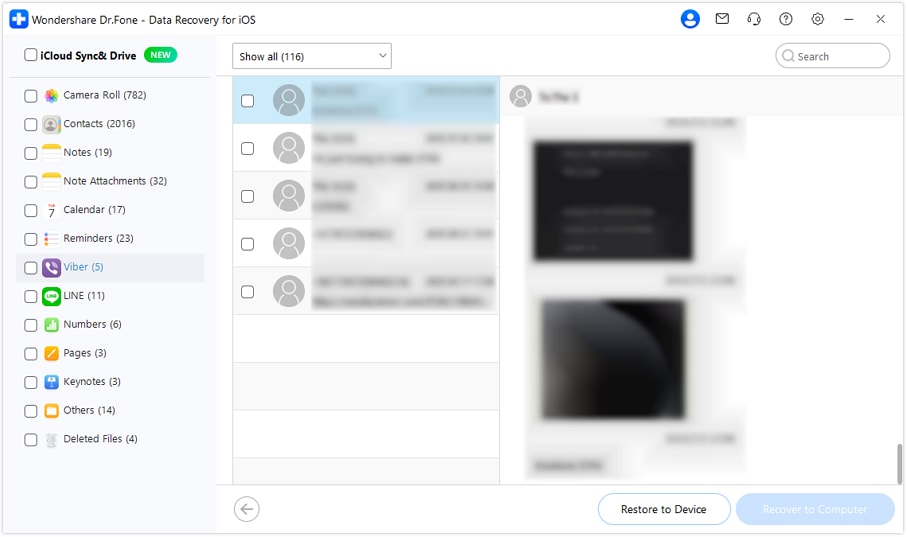
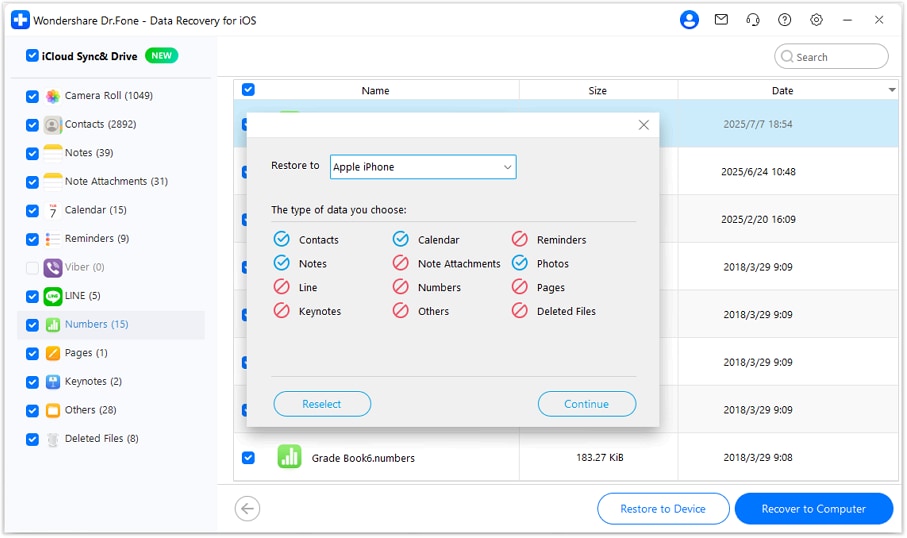
After the program has finished scanning, you will be able to have a sneak peek of almost all files in your iCloud backup file. You will be able to actually see the content of a document or PDF file, the contact details (phone numbers, email address, profession etc.) in your address book or the content of the SMS you have kept by highlighting the filename. If it is something that you want, check the box next to the filename. Once you have ticked all the files you wanted, click on the "Recover to your device" button to save them on your new iPhone 13.

To ensure that the recovery process is successful, ensure that the connection between the iPhone 13 and the computer is not interupted. Avoid leaving the cable vulnerable to accidental (or not so accidental) trips.
It is so easy, right?
If you think of getting the Dr.Fone - iOS Data Recovery, it is highly affordable and delivers great value for your money. While the price tag may be hefty for some people, do bear in mind that it can do more than selectively restore backup files to your device(s). Of course, there is a free trial version---do take note that this is not the full-fledged software and that its capabilities are limited. It is highly commendable that Wondershare allows users to test run the program before committing fully to it.
You might also interest:
A Comprehensive Guide on How To Back Up iPhone to Google Drive
How to Back Up Your iPhone Before Upgrading
Unlocking the Power of NAS: A Comprehensive Guide to iPhone Backup
Ultimate Guide: Back Up Notes or Recover Deleted Notes on iPhone without Backup
How to Back Up WhatsApp on iPhone with Easy Steps
[2023] 10 Best Backup Chargers for Your iPhone
Dr.Fone Basic:
Better Control for Your Phone
Manage, transfer, back up, restore, and mirror your device


Alice MJ
staff Editor