How to sync iTunes to iCloud

Jul 12, 2024 • Filed to: Manage Device Data • Proven solutions
Well, who doesn’t love Apple devices? We all love its hardware and most definitely, the software that keeps it all together. Having said that, iTunes is probably one of the most exciting apps on Apple devices. It gives us access to our favorite music, no matter where we are.
Talking about accessibility to music, one of Apple users' most pressing issues is how to sync iTunes to iCloud. Syncing your iTunes helps you get access to your data across all your devices. There are many different ways you can sync iTunes to iCloud to get improved access to your albums and playlists on different devices.
In this article, we are going to talk about how to sync iTunes to iCloud in detail. Let’s begin!
Part 1: Something you need to know before syncing iTunes to iCloud
Sometimes, the process of syncing iTunes to iCloud can be a bit long. As such, to make sure that the entire process goes on smoothly, you’ll have to ensure that you meet all the prerequisites first.
You need to do three things before moving forward in the guide on how to sync iTunes to iCloud.
- Update all your Apple devices to the latest iOS version. If you are using iTunes on your Windows PC, make sure it has the latest iTunes version.
- Use the same Apple ID to sign across all your devices before syncing iTunes to iCloud.
- If you want to sync iTunes to iCloud using the iTunes/Apple Music app, you’ll have to be a subscriber of either Apple Music or iTunes Match.
- You can sync your music across all your Apple devices and Windows PC without the help of iTunes. Yes, you heard that, right!
Here’s the thing. There are many situations where you would want to access your music on all your devices, but you don’t have access to iTunes. Well, you don’t necessarily need iTunes to sync your music to iCloud for accessibility across all your devices. It is none other than the popular tool: Dr.Fone - Phone Manager (iOS)
Recommended Way: Dr.Fone - Phone Manager (iOS)
Dr.Fone - Phone Manager (iOS) is a widely popular data transfer and managing solution for iOS. It makes it super simple to transfer data between your Apple devices and Windows PC/Mac without using iTunes. You can use it to transfer anything and everything completely hassle-free. Besides, you can use it to manage your Apple device’s data completely.
This tool allows you to transfer anything from a text file, SMS document, and contacts to music, video, and other media files. Let’s look at some key features of Dr.Fone - Phone Manager (iOS).
Key Features:
Here are some of the most exciting features of Dr.Fone - Phone Manager (iOS). Keep in mind that these are just a few features of the tool and not the entire list of features!
- You can use it to transfer all sorts of files - contacts, SMS, photos, music, video, etc. between Apple devices and Windows PC/Mac.
- You can use it to manage your data by adding, deleting, exporting, and to perform other data managing solutions.
- You can use this tool to transfer your data between your devices without the help of iTunes.
- Here is the best feature of this tool. It fully supports the latest iOS 14 and all iOS devices.
Given the key features of this tool, you can definitely use it to move your data in between your Apple devices as well as Windows computers. In the next section, we will look at how to sync iTunes to iCloud using Dr.Fone - Phone Manager (iOS).
Part 2: How to sync iTunes to iCloud with Dr.Fone?
In this section on how to sync iTunes to iCloud with Dr.Fone, we have covered the entire data transfer process between different devices using this tool. The prerequisite to each of the solutions mentioned below is that you have downloaded this tool on your Windows PC or Mac.
Let’s begin!
2.1 Transfer iTunes media on iPhone to PC
In this section on how to sync iTunes to iCloud, we will look at how to transfer your iTunes media from your iPhone to your PC. Follow these simple steps to transfer iTunes media from your iPhone/iPad to PC.
Step 1: Run the Tool
Launch the Dr.Fone- Phone Manager (iOS) on your PC and connect the sender device using a USB cable.
Step 2: Choose Tab
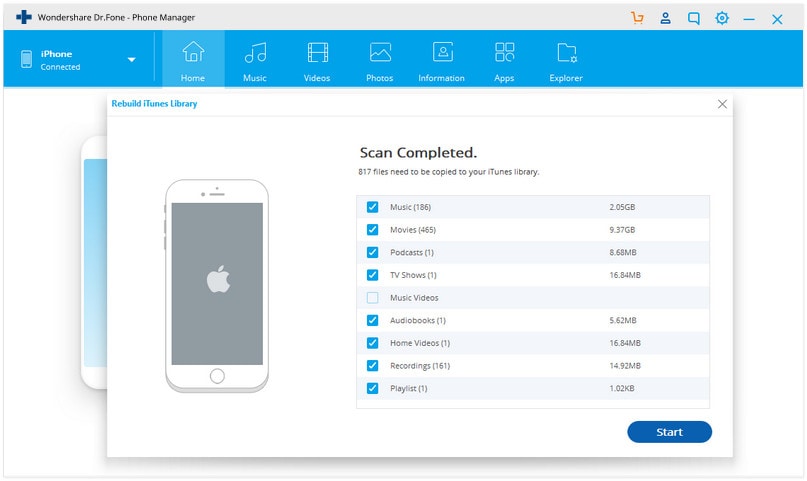
Once the device is detected, click on the “Transfer Device Media to iTunes” option. The tool selects only the files that are not already present on your target device. Click on “Start” to start scanning the media files.

Step 3: Choose Files
Start selecting the files you want to transfer, and once you have selected all of them, click on the “Start” button to start scanning them.
Click “Transfer,” and in a matter of a few minutes, the media files on your iPhone will successfully be transferred to your iTunes library.
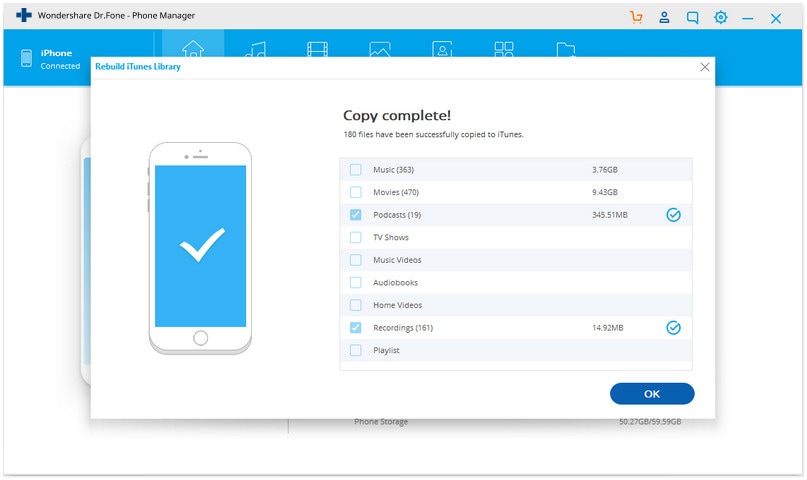
This is one of the important aspects of how to sync iTunes to iCloud. Once you have successfully transferred your iTunes media to your PC, follow the next section to transfer the media files to iCloud.
2.2 Transfer iTunes media from PC/Mac to iCloud
The next aspect of your attempt to sync iTunes to iCloud is transferring media files you received on your PC/Mac to iCloud. Now there are two different types of iTunes users as far as this process is concerned - Apple Music for Mac users and iTunes for Windows users.
We have divided this section into two different parts, one for users with Windows PC and the other for Mac users.
Windows:
If you are using iTunes on your Windows PC, follow the steps mentioned below to transfer it to iCloud.
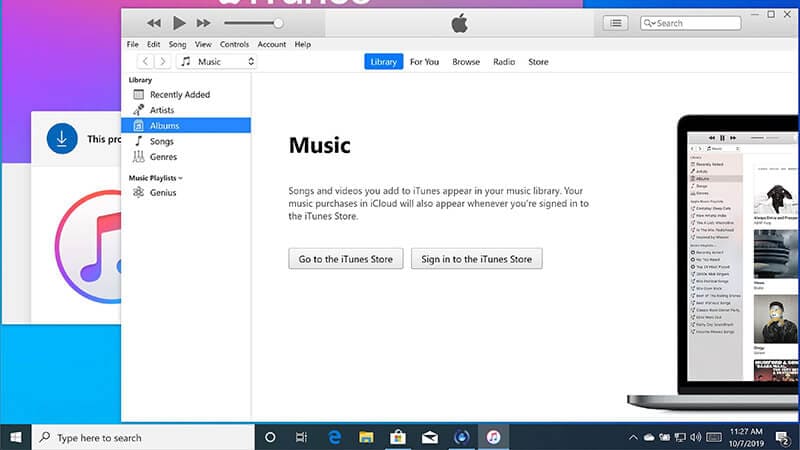
Step 1: Open iTunes on your Windows PC.
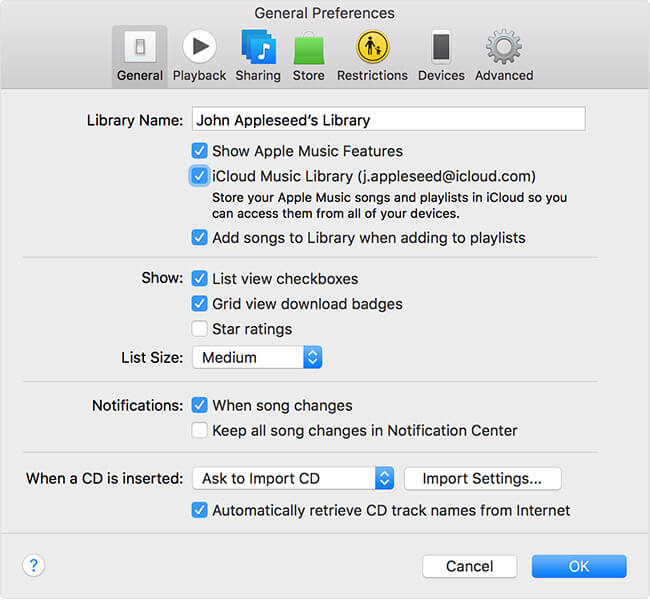
Step 2: Go to the menu bar on the top of your iTunes screen, click on the “Edit” option and then click on the “Preferences” button.
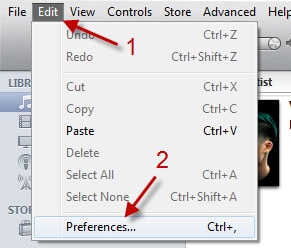
Step 3: You’ll see many tabs in there, but the tab we want here is the “General” tab. In the General tab, select “iCloud Music Library” to switch it on and then click “OK”.
And that’s it. That’s how to sync iTunes to iCloud on your Windows PC. In the next section of moving data from iTunes to iCloud.
Please keep in mind that the option of “iCloud Music Library” only appears for users who have subscribed to Apple Music or iTunes Match.
Note: If you have many files in your music library, it might take a while before they start appearing on all your devices.
Mac:
If you use Apple Music on your Mac, follow these steps if you wonder how to sync iTunes to iCloud.
Step 1: Open Apple Music on your Mac.
Step 2: Not very different from the previous step; click on the “Music” option, followed by the “Preferences” button.
Step 3: You will see many tabs, but you need to go to the “General” tab. You will see “Sync Library” in there. Click on the checkbox that corresponds to that to turn it on. Once you have done that, click on the “OK” button.

Make sure that you have subscribed to either Apple Music or iTunes Match. The option of “Sync Library” only for subscribers only. Just as iTunes' sync for Windows PC takes time if you have a huge music library, you will also have to wait for a few minutes before the process to sync iTunes to iCloud is complete.
Conclusion
We hope that this guide on how to sync iTunes to iCloud gave you an end-to-end perspective on transferring iTunes library to iCloud. As you can see, to move iTunes to iCloud, you must be a subscriber of Apple Music or iTunes Match. The good thing is when you use Dr.Fone - Phone Manager (iOS), you don’t even need iTunes.
You can manage/ transfer your data, be it your media files or any other type of file, between your Apple devices, Mac or Windows PC. So, what are you waiting for? Download the Dr.Fone - Phone Manager (iOS) tool and use it to transfer your favorite music on all your devices seamlessly!


iCloud Transfer
- Transfer to iCloud
- 1. Sync Data from iTunes to iCloud
- 2. Transfer Google Drive to iCloud
- 3. Transfer iPhone Music to iCloud
- 4. Move iPhone Photos to iCloud
- 5. Upload Camera Roll to iCloud
- 6. Upload Photos to iCloud
- Transfer from iCloud
- 1. Transfer iCloud Data to Android
- 2. Transfer iCloud Data to Samsung
- 3. Transfer iCloud Contacts to Android
- 4. Transfer iCloud Photos to Android
- 5. Transfer iCloud Photos to iPhone
- 7. Export iCloud Contacts to Outlook
- 8. Restore WhatsApp Backup from iCloud to Android
- 9. Transfer WhatsApp Backup from iCloud to Google Drive
- iCloud Tips
- ● Manage/transfer/recover data
- ● Unlock screen/activate/FRP lock
- ● Fix most iOS and Android issues
- Transfer Now Transfer Now Transfer Now
Alice MJ
staff Editor