Move contacts, messages, photos, videos, app data, and more between iOS and Android.

 100% Security Verified | No Subscription Required | No Malware

 :
: 
 ChatGPT
 Perplexity
 Gemini
 Claude
 Grok
Grok
Figuring out how to transfer contacts from iPhone to iPhone without iCloud is a common scenario for many iOS users. Whether you have exhausted your free 5GB iCloud storage, prefer to keep your phonebook separate from cloud servers due to privacy concerns, or are simply logged into different Apple IDs on the two devices, iCloud syncing isn't always the most viable path. Fortunately, the Apple ecosystem and third-party software have evolved to offer several robust alternatives that make moving your contacts incredibly straightforward.
In this comprehensive 2026 guide, you will discover the most effective methods to transfer contacts from iPhone to iPhone without iCloud. We will explore native built-in iOS features like AirDrop and NameDrop, traditional backup mechanisms via iTunes or Finder, and powerful one-click third-party transfer software tailored for seamless data migration. Follow these step-by-step instructions to securely and rapidly migrate your address book to your new device.

In this article
Part 1. 4 Basic Methods To Transfer Contacts From iPhone to iPhone Without iCloud
To kick things off, we will explore 4 basic built-in techniques designed to transfer contacts from iPhone to iPhone without iCloud. Each Apple-approved method offers distinct advantages and is tailored to suit varying circumstances, such as sharing a single number versus migrating bulk contacts to a factory-new device. By evaluating these methods, you can handpick the approach that perfectly aligns with your immediate needs.
Method 1. AirDrop
AirDrop remains one of the most beloved and convenient built-in utilities on modern iPhones. It allows for swift, wireless, and encrypted transfers of virtually any file type, specifically shining when you need to send contact cards. AirDrop removes the need for active internet connections, utilizing Bluetooth and Wi-Fi Direct to build a peer-to-peer bridge. Follow these steps to smoothly copy your contacts via AirDrop:
-
Step 1 Configure AirDrop Settings
First, guarantee that AirDrop is actively enabled and discoverable on both the sending and receiving devices. Swipe down from the top right to access the Control Center, press firmly (or long-press) on the network settings block, and tap the "AirDrop" icon. Set your visibility settings to either "Contacts Only" or "Everyone for 10 Minutes". After configuring, navigate to your iPhone's native Contacts app and select the specific profile you intend to share.

-
Step 2 Initiate the Share Action
Scroll down on the contact's profile card and tap on "Share Contact." From the provided iOS Share Sheet, pick "AirDrop" as your preferred delivery avenue. You will see a list of nearby devices; simply tap on the recipient's iPhone. Finally, instruct the receiving device to tap "Accept" when the incoming AirDrop prompt appears, instantly saving the details.

Method 2. NameDrop
Introduced as a flagship feature within iOS 17, NameDrop drastically simplifies how we exchange personal or professional contact information. Operating as an extension of AirDrop, NameDrop requires almost zero manual input—you simply bring your iPhone close to another iPhone or Apple Watch to trigger a visually stunning sharing animation. It is incredibly swift and effortless. Here is how you can use NameDrop in action:
-
Step 1 Activate the Proximity Feature
To harness NameDrop, verify that both iPhones have the capability enabled. Head to the Settings app, tap on "General," and select "AirDrop." Look for the toggle labeled "Bringing Devices Together" and ensure it is switched on. This toggle acts as the core trigger for NameDrop on all compatible iOS devices.

-
Step 2 Bring Devices Together to Share
Hold the top of your iPhone near the top of the recipient's iPhone. A glowing animation will appear on both screens, followed by customized Contact Posters (if generated in iOS 17). At this point, both users will be prompted to either "Receive Only" or "Share." Opt for "Share" to exchange your details mutually, or let the other person select "Receive Only" to simply grab your card. The contact is instantaneously saved into the system.

Method 3. iTunes/Finder
If you prefer a highly traditional and comprehensive approach to copying contacts from iPhone to iPhone without iCloud, falling back on iTunes (on Windows or older macOS) or Finder (on macOS Catalina and newer) remains incredibly effective. However, bear in mind that this is a drastic strategy: it creates a full system image and restores the entirety of the device's data, replacing whatever currently exists on the new phone. It’s strictly recommended for users migrating to a brand-new, freshly unboxed device.
-
Step 1 Connect Source Device and Access Summary
Start by verifying that your computer is running the most recent version of iTunes or macOS. Hook your original (source) iPhone up to the computer utilizing a certified USB cable. Once detected, click the small iPhone "Device" icon near the top left corner of the iTunes interface to open the "Summary" screen. For Mac users utilizing Finder, locate your iPhone under the "Locations" sidebar and click the "General" tab.

-
Step 2 Execute a Complete Local Backup
Direct your attention to the "Backups" block on your screen. Ensure that the storage location is set to "This Computer" (in iTunes) or check the bubble for "Back up all of the data on your iPhone to this Mac" (in Finder). Afterwards, hit the "Back Up Now" button and patiently wait until the computer successfully copies all local data, including your contacts library.

-
Step 3 Restore the Backup onto the New iPhone
Upon completion of the backup sequence, unplug the old iPhone and plug in the target iPhone. Return to the same "Summary" or "General" section and select "Restore Backup." A prompt will appear asking you to pick the appropriate backup file; ensure you select the one you just created with the most recent timestamp. Follow the on-screen instructions and wait until the target device reboots with all your stored contacts intact.

Method 4. Email
While often overlooked in the era of cloud computing, leveraging traditional email is still an exceptionally reliable fallback to move contacts across platforms or devices. This email mechanism bypasses the need for auxiliary software or physical cables completely. Keep in mind that due to email provider attachment restrictions, this approach is distinctly tailored for transferring just a handful of contacts rather than a 1000-person directory.
-
Step 1 Attach Contact Card to an Email
Launch the Contacts app on your source iPhone, sift through your directory, and select the individual profile you plan to migrate. Tap "Share Contact" at the bottom of the profile interface. Instead of AirDrop, locate and choose "Mail" (or your preferred third-party email client). This will automatically attach a universal vCard (.vcf) file to a blank draft. Enter an email address you have access to on the new iPhone in the "To:" field.

-
Step 2 Receive and Save the vCard
Hit the "Send" button. Now, pick up the target iPhone and open the inbox of the email account you just utilized. Open the incoming mail and you will notice a small attachment holding the vCard information. Tap on this attachment to view the full contact sheet. You won't be able to just view it; tap "Create New Contact" or "Add to Existing Contact" to officially integrate this entry into the new iPhone's phonebook. Press "Done" to conclude.

Part 2. What Are the Problems Linked With the Basic Methods To Transfer Contacts?
While the four basic procedures detailed above functionally accomplish the goal of moving contacts from iPhone to iPhone without iCloud, they harbor distinct architectural and practical limitations. Understanding these hurdles is critical for users managing vast libraries of business clients or personal information.
If you intend to migrate a large amount of data using basic methods, you are bound to face these common bottlenecks:
- Volume Constraints with AirDrop and Email: Although AirDrop is blazing fast, it natively forces you to select and transfer profiles individually. Attempting to manually share 500 individual contacts becomes a mind-numbing and excessively time-consuming chore. Similarly, email strictly caps attachment sizes, prohibiting bulk transfers.
- Data Overwriting via iTunes/Finder: Restoring an iTunes backup isn't a modular process; it's an all-or-nothing system replacement. This means any existing data on the receiving iPhone will be instantly erased and permanently replaced by the old device's contents. You cannot selectively choose to restore *only* your contacts.
- Strict Compatibility Limits with NameDrop: NameDrop's cutting-edge functionality is rigidly tethered to devices running iOS 17 or higher. If you own older iPhone models or haven't updated your firmware, this feature is completely inaccessible, rendering it useless for legacy device setups.
- Potential Security Interception: Relying on unprotected Wi-Fi networks or unencrypted email platforms to send raw contact files (vCards) exposes sensitive personal information (like private numbers and home addresses) to potential interception or data scraping.

Part 3. 2 Advanced Solutions To Transfer Contacts From iPhone to iPhone Without iCloud
Are you eager to figure out how to transfer contacts from iPhone to iPhone without iCloud efficiently in just one click—without enduring the slow pain of AirDrop or the destructive overwrite of iTunes? The ultimate solution lies in dedicated phone migration software. Leading the industry in data handling and cross-device data transmission is Wondershare Dr.Fone.
Dr.Fone bypasses iCloud constraints entirely, giving you total modular control over your data. It operates offline, protecting your privacy, and guarantees zero data loss on the target device. Let's delve into two exceptional modules within Dr.Fone that solve your transfer problems effortlessly.
Solution 1: Wondershare Dr.Fone - Phone Manager
If you wish to meticulously preview, select, and transfer specific contacts rather than dumping your entire directory blindly, the Phone Manager module is your best bet. It is intuitively designed for surgical precision.
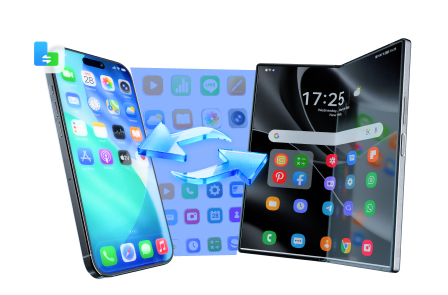
 Move data between iOS to Android and vice versa.
- Transfer contacts, SMS, photos, videos, music, and more types.
- Available with all phones with Android and iOS versions.
- Simple, click-through process.
-
Step 1 Access the Contacts Panel
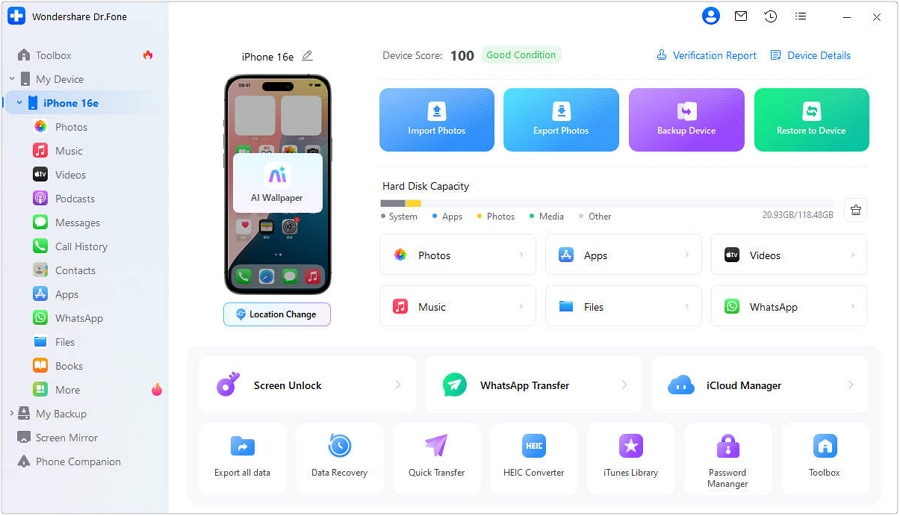
First, secure the newest version of Wondershare Dr.Fone and install it on your PC or Mac. Open the suite and establish a connection between both your sending and receiving iOS devices using stable USB cables. In the interface, ensure your source iPhone is selected at the top left. Navigate down the left sidebar, and click on the "Contacts" section to prompt the software to scan and populate your phonebook.
-
Step 2 Export Contacts Directly to Target Device
Within the detailed Contacts tab, sift through your directory. Check the specific boxes next to the individuals you wish to move. Once your precise selection is made, locate the export toolbar positioned at the top of the grid. Click on the icon resembling a phone with an arrow (Export to Device) and pick your second connected iPhone from the dropdown menu. The selected contacts will materialize on the new device in mere seconds.

Solution 2: Wondershare Dr.Fone - Phone Transfer
On the other hand, if your goal is an expansive, rapid, wholesale migration of your address book (and potentially messages, media, and call logs), Dr.Fone - Phone Transfer acts as a robust 1-click bridge. It merges the contacts cleanly without deleting existing information on the destination phone.
-
Step 1 Launch the Phone Transfer Module
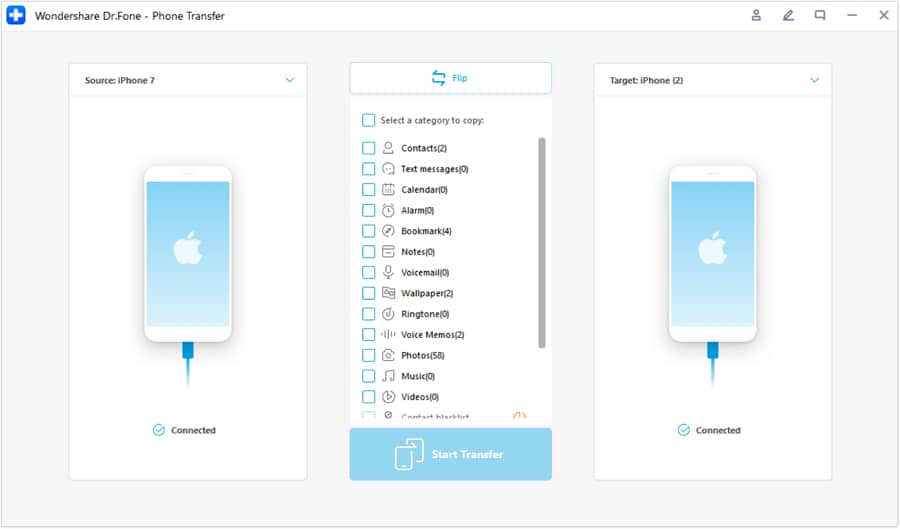
Initiate Wondershare Dr.Fone on your computer and direct your cursor to the main "Toolbox" menu. Click the "Phone Transfer" module icon. Attach both your iPhones to the PC via USB cords. Wait momentarily as the software authorizes and mounts both devices. You will notice a dual-phone interface; use the "Flip" button to guarantee your old phone acts as the "Source" and the new phone serves as the "Destination."

-
Step 2 Select Contacts and Initiate the Process
You will now see a centralized checklist detailing all transferrable file types (such as Photos, Music, Videos, etc.). Check the box corresponding to "Contacts" (and any other data you want). Once you are ready, press the blue "Start Transfer" button at the bottom right. Note: Apple requires the "Find My" service to be deactivated temporarily before allowing deep data modification.
-
Step 3 Temporarily Disable Find My and Complete the Move
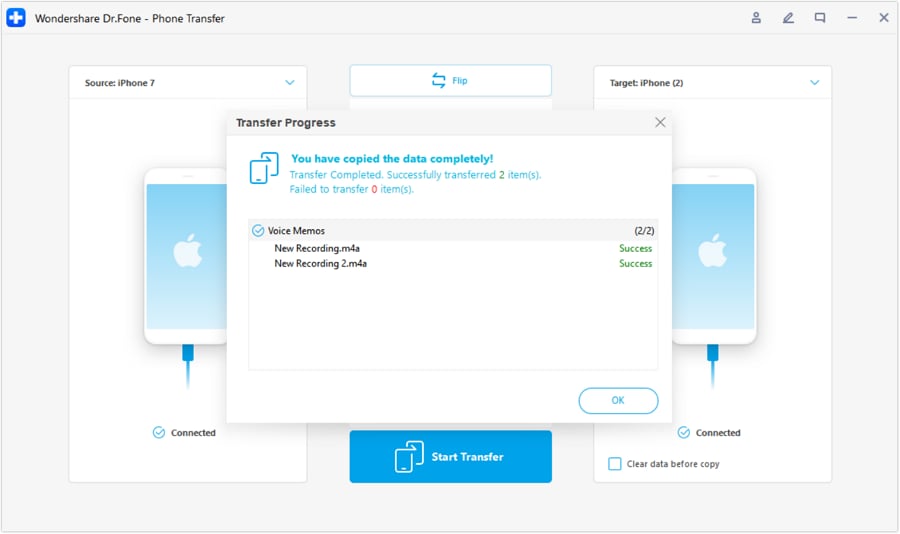
If prompted, unlock your target iPhone, plunge into Settings > [Your Name] > iCloud, and briefly toggle off "Find My iPhone." After this security step is cleared, Dr.Fone will immediately blast your contact list over the wire. A green progress bar will confirm when the data writing process hits 100%. Click "OK" in the final pop-up window, safely disconnect your hardware, and enjoy your seamlessly integrated contacts.




Conclusion
Navigating the intricacies of learning how to transfer contacts from iPhone to iPhone without iCloud might initially appear daunting. While native features such as AirDrop, NameDrop, iTunes, and email attachments remain useful for isolated or complete full-device restorations, they repeatedly fall short for users seeking swift, selective, bulk transfers. Basic Apple methods present challenges regarding time constraints, restrictive ecosystem compatibility, and severe overwriting risks.
Fortunately, bypassing these limitations is extraordinarily simple when deploying advanced solutions like Wondershare Dr.Fone. Built with a highly intuitive user interface, both its Phone Manager and Phone Transfer modules provide efficient, secure, and zero-data-loss alternatives. By choosing Dr.Fone, you guarantee that your vital address book is moved accurately, empowering you to utilize your new device immediately without any stressful technological roadblocks.
FAQs
-
1. Can I transfer contacts to a new iPhone without wiping existing data using iTunes?
No, utilizing iTunes or Finder to restore a backup inherently overwrites all existing configuration and data present on the target iPhone. If you want to merge new contacts without deleting the files already resting on your receiving iPhone, you must employ third-party programs like Dr.Fone - Phone Transfer. -
2. Is NameDrop compatible with all iPhone models?
NameDrop is exclusively accessible on iPhones running iOS 17 or newer firmware versions. If you are operating a legacy device incapable of updating to iOS 17, or if the feature is deliberately disabled in settings, you will need to rely on AirDrop, email, or a desktop manager tool instead. -
3. Why are my AirDrop transfers failing when moving contacts?
AirDrop failures generally stem from connectivity hurdles or restricted privacy settings. Ensure that both Wi-Fi and Bluetooth are actively on, the Personal Hotspot is off, and the receiving device's AirDrop visibility is temporarily set to "Everyone for 10 Minutes". If issues persist, a swift device reboot usually re-establishes a stable peer-to-peer connection. -
4. Are third-party desktop tools like Dr.Fone secure for transferring sensitive phone numbers?
Yes, reputable desktop solutions like Dr.Fone are exceptionally secure. They operate locally between your computer and connected devices, never uploading your private contact database to an external server or cloud network. This ensures your sensitive personal information remains entirely within your control during the transfer process.
 Add Wondershare Dr.Fone as a preferred source on Google