Dr.Fone App User Guide
Learn how to use Dr.Fone app to unlock, clean, recover, and manage your mobile devices. Download the latest version of the Dr.Fone app now for a unique experience.


- Manage/transfer/recover data
- Unlock screen/activate/FRP lock
- Fix most iOS and Android issues
How to Recover Contacts, Photos, Videos, Audios, and Files From Android Devices?
In our modern digital world, losing crucial data such as contacts, photos, videos, audio, and other files from your Android device can be quite distressing. Dr.Fone app for Android Data Recovery effectively recovers these important files. This guide will help you recover your lost data with ease, ensuring you can quickly access your valuable information again.
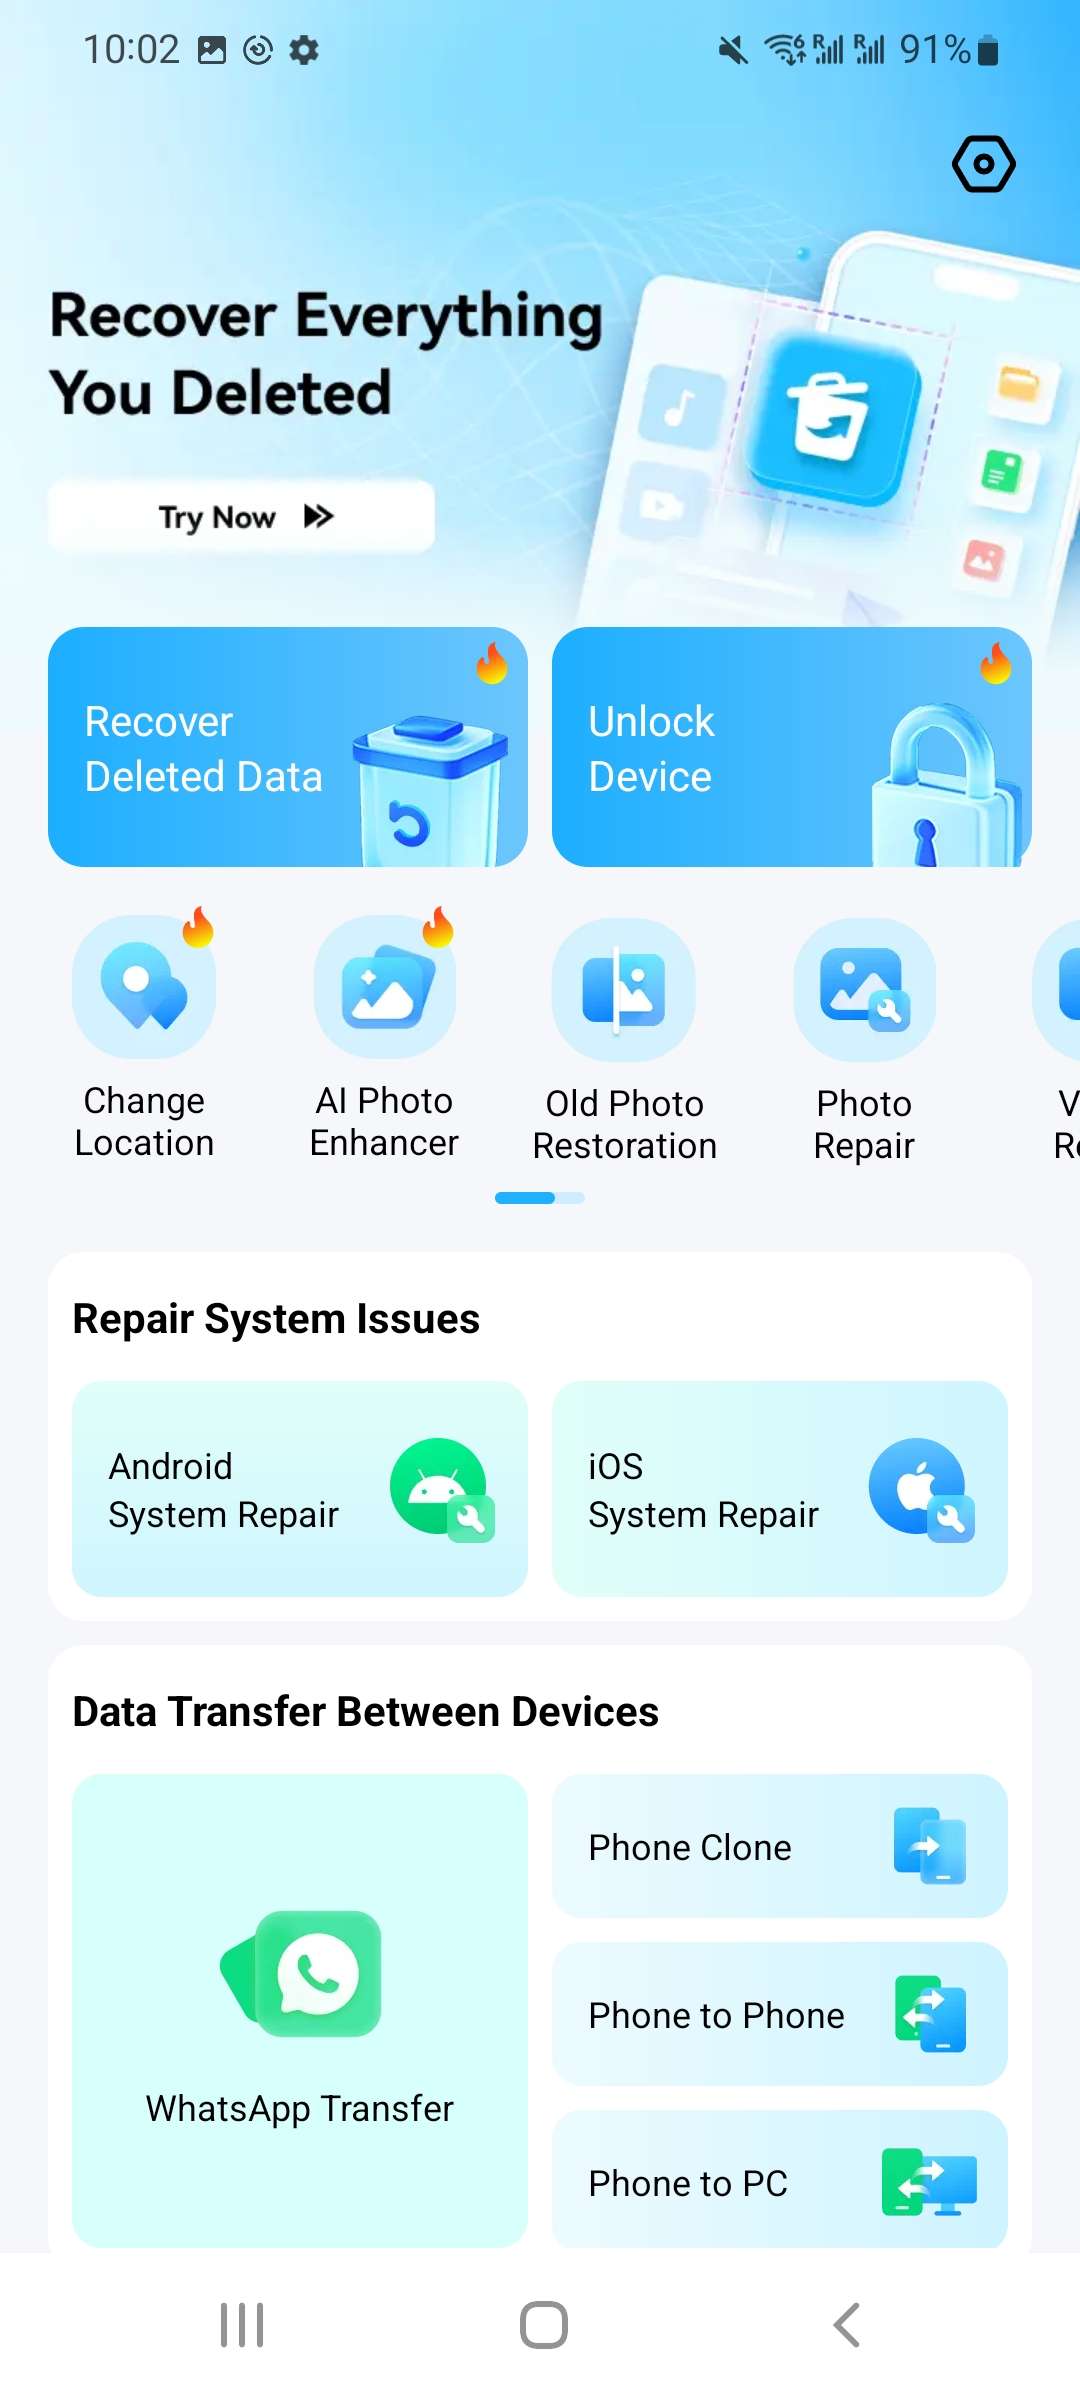
Manage Your Phone Wherever You Go
Note: With compatibility across more than 6,000 Android devices, including popular brands like Samsung, Huawei, and OPPO, you can effortlessly retrieve various types of data from your Android device, such as photos, videos, audio, and files (See part 1), and also recover deleted contacts (See part 2).
Deleted messages on Android? Dr.Fone App recovers deleted social app messages in one easy step.
Part 1. How to Recover Photos, Videos, Audios, and Files
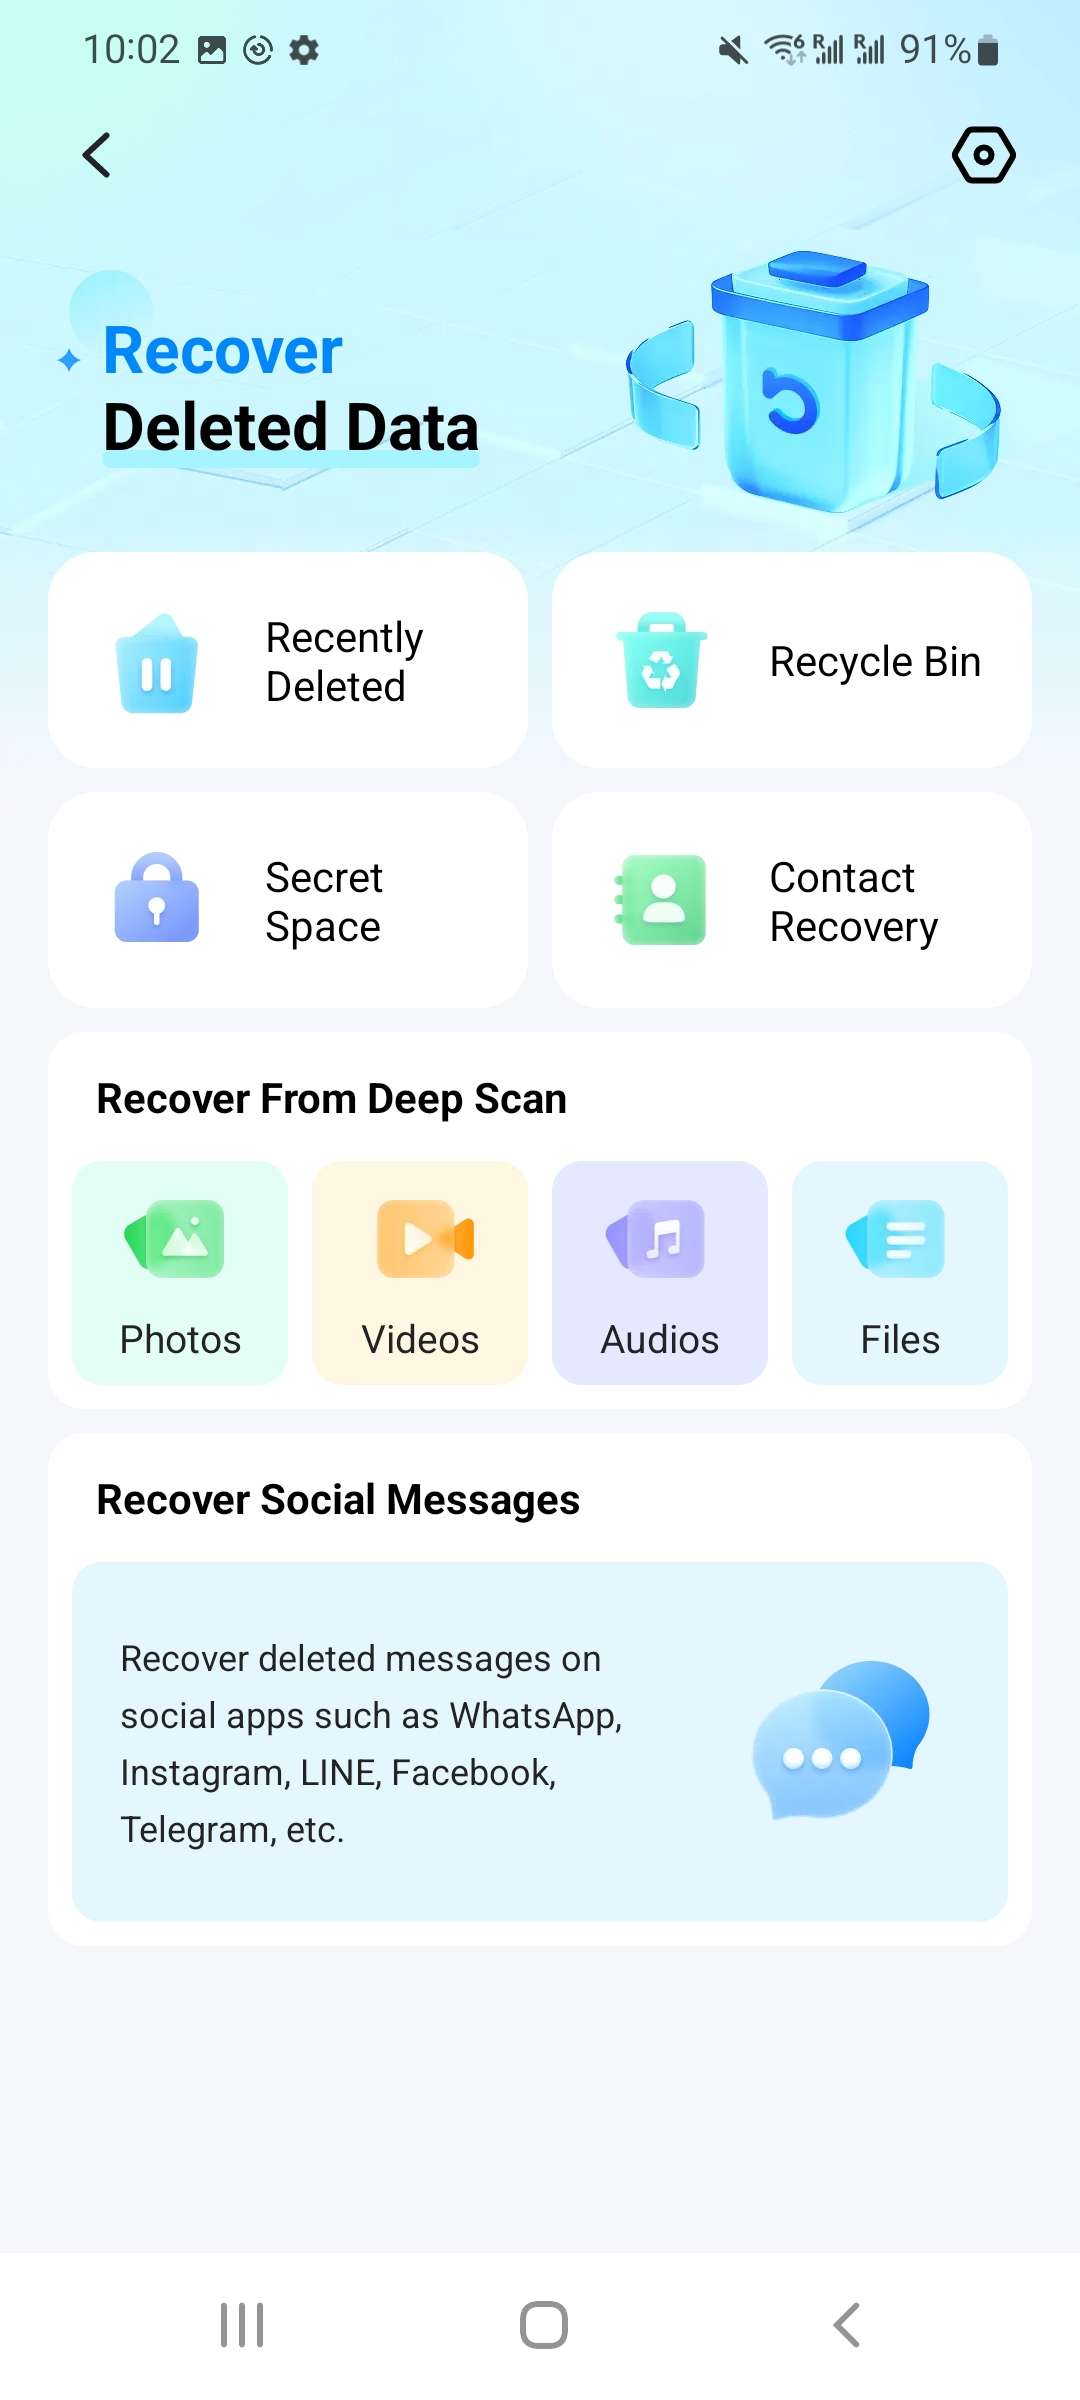
Start the Dr.Fone software on your device to recover your lost data. When you open the app, the main screen will show several software suite features. Find the "Recover Deleted Data" icon and tap it.
Here you could choose to recover photos, videos, audios, and files.
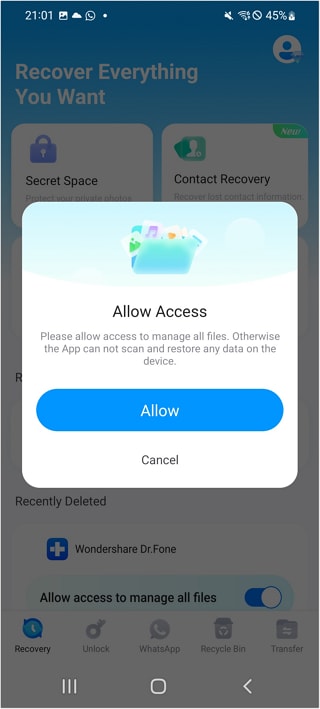
You'll need to allow access to your device's data before you can start data recovery. This lets the recovery tool look through your device and get back any files you accidentally deleted or lost. To make sure the software can read and recover data from your Android device, just follow the on-screen instructions.
After the check, Dr.Fone will show you all the recoverable files grouped by data type. Find the "Photos/videos/audio" area and look at the thumbnails or file names that can be recovered. Carefully look through the list and pick out the data you want to get back. Once you've chosen, click "Recover" to save the data to your desired device
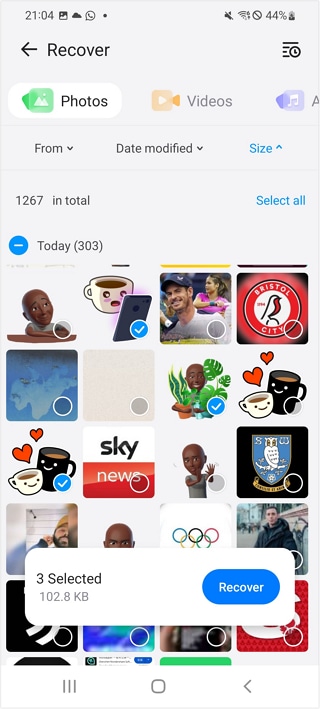
Note:Before saving the recovered data, ensure your storage device has enough space.
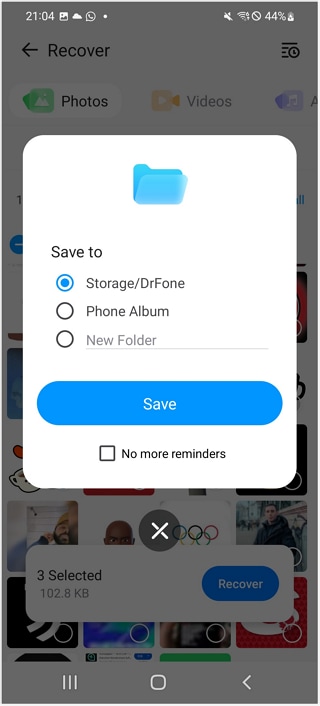
The next step is to choose where to save the recovered files after you have chosen the data you want to recover. When the "Save to" screen comes up, carry out the following actions:
- ● Storage/DrFone: Choose this option to save the recovered data to a folder called "DrFone" on your device's internal storage. This helps save all of your recovered files in one place.
- ● Phone Album: This choice saves the recovered media in the phone's default gallery or albums.
- ● New Folder: You can put all your restored files in a new folder you name however you want. Pick this choice, give your folder a name, and go ahead.
When you're done choosing, tap the Save button.
A screen prompt "Recover Successfully" will let you know that the recovery process is done. This means your chosen data has been restored and saved in your chosen location.
- ● Tap on View Now to access the restored files immediately and review them. This will take you to the location where your files are stored.
- ● Click "Cancel" to exit the recovery process if you don't want to see them now.

You can keep track of all your recovery steps with Dr.Fone - Data Recovery. To get to this history:
- ● Open the app and go to the Recovery History location.
- ● This is where you'll see a list of all the recoveries already done, along with the file names, times, and locations of each set of files. This is very helpful for keeping track of and handling many recoveries at once.
- ● To return to a recovery, tap on the file's name or path to see more information.

Part 2. How to Recover Contacts
Launch the Dr.Fone - Data Recovery (Android) tool on your device. On the main interface, you'll see various recovery options. Press "Contact Recovery" to start the recovery procedure.
Once you select "Contact Recovery" a list of contacts that can be recovered will be displayed. Scroll through and choose the specific contact(s) you wish to recover. After making your selection, hit the Recover button at the bottom of the screen.

The tool will now restore the selected contacts. A confirmation message will appear on the screen, indicating that your contacts have been recovered. Click View Now to check the restored contacts or Cancel to exit.

Using Dr.Fone app for Android Data Recovery, these easy steps will help you get back lost contacts, photos, videos, music files, and more from your Android device.
WHAT YOU'LL NEED

Dr.Fone provides a complete set of tools for solving all iOS/Android phone problems.
Need help?
You might find the answer to your question in the FAQ or additional information below: