Dr.Fone App User Guide
Learn how to use Dr.Fone app to unlock, clean, recover, and manage your mobile devices. Download the latest version of the Dr.Fone app now for a unique experience.


- Manage/transfer/recover data
- Unlock screen/activate/FRP lock
- Fix most iOS and Android issues
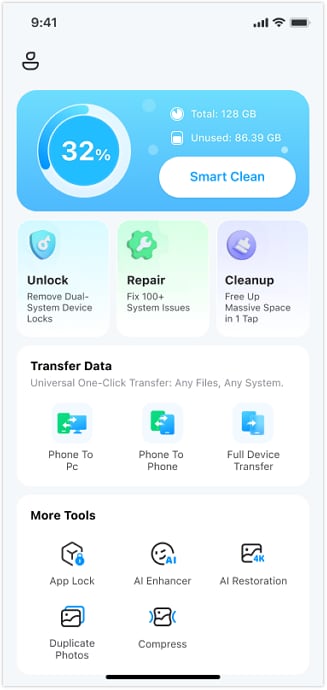
How to Use Smart Clean in the Dr.Fone App?
Dr.Fone is a powerful app made by Wondershare that helps you better manage your phone. It has many features like unloking screen, recovering lost data, moving files between phones, and fixing phone problems for iPhone users. One of its main features is Smart Clean. This feature simplifies keeping your phone in good condition by automatically finding and deleting unnecessary data. Download the latest version of Dr.Fone app on your iphone now and follow the steps below to experience.
Manage Your Phone Wherever You Go
01 Allow Permissions
Dr.Fone’s Smart Clean feature is designed to help users efficiently manage their device storage by removing unnecessary files. This tool is handy for keeping your iPhone organized and running smoothly. With Smart Clean, you can easily eliminate unnecessary screenshots, photos, videos, or calendars that slow down your device.
- Screenshots
- Similar Photos
- Duplicate Photos
- Similar Videos
- Duplicate Contacts
- Expired Calendars
Below is a step-by-step guide on how to use the Smart Clean feature in the Dr.Fone app, categorized by the types of cleaning it can perform.
Begin by launching the Dr.Fone app on your device and click Smart Clean.
Tap the Next button to allow Dr.Fone to access the permissions of your photos, contacts, or calendars.

Tap Allow or Allow Full Access to give full access to your photos, contacts, and calendar.

02 Select Items
Cleaning up your device space can make life easier and more organized. This section will focus on three main areas: photos, contacts, and calendar events. Each section will provide simple steps to help you declutter. By following these steps, you can find what you need quickly. Let’s get started!

Photos
Dr.Fone App will display photos and videos from your album in a separate category, including screenshots, similar photos, duplicate photos, and similar videos. Choose any that you wish to delete.

Browse through the results to identify which photos are duplicates or similar.
Check the boxes next to the photos you want to remove.
Tap the arrow at the top left corner to exit to the previous level. Tap the Clean icon at the bottom of the screen to delete selected items.

Contacts
After granting access to Dr.Fone, it will show any duplicate contacts it has identified.
Examine the list of identified duplicate and incomplete contacts. Choose the contacts you wish to merge or delete.

Calendars
After granting Dr.Fone access to your calendar, it will display all previously occurred events.
Browse through the list of expired events. Check the boxes next to the events you wish to remove.

03 Confirm the Deletion
After selecting all the items you wish to delete, tap the arrow at the top left corner to exit to the previous level. Then tap the Clean icon at the bottom of the screen to delete them at once.

After you have finished cleaning with Dr.Fone's Smart Clean feature, a confirmation page will pop up to show that the operation is complete. Click the OK button to finish the process.

Your device will be optimized, with unnecessary files removed and your data organized. This will improve your iPhone’s performance and provide a better user experience. With just a few taps, you can take control of your storage and enjoy a more streamlined iPhone experience!
Need help?
You might find the answer to your question in the FAQ or additional information below: