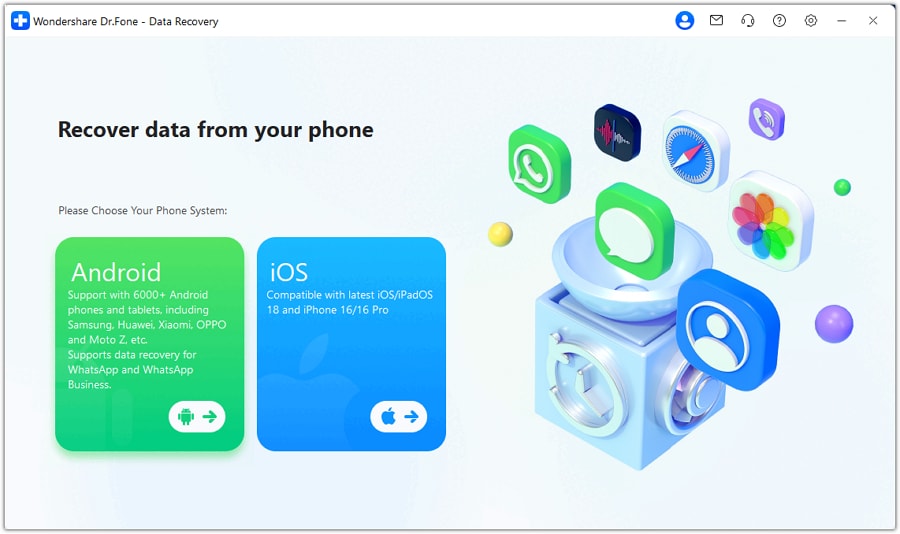
How To Recover Data From Broken Android Device?
Accidentally damaged your Android device, and now the screen isn’t working as it should? Whether your phone’s display is cracked, black, or lights up but remains unresponsive, you can still retrieve your important files.
Dr.Fone - Data Recovery (Android) provides a reliable method to recover from broken Android devices, no matter how badly the screen is damaged. Designed for real-world scenarios, it helps you access and extract contacts, photos, messages, videos, WhatsApp data, and more, even when the device cannot be operated normally.
Manage Your Phone Wherever You Go
Index
Recover Data from Android with Screen On but Unresponsive
You have to start by launching Wondershare Dr.Fone on your computer. Continue from Toolbox > Data Recovery to open the respective tool on a new window.

Since you are dealing with a broken Android, continue to select Android on the window that pops up.
You will be directed to a new screen where you have to select the option of Recover from Broken Phone to proceed.

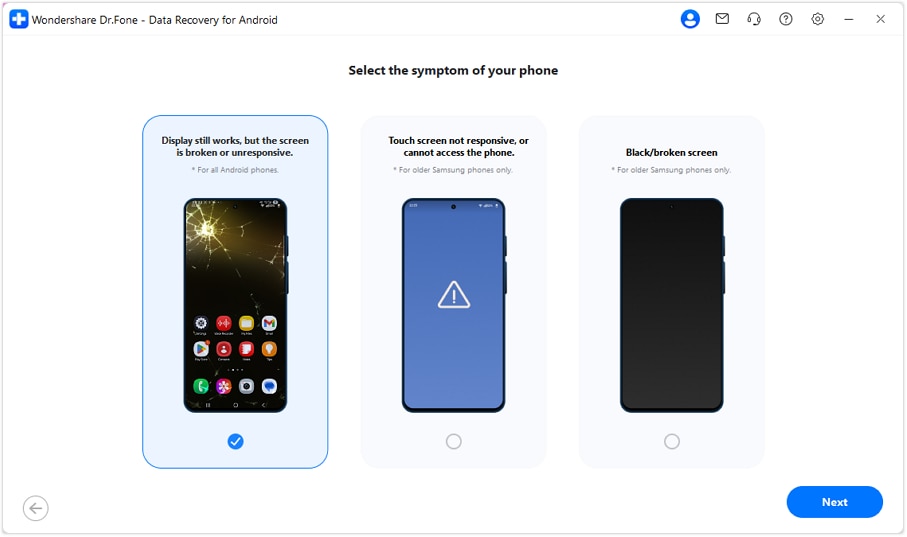
According to your phone’s condition, choose the option "Screen On but Unresponsive" if your phone screen can light up and display the interface but cannot respond to touch. Click Next to proceed.
It is compatible with all Android phones.
Ensure that only the Android phone you want to recover data from is connected to your computer.

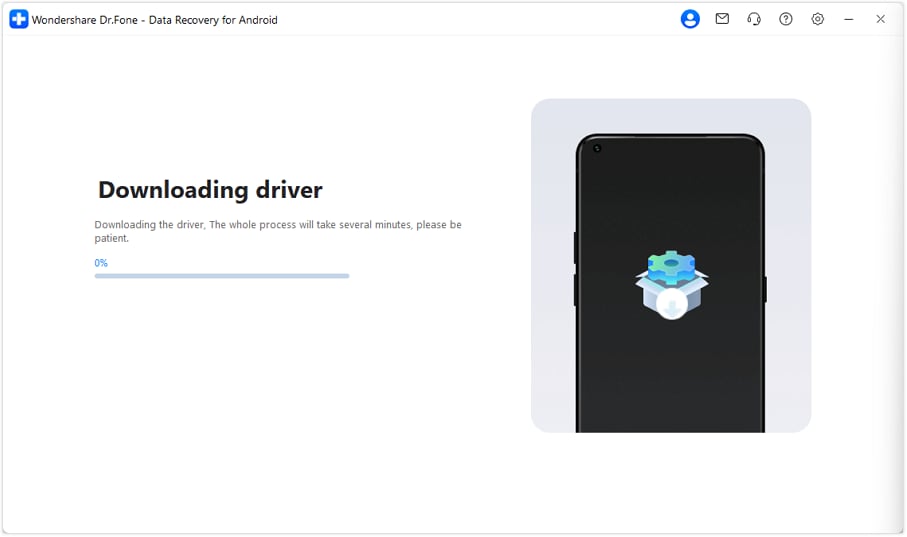
The program will automatically start downloading the necessary drivers. Wait patiently until the installation finishes — it will automatically move to the next screen once completed.
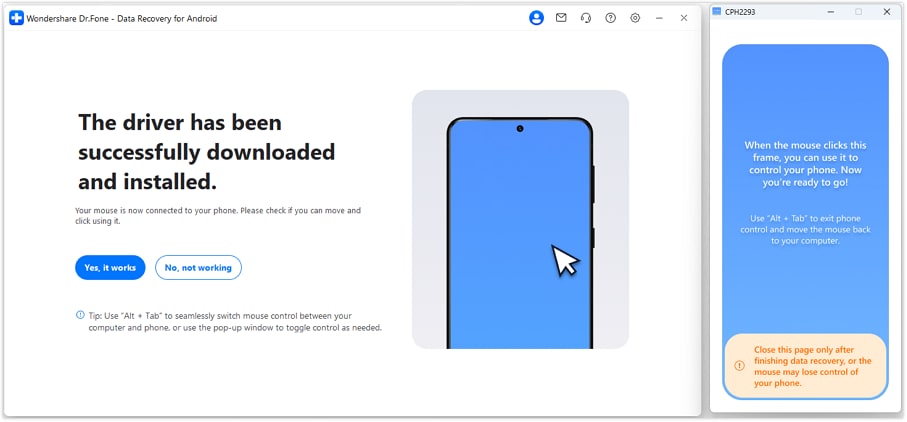
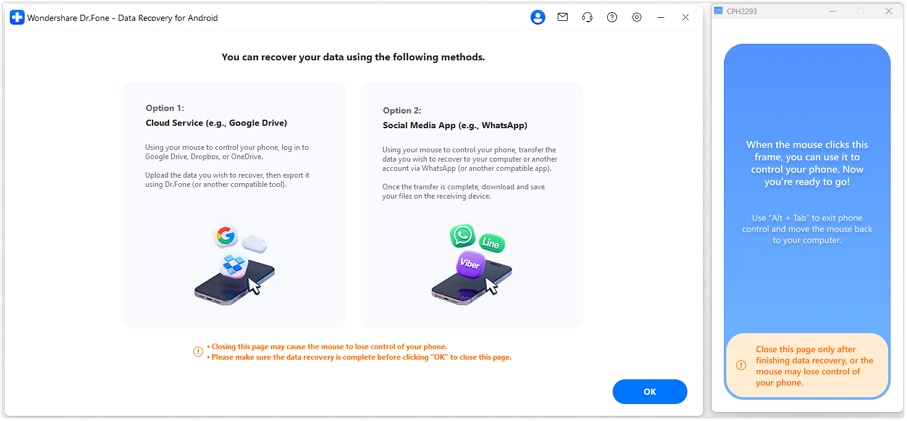
After the driver installation succeeds, you can control your phone directly from the right panel using your computer mouse. Click Yes, it works to proceed to the detailed data recovery process.
Select a suitable method to recover or transfer your data:
Cloud Service: Upload your phone data to the cloud first, then download and export it to your computer.
Social Media App: Transfer your phone data to another device or computer through supported social media applications.
Recover Data from Android with Black or Broken Screen
Before proceeding, refer to the previous steps to enter the device symptom selection screen.
On this screen, choose the option that best matches your phone’s condition — such as a black screen or a broken display — and then click Next to continue.
If your device does not match these conditions, please return to the previous step and select a different recovery scenario.

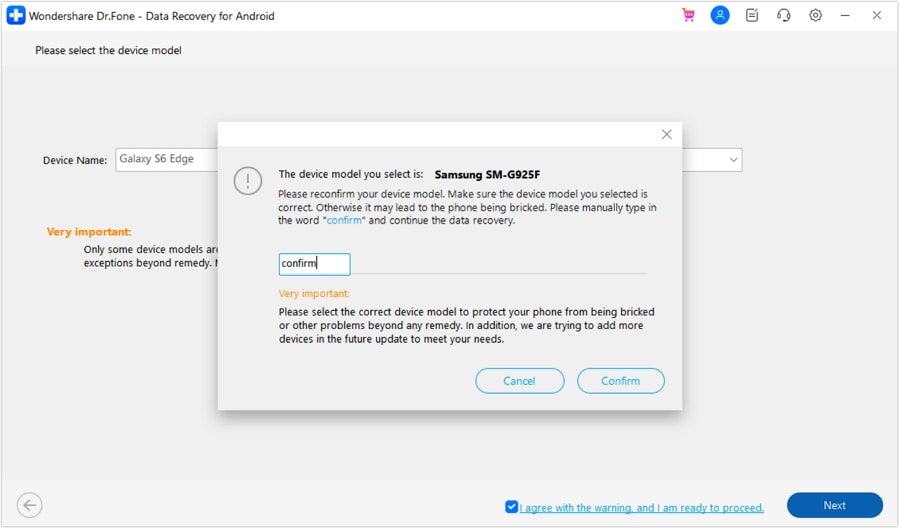
You will be directed to a new screen where you have to select the Device Name and Device Model according to your Android. Do select the suitable model, as choosing the wrong options might brick the Android. Checkmark the option of I agree with the warning, and I am ready to proceed on the bottom-right of the screen and click Next.

The platform prompts to confirm the process, which needs to be done by typing the required word on the screen. Click Confirm to proceed toward the data recovery.
For the next screen, you will be asked to follow the on-screen instructions in putting the device in Download Mode. Once done, click Next to proceed with the data recovery.

The following screen comes up with a display of the progress of data that has been downloaded successfully.
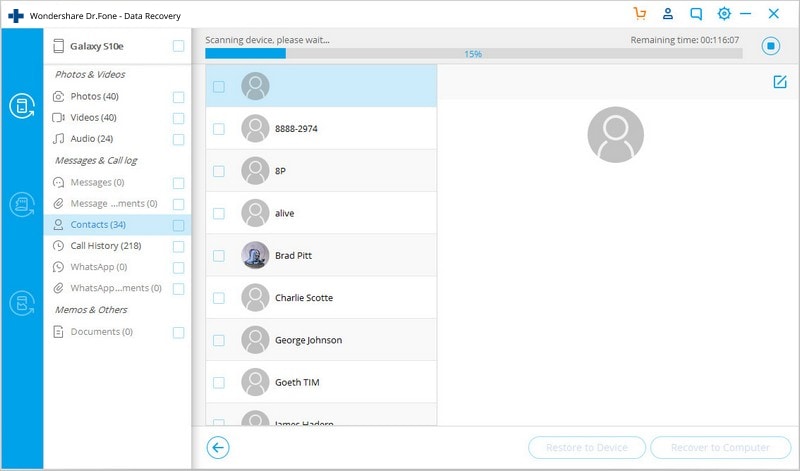
After a successful analysis, you can easily preview the data in categories. Select any respective category or data type that you want to recover and continue to the options of Restore to Device or Recover to Computer.

WHAT YOU'LL NEED

Dr.Fone provides a complete set of tools for solving all iOS/Android phone problems.
Need help?
You might find the answer to your question in the FAQ or additional information below: