How To Recover WhatsApp Data From Android Device?
WhatsApp has become a major platform of communication for people worldwide. With its wide utility, the need to manage the platform also arises. While you change your devices, you are unable to properly manage the data against your WhatsApp account. If so, there is always an option to recover WhatsApp data from Android. Whether you have a backup or not, you can restore data from WhatsApp (with & without backup). This can be done with the help of Dr.Fone - Data Recovery (Android).
- Wide Device Compatibility: Dr.Fone supports recovery on 6000+ Android devices, ensuring users across nearly all major brands and models can restore WhatsApp data with ease.
- Comprehensive WhatsApp Data Recovery: Supports 14+ WhatsApp data types, including: Individual chats, Group chats, Broadcast messages, Contacts, Call history, Photos, Videos, Voice messages, Audio files, Documents, Links, Stickers, Status, and Starred messages.
Manage Your Phone Wherever You Go
Recover WhatsApp Data from Android Devices
You need to start the process by launching Wondershare Dr.Fone on your computer. Continue from Toolbox > Data Recovery to launch the specific tool.

* Dr.Fone Mac version still has the old interface, but it does not affect the use of Dr.Fone function. We will update it as soon as possible.
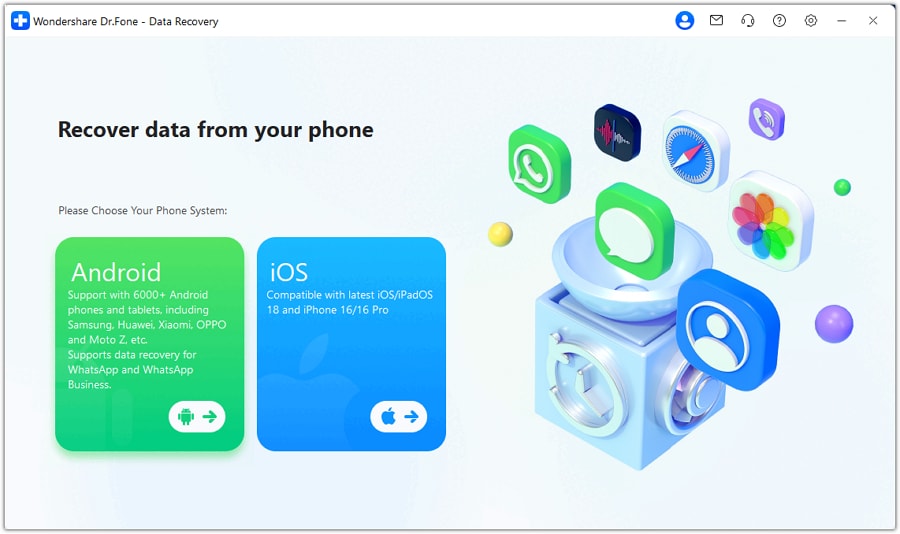
On the window that opens, select Android as the specific device type that will be dealt with for this process.
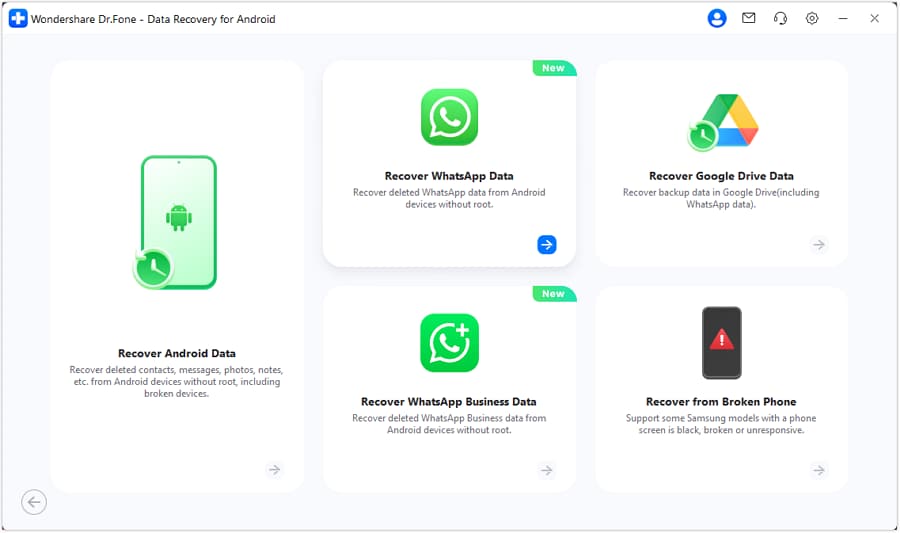
Continue to select Recover WhatsApp Data on the next screen to recover the present and deleted WhatsApp content.
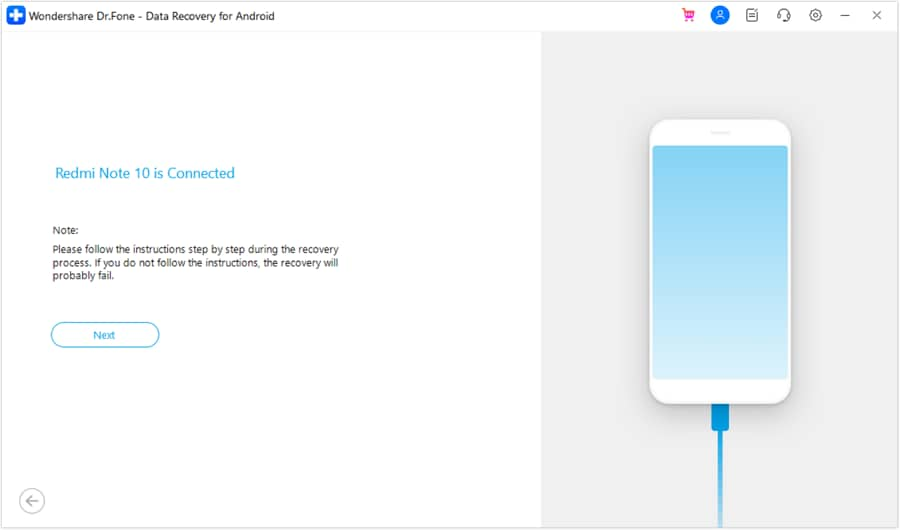
As the screen prompts to connect the device, it shows the successful connection of the Android. You are advised to click Next to initiate the recovery process.
While you proceed to the next screen, the progress of the entire backup is displayed there. You can click Cancel to close down the process if needed.

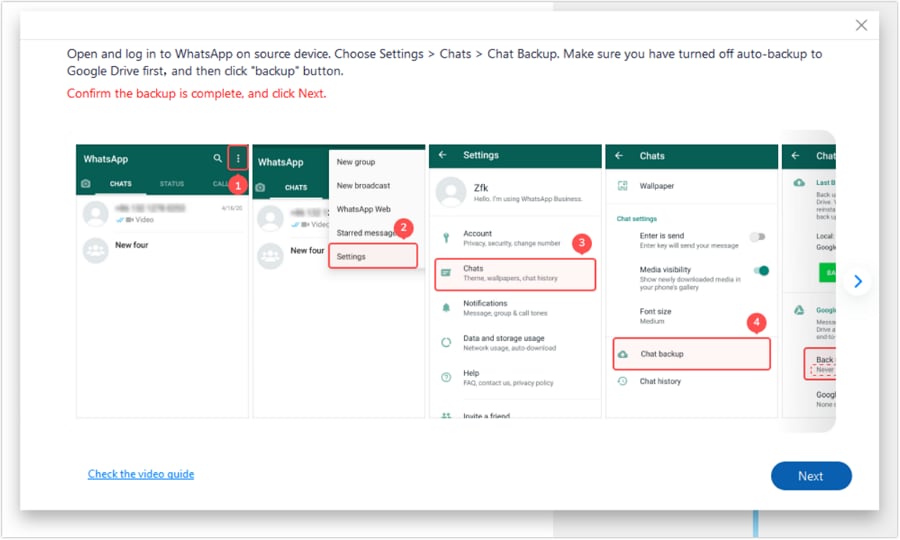
Before you successfully conclude the entire process, you will have to follow the on-screen instructions to back up your WhatsApp data. Open WhatsApp on your Android, select the three-dotted icon and proceed to Settings. Navigate through Chats > Chat backup and turn off auto backup on Google Drive. Once done, click the Backup button to back up your WhatsApp data on the device.
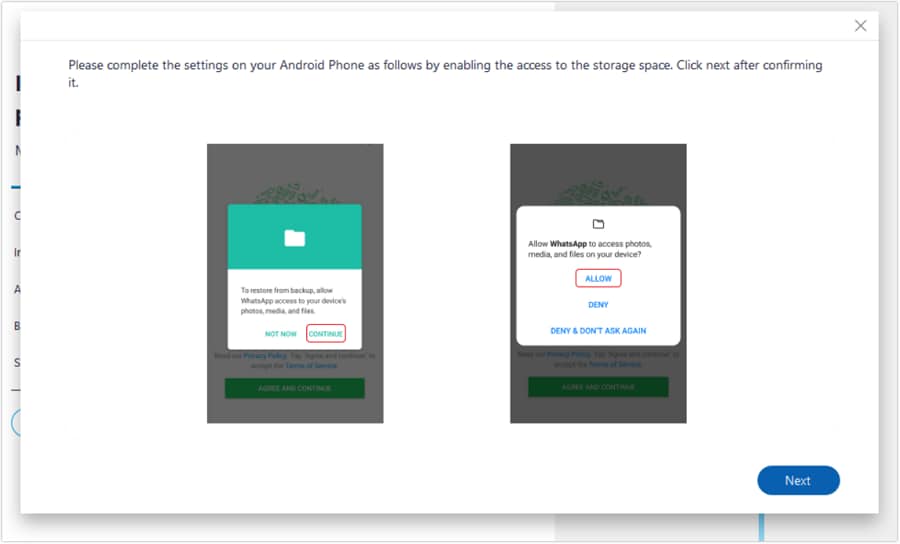
Once done, WhatsApp will automatically uninstall from the Android and will be reinstalled again. Once it does and launches on the device, provide all necessary permissions and click Next on your computer’s screen.
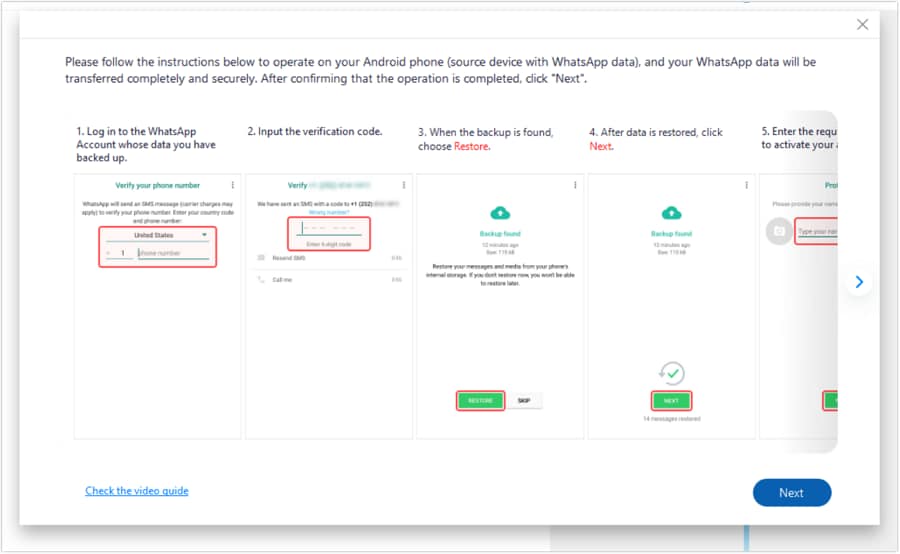
You will be prompted to activate your WhatsApp with your registered phone number. Add the number, verify the account, and continue to automatically search for a backup file to restore. Click the Restore button as the backup file is found, and proceed to tap Next on your Android. Once WhatsApp has been successfully set on your Android, click Next on the computer screen.
The computer will successfully recover and scan all the WhatsApp data from the Android device. It will display it in categories across the preview window.
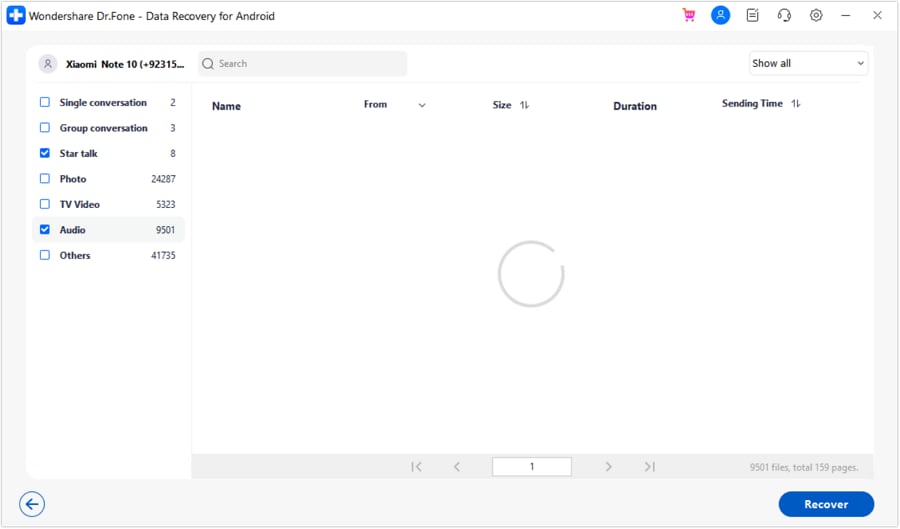
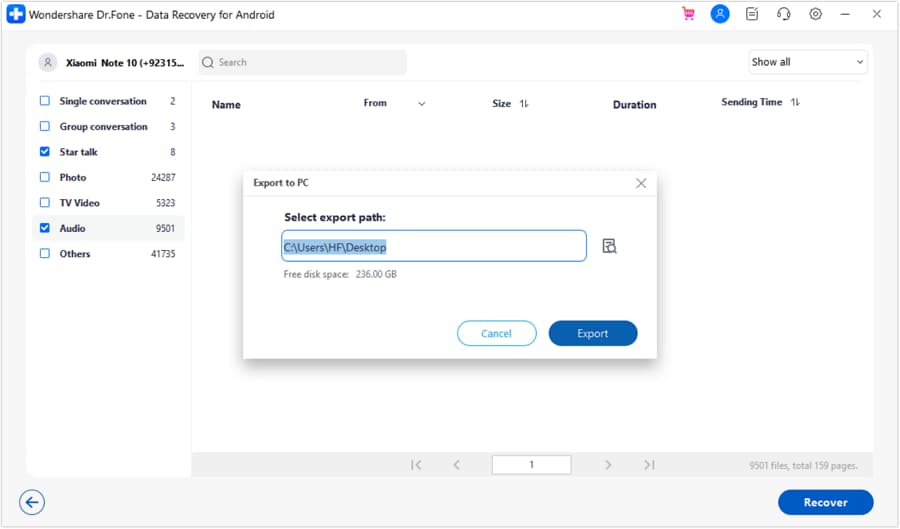
Select the data that you want to recover and continue to tap the Recover button. As a pop-up window appears on the screen, define the location and click Export.
WHAT YOU'LL NEED

Dr.Fone provides a complete set of tools for solving all iOS/Android phone problems.
Need help?
You might find the answer to your question in the FAQ or additional information below: