How to Unlock a Network Locked OnePlus Phone?

Jun 11, 2026 • Filed to: Screen Lock Removal • Proven solutions
 TL;DR:
The most secure method to unlock a network-locked OnePlus phone is to request an official network unlock code directly from your original carrier, provided you are the original buyer.
● Unlocking your network-locked device is legally permissible, but proceeding with the unlock process will result in the loss of the device's original manufacturer warranty.
● If carrier unlocking is not an option, third-party paid services like UnlockScope or Dr.Fone SIM Unlock Online can remove restrictions by generating a code based on your device's IMEI, model, and current network details.
● For users attempting to unlock iOS devices using the Dr.Fone - Screen Unlock (iOS) software, the utility is restricted to iPhone models 5S through X and strictly requires jailbreaking the device to bypass the SIM lock.
Ask AI for a summary
 ChatGPT
 Perplexity
 Gemini
 Claude
 Grok
Grok
Revolutions in the telecommunication industry have introduced advancements in smartphone features and utilities. The other side of the coin is, however, not as appealing. Thanks to the different carrier services, network locking is the commonest issue of recent mobile launches. Users have reported of OnePlus phones refusing to work with different carriers.
The issue limits the smartphone's functioning to the specific carrier from whom the device is purchased. Consequently, there are annoying connectivity problems that restrict seamless mobile usage. The problem aggravates in geo-restricted regions where the carrier options are quite limited. This scenario puts forward the need for OnePlus network unlock solutions.

Part 1: What Does It Mean When Your OnePlus Phone is Network Locked?
In the simplest words, a network-locked OnePlus phone means that your device has become carrier-specific. It will now work only with the network provider from where the phone was purchased. Another problem is that there is no automatic unlocking even after the expiry of your contract with the carrier service. Having a network-locked OnePlus phone poses undesired connectivity issues.
1. Why is my phone locked to the network carrier?
Smartphones are network locked by carrier services to prevent customers from switching to a different carrier. Reasons for switching can be the availability of better plans, discounts, etc. Another cause of locking the phones to specific carriers is preventing them from theft and unauthorized usage.
2. Is it legal to unlock it?
Unlocking your network-locked phone is legal in every sense. It is however advisable to contact your service provider for addressing the concern. The only downside of unlocking such phones is the loss of device warranty assured at the time of purchase.
Part 2. How to Unlock a Network Locked OnePlus Phone?
When looking for affordable solutions to address the OnePlus SIM unlock task, you can follow the methods discussed below:
Method 1: Use Network Unlock Code
The safest way to unlock a network-locked OnePlus phone is through the network unlock code provided by the carrier service. Here's what you should do:
Contact Your Network Provider
Contact your network provider to receive the network unlock code if you are the actual buyer of the device. Your carrier's customer service will guide you with the OnePlus unlocking process using the code. Drop your worries about the expired contract as that's not a problem in unlocking your phone.
Listed below are some popular carrier service providers in the USA with the applicable phone models. You can have a look to find out yours:
| Carrier Providers | Mobile Phones |
| Verizon | OnePlus 8, OnePlus 8 Pro |
| T-Mobile US | OnePlus Nord N10, OnePlus 9 |
| AT & T Mobility | OnePlus 7T, OnePlus Nord N200 |
| Dish Wireless | OnePlus 8, OnePlus Nord N10 |
| US Cellular | OnePlus 8, OnePlus 8 Pro |
How to Use Your Network Unlock Code
Take the following steps to unlock your OnePlus phone with the network unlock code:
- Step 1: Shut down your OnePlus smartphone.
- Step 2: Insert a different carrier's SIM card into the device.
- Step 3: Power on your OnePlus phone.
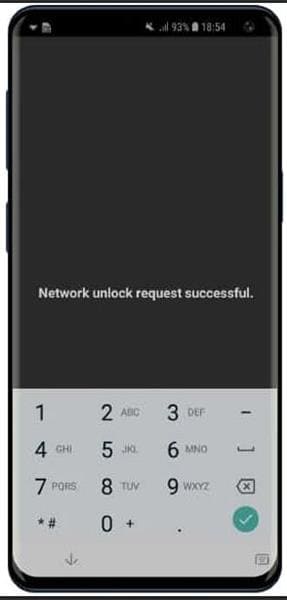
- Step 4: One of the SIM lock/unlock code/ SIM network unlock PIN/NCK prompts will pop up.

- Step 5: Enter the network unlock code received from your carrier service provider. The device is unlocked and can work with all GSM network services.

Method 2: With a Third-Party Service
If you don't wish to use the carrier unlock code, several third-party services can be availed to unlock a network-locked OnePlus device. The UnlockScope application is one such utility to proceed with the process. The tool helps to unlock your network-locked OnePlus phone by sending an unlock code on request. Here's how you can work with the tool:
- Step 1: Download and launch the application on your OnePlus phone.

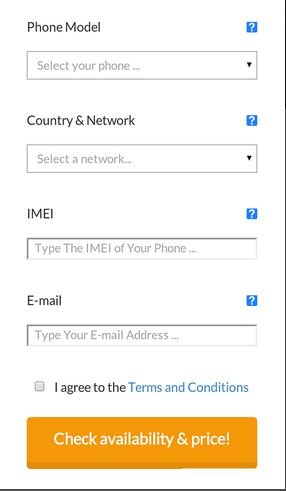
- Step 2: Select the details of brand, phone model, IMEI number, country, and network. Then, enter your email address and agree to the app's terms and conditions to continue.

- Step 3: Click on the 'Check Availability and Price' tab; followed by choosing the price and payment method. Finally, tap 'Go to Payment'.

- Step 4: Make the payment and wait for its acknowledgment. You will receive the code once the payment is successful.
Method 3: Dr.Fone SIM Unlock Online
If your OnePlus phone is locked to a specific carrier and you want a cleaner unlock experience, Dr.Fone SIM Unlock can be introduced as a practical online solution. It helps users remove SIM restrictions and start using another network with fewer complications.
This is a useful option for people who want a more guided route instead of relying only on scattered unlock services or manual carrier communication.
Reasons it may fit better:
- Let your phone work with a wider choice of carriers.
- Greater peace of mind with refund-backed support.
- No need for device reset or risky system-level changes.
- Make switching carriers feel less complicated.
- Your phone stays in your hand from start to finish.
- Made for a quicker and more streamlined turnaround.
Open the official Dr.Fone SIM Unlock page online and begin the request.
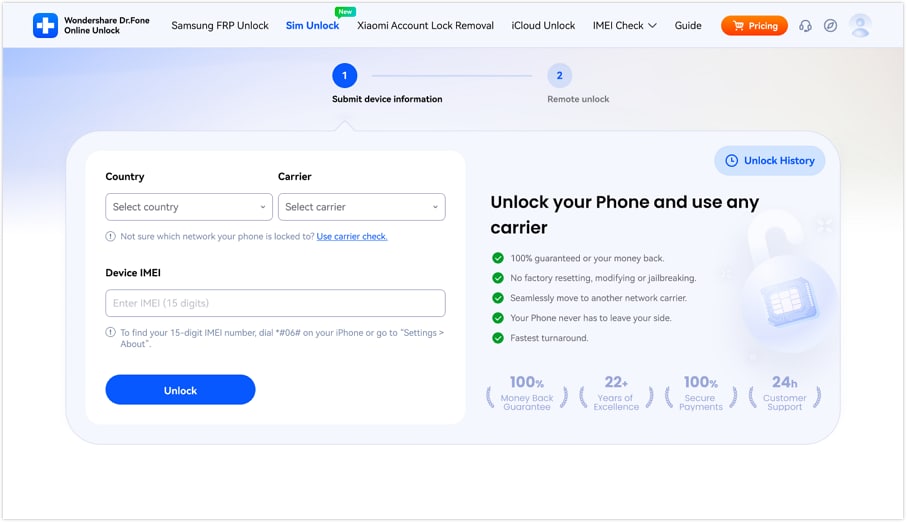
Choose the appropriate carrier information and add the IMEI of your device carefully.
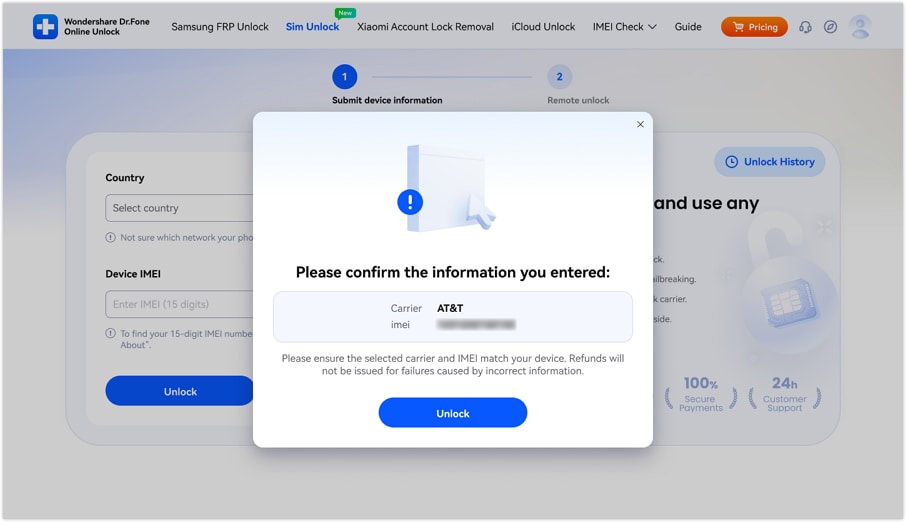
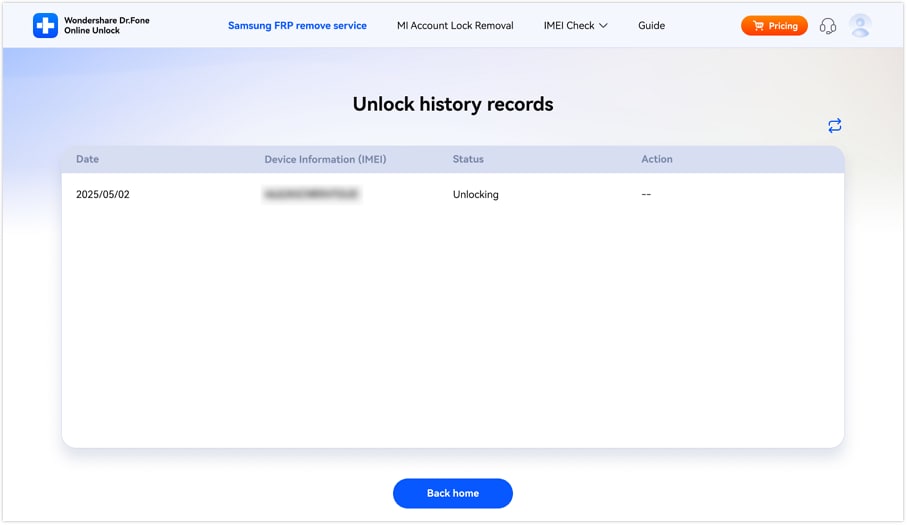
Review the details, submit the order online, and later check the unlock status through the result page or email notice.
Dr.Fone - Screen Unlock (Android)
Unlock Your OnePlus Phone in a Flash
- Pattern, PIN, password, fingerprints & face screen lock can all be unlocked.
- Bypass Android FRP lock without a PIN or Google account.

- Unlock mainstream Android brands like Samsung, Huawei, OnePlus, Xiaomi, etc.
- No tech knowledge required, Simple, click-through, process.


Part 3. What to ask Before Signing a New OnePlus Phone Contract?
Signing in a new OnePlus contract has many factors to consider for affordable purchases and consumer safety. When entering into such deals, you should pay head-to-data allowances, upfront costs, price hikes, carrier coverage, roaming charges, contract length, flexibility, etc. A low price is not the only thing that should be taken care of.
Part 4:Bonus Tips: iPhone SIM Unlock to Work on Any Carrier Worldwide
Working with the Dr.Fone - Screen Unlock (iOS) application is advisable to quickly unlock your network-locked iPhone. The tool uses a simple and intuitive method to sort out the issue in just a few simple steps. In addition, the app's responsive interface guides you at every step of the process and ensures complete information security.
Dr.Fone - Screen Unlock (iOS)
iPhone SIM Unlock to Work on Any Carrier Worldwide
- Support newly released models from iPhone 5S to iPhone X.
- Move to any network operator within minutes, aimlessly without data loss.
- You can unlock an iPhone without an R-SIM.
- Compatible with most carriers, T-Mobile, Sprint, Verizon, etc.
How to Unlock Network Locked iPhone with Dr.Fone - Screen Unlock (iOS)
To unlock your network-locked iPhone with the aforesaid app, you can take the following steps:
- Step 1: Visit the official Dr.Fone website and download the app to your PC. Install the program by adhering to the on-screen instructions.
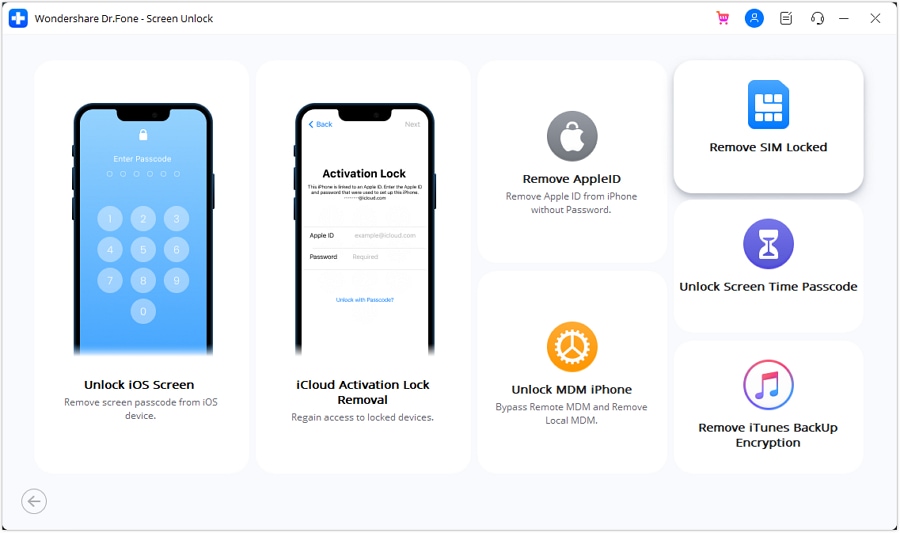
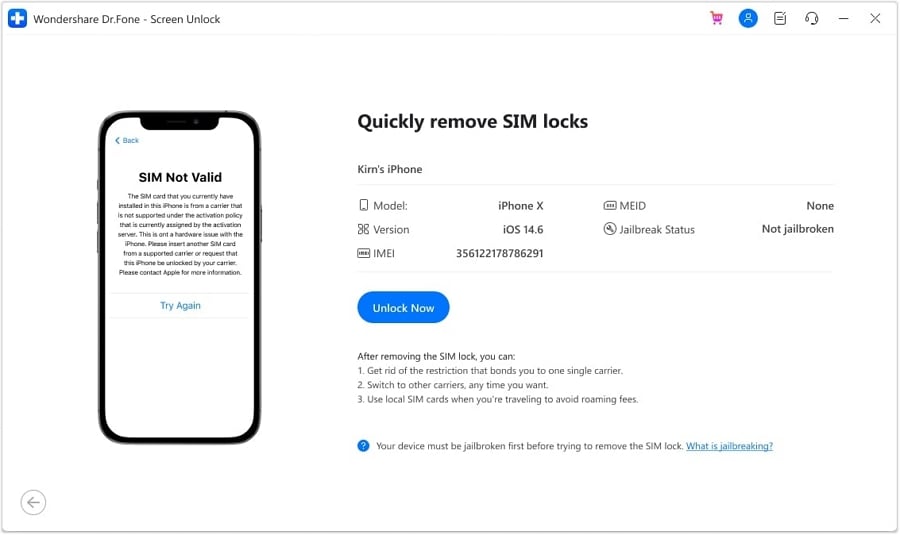
- Step 2: Launch the app and tap on the 'Remove SIM Locked' function in the main interface.
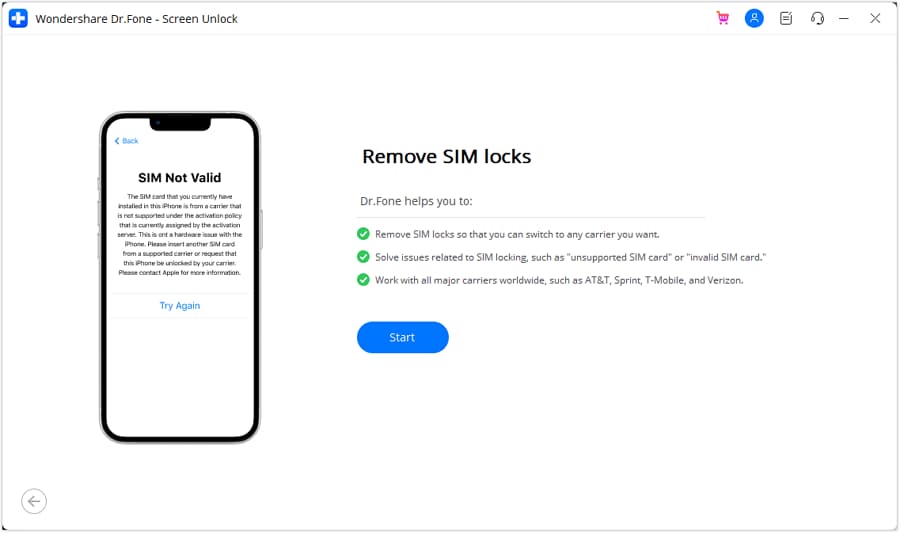
- Step 3: Tap 'Start' to initiate the authorization and verification process. Next, connect your iPhone to the PC and hit the 'Confirmed' button to proceed further.
- Step 4: Follow the instructions in the configuration profile sent by Dr.Fone to unlock the iPhone screen. It is necessary to jailbreak your iPhone to remove the SIM lock.
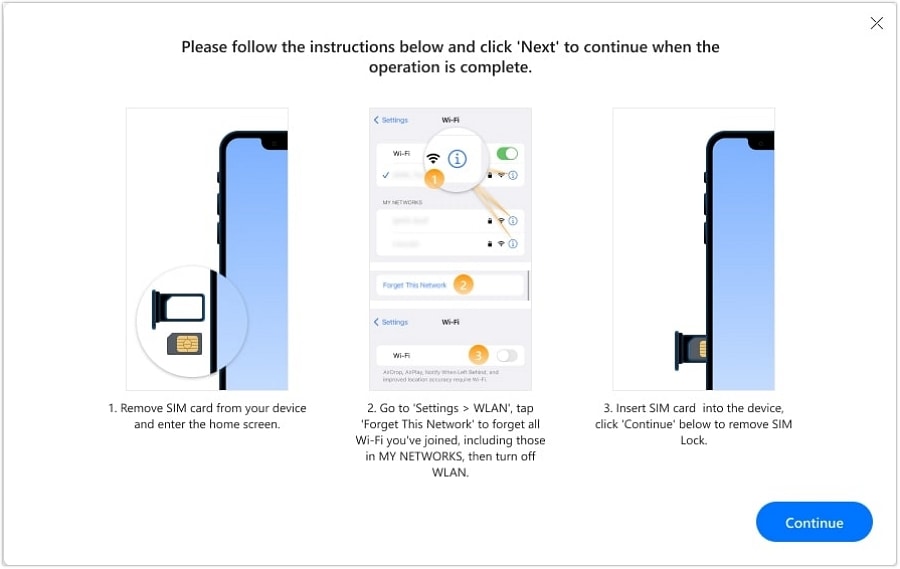
- Step 5: Take the following steps to remove all Wi-Fi networks.
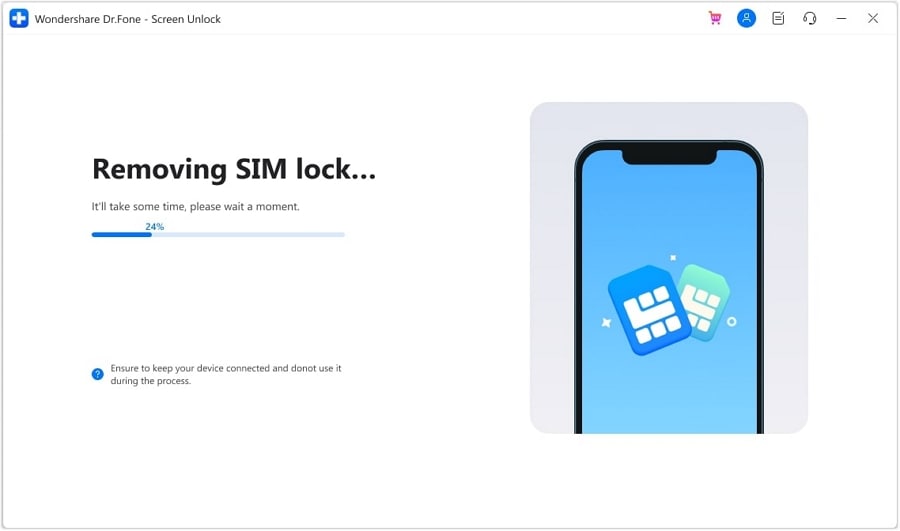
- Step 6: The following screen displays the prompt window featuring the SIM unlocking process's progress. After that, you are free to use your choice's SIM plan and carrier network.
Conclusion
Technology has a pivotal influence on today's high-tech lifestyles, which is rewarding in several ways, but there are glitches too. The latest ones are the network-locked OnePlus devices that have become carrier-specific. When looking for effective solutions to resolve the issue, getting in touch with your service provider is the safest option. You will receive an unlock code to make your device work with different carriers. Another way is to use third-party apps to address the concern. If you want to unlock your iPhone. Searching for a reliable one, you can trust the Dr.Fone - Screen Unlock (iOS) application for a quick and convenient solution.


OnePlus Manage
- OnePlus Unlock
- 1. Bypass Google FRP on OnePlus
- 2. Reset or Hard Reset OnePlus
- 3. Unlock OnePlus without Password
- 4. Unlock Bootloader on OnePlus
- 5. Network Unlock OnePlus Phone
- OnePlus Tips
- ● Manage/transfer/recover data
- ● Unlock screen/activate/FRP lock
- ● Fix most iOS and Android issues
- Free Download Free Download Free Download

James Davis
staff Editor