Vivo Cloud Backup and Restore: 4 Easy Ways
Android Backup
- Backp Android
- 1. Backup Android to PC
- 2. Backup Android Photos
- 3. Android Wifi Backup
- 4. Backup Phone with Broken Screen
- 5. Backup Android Rom/Firmware
- 6. Backup SD Card on Android
- 7. Backup Android SMS
- 8. Backup Android Phone With Root
- 9. Backup Android to Mac
- 10. Backup Viber Messages
- Android Restore
- 1. Guide to Restore Android Phone
- 2. Backup and Restore Android Phone
- 3. 2 Ways to Restore Contacts on Android: Step-by-Step Guide
- 4. Restore WhatsApp from iCloud
- Backup Apps
- 1. Android Backup Apps to Backup Files
- 2. 6 Apps to Backup Bookmarks
- 3. Top 10 Contacts Backup App
- 4. Backup Android App and App Data
- 5. The Best Android Backup Extractor
- 6. Top 5 Android Backup Softwares
- 7. 6 Best Android Backup Softwares
- 7. 7 Android Fastboot Reset Tools
- Samsung Backup
- 1. Back Up Samsung to Google Drive
- 2. Backup Contacts on Samsung
- 3. Backup Text Messages on Samsung
- 4. Backup and Restore Samsung Galaxy
- 5. Backup Everything on Samsung
- 6. Backup Samsung Galaxy to PC
- 7. 10 Samsung Cloud Backup Services
- 8. Solution For Samsung Message Backup
- 9. 5 Samsung Photo Backup Solutions
- 10. Backup Samsung S10 to PC
- ● Manage/transfer/recover data
- ● Unlock screen/activate/FRP lock
- ● Fix most iOS and Android issues
- Free Download Free Download Free Download

May 18, 2026 • Filed to: Backup & Restore Solutions • Proven solutions
 TL;DR:
To securely back up and restore a Vivo phone, choose Vivo Cloud or a Google Account for wireless synchronization, Vivo PC Suite for local computer storage, or Wondershare Dr.Fone for comprehensive cross-platform device management.
● While Vivo Cloud requires a registered Vivo Account to sync native contacts, SMS, and notes, relying on a Google Account is the most efficient method for restoring apps and data directly during a new phone's initial setup phase.
● Using the official Vivo PC Suite (vivo Assistant) for local backups requires a physical cable connection and manually enabling USB debugging by tapping the phone's Build number seven times.
● Wondershare Dr.Fone operates on Windows and Mac as a desktop alternative, but strictly requires temporarily setting the Dr.Fone Image name app as your default SMS application to successfully back up text messages.
Ask AI for a summary
 ChatGPT
 Perplexity
 Gemini
 Claude
 Grok
Grok
Dr.Fone Basic:
Better Control for Your Phone
Manage, transfer, back up, restore, and mirror your device
Are you worried about losing your precious data on your Vivo phone?
Or You're about to capture a memorable moment, but your phone flashes ''Storage Full''. Or you lose your phone and all your important contacts and photos with it. These situations can be stressful, right? Well, fear not!
This article is your lifesaver, guiding you through all the ways to Vivo backup and restore. We'll show you how to keep your data safe and sound, ensuring that you're prepared for any situation.
Whether it's saving those priceless photos or keeping your business contacts secure, you'll learn the best ways to backup and restore your data. Let's start the discussion to ensure your digital life is protected!
Part 1. How to Do Vivo Backup and Restore Via Vivo Cloud?
Vivo Cloud offers a simple and efficient way to backup and restore data on Vivo devices. It's designed to keep your information safe and accessible. With Vivo Cloud backup, users can securely store their important files and easily recover them if needed. This service is like an extra layer of security and convenience for Vivo users.
Backup and Restore Your Data On The Vivo Cloud
The following steps will help you with Vivo backup via Vivo Cloud.
Step 1
Begin by downloading the Vivo Cloud app on your phone if it's not already installed. This app is free and available in the App Store.
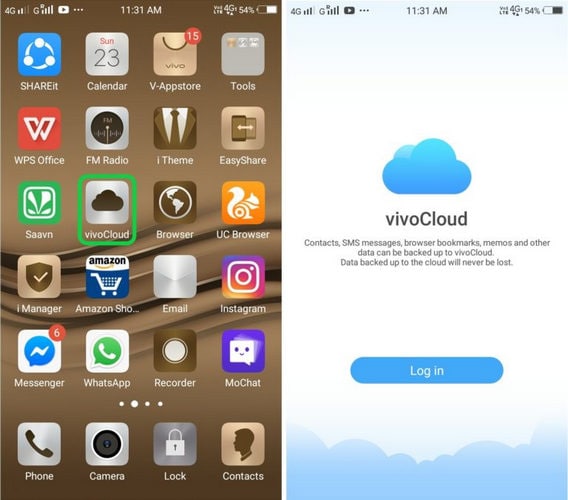
Step 2
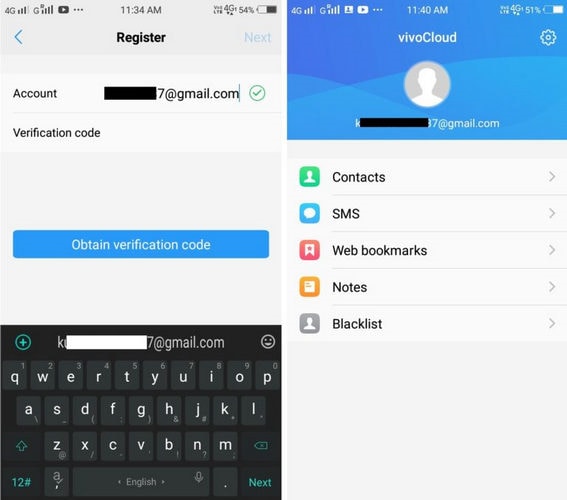
Launch the VivoCloud app and sign up for a Vivo Account to start backing up your data.
Step 3
Go to the Settings tab on the application. Then go to Accounts and Sync. Now, select the data that you want to back up.
Step 4
For Vivo Cloud backup photos, open the "Photos" app or "Google Photos." Click the three vertical lines at the top left corner for the "Menu." Then select "Settings." Enable the "Back Up and Sync" option for automatic photo backup.
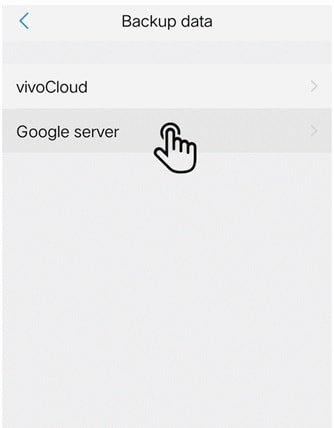
Step 5
For backing up additional data, go to "Settings," then "More settings," followed by "Back up and reset." Choose "Backup data" and select "Google Server." Finally, click on "Back Up My Data" to save and back up the rest of your data.
Step 6
To Restore your data, open the VivoCloud app. Now, choose the data type you want to restore, such as "Contacts," "SMS," or "Notes."
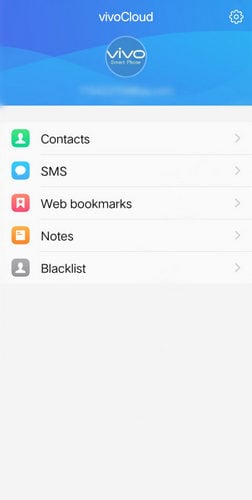
Step 7
After selecting data, tap the restore button.

That’s all about Vivo Cloud backup and restore. Let’s keep the momentum going and discuss another method for Vivo back up and restore.
Part 2. How to Do Vivo Backup and Restore Via Google Account?
If you want to back up Vivo phone, a Google account is a reliable method. It lets you easily sync important data like bookmarks, contacts, and calendar events to your Google profile. This process ensures your crucial information is safely stored and retrievable. Let’s look at how you can use a Google account for Vivo data backup.
Steps to Vivo Backup and Restore Using Google Account
The following steps will assist you in Vivo phone data backup.
Step 1
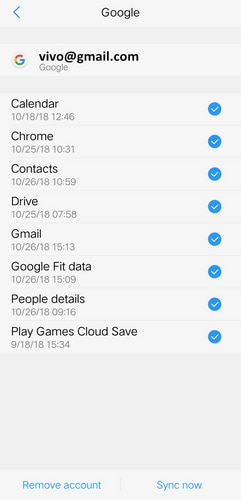
On your Vivo phone, go to the "Settings" app. Then scroll down to find and select "Accounts & Sync."
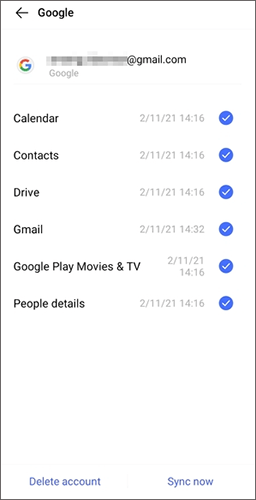
Step 2
Choose your Google account and check all the boxes. Then start the synchronization by clicking on "Sync now." This will seamlessly sync your information.
Here it is! You will be able to Vivo backup data by following the above steps. Now, let’s see how to restore data using Google Account.
Step 3
Turn on your new phone and select the language you prefer. When you see the "Copy apps and data" screen, tap on the "Next" button.
Step 4
If you cannot use your old device, click on "Can't use the old device?" to sign into your Google account. Then, choose a backup file and press "Next."
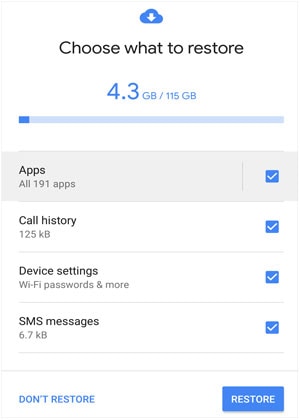
Step 5
At the "Choose what to restore" screen, select the content you wish to retrieve. Tap the "Restore" button to start. After completion, your data will be successfully restored on your Vivo phone.
Voila! That’s all about using a Google account for Vivo phone backup. However, if this method does not work for you, let’s move to the next one.
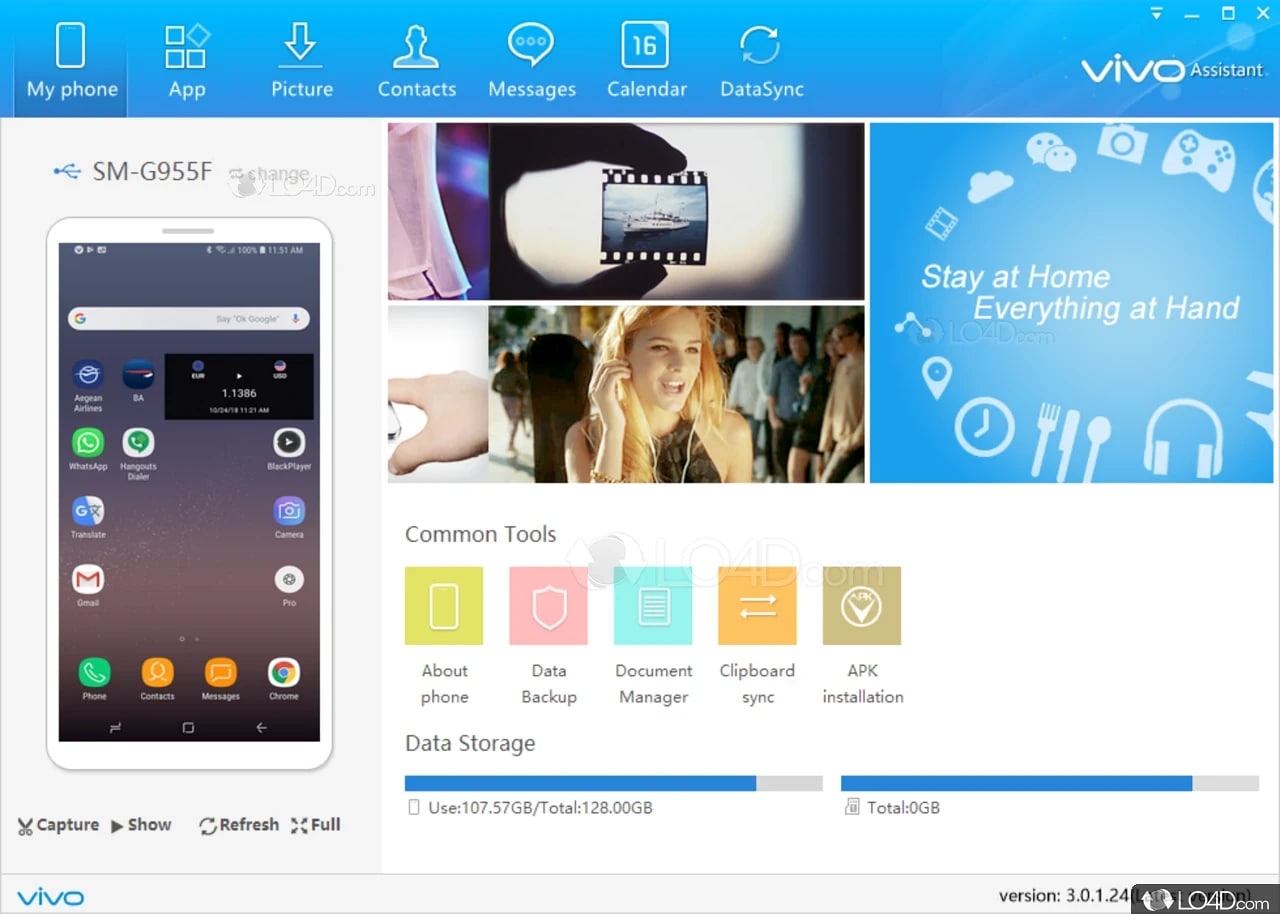
Part 3. How to Do Backup and Restore Vivo Via PC Suite
This method is perfect if you want to backup Vivo phone to PC. Vivo PC Suite, also called vivo Assistant, is the official file manager for Vivo devices. Also, it's easy to Download and install the latest version on your PC. If you have an older version, you can update it easily from the tool's settings.
Step-by-Step Guide for Vivo Backup and Restore Via PC Suite
Below are some easy steps for Vivo backup to PC.
Step 1
Go to "Settings" on your vivo phone and select "About Phone." Now, enable "Developer Options" by tapping the Build number seven times.
Step 2
Return to "Settings," where "Developer Options" will now be visible. Turn on USB debugging on your Vivo phone.
Step 3
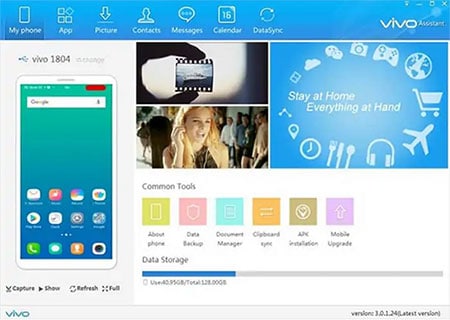
Use a data cable to connect your Vivo phone to the computer. Open the vivo PC Suite on your computer.
Step 4
The PC Suite will recognize your phone. If it asks for USB Debugging permission on your phone, approve it.
Step 5
The tool will then display all files from your phone.
Step 6
Choose the types of data you want to back up, like contacts, messages, and photos.
Step 7
Select the folder on your computer for storing the backup. Press the "Backup" button to initiate the backup process.
You will be able to do Vivo phone backup to PC by following the above steps. Now, let’s see how to restore data using PC Suite.
Step 8
Make sure you have the backup file from an earlier backup. Connect your vivo phone to the computer with a USB cable.
Step 9
Open the Vivo PC Suite on your computer.
Step 10
Have the tool recognize your device, similar to the backup process. Click on the "Restore" button in the PC Suite.
Step 11
Find and select the backup content on your computer. Then, choose the types of data you wish to restore to your vivo phone.
Step 12
Press "Restore" again to initiate the restoration process.
That’s it! Now, you can easily Vivo backup and restore to your PC using PC Suite. However, if you find this method difficult, we can try the next one!
Part 4. Wondershare Dr. Fone: The Best Vivo Cloud Alternative
Wondershare Dr.Fone is a great alternative to Vivo Cloud. It's a versatile tool for managing smartphone data. It supports a range of functions, from data recovery to backups. It's user-friendly and compatible with many devices. This makes it a popular choice for phone data management.
Wondershare Dr.Fone stands out for its comprehensive features beyond simple backups. It can also handle data transfer, system repairs, and unlocking phone features. With its intuitive interface, it's suitable for both tech experts and beginners.
Additionally, Dr. Fone ensures high levels of data security. This makes it a reliable choice for personal and professional use. Its widespread compatibility with various phone models, including Vivo, adds to its versatility as a mobile solution.
Dr.Fone - Basic
One - Stop Solution to Manage and Backup Data&Files on Android Phone
- Transfer files between Android and computer, including contacts, photos, music, SMS, and more.
- Manage, export/import your music, photos, videos, contacts, SMS, Apps, etc.
- Back up Android data to the computer with just one click.
- Manage your Android device on the computer.
- Fully compatible with the newest Android system.


Steps to Vivo Backup and Restore Using Wondershare Dr.Fone
The guide will help you to backup Vivo phone to PC using Wondershare Dr.Fone.
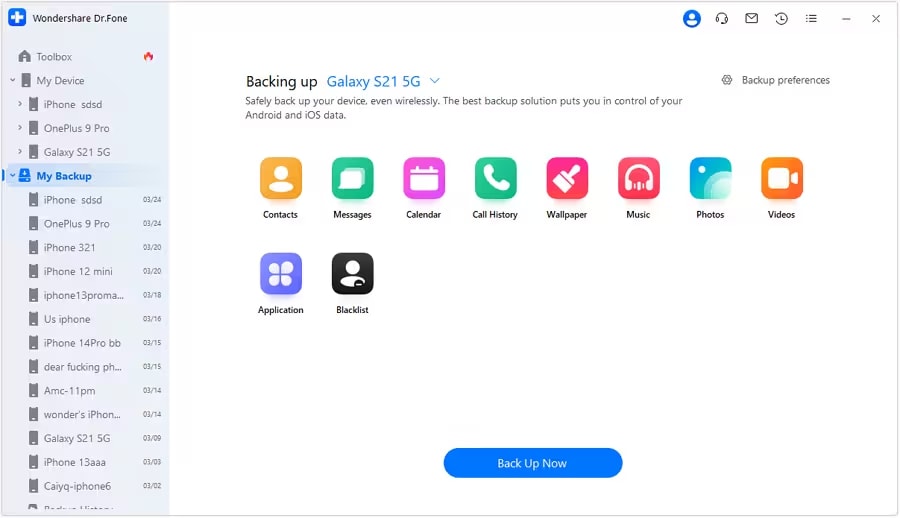
Step 1
Start by opening Dr.Fone on your computer and connecting your Android device to it. Then go to My Backup > Back Up Now.
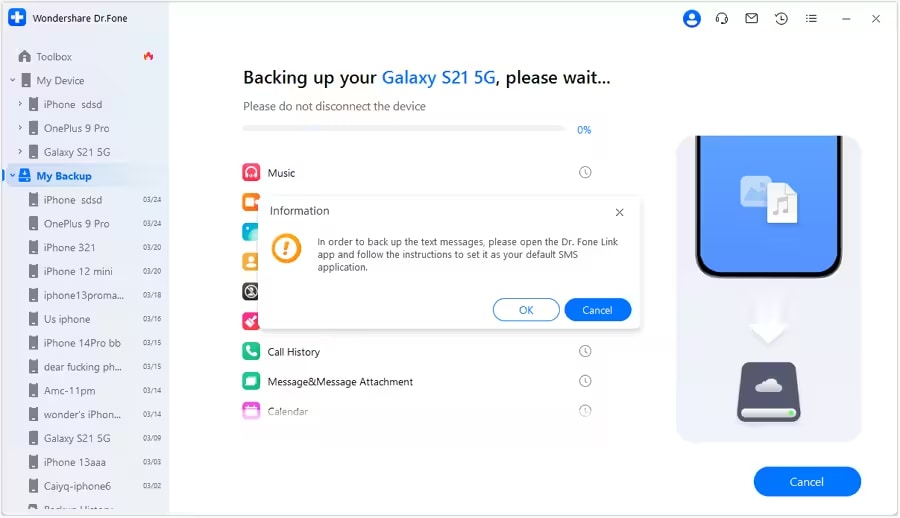
Step 2
Now, set the Dr.Fone Image name app as the default SMS app. Click OK after performing this task.
Step 3
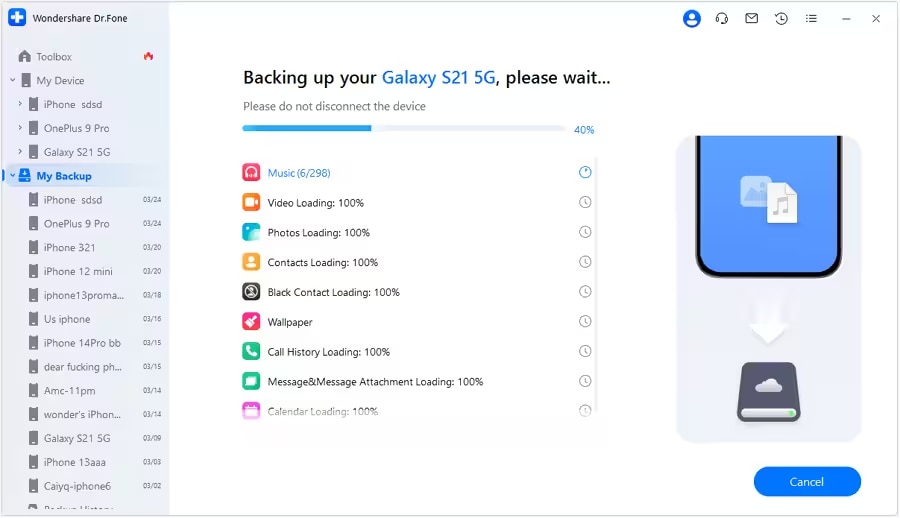
The backup will begin automatically. A progress bar will show how much of the backup is complete.
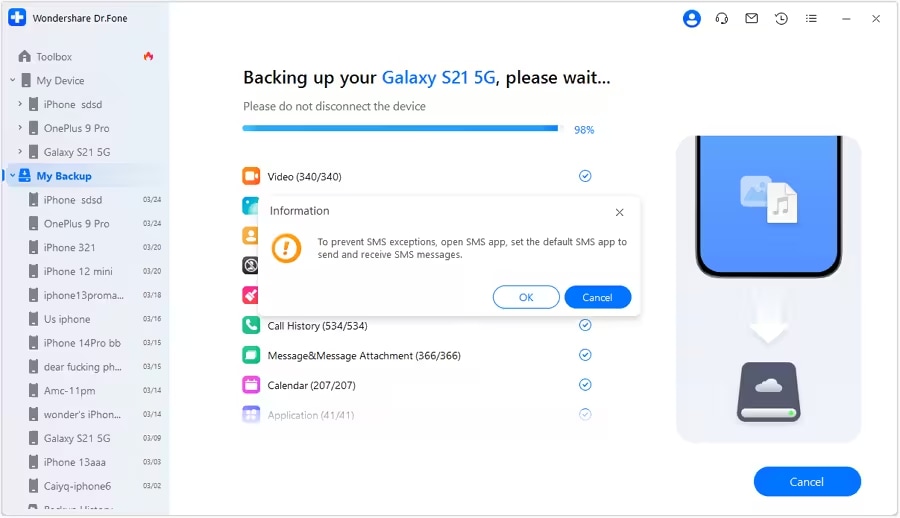
Step 4
As the backup nears completion, a prompt will ask you to set the default SMS app on your Android. To do this, open the SMS app and choose the default application. Click OK when done. If you don't want to back up text messages, just tap Cancel.
Step 5
When the backup finishes, it will show up in the window. To see the backup on your PC, click "Open in Folder." To look at all backups made, select "View Backups."
Steps to Restore Android Backup to Android Device
Follow the below easy steps to restore your mobile phone data.
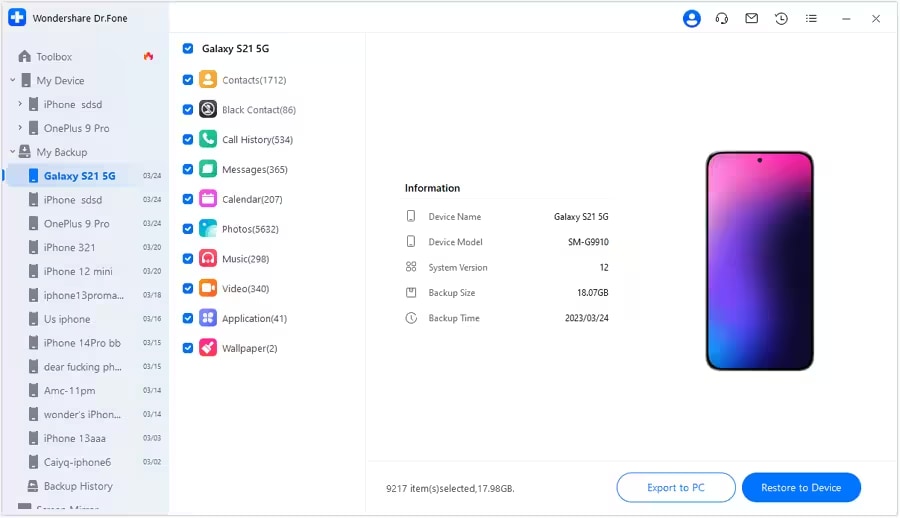
Step 1: Select the Backup File.
To restore an Android backup, connect your smartphone to your computer. Go to the My Backup section on the left panel. Now, pick your backup file. Look at the file, and if you want to restore it, select the data for restoration. Next, click "Restore to Device" at the bottom of the screen. Alternatively, you can choose "Export to PC" to save the data on your computer.

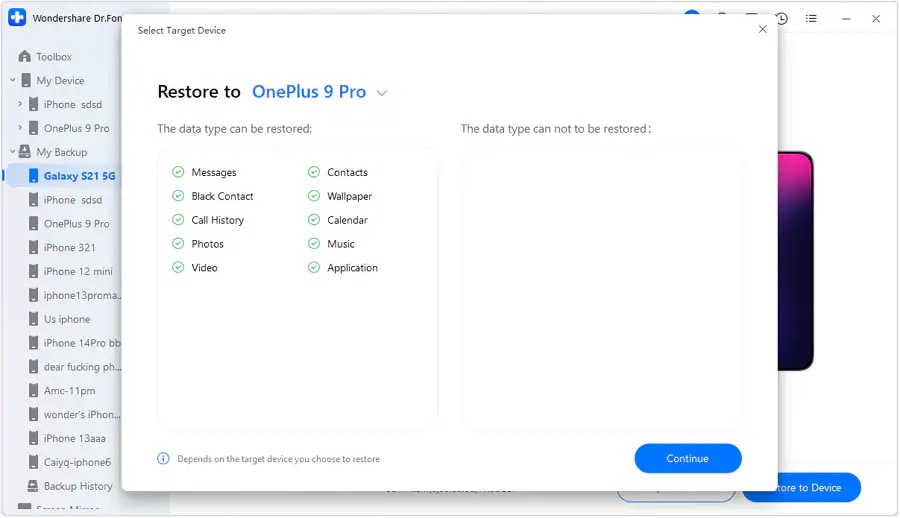
Step 2: Check the File Types that will Restore
A window will appear, listing the data types that can and cannot be restored to the connected smartphone. The types of files you can restore vary between Android and iOS devices. After reviewing the data, click "Continue" to proceed with the restoration.
Step 3: Start to Restore Android Backup to Device
The next window displays the data restoration progress. You can see the progress bar to see how much of the data has been restored.
Step 4: Conclude Restoration of Data to Android.
When the Android backup restoration finishes, a message of completion will appear.
Click "Done" to complete the entire data restoration process.
That's how you can backup and restore data using Wondershare Dr. Fone! Let's conclude our discussion.
Final Words
In this article, we've shown you different ways to Vivo backup and restore. Vivo Cloud offers easy and secure cloud storage. While using a Google account for backup is another handy option. The Vivo PC Suite is great for managing data on your PC.
For a more all-around solution, Wondershare Dr.Fone Basic provides many features for safe data handling. Each method ensures your Vivo backup is both safe and easy to access. Thus giving you peace of mind about your important data!
Dr.Fone Basic:
Better Control for Your Phone
Manage, transfer, back up, restore, and mirror your device


Daisy Raines
staff Editor