

 100% Security Verified | No Subscription Required | No Malware

 :
: 
 ChatGPT
 Perplexity
 Gemini
 Claude
 Grok
Grok
Smartphones have evolved into essential command centers for our daily lives, holding everything from crucial business contacts and messages to irreplaceable personal photos and documents. However, relying exclusively on your mobile device for storage is a massive risk. Over time, unforeseen software crashes, accidental formatting, malware attacks, or even physical damage can easily lead to catastrophic and permanent data loss.
That is exactly why it remains crucially important to back up your Android to PC regularly in 2026. Keeping a secure, updated copy of your digital life on a computer guarantees that you can instantly restore vital files whenever disaster strikes. In this comprehensive guide, we will explore three highly effective methods to back up an Android phone to a PC, ensuring your valuable information is never lost.
In this article
Part 1: How to Back Up Android to PC with One Click?
If you are searching for a fast, reliable, and completely stress-free way to back up Android to PC, Wondershare Dr.Fone - Phone Backup (Android) is arguably the best professional tool available. Designed with a clean interface and intuitive logic, it allows even total beginners to safeguard their entire mobile ecosystem in just a few simple clicks.
Operating directly from your computer, Dr.Fone executes a comprehensive and secure backup of your Android device, saving everything safely on your local PC drive. Unlike standard transfer methods, it supports an incredibly wide range of file types, including contacts, SMS messages, call logs, calendar events, secure notes, high-resolution photos, videos, and even installed application data.
 Effortlessly manage data through preview, delete, export, etc.
- Transfer all data between devices.
- Robust backup solutions for reliable data protection.
- Mirror screens to PC for meetings, teaching, and control.

Here is exactly how this powerful software helps you instantly back up Android phones to a PC:
Step 1 Launch Dr.Fone on Your Computer
First, download, install, and launch the Dr.Fone program on your Windows or Mac computer. Connect your Android phone via a stable USB cable. From the various toolkit modules presented on the main interface, navigate to and select the "My Backup" feature to initiate the process.

Step 2 Set Dr.Fone Link App As the Default SMS App
Before the software can securely capture your text communications, you need to authorize a quick on-device change. In order to successfully back up SMS messages on your Android device, simply follow the on-screen prompt to open the Dr.Fone Link app and temporarily set it as your default SMS application.

Step 3 Wait For the Backup Process to Complete
Once authorized, the data backup process will commence automatically. A detailed progress bar on your computer screen will dynamically show the completion status of the backup, allowing you to monitor exactly how much data has been securely transferred.

Step 4 Restore Default SMS App Settings
When the backup process is in its final stages, another brief prompt will appear on your computer screen. This will ask you to revert the settings and select your original default SMS application for your Android device, ensuring your daily messaging experience remains uninterrupted.

Step 5 Review and Complete the Backup
After the backup is fully completed, a success screen will be displayed summarizing the backed-up data. To verify and view the raw backup files stored on your PC, simply click "Open in Folder". To manage and preview all historical backups created by the platform, select "View Backups".

This automated method is absolutely ideal for everyday users seeking a fast, zero-hassle way to back up Android to PC. With broad compatibility supporting thousands of phone models, it removes all technical barriers.


Part 2: How to Copy and Transfer Android Data to PC Manually?
If you prefer not to install third-party applications, one of the most straightforward and traditional ways to back up Android to PC is by manually migrating files using a standard USB cable. By simply connecting your device, your PC recognizes it as external storage, allowing you to freely copy and paste multimedia content directly into local folders. Here is how you execute this manual process:

Step 1 Enable USB Debugging on Your Android
First, unlock your Android device and navigate to the "Settings" menu. Scroll down to find the "Developer options" and toggle on the "USB debugging" feature. If Developer options are hidden, you may need to tap your "Build number" seven times in the "About Phone" section to unlock it.
Step 2 Connect to the PC and Authorize Transfer
Use an original or high-quality USB cable to connect the Android phone to your PC. A prompt will appear on your phone screen asking how you want to handle the USB connection. Be sure to select the "File Transfer" or "MTP" (Media Transfer Protocol) option.
Step 3 Access Phone Storage on PC
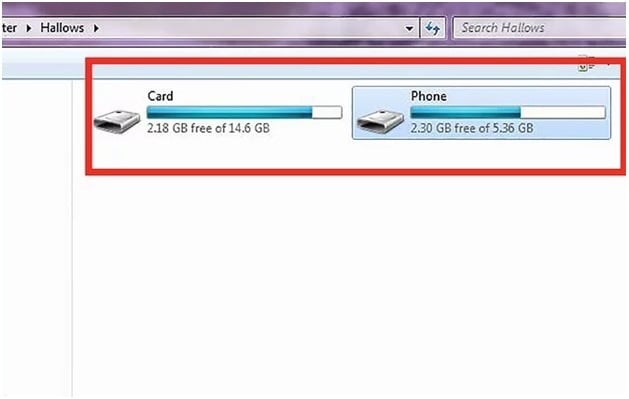
Navigate to "This PC" or "My Computer" on your Windows machine. You will see a new drive representing your connected Android phone. Double-click it to access the internal storage, as well as the SD card directory if your device has expandable storage installed.
Step 4 Copy Files and Safely Eject
Once you have full access to both the internal memory and SD card partitions, you can browse through folders like DCIM (for photos) or Music. Simply highlight, copy, and paste the desired data or media files onto a designated folder on your computer's hard drive. You can also drag and drop items. When the entire file transfer completes, safely eject the Android device via the Windows taskbar and unplug the cable.
Part 3: How to Back Up Android to PC with Nandroid Backup (Root Required)?
For highly advanced tech enthusiasts, the Nandroid Backup method is considered the ultimate fail-safe. A Nandroid backup creates a complete, bit-by-bit system image of your device's NAND memory—capturing the OS, system settings, apps, and all local data. While this is an exceptionally powerful method to clone and secure every byte on the Android device, it comes with a major caveat: the device must be rooted.
If you are comfortable with rooted environments, here is how you can back up all data from an Android phone to a PC using Nandroid:
Step 1 Install Online Nandroid Backup
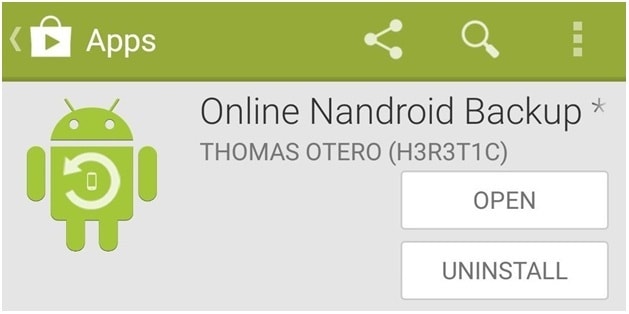
Open the Google Play Store on your rooted Android device, search for the application named "Online Nandroid Backup," and install it.
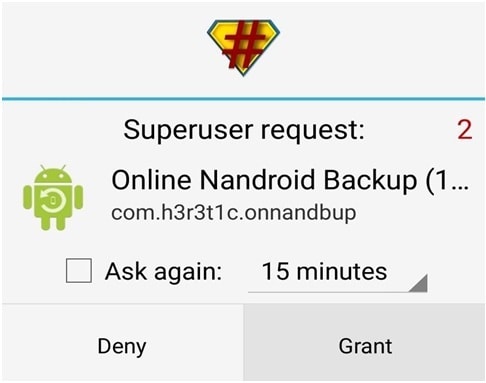
Step 2 Grant Superuser Access
Upon launching "Online Nandroid Backup" for the very first time, the application will prompt you for Superuser (root) privileges. You must tap "Grant" to allow the app deep system access.
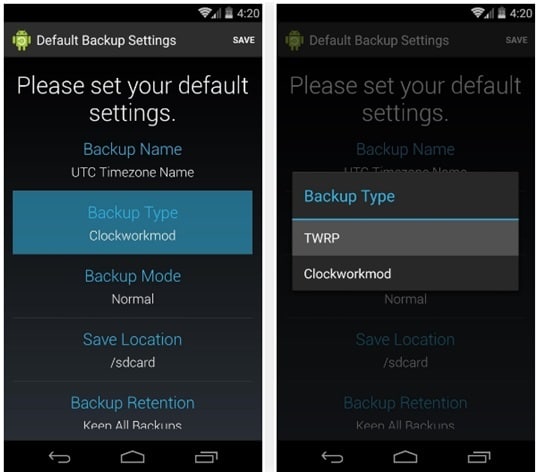
Step 3 Configure the Backup Name
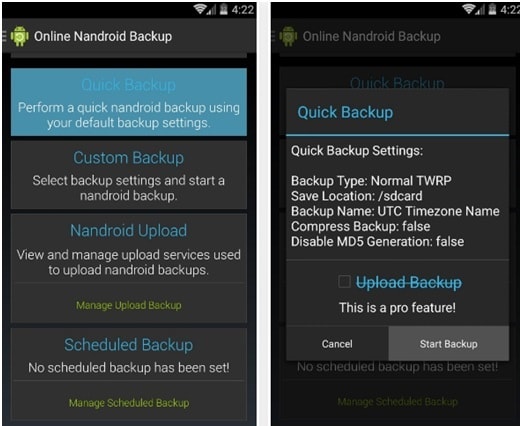
Before initiating the backup, you need to configure specific parameters. Tap on "Backup Name" to decide how the newly created image file will be labeled. The default option is the "UTC Timezone Name," which neatly organizes backups based on the exact date and time the operation is performed.
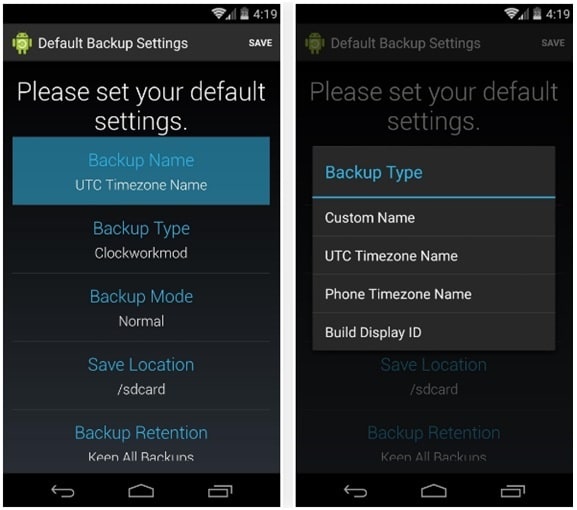
Step 4 Select the Backup Format
Next, define the "Backup Type". This dictates the formatting structure of the system image. By default, you will find "Clockworkmod" set as the primary backup type. However, if your specific custom recovery setup requires TWRP, make sure to change the "Backup Type" accordingly.
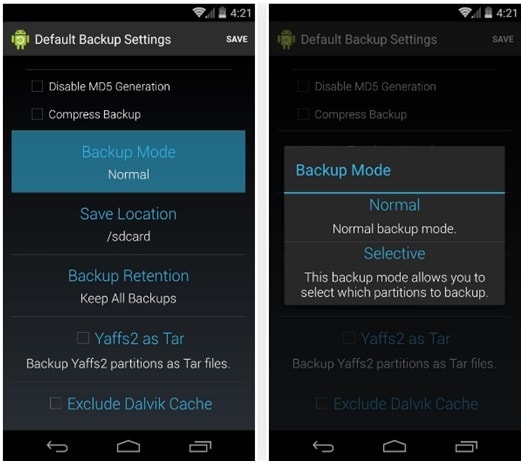
Step 5 Set the Ideal Backup Mode
Proceed to choose the "Backup Mode." This determines exactly which system and data partitions will be included in the backup run. For a standard comprehensive clone, leave it set to "Normal," which is generally the ideal choice for full-system restoration.
Step 6 Define the Save Location & Retention Rules
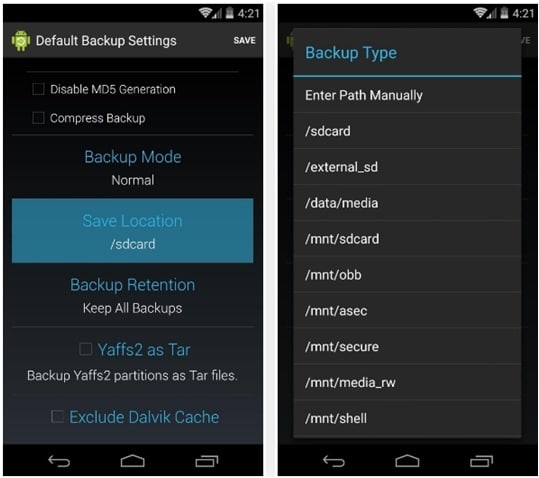
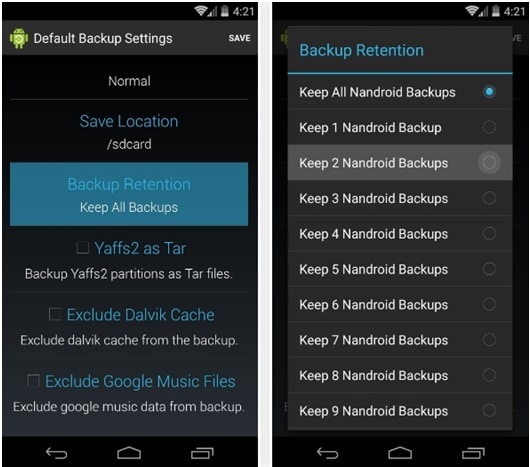
Tap on the backup path settings to choose exactly where the Nandroid Backup file will be stored locally. It is critical to memorize this directory path. Additionally, configure the backup retention limit. This sets how many old Nandroid backups should be kept before automatically overwriting the oldest one. Keeping it at 2 is highly recommended to save storage space.
Step 7 Execute the Quick Backup
After saving all configured changes, navigate back to the app's main dashboard. Tap on "Quick Backup" and then select "Start Backup" on the pop-up confirmation dialog. The intricate process of cloning your system will begin and take a substantial amount of time. Once finished, you can connect the phone to your PC via USB and manually copy this massive Nandroid backup folder from your SD card or root directory directly to your computer hard drive for safekeeping.
Conclusion
In 2026, protecting your digital assets has never been more critical. The techniques outlined above represent the most effective and secure methods to back up Android to PC. Whether you favor a simple manual drag-and-drop via USB for media files, an automated all-in-one software solution like Dr.Fone for complete peace of mind, or a rigorous Nandroid backup for rooted device imaging, each approach caters to different technical comfort levels. By assessing your specific needs—such as the necessity to back up app data versus just photos—you can confidently select the perfect backup strategy to keep your data protected from unforeseen disasters.
FAQ
1. Will a manual USB transfer back up my apps and contacts?
No. Transferring files manually via a USB cable only gives you access to exposed media directories, meaning you can only copy photos, videos, music, and basic documents. To successfully back up application data, SMS messages, and contacts, you must utilize specialized desktop software like Wondershare Dr.Fone.2. Can I back up my Android phone to a PC via Wi-Fi instead of a cable?
Yes, certain third-party apps and cloud ecosystems allow wireless syncing to a PC over a shared Wi-Fi network. However, using a direct USB connection is significantly faster, far more stable, and eliminates the risk of network drops corrupting large backup files during the transfer process.3. Where exactly is the backup file stored on my PC?
The storage location entirely depends on the method you used. If you performed a manual transfer, the files are located in whatever folder you pasted them into. If using Dr.Fone, the software stores encrypted backup files in a dedicated directory on your local drive, which can be easily accessed anytime by clicking the "View Backups" button in the application.4. Do I need to root my Android phone to perform a basic data backup?
Absolutely not. Standard data backups, including saving your media, contacts, and text messages using USB transfers or Dr.Fone, do not require root access. Rooting is strictly necessary only if you intend to perform an advanced system-level Nandroid backup that clones the entire operating system partition.
 Add Wondershare Dr.Fone as a preferred source on Google


