How To Turn Off Camera Shutter Sound on iDevices?
In certain situations, the camera shutter sound on your iDevice can be disruptive or embarrassing. While many believe this feature is essential, turning it off allows you to capture moments quietly in sensitive environments. This highlights the need for a reliable tool to disable the camera sound seamlessly. Dr.Fone - iCloud Activation Unlocker "Turn Off Camera Sound" feature enables you to effortlessly mute your device’s camera shutter sound.
With support for iOS 12 through iOS 16, this guide walks you through everything from checking your device status to jailbreaking and completing the silent camera configuration.
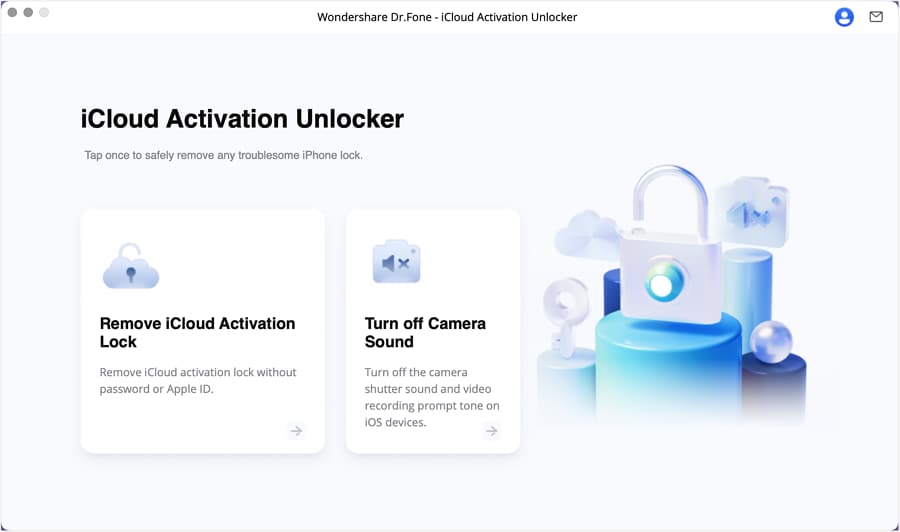
Turn off Camera Sound Easily
🔔 Disclaimer:
Dr.Fone is purposefully designed to remove the lock, restoring your device to its full potential. This software is intended exclusively for personal use. Any form of misuse, including but not limited to using Dr.Fone for commercial or illegal purposes, is strictly prohibited.
Index
Part 1: Connect Your Device
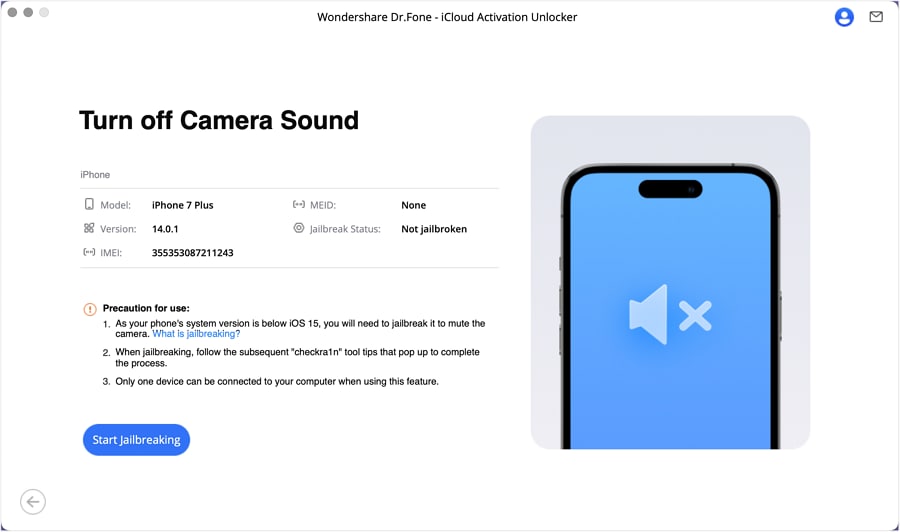
Launch the Dr.Fone - iCloud Activation Unlocker on your computer and click on "Turn off Camera Sound". Ensure the software is updated to the latest version for optimal performance and compatibility.
Compatible Devices (Running iOS/iPadOS 12 to 16):
- iPhone: iPhone 5S, iPhone 6/6 Plus, iPhone 7/7 Plus, iPhone 8/8 Plus, iPhone X, iPhone SE (1st Gen).
- iPad: iPad Air, iPad Mini 2/3/4, iPad (5th to 7th Generation), iPad Pro 1/2.
- iPod Touch: iPod touch (6th/7th Generation).
Part 2: Jailbreak Preparation for iOS/iPadOS 12 ~ 14 Devices
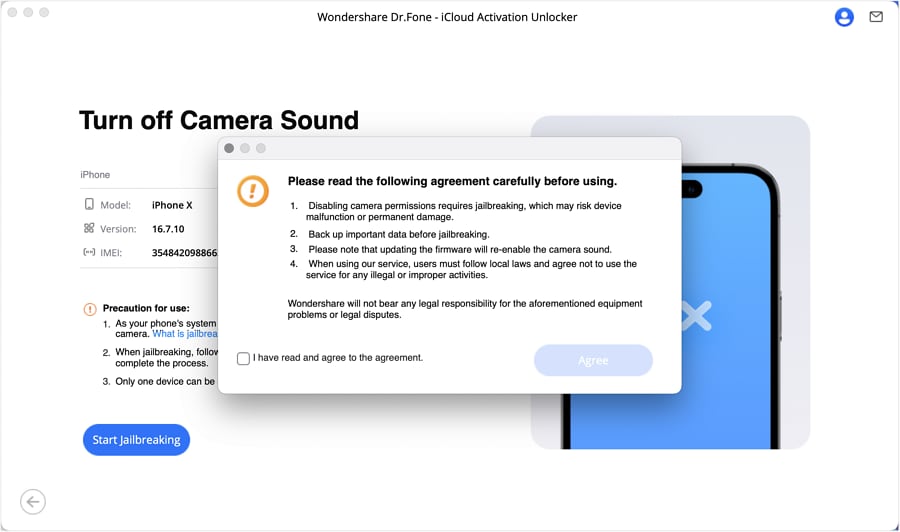
Use a USB cable to connect your iOS device to your computer. Confirm that the device is recognized by your computer and appears in the software interface with device details displayed.
If your device is already jailbroken, you can proceed directly to Part 4. If not, a popup will prompt you to agree to the jailbreak terms. Check "I have read and agree to the agreement" to continue.

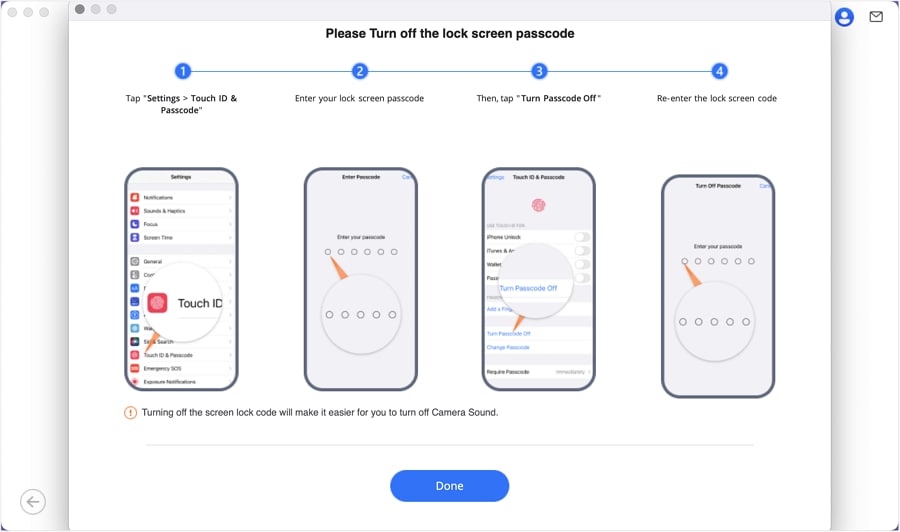
Follow the on-screen instructions to temporarily disable the screen lock passcode. This ensures a smooth jailbreak process.
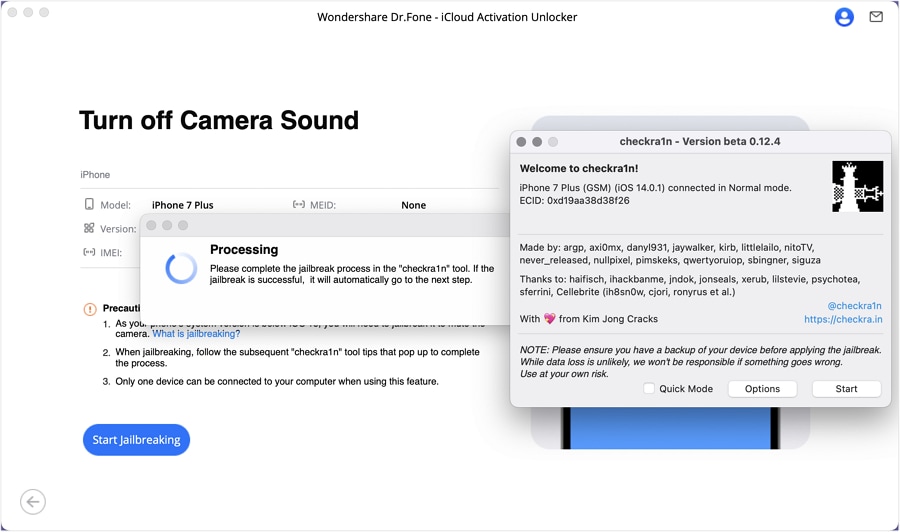
The software will guide you through each step, with the help of the jailbreak application. Once the device is jailbroken successfully, you're ready to turn off the camera sound in Part 4.
Part 3: Jailbreak Preparation for iOS 15 ~ iOS 16 Devices
Plug in your iPhone via USB and make sure it's recognized by the software. Once detected, the tool will display your device model, iOS version, and jailbreak status.

If not jailbroken, agree to the terms by checking "I have read and agree to the agreement" and proceed with the jailbreak process tailored for iOS 15–16 devices.
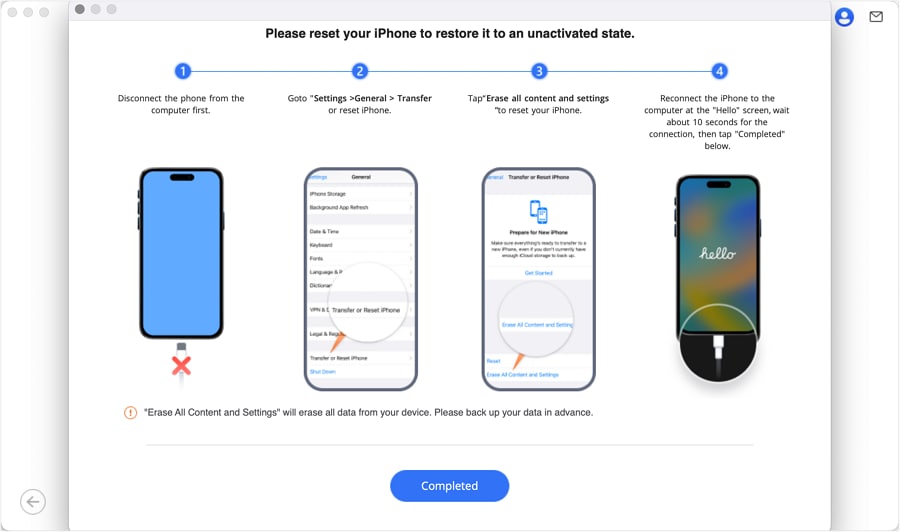
Follow the guide to reset your device to a clean, unactivated state—a necessary step for deep system modification.
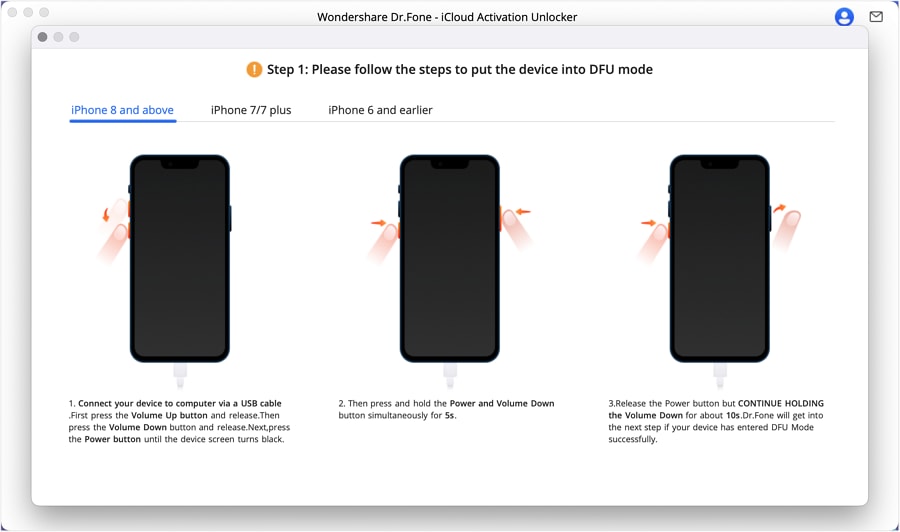
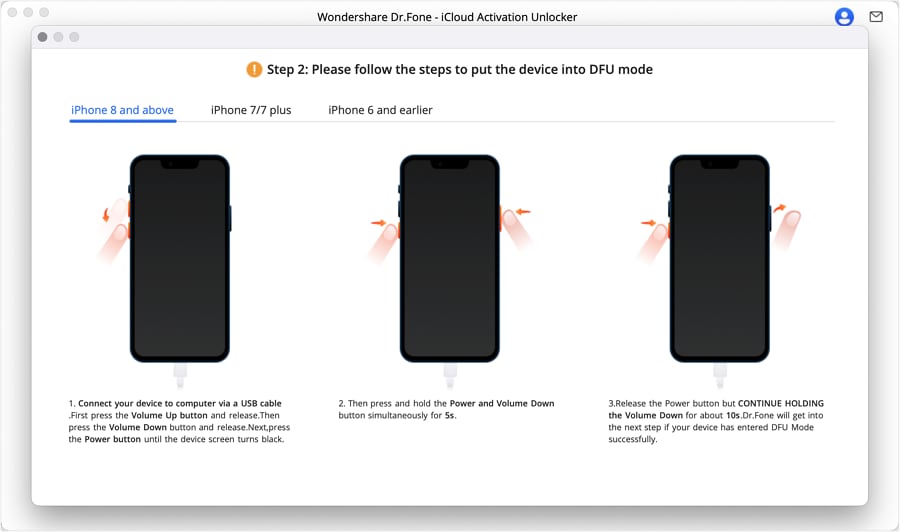
Put your iPhone into DFU mode as per the on-screen steps.
The program will begin real-time processing. You can view each phase of progress clearly.
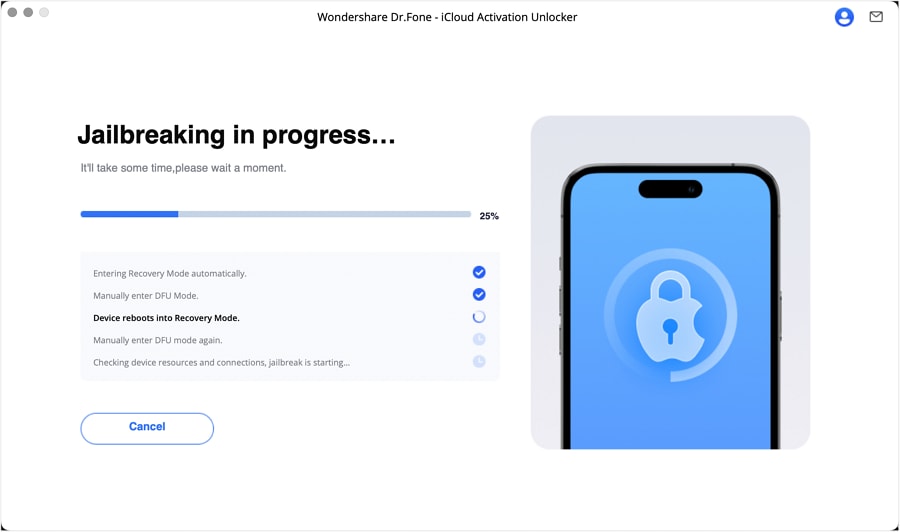
You may be asked to re-enter DFU mode to ensure full system access.
Once the device is jailbroken successfully, you're ready to turn off the camera sound in Part 4.
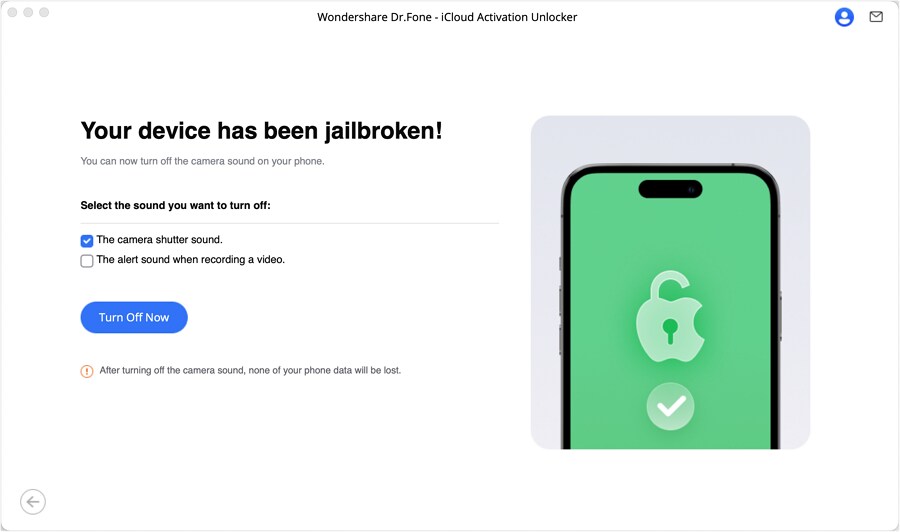
Part 4: Turn Off Camera Sound or Video Recording Sound
After jailbreaking, come to the "Turn Off Camera Sound" section. Select the sound(s) you'd like to turn-off: The camera shutter sound or The alert sound when recording a video, then click "Turn Off Now".
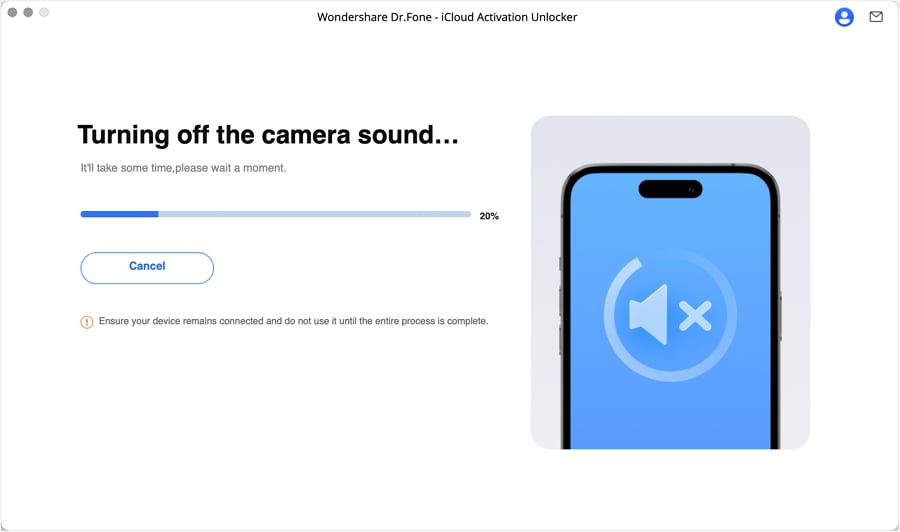
The system will apply the changes in just a few moments.
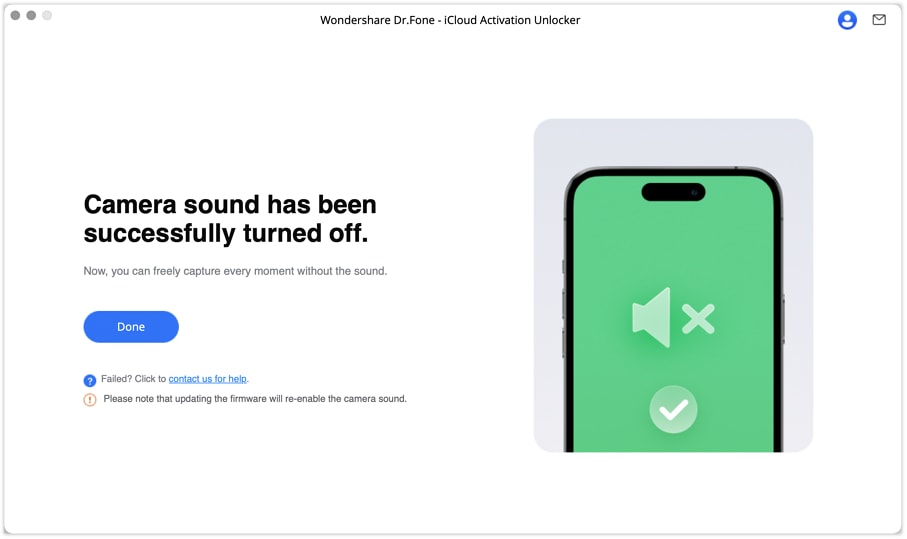
Your iPhone is now free from shutter or recording alert sounds.
WHAT YOU'LL NEED

Dr.Fone provides a complete set of tools for solving all iOS/Android phone problems.
Need help?
You might find the answer to your question in the FAQ or additional information below: