How to Jailbreak iOS on a Windows Computer?
Jailbreak iOS is the first thing you must do to bypass an activation lock. Tools on the market are not compatible with Windows OS. But you can create an environment manually. Read this tutorial. Learn how to create an environment for jailbreaking iOS and complete a jailbreak on a Windows OS computer.
Manage Your Phone Wherever You Go
🔔 Disclaimer:
Dr.Fone is purposefully designed to remove the lock, restoring your device to its full potential. This software is intended exclusively for personal use. Any form of misuse, including but not limited to using Dr.Fone for commercial or illegal purposes, is strictly prohibited.
Index
Part 1: Jailbreak iOS on a Windows Computer With WinRa1n2.0
1.1 What to Prepare Before You Jailbreak iOS With WinRa1n2.0?
You have to ensure a few requirements are completed before initiating the process of jailbreaking your iOS device with WinRa1n2.0 on Windows. The following are the requirements that you have to complete:
- PC with minimum Windows 7 or above.
- An Apple-certified lightning cable to connect iPhone to computer.
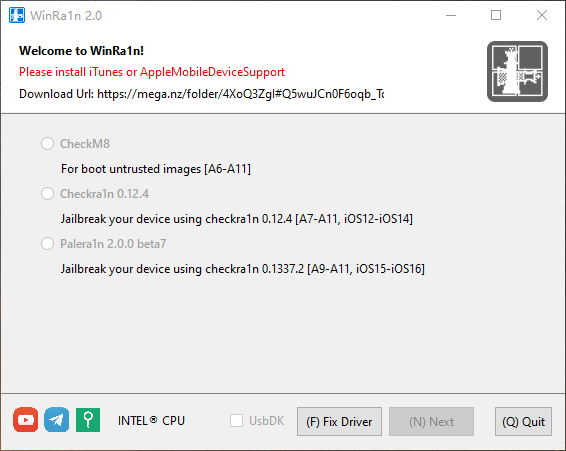
- Download the latest version of iTunes and WinRa1n2.0
1.2 How to Jailbreak iOS on Windows Step-by-Step
Before initiating the process, connect your iPhone with an Apple-certified lightning cable and make sure you have iTunes installed on your Windows PC.
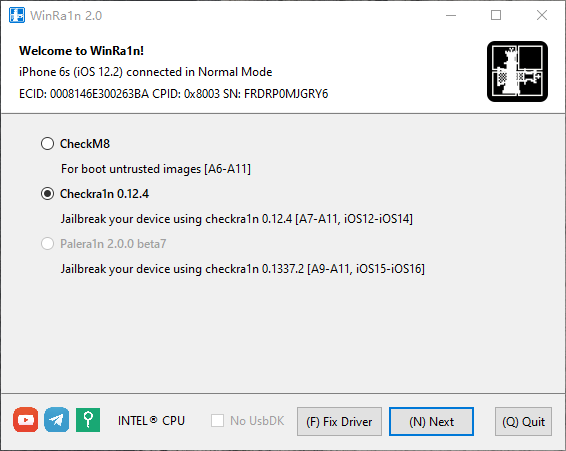
To jailbreak Apple A7 - A11, iOS 12 - iOS 14
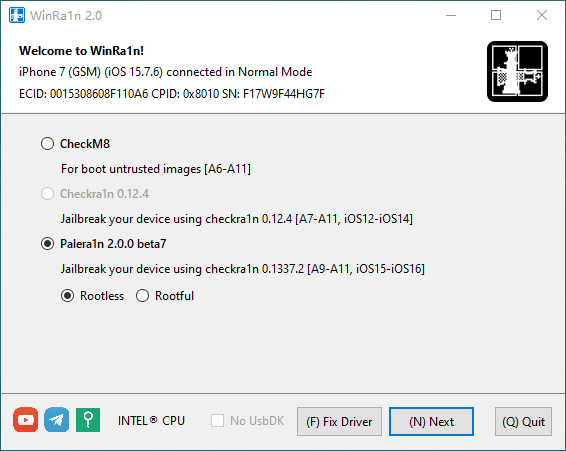
1. Enable the Checkra1n 0.12.4 option and press the Next button.
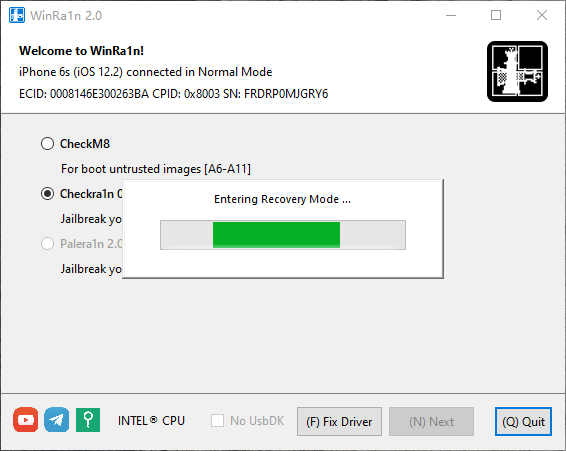
2. This will initiate activating the recovery mode on your connected iOS device.
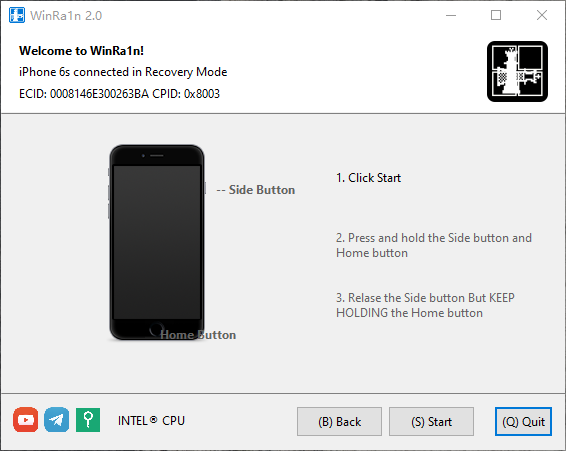
3. Once the iPhone is in Recovery Mode, you must follow the on-screen instructions to activate the DFU Mode.
4. The process of Payload Running will start whose progress you can see on the screen.
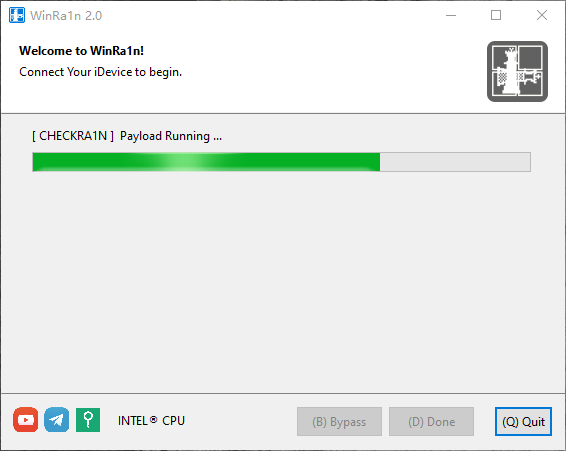
5. Once the Payload Running process is completed, your iPhone will enter Download Mode automatically.

6. The jailbreak process will be completed once the device is in Download Mode. Press the Done button to end the jailbreak process successfully.
To jailbreak Apple A7 - A10, iOS 15 - iOS 16
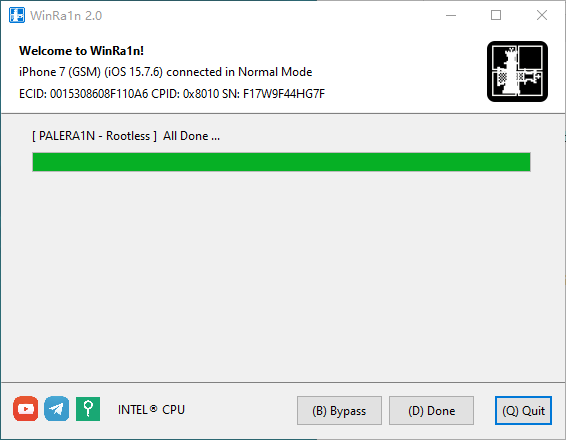
1. Select Palera1n 2.0.0 beta7 as your jailbreak mode and enable the Rootless option. Then, press the Next button to proceed to the next step. (Note: Don't select Rootful, as it may cause system damage.)
2. Your iPhone will start entering Recovery Mode automatically.

3. Following this, activate the DFU Mode for your iPhone by following the on-screen instructions.

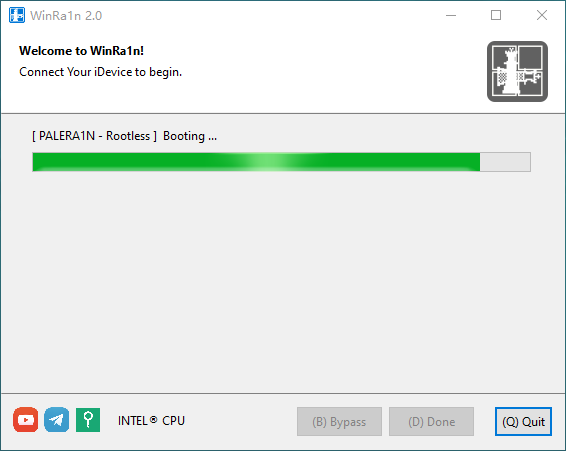
4. Once the DFU Mode is activated, the process of jailbreaking will start, and you can see through the progress bar.
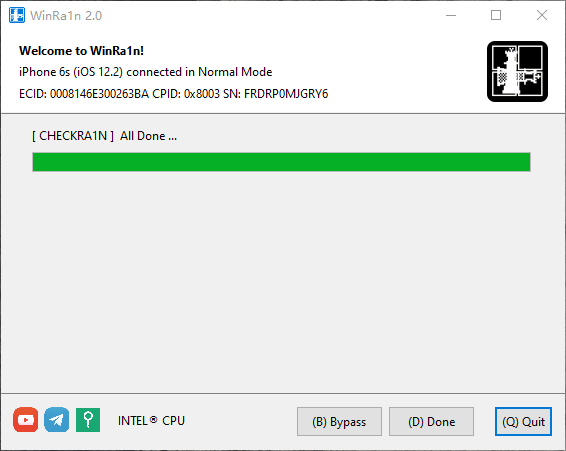
5. You can see the All Done status on your screen if your iPhone has been jailbroken successfully. Then, click on the Done button to complete the jailbreak process.
Part 2: Jailbreak iOS on a Windows Computer With with Checkn1x
2.1 What to Prepare Before You Jailbreak iOS with Checkn1x?
There are a few things to regulate before you jailbreak iOS on a Windows computer. You must make sure to have these things with you during the process:
- The computer should run on Windows 7 or above.
- A USB flash drive with a capacity exceeding 2GB.
- Download checkn1x-amd64.iso and rufus.exe for the procedure.
2.2: How to Jailbreak iOS on Windows Step-By-Step
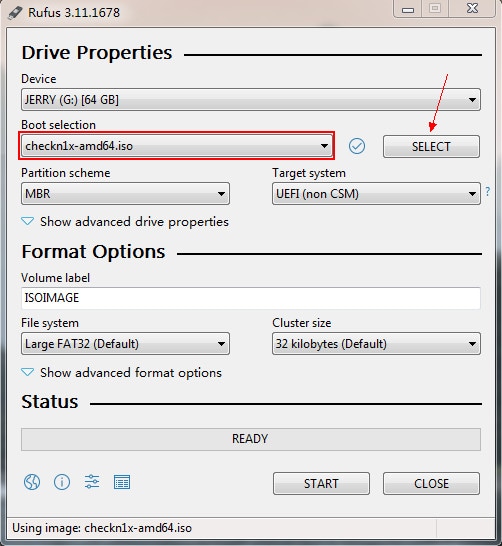
1. Plug in your USB drive to the computer and open the rufus.exe file. Following this, click SELECT > select the downloaded checkn1x-amd64.iso. Continue by clicking START.
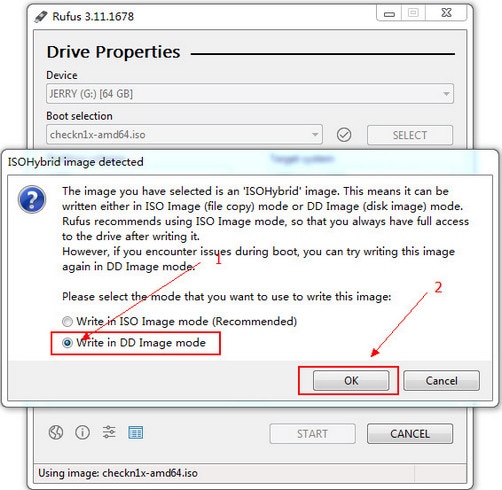
2. As a warning message appears on the screen, select the checkmark option showing Write in DD image mode and continue by pressing OK. If necessary, back up your USB flash drive because it will format the data.
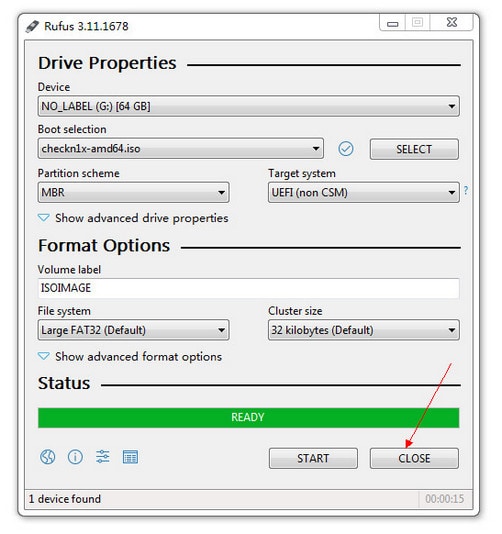
3. This will initiate the process of writing image data, which can be observed against the progress bar at the bottom of the window. Wait for 2-3 minutes.

4. As the burning concludes, click CLOSE. Replug your USB flash drive into your computer. It's essential because the Windows system may not recognize it after it's burned.
1. Restart your computer (keep the battery). Press F12 to open the Boot Menu while the computer is powered and booted for a while.
| Desktop Brand | Laptop Brand | Motherboard Brand | |
| ESC | Dell | ASUS, Sony | MAXSUN, UNIKA, SUPOX, Spark, SOYO, EPOX, UNIKA, Jetway, J&W, Colorful, ECS, SOYO, FOXCONN |
| F8 | ASUS, BenQ | ASUS, YESTON, J&W | |
| F9 | HP, BenQ | BIOSTAR, GUANMING | |
| F10 | ASL | ||
| F11 | MSI | MSI, ASRock, ONDA, Colorful, ECS, Gamen, Topstar | |
| F12 | Lenovo, HP, Acer, Hasee, eFound, THTF, Haier | Thinkpad, Dell, Lenovo, TOSHIBA, Samsung, IBM, Acer, Hasee, Haier, eFound, THTF, GIGABYTE, Gateway, eMachines | GIGABYTE, Intel, Cthim, SOYO, FOXCONN, Gamen, Topstar |
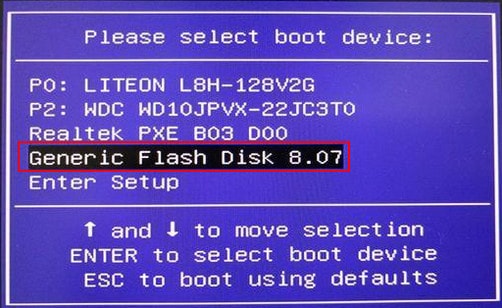
2. Choose the USB flash drive in the Start Menu.
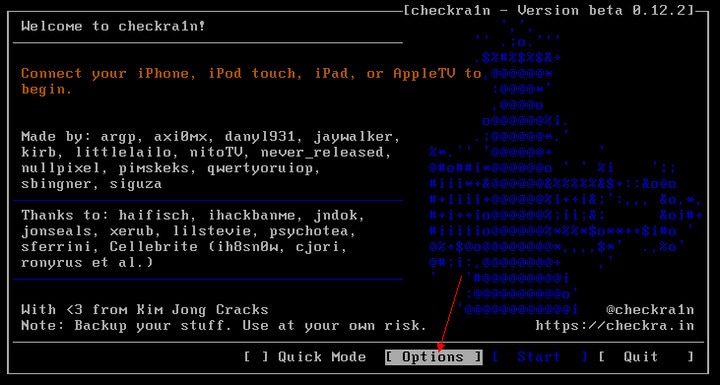
3. Following this, connect your iOS device that is to be processed. Use the arrow keys on the keyboard to lead to the Options button. Press Enter to set up the jailbreak tool.
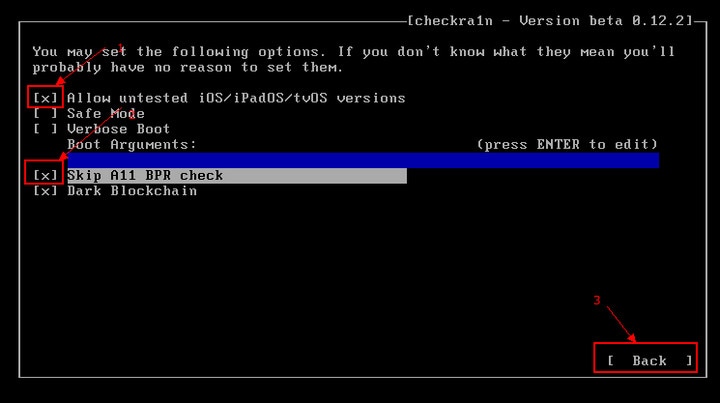
4. Next, you will have to navigate to the Allow untested iOS/iPadOS/tvOS versions option and press Enter. Select Skip All BPR check, and press Enter. Continue to select Back on the bottom of the screen, press Enter, and lead back to the main screen.
1. If you have an iPhone 8/8 Plus/X equipped with an iOS 14 system, select the Skip A11 BPR check option.
2. You cannot jailbreak iPhone 8/8 Plus/X running iOS 14 (with a lock screen password). If you have a lock screen password, deep-flash the firmware first, and then try to jailbreak again.
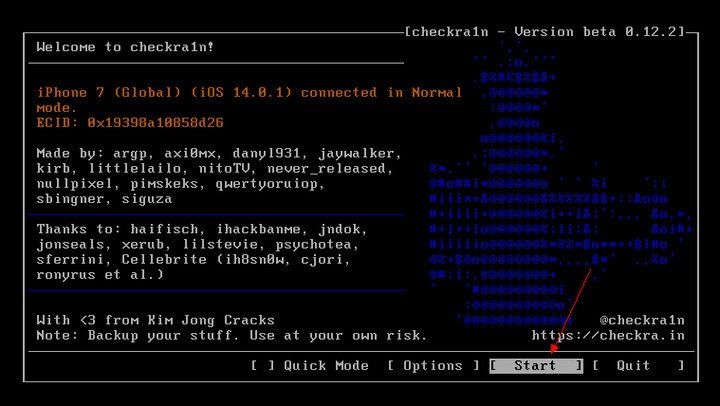
5. On the main screen, you have to select the Start option and press Enter to initiate jailbreaking.
6. CheckN1x requires your device to be in DFU mode to jailbreak your iOS device. Select Next. It will guide you into DFU mode.
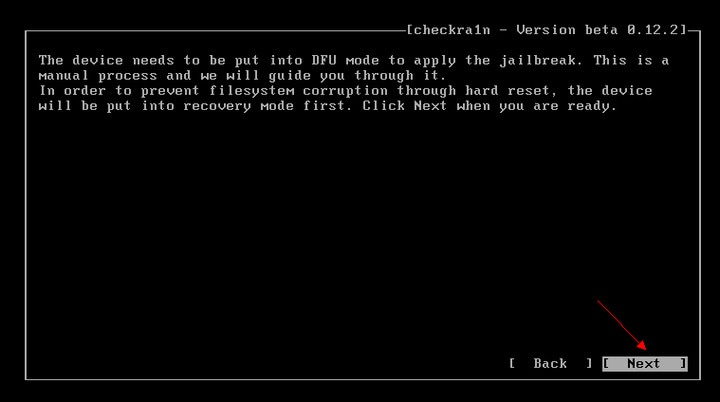
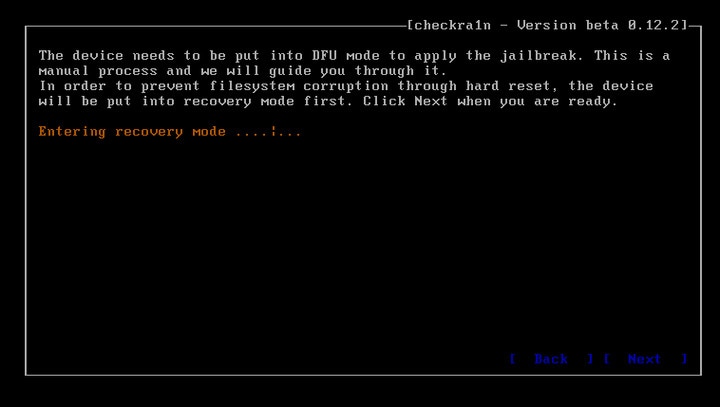
7. On selecting Next, the iOS device will be automatically put in Recovery Mode first.
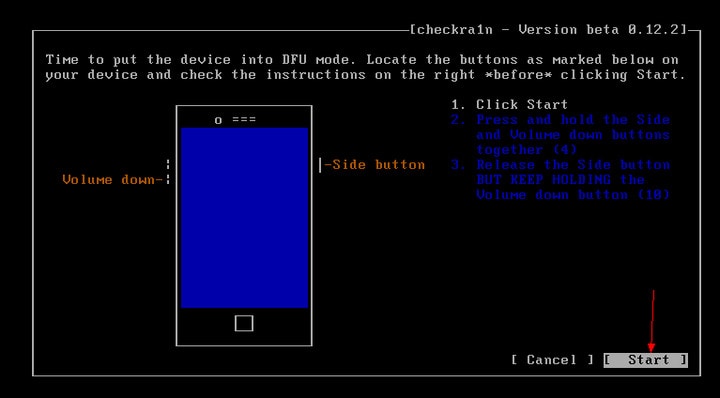
8. Select the Start option and then follow the on-screen instructions on Checkn1x to put your iOS device in DFU mode. As it enters mode, Checkn1x will automatically jailbreak the device. Select Finish and unplug the USB device from the Windows computer.
2.3 Tips You Should Know
There are a few tips that you should keep in mind while performing a jailbreak on iOS, which are discussed as follows:
Tip 1: If the jailbreak process is in trouble, do as follows:
1. Replace with another USB flash drive, and then try to jailbreak again.
2. Restart your iOS device and computer, and then try to jailbreak again.
Tip 2: If the jailbreak fails:
Reinsert the device into the USB port on the back of the host computer and try again.
Tip 3: Note for iPhone 8/8 Plus/X devices equipped with iOS 14 system:
For iPhone 8/8 Plus/X using the iOS 14 system before jailbreaking, they should be inactive and without any lock screen password.
Part 3: How to Unlock Activation Lock?
Once you have completed the jailbreaking process, you can continue to unlock the Activation Lock across the iOS device. For this, you can take the aid of Dr.Fone – Screen Unlock (iOS), which will help you achieve proper results. To know more about how it helps users in the procession, follow the step-by-step guide.

WHAT YOU'LL NEED

Dr.Fone provides a complete set of tools for solving all iOS/Android phone problems.
Need help?
You might find the answer to your question in the FAQ or additional information below: