Recover photos, messages, WhatsApp, and more — no backup
needed.
Recover photos, messages, WhatsApp, and more — no backup
needed.

 100% Security Verified | No Subscription Required | No Malware

 :
: 
 ChatGPT
 Perplexity
 Gemini
 Claude
 Grok
Grok
Are you constantly asking yourself, 'how do I see photos stored in iCloud?' Rest assured, you are definitely not alone. Apple’s iCloud infrastructure is designed to seamlessly sync and protect your personal media, making it incredibly easy to keep digital memories safe from hardware failures. However, many users find themselves confused when their iCloud photos mysteriously fail to appear in their device's local gallery.
In this comprehensive 2026 guide, we will break down exactly how to quickly access and view photos stored in iCloud. Whether you are operating an older iOS model, upgrading to the latest iPhone 17, or browsing from a Windows computer, we will ensure your pictures are always within arm's reach.

Throughout the following sections, we will examine streamlined methods for Mac and Windows PCs. You will discover exactly how to view iCloud photos via any web browser, even if you do not currently have your Apple device in hand. Finally, we will guide you through crucial troubleshooting protocols and discuss recovering photos from iCloud using advanced software like Dr.Fone - Data Recovery (iOS). By the end of this tutorial, you will fully master how to see pictures stored in iCloud.
In this article
- Part 1. Prerequisite: Is iCloud Photos Turned On?
- Part 2. How to See Photos Stored in iCloud on iPhone and iPad
- Part 3. How to View Photos Stored in iCloud on Mac
- Part 4. How to See Photos Stored in iCloud on Windows PC
- Part 5. How to See Pictures in iCloud via Browser (Any Device)
- Part 6. Bonus Tip: Retrieve Lost iCloud Photos Easily
- Part 7. Troubleshooting: When You Can't See Your iCloud Photos
Part 1. Prerequisite: Is iCloud Photos Turned On?
Before diving into the specifics of how to view iCloud photos, you must verify one fundamental requirement: Is the iCloud Photos feature actually enabled? This foundational setting is strictly required, as it alone dictates whether your device is permitted to upload and sync picture data to Apple's cloud servers.
Why Does This Setting Matter?
Without activating the iCloud Photo Library, your images remain stranded on your local hardware. They will not propagate across your other Apple ID-enabled devices, nor will they appear on the iCloud web portal. If you want to successfully see iCloud photos across your digital ecosystem, flipping this switch is non-negotiable.
How to Check the Status on iPhone or iPad
-
Step 1 Open Device Settings
Launch the native "Settings" application from your iPhone or iPad home screen.
-
Step 2 Access Apple ID Profile
Tap your name banner (the Apple ID section) situated at the very top of the Settings menu.
-
Step 3 Navigate to Photos
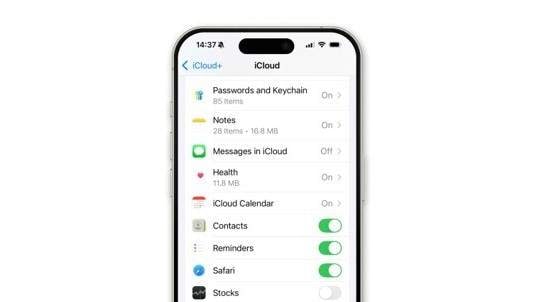
Select "iCloud" from the list of services, then choose the "Photos" category.
-
Step 4 Enable Syncing
Toggle the switch that says "Sync this [Device]" or "iCloud Photos" to the ON position. Your digital library will instantly begin mirroring to the cloud.
How to Check the Status on Mac
-
Step 1 Open System Settings
Click the Apple logo in the top-left corner and open "System Settings" (labeled "System Preferences" on older macOS builds).
-
Step 2 Access iCloud Settings
Click on your Apple ID name, followed by "iCloud."
-
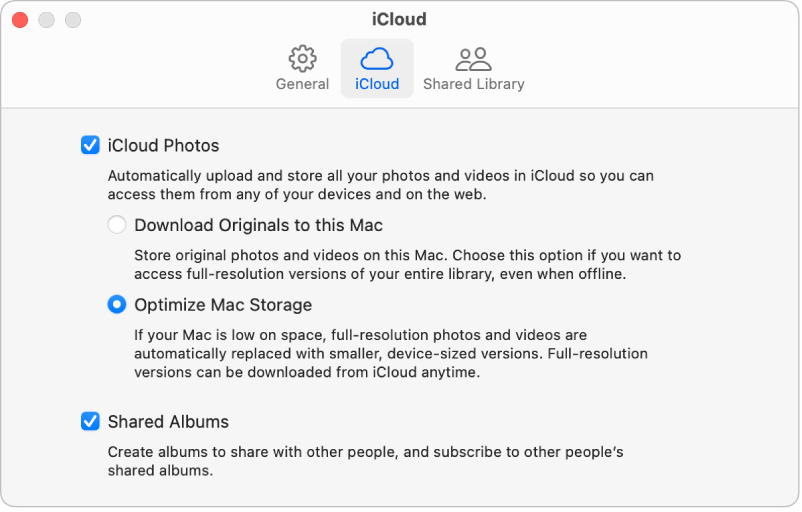
Step 3 Enable Photos Checkbox
Under the Photos tab, click "Options" and ensure the iCloud Photos checkbox is distinctly ticked to initiate background backup.
Part 2. How to See Photos Stored in iCloud on iPhone and iPad
Wondering how can I see photos stored in iCloud effortlessly from a mobile device? Once you have confirmed that cloud synchronization is active, locating the actual files takes only a few quick taps.
-
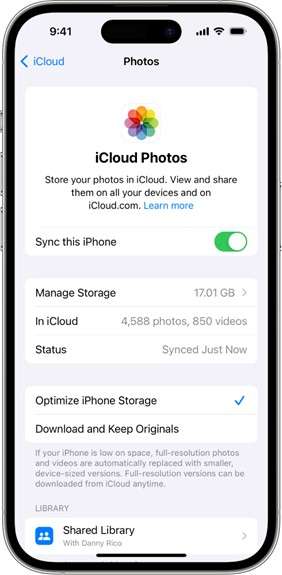
Step 1 Verify Apple ID Synchronization
As previously mentioned, open "Settings" > Tap your "Apple ID" > select "iCloud" > "Photos." Confirm that "Sync This iPhone/iPad" remains securely toggled ON.
-
Step 2 Launch the Photos Application
Return to your device's Home Screen and launch the native Apple "Photos" app. This central hub is where you will quickly view iCloud photographs merged with your local shots.
-
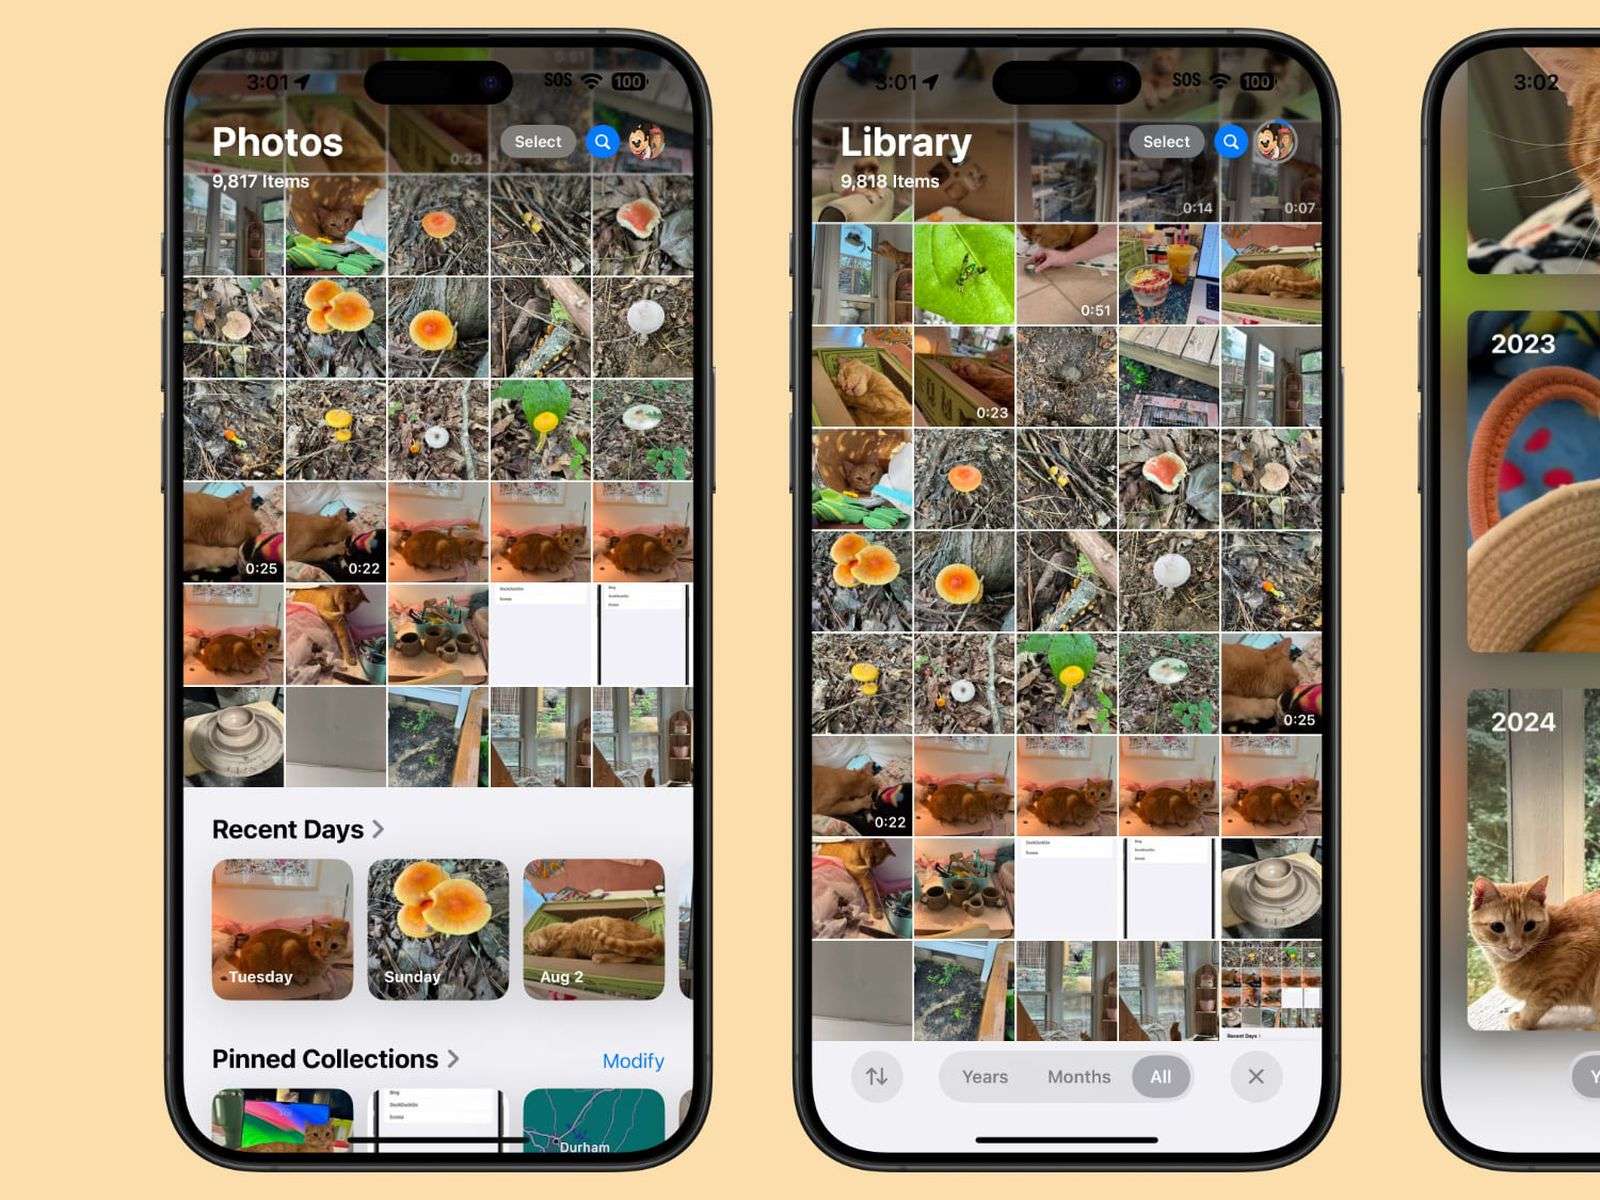
Step 3 Browse the Combined Library
Tap the "Library" tab resting at the bottom menu. You will observe filters like Years, Months, Days, and All Photos. Select "All Photos." Every piece of media synchronized from both your smartphone hardware and your iCloud backup will display here comprehensively. You can also explore smart albums like Recents, People, and Places, which intelligently fetch iCloud data.
Part 3. How to View Photos Stored in iCloud on Mac
Finding out how to see iCloud photos on your MacBook or iMac desktop is just as straightforward. The macOS architecture integrates cloud media directly into the system's viewing applications.
-
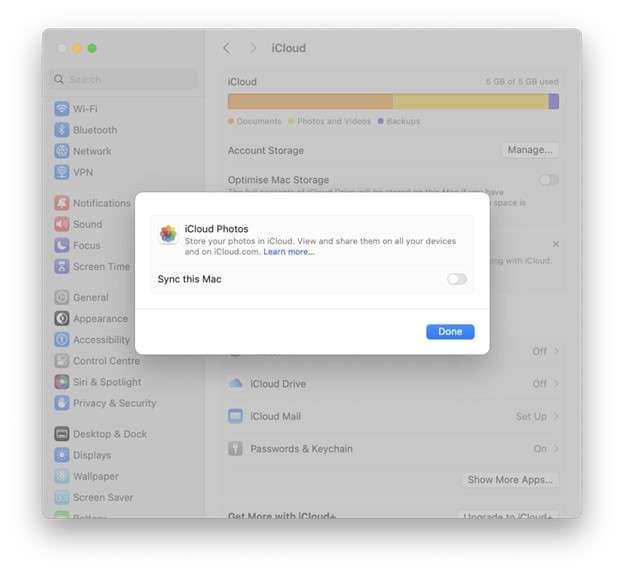
Step 1 Validate Mac Sync Protocols
Navigate to System Settings and guarantee that "Sync This Mac" for Photos is enabled. This core setting permits the macOS Photos app to aggregate your cloud data.
-
Step 2 Launch the macOS Photos App
Click the "Photos" icon housed in your Dock or Applications folder. If prompted for security credentials, input your Apple ID and authorize iCloud Photos connection.
-
Step 3 Explore the Library Tab
In the left-hand sidebar, click on "Library." Here, you can actively view iCloud images side-by-side with localized files. The app maps out a complete chronological history of every video and photograph tied to your Apple account.
-
Step 4 Utilize Organized Albums
Clicking the "Albums" tab will display meticulously organized collections. You will see dedicated folders for Recents, Favorites, Places, and user-generated shared albums. This structure makes viewing iCloud photographs in curated batches incredibly intuitive.

Part 4. How to See Photos Stored in iCloud on Windows PC
Many users ask, "how do I see photos stored on iCloud if I don't own a Mac?" Thankfully, Windows PC users possess multiple avenues to access their Apple libraries, primarily leveraging the iCloud for Windows desktop program or Windows 11 integration.
-
Step 1 Install iCloud for Windows
Open the Microsoft Store and download the official "iCloud for Windows" application. Once installed, log in with your primary Apple ID credentials. This baseline software is mandatory to natively view iCloud photos on PC.
-
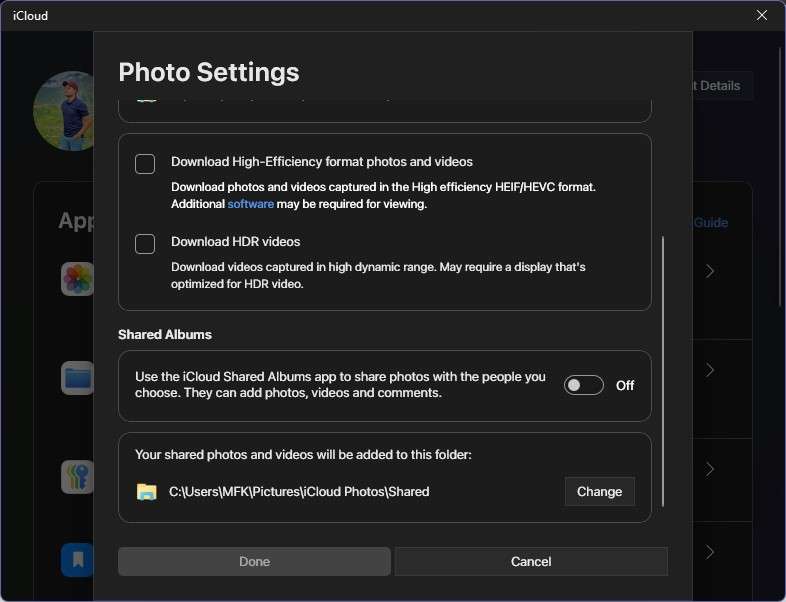
Step 2 Configure Photo Sync Settings
Launch the newly installed program. Tick the checkbox directly beside "Photos." Next, click on "Options" located adjacent to the Photos listing.
-
Step 3 Apply Enhancements
Ensure that "iCloud Photos" is fully selected. If you collaborate with family, tick "Shared Albums" as well. Hit "Done" and subsequently click "Apply." Your Windows system will now initiate syncing with Apple servers.
-
Step 4 Access Your Synced Files
You can browse your imported images using two main avenues:
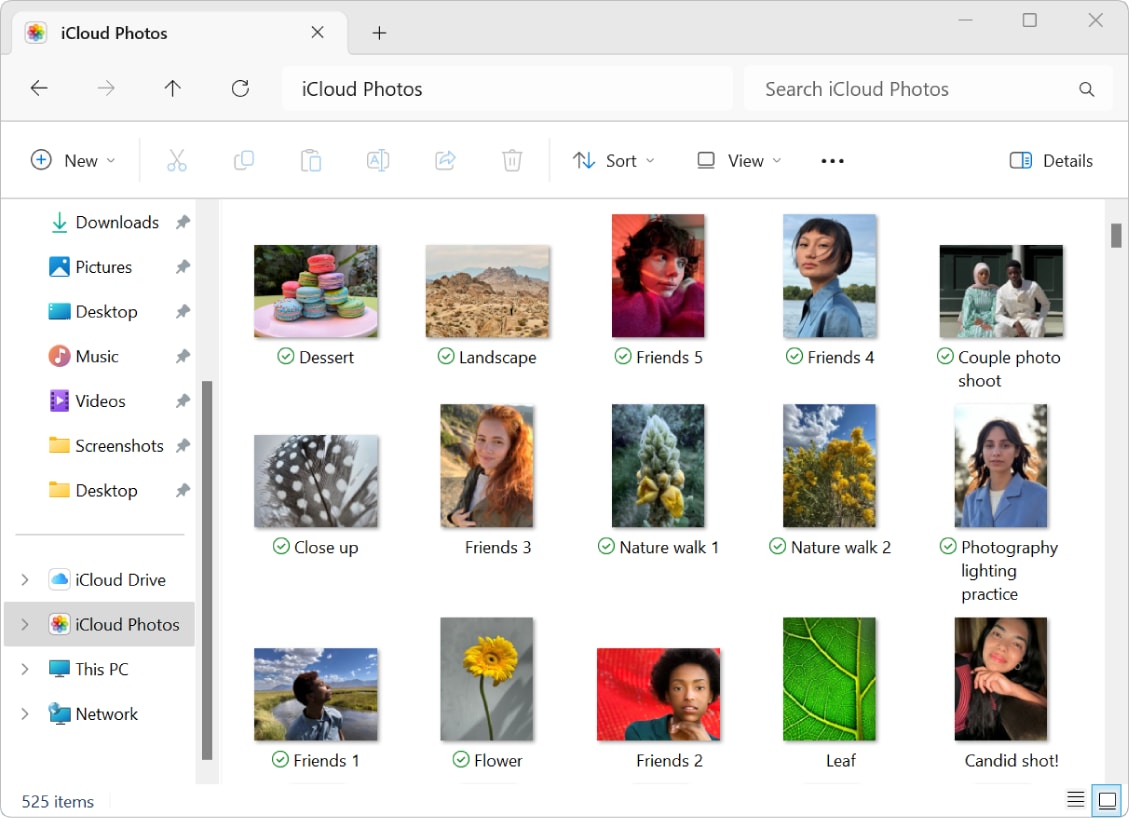
A) Using Windows File Explorer
- Launch standard File Explorer on your desktop.
- Locate and click "iCloud Photos" pinned to the left-hand navigation sidebar (or under Quick Access/Favorites).
- You will spot folders labeled Downloads, Uploads, and Shared. Double-click any thumbnail to view the full resolution version.
B) Using the Windows Photos App
- Open the built-in Windows Photos application.
- Navigate to the Folders section. (Note: On recent Windows 11 updates, iCloud Photos is directly integrated into the sidebar natively).
- Click to seamlessly preview your synchronized cloud albums within the Windows interface.

Part 5. How to See Pictures in iCloud via Browser (Any Device)
If you need a universal method outlining how to see photos saved in iCloud from a public computer, an Android phone, or a friend's tablet, the web browser approach is flawless. No dedicated apps are required.
-
Step 1 Open a Web Browser
Launch any modern browser (Chrome, Safari, Firefox, Edge) on your preferred device.
-
Step 2 Navigate to the iCloud Portal
Type the URL "iCloud.com" into the address bar and press Enter.
-
Step 3 Authenticate Your Account
Input your Apple ID email and password. Since Apple enforces two-factor authentication, check your trusted iPhone or Mac for the 6-digit security code and type it into the browser prompt to securely bypass the lock.
-
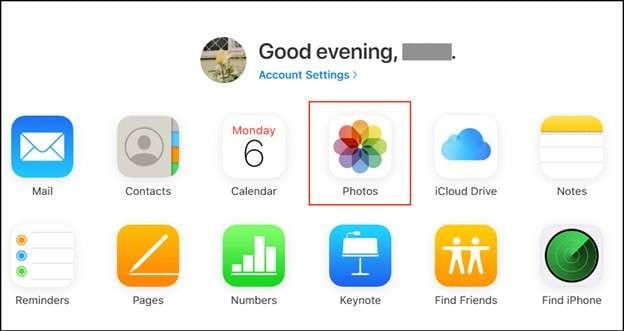
Step 4 Launch the Web Photos App
Once logged into the main dashboard, select the "Photos" icon from the grid of web applications. This grants you complete access to your entire iCloud Photo Library in a layout virtually identical to the iPhone or Mac application.
-
Step 5 Browse, Download, or Delete
Utilize the left sidebar to navigate chronological thumbnails, custom albums, or your Favorites folder. You can click on individual photos to expand them full-screen, download source files to the local machine, share links, or permanently delete unwanted shots.
Part 6. Bonus Tip: Retrieve Lost iCloud Photos Easily
Now that you have a firm grasp on how to view iCloud images, what happens if crucial photos are mysteriously missing from your timeline? It's highly common for files to vanish due to accidental deletion, a corrupted iOS update, or sudden synchronization failure. When native Apple recovery falls short, Dr.Fone - Data Recovery (iOS) serves as the ultimate failsafe.
Why Choose Dr.Fone?
Dr.Fone specializes in rescuing deleted or lost media directly from your iCloud backups without demanding a total factory reset of your device. It safely extracts photographs, videos, and app data while preserving your existing files. Boasting high compatibility, it completely supports devices running iOS 16, 17, and beyond.
 Recovers data after deletion, crashes, or device damage.
- Supports photos, messages, contacts, WhatsApp, and more.
- Supports all major iPhone, iPad, and iPod models.
- Preview and recover only what you need.

Step-by-Step Guide: How to Recover Lost iCloud Photos with Dr.Fone
-
Step 1 Install and Navigate to Data Recovery
First, install the latest version of Dr.Fone – Data Recovery (iOS) on your PC or Mac. Open the application dashboard and navigate directly to "Toolbox" > "Data Recovery."
-
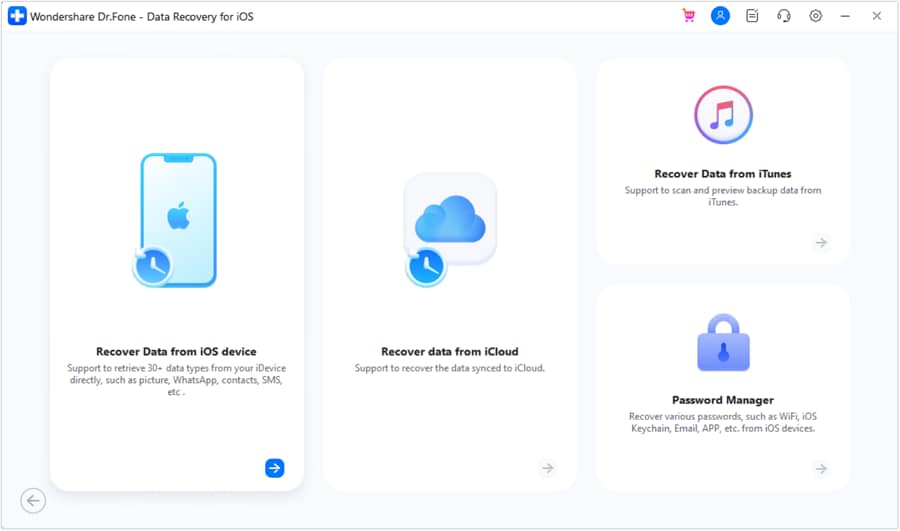
Step 2 Sign Into Your iCloud Backup
Select the module labeled "Recover Data from iCloud Backup." You will be prompted to safely sign in utilizing your Apple ID credentials. Protect your authentication with the standard two-factor verification code.
-
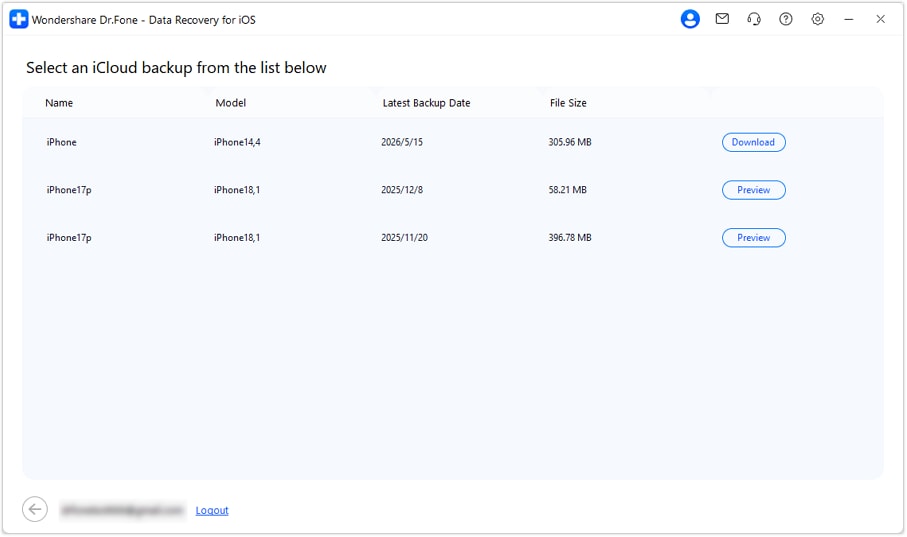
Step 3 Download the Appropriate Backup Set
The software will scan and display a comprehensive list of your available backup files on Apple's servers. Locate the backup file that most accurately matches the relevant timeline or device model where the photos were last seen. Click "Download" next to that specific set.
-
Step 4 Selectively Preview and Recover Files
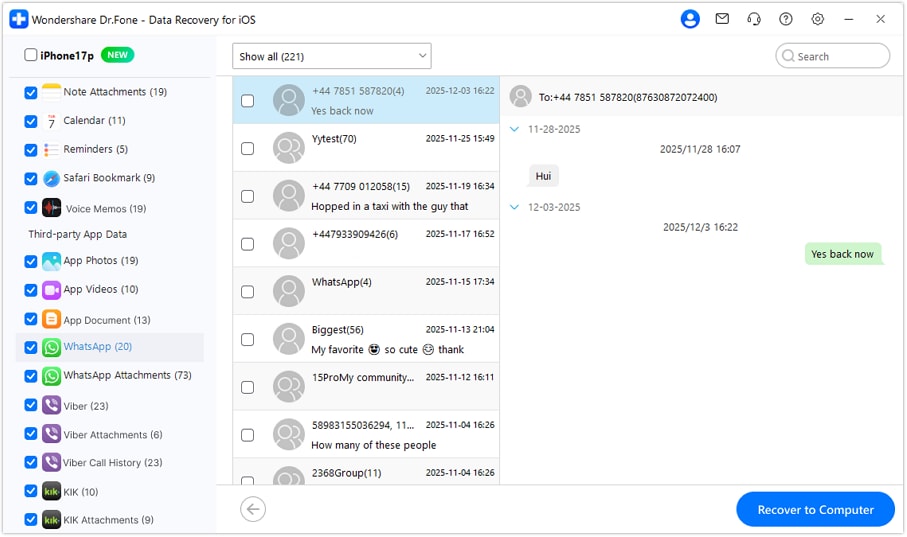
Once Dr.Fone finishes processing the downloaded backup package, it will categorize the extracted data in the left-hand panel. Click on the "Photos" category to populate thumbnail previews on the right screen. Thoroughly review the images, check the boxes next to the content you wish to resurrect, and click "Recover to Computer" to export them locally.




 safe & secure
Part 7. Troubleshooting: When You Can't See Your iCloud Photos
Even when you precisely understand how to view iCloud images, technical anomalies can occasionally prevent files from rendering correctly. If your gallery feels suspiciously empty, execute these proven remedies:
- Verify iCloud Photos Toggle is Active: Double-check Settings (iPhone/iPad) or System Settings (Mac) to ensure "iCloud Photos" is switched ON. Photos strictly cannot upload without this prerequisite.
- Test Your Internet Stability: The synchronization of thousands of media files heavily relies on stable Wi-Fi or high-bandwidth cellular data. Spotty network coverage will stall your downloads.
- Exercise Patience for Large Libraries: If you recently activated the sync feature, just bought a new iPhone 17, or own a massive 100GB photo library, population delays are normal. Allow the device to sync overnight.
- Inspect Remaining iCloud Storage Space: Apple will decisively halt all synchronization once your tier allocation (like the free 5GB limit) is exhausted. You must either upgrade your subscription plan or drastically purge old files.
- Cycle Your Apple ID Authentication (Sign Out/In): Background syncs occasionally experience handshake errors. Fully signing out of iCloud, rebooting the hardware, and signing back in resets the connection tokens.
- Ensure Accurate Date and Time Configurations: Apple server security rejects requests from devices broadcasting incorrect timestamps. Always navigate to Settings and enforce "Set Automatically" to remain aligned.
Conclusion
Gaining full mastery over how to see pictures stored in iCloud empowers you to browse, manage, and safeguard your most treasured memories across any screen size. Whether leveraging native apps on an iPhone or Mac, running the dedicated Windows client, or logging into the universal web portal, the process hinges on correct synchronization setups, network stability, and adequate cloud space. And should disaster strike, tools like Dr.Fone offer unparalleled peace of mind for deep file recovery. Put these comprehensive steps into practice, and ensure your visual history is never truly out of reach.
safe & secureFAQ
-
1. How do I see photos stored in iCloud without an Apple device?
You can easily view your iCloud photos from any non-Apple device by utilizing a standard web browser. Simply navigate to iCloud.com, authenticate securely with your Apple ID credentials, and click on the "Photos" web app to unlock full access to your synced gallery. -
2. Will turning off iCloud Photos delete my pictures?
Disabling iCloud Photos essentially halts new images from syncing. During the process, Apple will prompt you to either download a full-resolution copy of your library to your local hardware or remove the optimized local versions. Regardless of your choice, your master files remain preserved on Apple's cloud servers until manually deleted. -
3. Why are my iCloud photos not showing up on my new iPhone 17?
If you are struggling to view your digital history on a newly purchased device, confirm you are logged in using the identical Apple ID. Navigate to Settings > [Your Name] > iCloud > Photos and verify that "Sync this iPhone" is actively toggled. Also, ensure you have a robust Wi-Fi signal and sufficient battery life for the bulk download to trigger. -
4. Can I retrieve iCloud photos that I permanently deleted from the Trash?
Once images are cleared from the "Recently Deleted" album, they are purged from Apple's servers. However, employing specialized data retrieval tools like Dr.Fone - Data Recovery (iOS) may allow you to extract the raw image traces from your underlying device storage or target older localized backup files before they were completely overwritten.
 Add Wondershare Dr.Fone as a preferred source on Google