How to Root My Android Device in Minutes No Tech Skills Needed

Jun 11, 2026 • Filed to: Device Data Management • Proven solutions
 TL;DR:
Rooting an Android device grants system-level control to remove pre-installed apps and customize performance, which can be executed via PC programs like Kingo Android Root and Root Genius, on-device apps like Framaroot and Universal AndRoot, or Wondershare Dr.Fone specifically for Samsung models.
● Before initiating any method, you must back up your data and enable either USB Debugging for PC connections or Unknown Sources for direct APK installations, acknowledging that the process carries the risk of voiding your warranty or rendering the device unusable.
● Tool requirements vary based on the approach: Root Genius executes on a PC without installation, whereas rooting Samsung devices with Dr.Fone requires a minimum 30% battery charge, OEM Unlocking enabled, and booting into Download Mode to extract and flash patched firmware.
● You can reverse root access to restore factory settings and potentially reinstate the warranty by selecting Full Unroot in the SuperSU app, executing a Complete Uninstall via Magisk Manager, or flashing OEM stock ROM using Odin for Samsung or Fastboot for other brands.
Ask AI for a summary
 ChatGPT
 Perplexity
 Gemini
 Claude
 Grok
Grok
Dr.Fone Basic:
Better Control for Your Phone
Manage, transfer, back up, restore, and mirror your device
It’s a familiar scene — your Android device feels sluggish, bogged down by apps you never use, and customization seems out of reach. You’ve heard the word on the street about rooting and what it could bring – a quicker, more customized experience. I've heard terrifying tales of individuals bricking their Android phones due to rooting. How can I root my Android phone without bricking it or voiding the warranty? Fear not; this post walks you through how to safely and correctly root an Android device.
We will guide you step-by-step, using essential tips, to unlock the true potential of your device, transforming it from ordinary to extraordinary. With the help of essential tips, we will gradually unlock your device's true potential, transforming it from ordinary to extraordinary.
Part 1: What Does Rooting Your Android Mean?
Through the process of rooting, you will have full control over your Android device. Gaining root access enables system configurations that are typically inaccessible, permitting you to circumvent limitations put in place by the device's makers. This level of access allows you to modify or eliminate pre-installed applications, incorporate tailored software applications, and significantly enhance the system performance that is otherwise not achievable with a regular device.
Some argue that these restrictions exist to prevent users from damaging the system. Others believe manufacturers limit access to control functionality and performance. Most likely, the truth can be found somewhere in the middle.
Tip: Before You Root Android Device – Backup First!
Although rooting confers power, it also carries with it certain risk factors. If anything goes wrong, your device could crash or become unusable. Always backup your phone before making any changes. Having a backup assures that you will be able to recover your system in the event that it is required.
Part 2: How to Root Your Android Phone or Tablet
Method 1: Using Kingo Android Root
First, check that your computer has sufficient battery to prevent outages. Then, follow my instructions on how to root your device with the Android software KingoRoot in the safest way possible.
Step 1: Download and install KingoRoot on your PC
To install the Kingo Android Root, a free rooting application, in just a few clicks, go ahead and download and install it. Once installation is complete, click the newly created shortcut to launch the program.
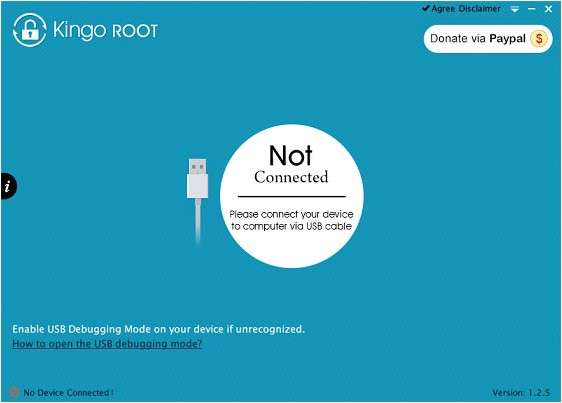
Step 2: Connect your Android phone
Now grab a USB cable and connect your Android device to your PC. Make sure that the USB Debugging mode is turned on in the developer options on your computer.
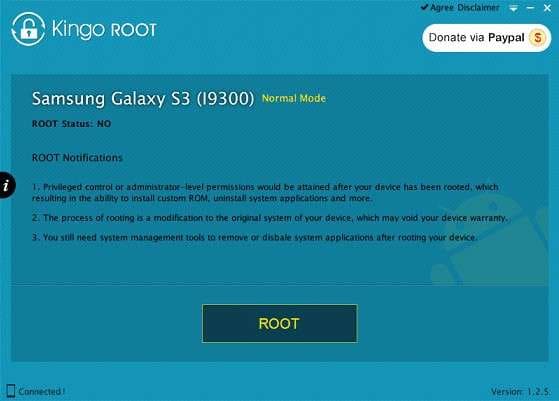
Step 3: Begin the Rooting Process
Carefully read any on-screen instructions. Click “ROOT” to start. Do not touch or disconnect your device while the process runs. It may take a few minutes.
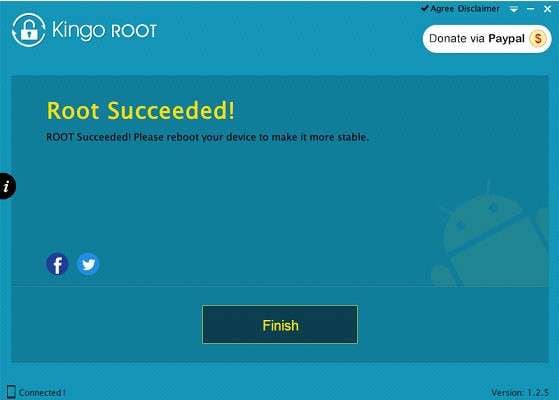
Step 4: Reboot and Verify Root Access
After the procedure is finished, you can restart your device by clicking the "Finish" button. Wait until it fully reboots. You should now see a SuperUser app, confirming that how to root Android device was successful.
Method 2: Using Root Genius
Another effective Android root tool is Root Genius. It offers a simple one-click root Android solution without requiring installation. With Root Genius, you can root Android tablet or phone quickly and gain full control over your device. To free up storage space, you can delete built-in applications and install new operating systems after rooting your device. To utilize it in a secure manner, follow these steps.

Step 1: Download Root Genius and Connect Your Device
Go to the official Root Genius website and download the software. You are free from the burden of installation and need only to execute the program. To proceed, please connect your Android device and your personal computer using a USB cable.
In the unfortunate case of an unsuccessful connection, kindly check if the USB Debugging option is activated on your tablet or Android device. Click Next once your device is detected.
Step 2: Start the Rooting Process
In the main window, check the box confirming you accept the terms. Then, click “Root it” to begin.
While rooting, do not unplug or move your device. The process may take a few minutes. When everything is finished, your Android smartphone will have root access, which will give you the ability to fully configure it.
Part 3: How to Root an Android Phone or Tablet without a PC
Users can root an Android device without a PC through apps such as Framaroot and Universal Androot. The solution usually exists and can be time-consuming. Note that while this may be the case, it is important to note that this may void your warranty and come with some risks.
Method 1: Using Framaroot
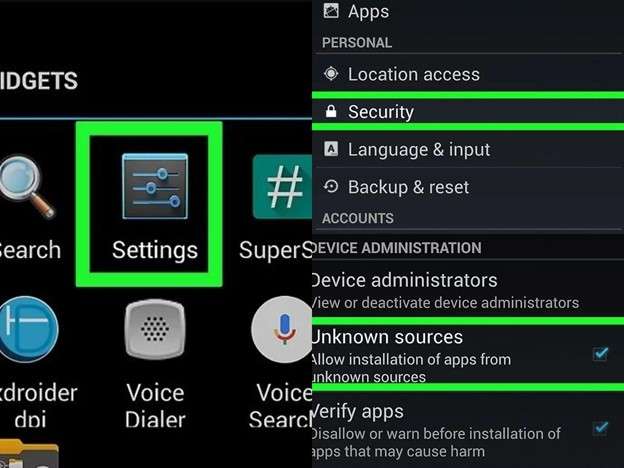
Step 1: Enabling Unknown Sources for App Installation
Open Settings > Security or Biometrics & Security. Allow app installs from unknown sources based on your Android version.
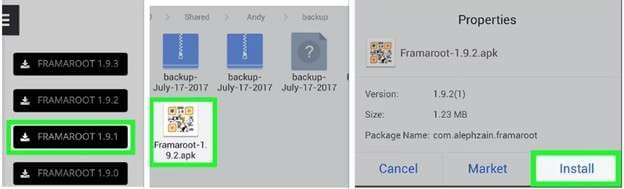
Step 2: Download and Install Framaroot
Visit Framaroot Official Website and download the APK. Open the Downloads folder and tap the Framaroot APK. Tap INSTALL, then OPEN once installed.
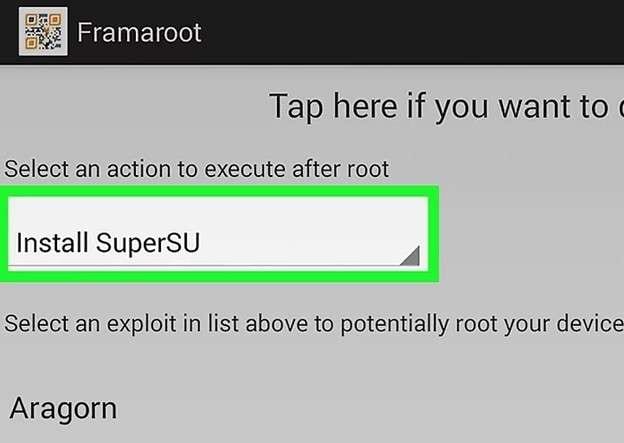
Step 3: Start Rooting Process
If your device is compatible, tap Install SuperSU in the Framaroot menu. Wait for the process to complete. If you see an error, try a different method.
Step 4: Restart and Verify Root Access
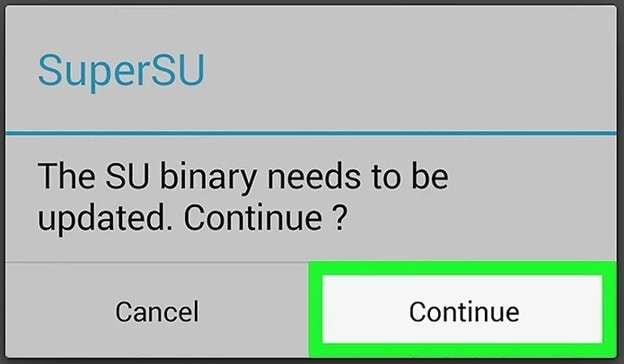
Reboot your Android phone or tablet after successful rooting. Open the SuperSU app from your app drawer. If prompted, tap Update Binaries to finalize the root process.
Method 2: Using Universal AndRoot
Another way to root Android device without a PC is by using Universal Androot. Android Root App is fully working fine for numerous handsets. Nonetheless, the user has to take the subsequent actions to confirm if it works out for them.
Step 1: Enable Unknown Sources
Open Settings > Security or Biometrics & Security. Enable Unknown Sources to allow third-party app installations.
Step 2: Download and Install Universal Androot
Visit Universal Androot Official Site. Scroll down and tap Download Universal Androot APK. Open the Downloads folder and tap the APK file. Tap INSTALL, then OPEN once installed.

Step 3: Start Rooting Process
Choose your Android version from the drop-down menu. Tap Root or unroot to begin. Wait for the process to complete.
Step 4: Verify Root Access
If successful, a confirmation message will appear. If an error occurs, try again or use another best root Android method.
Part 4: How To Root Samsung Phones Using Wondershare Dr.Fone
If you want to root Android device and remove system restrictions, Dr.Fone offers a safe and reliable method. With Wondershare Dr.Fone’s Android root feature, you can root a Samsung phone and tablet easily while maintaining security. Follow these steps carefully to ensure a smooth process.
Wondershare Dr.Fone
One-Stop Solution to Manage and Transfer Data on Android Phone
- Transfer files between Android and computer, including contacts, photos, music, SMS, and more.
- Manage, export/import your music, photos, videos, contacts, SMS, Apps, etc.
- Transfer iTunes to Android (vice versa).
- Manage your Android device on the computer.
- Fully compatible with the newest Android OS.


4.1 Prepare Your Samsung Device for Rooting
1. Check Device Compatibility and Backup Data
Ensure your Samsung phone or tablet is supported. Unlocked devices work best for rooting. Charge your device to at least 30% to avoid interruptions. Backup your data to prevent loss.
2. Download Dr.Fone Software
Visit the Dr.Fone website and download the tool. Open the software and select the Root function.

3. Enable USB Debugging
Connect your Android device via a USB cable. Enable USB Debugging
Open Settings > About Device. Tap Build Number seven times. Return to Developer Options and enable USB Debugging.

4.2 Step to Root Samsung Device with Dr.Fone
Step 1. Enable OEM Unlocking
Open Settings > Developer Options. Toggle OEM Unlocking and confirm.

Step 2. Enter Download Mode
Follow the method based on your Samsung model:
- Devices without Bixby: Power off, then use the required button combination.
- Devices with Bixby: Hold Volume Up (+) and Volume Down (-) together.
- Devices with Home Button: Press the right combination, then select Next.

Step 3. Confirm Device Information
Ensure the correct model number and firmware details to avoid issues.

Step 4. Download and Install the Latest Firmware
Download the latest firmware package. Follow the on-screen steps to enter Download Mode again.
Step 5. Extract and Upload Firmware
Locate the downloaded firmware. Extract the files and click Start to begin flashing.
Step 6. Complete the Flashing Process
Wait for your Samsung device to restart. Follow on-screen instructions to finish the setup.

Step 7. Install Patching Tool
Run the patching tool to prepare for rooting. Download the patched file to your computer.
Step 8. Upload Patched Files and Apply Updates
Upload the four necessary files. Drag and drop the patched AP file from the previous step. Start the update process and let your device restart.

Step 9. Install Root Management App
Scan the QR code displayed on Dr.Fone to install the root manager. Your Samsung phone or tablet will restart automatically. Once rebooted, your device is successfully rooted.

4.3 Why Use Dr.Fone Root for Samsung Root?
With Dr.Fone, you gain complete control over your Android device. Rooting allows you to:
- Remove bloatware and free up storage
- Improve performance and battery life
- Customize your Samsung device without limitations
- Use apps that require root access
This one-click root Android method makes rooting easy and safe. If you’re looking for a trusted Android root tool, Dr.Fone is an excellent choice.
Part 5: How to Unroot Your Android Device
If you ever need to remove root access, there are a few simple ways to unroot Android device. Popular methods include SuperSU, Magisk Manager, or flashing stock firmware. Follow these steps carefully.
Method 1: Unroot Using SuperSU
SuperSU is a utility for administering root privileges on your device. Here’s how to use it for unrooting:
- Install and open SuperSU.
- Go to Settings and tap Full Unroot.
- Follow the on-screen instructions.
- Restart your Android phone to complete the process.
Method 2: Unroot Using Magisk Manager
Magisk Manager allows for easy systemless unrooting.
- Install and open Magisk Manager.
- Navigate to the Uninstall section.
- Select Complete Uninstall.
- Follow the prompts and reboot your device.
Method 3: Unroot by Flashing Stock Firmware
Restoring stock firmware removes root access and restores factory settings.
- Go to your device manufacturer's page and download the OEM stock ROM.
- Use Odin (for Samsung) or other suitable tools like Fastboot (for other brands) to install the firmware.
- Reboot your device after the process is done.
Once Android device root is undone, your phone returns to its original state. This may also restore your warranty and fix any issues caused by rooting.
Conclusion:
In its most fundamental form, rooting means gaining unrestricted access to the operating system of an Android device. It has its benefits, such as unrestricted access to the device, altering the device's default settings, and even increasing its performance. However, it comes with certain costs which negates its advantages. But it’s not without risks. Whether you want deeper customization, better battery life, or access to apps requiring root, choosing the right method matters. Some prefer one-click root Android solutions, while others follow detailed steps for complete control.
For Samsung users, Dr.Fone Android Root simplifies the process, ensuring a safe and structured approach. If you ever wish to revert changes, unrooting is just as accessible. Your device should work for you, not the other way around—rooting lets you decide how.
Dr.Fone Basic:
Better Control for Your Phone
Manage, transfer, back up, restore, and mirror your device


Android Root
- Generic Android Root
- 1. Text Message Apps for Android
- 2. Root Android ONE Devices
- 3. Best Android Root File Managers
- 4. Get Root Access with Computer
- 5. Delete Preinstalled Apps on Android
- 6. Get Free In-APP Purchase
- 7. Wifi Hotspot Apps without Rooting
- 8. Get Root Access on Android
- 9.Root Android Devices
- 10.Root Android Phones and Tablets
- 11.Root Smartphone on Android
- 12.Why Root Android and How to Root it
- 13.Root Android 4 Series in Two Ways
- 14.Tools to Root Android Online
- 15.Root Android without PC
- Specific Android Root
- 1. Root Samsung Galaxy S7& S7 Edge
- 2. Root LG Devices with Root Script
- 3. Samsung Root Software to Root
- 4. Root Motorola Devices
- 5. 2 Solutions to Root ZTE Devices
- 6. Solution to Root Huawei P9 Safely
- 7. 2 Methods to Root Nexus 7 Easily
- 8. Solutions to Root Sony Devices
- 9. Root Any HTC Device in One Click
- Android Root Tools
- ● Manage/transfer/recover data
- ● Unlock screen/activate/FRP lock
- ● Fix most iOS and Android issues
- Free Download Free Download Free Download


Alice MJ
staff Editor