100% Security Verified | No Subscription Required | No Malware

 :
: 
 ChatGPT
 Perplexity
 Gemini
 Claude
 Grok
Grok
Imagine unboxing a powerful new Android device, only to find it cluttered with pre-installed "bloatware" that eats up storage and drains your battery. For many users, the standard Android experience feels restrictive, limiting their ability to truly customize performance or access advanced system tweaks. Whether you want to uninstall stubborn factory apps or optimize CPU scaling for better speed, gaining administrative privileges is the key.
The good news is that the days of needing complex command-line setups are over. You can now root your Android device without a PC using simple, one-click mobile applications. This comprehensive 2026 guide explores the most effective methods to root your phone without a PC, helping you regain full control over your hardware safely and efficiently.
In this article
Part 1. Understanding Rooting and Key Technical Terms
Before you dive into the "how-to," it is vital to understand what happens under the hood when you root your device without a PC. Rooting is essentially the process of attaining "Root Access" to the Android operating system, which is based on Linux.
1-1. What Does Rooting Actually Mean?
Rooting provides you with administrative privileges, similar to the Administrator role in Windows or "jailbreaking" on iOS. It bypasses manufacturer-imposed software limitations. This allows for deep-level modifications such as flashing custom kernels, changing system fonts, or using specialized Android rooting apps that require access to the core file system. For anyone searching for how to root my device without pc, this is the first step toward total digital sovereignty.
1-2. Essential Rooting Terms for 2026
1. Bootloader
The foundational software that starts every time you power on. Most manufacturers lock this to prevent unauthorized OS changes. Rooting often requires an unlocked bootloader.
2. Recovery Mode (TWRP)
A separate bootable partition used for maintenance. Third-party tools like TWRP are used to flash root files (like Magisk) directly onto the system.
3. Superuser (Su)
The binary that manages which apps are allowed to have root permissions. Once you root your phone without a PC, a Superuser app will act as the gatekeeper for system security.
Part 2. 5 Best Methods to Root Android Without a PC
While there are dozens of tools claiming to work, only a few have stood the test of time. Below are the most reliable ways to answer how to root android without pc in 2026.
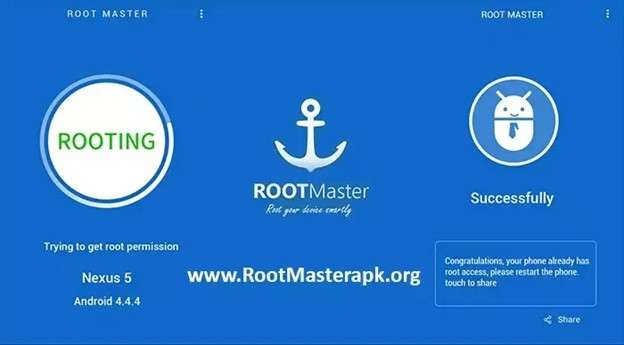
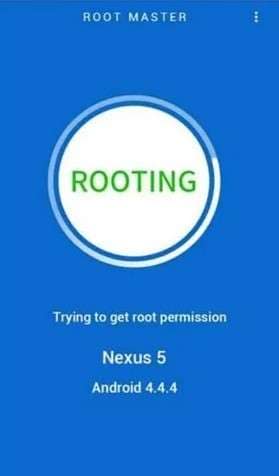
2-1. Rooting via Root Master (One-Click)
Root Master is legendary in the modding community for its high success rate across older and mid-range Android versions. It is designed specifically for those who want to root my phone without pc with zero technical background.
Step 1Install the APK
Download the Root Master APK and ensure "Unknown Sources" is enabled in your security settings to allow the installation.
Step 2Initiate Detection
Open the app and tap the central "Start" button. The app will automatically analyze your device model and Android version.
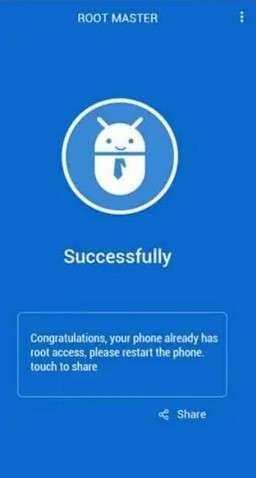
Step 3Execute Root
Tap "Root Now." The device may reboot. Once finished, you will see a success screen confirming administrative access.
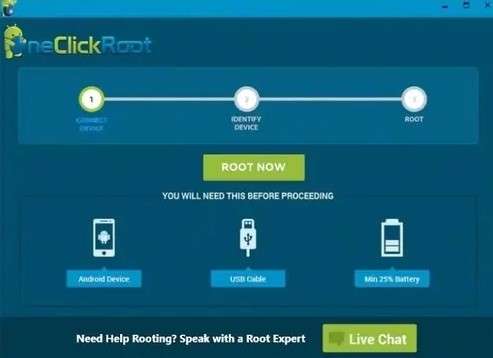
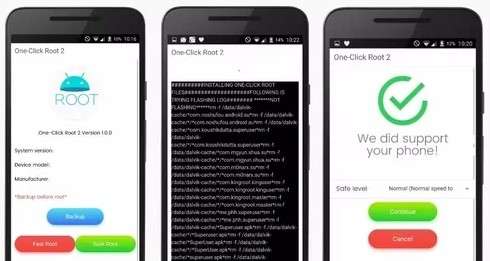
2-2. Using One Click Root for Beginners
If you are looking for a more polished experience, One Click Root offers a streamlined interface that handles the complexities of how to root android device without pc automatically. It is particularly effective for users who want to block system-wide ads and improve battery efficiency.
- Extremely simple UI for novices
- Fast processing speed
- Built-in unrooting option
- May not support the latest security patches
- Requires a stable internet connection
To use it, simply download the APK, choose the "Fast Root" option, and allow the app to run its script. Once done, restart your device to finalize the changes.
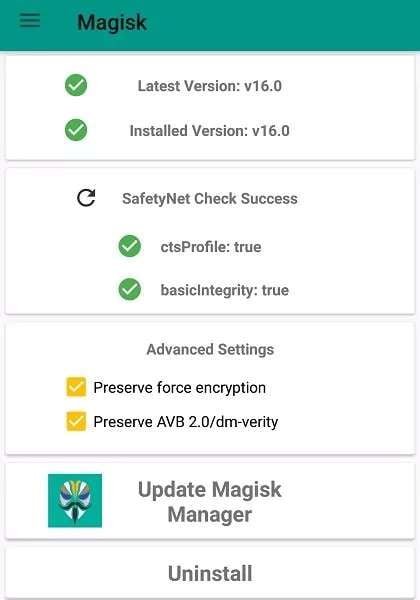
2-3. Systemless Root with Magisk
Magisk is the go-to tool for modern devices (Android 11, 12, and beyond). It offers a "systemless" root, meaning it doesn't modify the /system partition directly, which allows you to still use apps that normally block rooted users, like Google Pay.
Step 1Flash TWRP
Boot into TWRP Recovery. This is usually done by holding Volume Up + Power during startup.
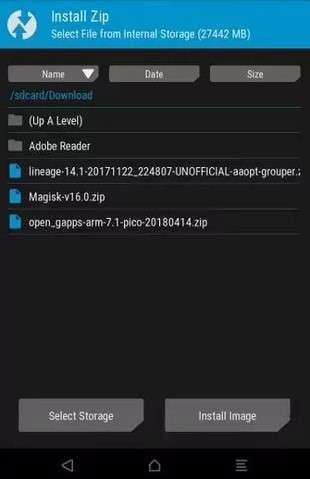
Step 2Install Magisk ZIP
Tap "Install," locate the Magisk ZIP file you downloaded, and swipe to confirm the flash.
Step 3Confirm Status
Reboot to the system and open the Magisk App. It should show "Installed" with the current version number.

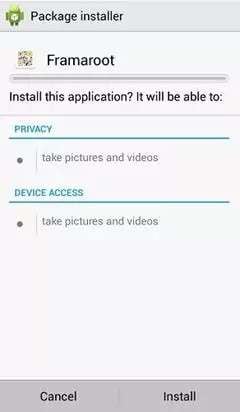
2-4. Fast Access with Framaroot
Framaroot uses specific exploits (named after Lord of the Rings characters) to root your device without a PC. It is exceptionally fast and often works on devices where others fail.

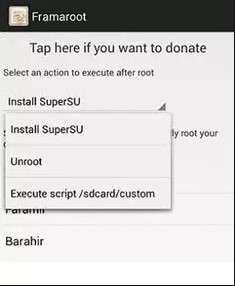
Step 1Select Action
Open Framaroot and select "Install SuperSU" from the dropdown menu.
Step 2Pick Exploit
Choose an exploit like "Boromir" or "Faramir." If successful, a pop-up will appear confirming root success.
2-5. High Compatibility with KingRoot
KingRoot is perhaps the most famous app for how to root android without pc. It supports over 10,000 devices and is constantly updated. However, be aware that it may void your warranty instantly.

Step 1Run One-Click Root
Tap the big blue button labeled "Try to Root." The app will cycle through various cloud-based exploits.
Step 2Verify Completion
Once you see the green checkmark, your phone is rooted. You can verify this with any "Root Checker" app from the Play Store.

Part 3. Pro Tip: Rooting Samsung Devices with Dr.Fone
While the APK methods above are convenient, Samsung users often face tighter security due to Knox. If the APK methods fail, Wondershare Dr.Fone provides a robust, professional-grade solution to root Samsung phone models using a secure computer interface.

 Effortlessly manage data through preview, delete, export, etc.
- Transfer all data between devices.
- Robust backup solutions for reliable data protection.
- Mirror screens to PC for meetings, teaching, and control.

Using Dr.Fone ensures that your device's firmware remains stable while granting you the access you need.
Step 1Connect and Enable Debugging
Launch Dr.Fone on your PC and connect your Samsung. Go to Settings > About Device and tap Build Number 7 times to enable Developer Options, then toggle on USB Debugging.
Step 2Match Firmware
Select your exact Samsung model to ensure the correct rooting package is downloaded. This prevents system mismatches.
Step 3Finalize Root
Follow the on-screen instructions to enter Download Mode and patch your AP file. Once the device reboots, you will have successful root access.


Conclusion
Rooting your Android device in 2026 is the ultimate way to unlock hidden features, remove bloatware, and enhance hardware efficiency. Whether you choose to root android device without pc using one-click apps or use a professional tool like Dr.Fone for more complex Samsung models, the benefits of administrative control are immense. Just remember to prioritize security and always back up your files before beginning your journey into system modification.


FAQ
1. Is it safe to root my Android device without a PC?
Rooting using APKs is generally safe if you use reputable tools like KingRoot or Magisk. However, there is always a slight risk of system instability or voiding your manufacturer warranty.2. Can I unroot my phone if I change my mind?
Yes, most modern rooting apps like SuperSU or Magisk include a simple "Unroot" or "Uninstall" button within their settings that restores your phone to its factory state.3. Will rooting delete my photos and apps?
The rooting process itself usually doesn't wipe data, but unlocking the bootloader (a necessary first step for some devices) often triggers a factory reset for security reasons.4. Does rooting allow me to install custom ROMs?
Absolutely. Once you have rooted your device without a PC, you can install custom recoveries like TWRP to flash entirely new operating systems and features.
 Add Wondershare Dr.Fone as a preferred source on Google