How to Transfer Files from an iPad to PC

Jul 12, 2024 • Filed to: Manage Device Data • Proven solutions
Transferring files like photos, videos, and documents from your iPad to a PC is simple with the right method. Whether you want to copy files over a USB cable, use cloud storage services, or utilize a dedicated app, you have several options to move your iPad data to a PC. This guide will walk through the various ways to transfer files from iPad to PC, allowing you to easily get documents, media, and other content off your iPad for access on another device. Read on to learn how to quickly move files from iPad to PC using built-in tools, third-party apps, and wireless sharing.

- Part I: How To Transfer Files From iPad To PC With iTunes
- Part II: How To Transfer Files From iPad To PC With File Explorer
- Part III: How To Transfer Files From iPad To PC With iCloud
- Part IV: How To Transfer Files From iPad To PC With Email

- Part V: Recommended - How To Transfer Files From iPad To PC With Dr.Fone
- Conclusion
Part I: How To Transfer Files From iPad To PC With iTunes

Using iTunes to move files and photos from your iPad to your PC is one of the more official transfer methods recommended by Apple. While not everyone loves having to use iTunes, it can get the job done.
Let's start with transferring general files like documents or videos using iTunes:
Step 1: First, connect your iPad to your PC using the charging cable that came with it. This will create a direct wired connection. If you don't already have iTunes, download it from the Microsoft Store or Apple's website and open it.
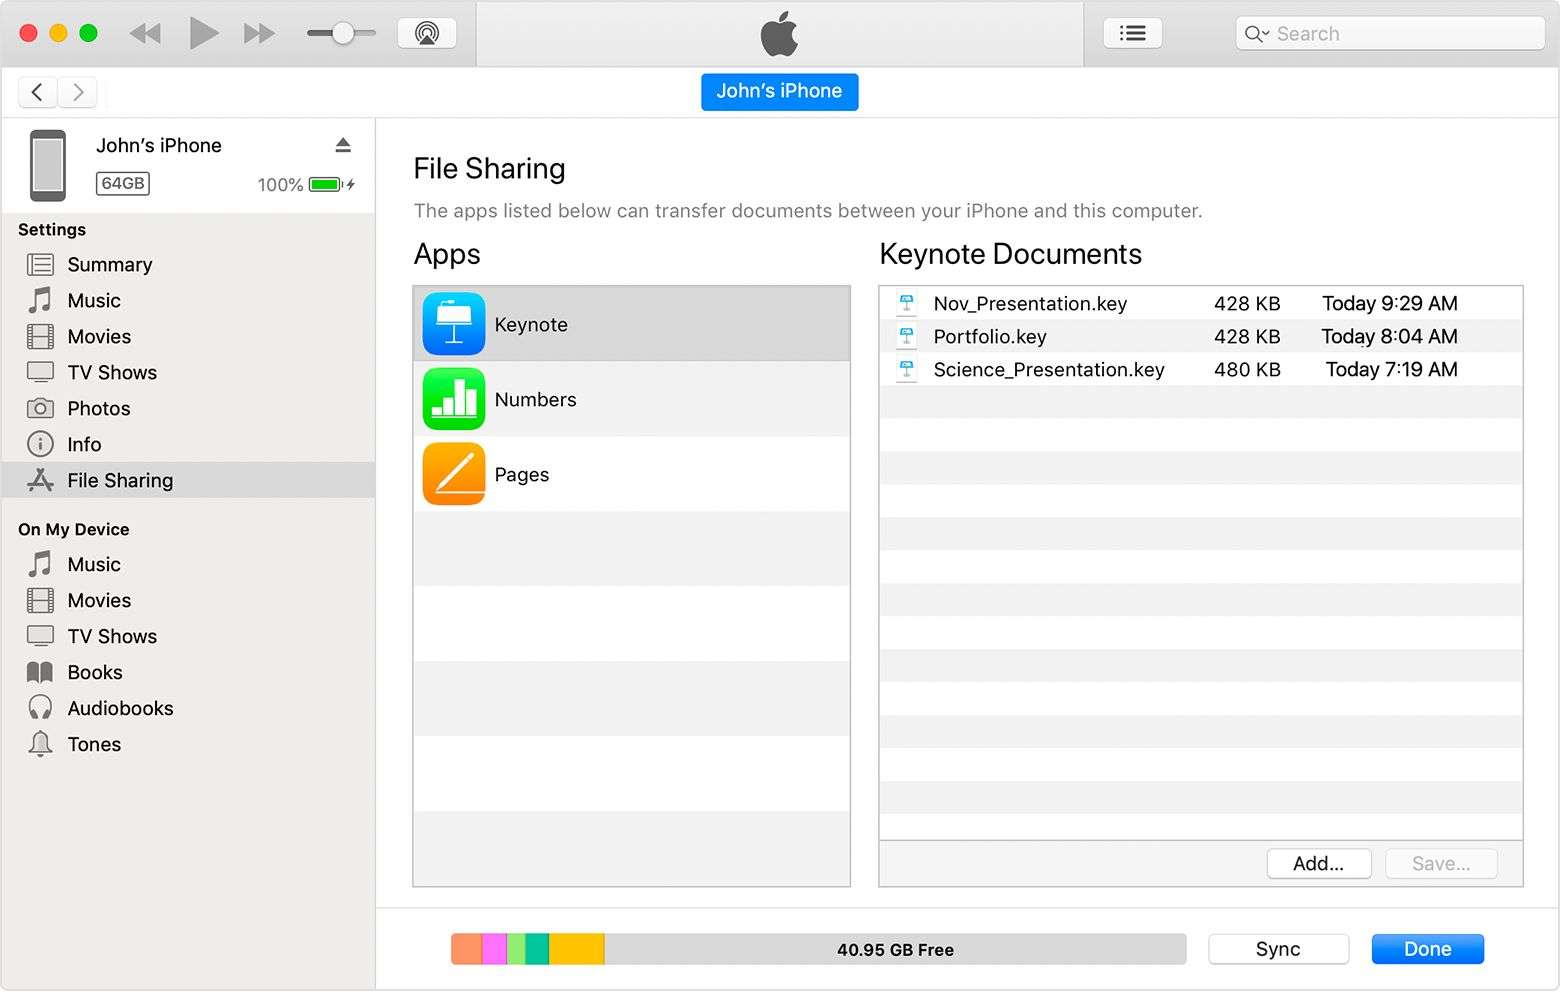
Step 2: In iTunes, click on the little iPad icon near the top left. This will show you all the content synced to your device.

Step 3: On the left sidebar, click on File Sharing. Here, iTunes will display a list of apps on your iPad and their associated files.
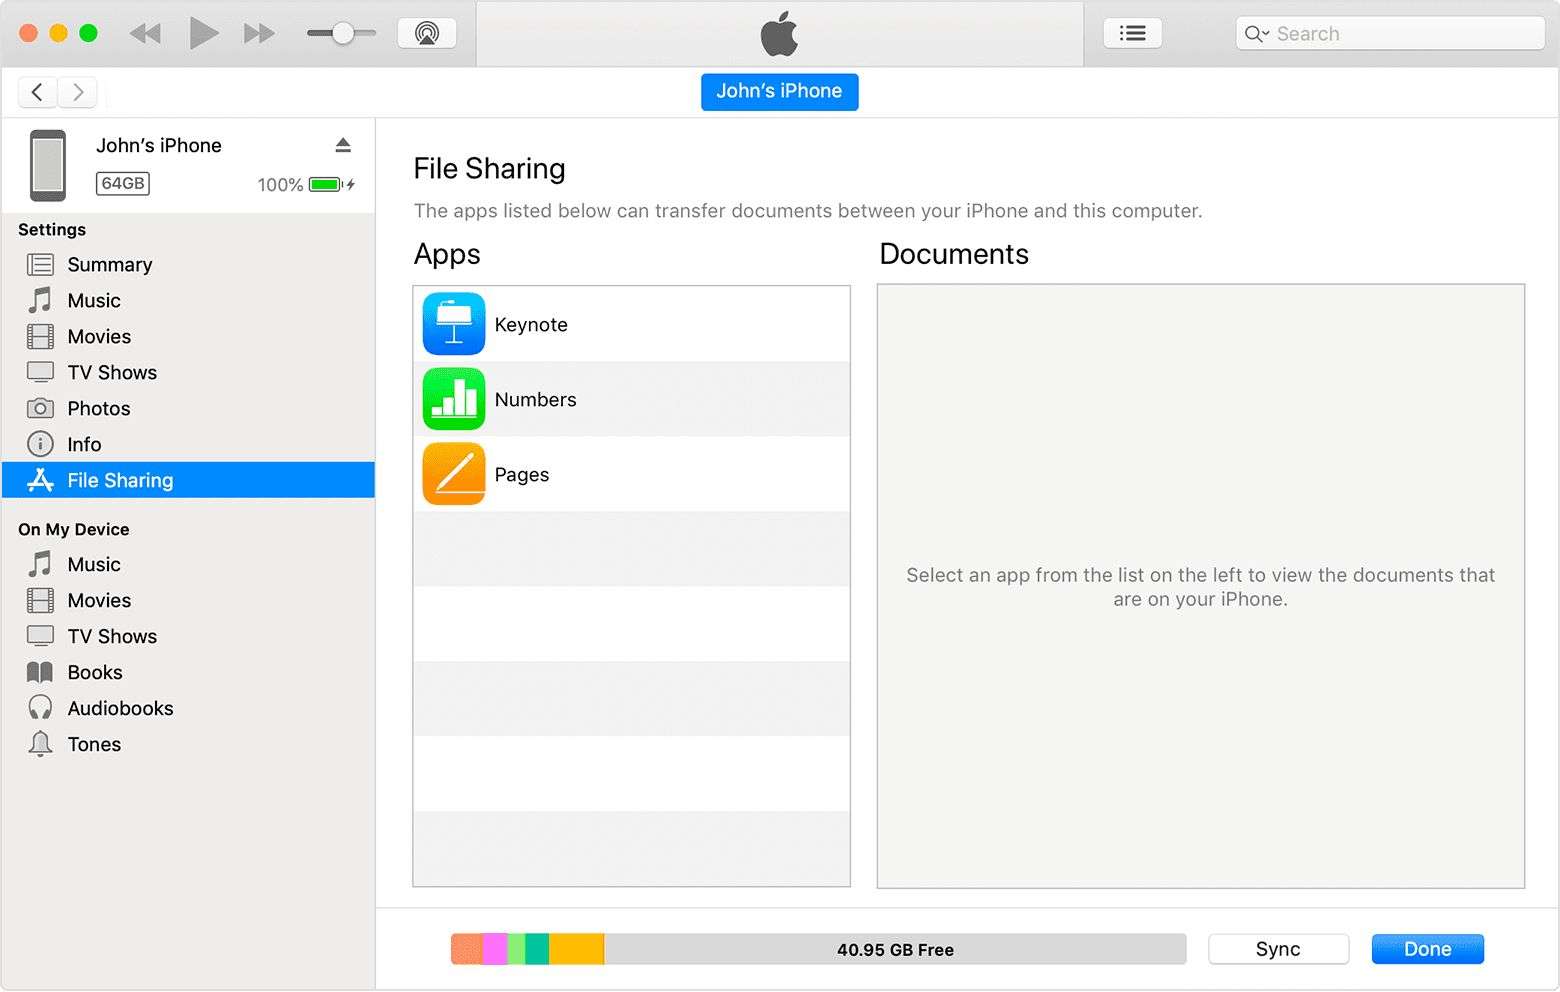
Step 4: Scroll and find the file you want to transfer to your PC. Click on it, then hit Save. Choose a save location on your computer - like your Documents folder. And that's it! The file will copy from your iPad to your PC.
Keep in mind this iTunes method only works for files associated with an iPad app. So if you want to move a file from your PC to your iPad later, make sure that app is installed.
Part II: How To Transfer Files From iPad To PC With File Explorer

If you don't want to use iTunes, the File Explorer method is an easy way to copy photos off your iPad and onto a PC. This makes your iPad show up just like an external camera or SD card in File Explorer for direct file transfers.
Follow these steps:
Step 1: First, make sure you have iTunes installed on your PC, even if you don't plan to actively use it. This allows Windows to recognize your iPad.
Step 2: Connect your iPad to your PC using the charging cable that came with your iPad. This creates a direct wired connection between the devices.
Step 3: Open File Explorer on your Windows PC. This is the app you use to browse folders and files on your system.
Step 4: In the sidebar, click on This PC. Here you will see a list of drives and devices attached to your computer.
Step 5: You should see your iPad listed under Devices with a name like "Apple iPad". Click on it.
Step 6: A prompt will pop up on your iPad asking if you Trust this computer. Tap Allow to give access.
Step 7: Now in File Explorer, click on Internal Storage, then DCIM. This is where your iPad stores photos.
Step 8: You'll see your photos divided into folders by date. Click to open one.
Step 9: Select the photos you want to transfer and copy them over to your PC using copy/paste or drag and drop.
And that's it! By using File Explorer, you can easily move photos from your iPad to your PC without needing iTunes at all. Just connect the devices and browse your iPad like external storage. This method works for any files you need to transfer, not just photos. Give it a try for easy iPad to PC file management!
Part III: How To Transfer Files From iPad To PC With iCloud

iCloud provides an easy and seamless way to move files between your iPad and PC. With just a few taps, you can upload content from your iPad to iCloud, then download it to your PC.
Step 1: To start, open the Files app on your iPad and navigate to the files or photos you want to transfer. Tap and hold to select them, then choose Copy.
Step 2: Next, open the iCloud Drive folder in Files. Tap an empty area and select Paste to copy the files there. This uploads them to your iCloud storage.
Keep in mind the free iCloud tier only includes 5GB of space, so large transfers may require an upgraded iCloud+ subscription. Also, use WiFi for large uploads to avoid cellular data overages.
Step 3: Once your files finish uploading, go to iCloud.com on your PC or use the iCloud for Windows app. Navigate to iCloud Drive to see your files now on the cloud.
Step 4: Select the files and click Download. Choose where to save them on your PC - like in your Documents folder. Your files are now transferred!
Step 5: For photos specifically, enable iCloud Photos on your iPad in Settings. This automatically uploads new pictures you take to iCloud.
Step 6: On your PC, go to iCloud.com and click Photos to access your iCloud photo library. Click Download on any images you want to save to your PC.
You can also transfer files the other way, from your PC to iPad via iCloud.
Step 1: On iCloud.com or the iCloud for Windows app, drag and drop files into iCloud Drive or use the Upload icon to select files to copy from your PC.
Step 2: The files will now be available in the iCloud Drive folder on your iPad's Files app. Tap to select them, then choose Copy.
Step 3: Go to Internal Storage and Paste to download the files to your iPad.
iCloud gives you a convenient wireless way to transfer both files and photos seamlessly between your iPad and Windows PC. Just be mindful of storage limits on the free iCloud tier when transferring large amounts of data.
Part IV: How To Transfer Files From iPad To PC With Email

Emailing yourself files and attachments can be a quick and easy way to transfer content from your iPad to your PC. As long as the files are under the attachment size limit, you can move them between devices wirelessly.
Here are the steps:
Step 1: On your iPad, open the file you want to transfer in its app - like a photo in the Photos app or a PDF in Files. Tap the Share icon, which looks like a box with an arrow.
Step 2: Select Mail from the share menu. This will open a new email with that file attached.
Step 3: In the To field, enter your own email address that you can access on your PC. You can also enter additional recipients if desired.
Step 4: Type a subject line and body text for the email if you want. Then hit Send.
Step 5: Open the Mail app on your PC and login to the same email account you used on your iPad.
Step 6: Open the email you sent yourself containing the iPad attachment.
Step 7: In your email app, look for the attachment icon and double click to download the file from the email to your PC.
Step 8: Choose where to save the downloaded file on your computer - like your Documents folder.
And that's it! The file will now be available on your Windows PC. Most email services have file size limits around 25-35MB, so this works best for transferring smaller files like documents, photos and videos.
Part V: Recommended - How To Transfer Files From iPad To PC With Dr.Fone
Dr.Fone Basic
Backup & Restore iOS Data Turns Flexible.
- One-click to back up the whole iOS device to your computer.
- Preview and selectively restore files to any device with simplicity.
- Export what you want from the backup to your computer.
- Your device's data remains intact during the restore process.
- Supports iPhone, iPad, iPod touch, and the latest iOS version.


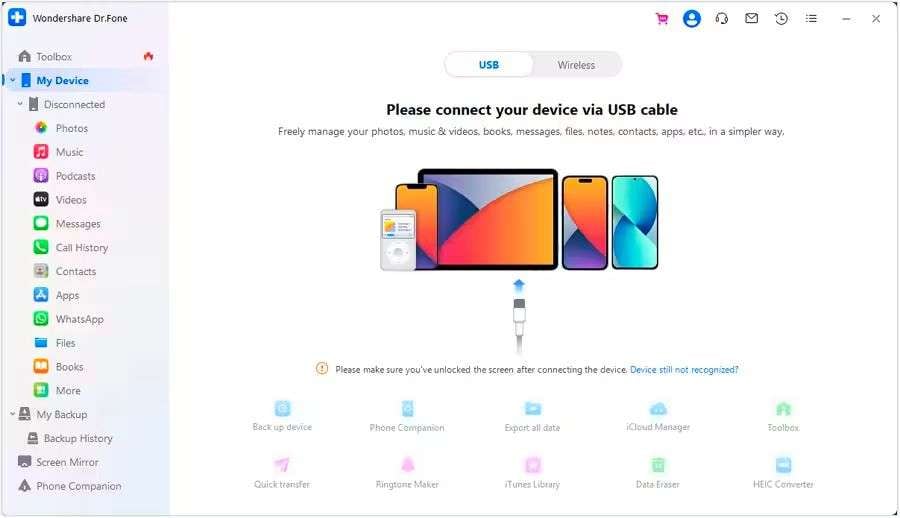
Step 1: First, download and install the Dr.Fone app on your computer. Launch the app when ready.
Step 2: Connect your iPad to the PC using the USB charging cable. Dr.Fone will detect your device.
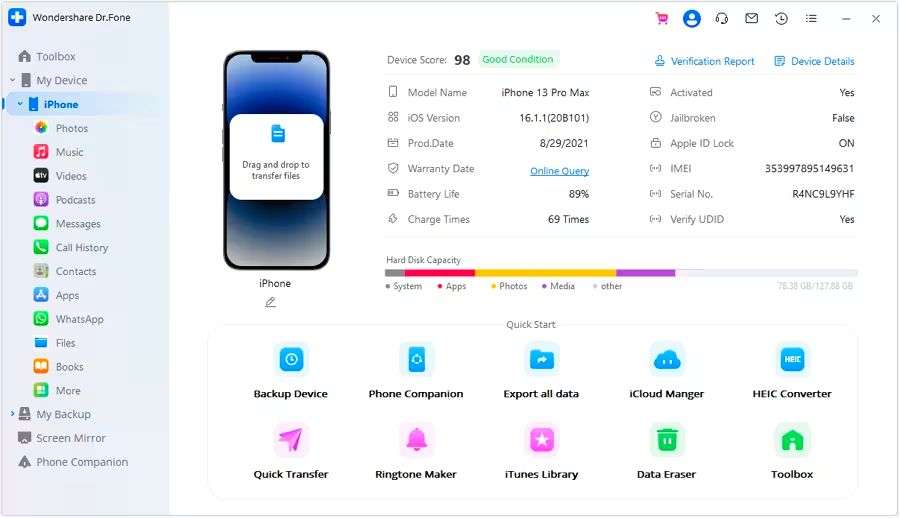
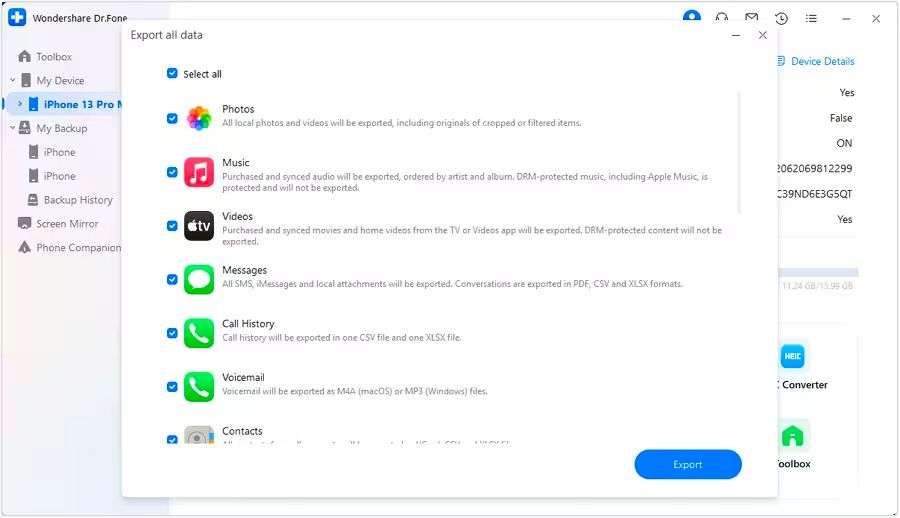
Step 3: On the Dr.Fone home screen, click "Export Data". This opens the data transfer screen.
Step 4: Select the types of files you want to transfer - like photos, messages, contacts etc. Check them all for a full backup. Click "Export" in the bottom right.
Step 5: Choose a folder on your PC to save the iPad backup files to. An external hard drive works great for extra storage space.
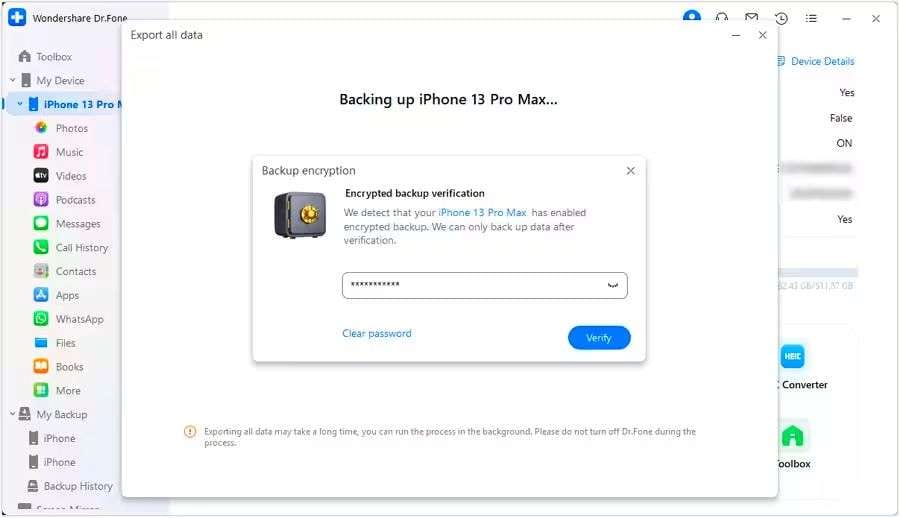
Step 6: Dr.Fone will now ask you to create a password to encrypt the backup. Enter a password you'll remember and click Done.
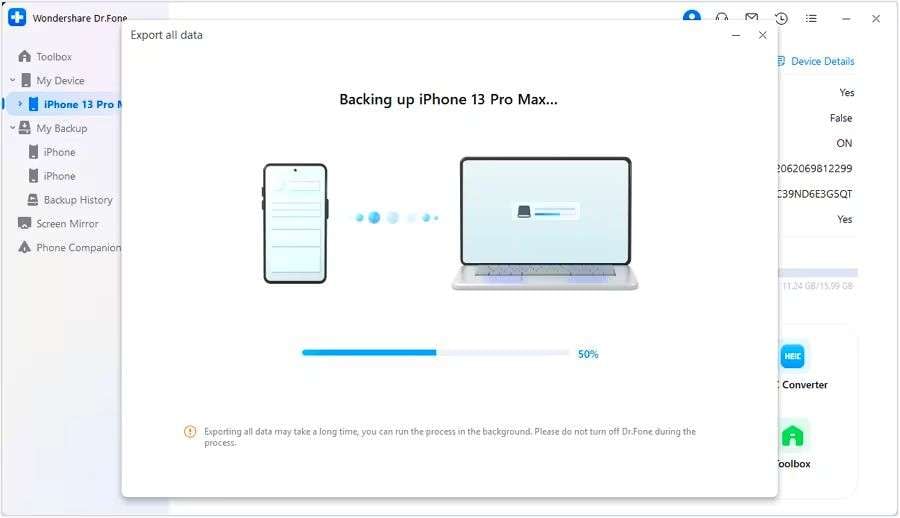
Step 7: The app will start transferring copies of your iPad data to your PC. The progress will display on screen.
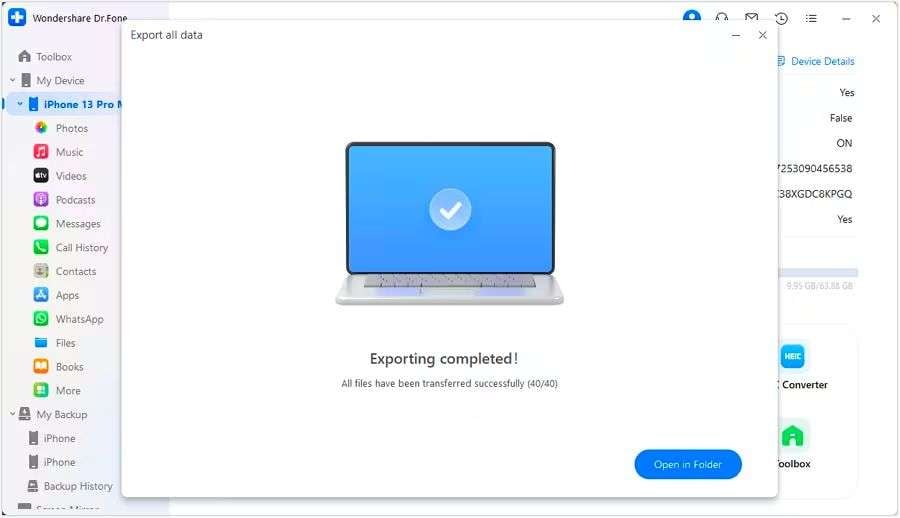
Step 8: Once completed, Dr.Fone will confirm the iPad to PC file transfer was successful. Click "Open" to access the files on your computer.
That's all there is to it! Dr.Fone makes it super simple to copy your iPad's photos, videos, messages, contacts and other files to your Windows PC for safekeeping and easy access. You can also use Dr.Fone to transfer files the other way, from your PC back to your iPad when needed.
The free trial allows you to preview and transfer limited data before purchasing the full version to unlock all features. Give Dr.Fone a try for reliable, quick iPad to PC file transfers!
Conclusion
Transferring photos, videos, documents, and other files from your iPad to a PC is simple when you know the right method. iTunes and iCloud offer official Apple options for syncing content between devices, while the File Explorer and email routes provide more direct transfer capabilities. For large batches of files, Dr.Fone Basic streamlines robust iPad backups. With the transfer techniques above, you can easily save, view, edit, and manage your iPad files on a Windows computer.


iPhone Data & Files
- iPhone File Managers
- 1. iPhone File Browsers
- 2. iPhone File Explorers
- 3. iPhone File Managers
- 4. Apps to Transfer File Wirelessly
- Transfer iPhone Files
- 1. Send Large Files For Free
- 2. Transfer File from iPhone to Laptop
- 3. Transfer Files from iPhone to Mac
- 4. Transfer Files from iPhone to PC
- 5. Transfer Files from Mac to iPhone
- 6. Transfer Files from PC to iPhone
- 7. File-Sharing Apps on iPhone
- 8. Transfer Files Over WiFi
- 9. iPhone File Transfer Without iTunes
- 10. Access iPhone Files Using a PC
- 11. Export Notes from iPhone to PC/Mac
- 12. Get Rid of Duplicated Note on iPhone
- 13. iPhone Notes Icon Missing
- iPhone Manage Tools
- 1. iPhone Transfer Tools
- 2. Manage Apps On iPhone
- 3. Security Apps for iPhone
- 4. Call Forwarding Apps
- 5. iPhone Tracking Apps
- Manage iPhone Apps
- 1. Change Viber Number
- 2. iPhone Calls Apps
- 3. Block People in Facebook
- 4. Monitor Snapchat on iPhone
- 5. Snapchat Saver Apps
- Sync iPhone Data
- 1. Sync Notes from iPhone to Mac
- 2. Ford Sync iPhone
- 3. Sync iCal with iPhone
- 4. iPhone Calendar Not Syncing
- 5. Sync iTunes Library to iPhone
- 6. Unsync iPhone from Computer
- 7. Sync iPhone with Multiple Computers
- More iPhone File Tips
- ● Manage/transfer/recover data
- ● Unlock screen/activate/FRP lock
- ● Fix most iOS and Android issues
- Manage Now Manage Now Manage Now
Alice MJ
staff Editor