How to Transfer Files from Mac to iPhone in 8 Tetsed Ways

Jun 11, 2026 • Filed to: Device Data Management • Proven solutions
 TL;DR:
You can seamlessly transfer files from a Mac to an iPhone using native macOS tools like AirDrop and Finder for direct sharing, cloud services for synchronized access, or third-party software like Wondershare Dr. Fone for comprehensive data management.
● Native Apple file sharing relies on AirDrop for wireless transfers which has no strict size limits but slows down on massive files, or requires a USB connection utilizing the Finder app for Macs running macOS Catalina or later.
● Cloud-based transfers depend on your specific storage capacity, requiring active device syncing for iCloud Drive or an external account for Google Drive, which provides 15 GB of free cross-device storage.
● Wondershare Dr. Fone serves as a third-party alternative that expands transfer capabilities beyond standard media and documents to include moving and backing up contacts, SMS messages, and applications.
Ask AI for a summary
 ChatGPT
 Perplexity
 Gemini
 Claude
 Grok
Grok
Dr.Fone Basic:
Better Control for Your Phone
Manage, transfer, back up, restore, and mirror your device

Transferring files between your Mac and iPhone used to be a hassle, but here's some good news: it's now easier than ever! There are plenty of straightforward and efficient ways to simplify the process.
In this guide, we walk you through 8 ways of transferring photos, videos, documents, and more between your Apple devices. And from the built-in tools such as AirDrop or iCloud, to helpful third-party options, namely Dr. Fone or Files, you can rely on the best method for each.
Let's dive in and find out how to transfer files from Mac to iPhone in 8 easy steps.
- Method 1: Transfer Files from Mac to iPhone via USB Cable
- Method 2: Transfer Files from Mac to iPhone via AirDrop
- Method 3: Transfer Files from Mac to iPhone via iTunes File Sharing
- Method 4: Transfer Files from Mac to iPhone via Email
- Method 5: Transfer Files from Mac to iPhone via iCloud Drive
- Method 6: Transfer Files from Mac to iPhone via Google Drive
- Method 7: Transfer Files from Mac to iPhone via DropBox

- Method 8: Transfer Files from Mac to iPhone in Clicks
Method 1: Transfer Files from Mac to iPhone via USB Cable
One of the easiest and most convenient methods to transfer files from MacBook to iPhone is to use a USB cable. You will require a USB or USB-C cable that is compatible to start.
Transfer files from Mac to iPhone via USB once you're prepared by following these steps:
Step 1 Connect one end of the USB cable to your Mac and the other end to your iPhone.
Step 2 Open "Finder" on your Mac, and click the left-hand menu to find the name of your iPhone.

Step 3 Tap on "Files" to see a list of all the apps installed on your iPhone.

Step 4 Drag and drop all the files that you wish to transfer from your Mac to the applications on your iPhone.
Method 2: Transfer Files from Mac to iPhone via AirDrop
If you prefer to transfer files from your Mac to your iPhone without having to work with a tangle of cables, AirDrop is the answer. This helpful iOS feature lets you share files wirelessly between your Mac and iPhone in just a few clicks and taps!
Here's how to use it:
Step 1 On your Mac, right-click on the file that you want to transfer to your iPhone, then click on "Share" and select "AirDrop."

Step 2 Choose your iPhone's name from the list of recipients and click "Done".
Step 3 Tap Accept on your iPhone when prompted.
Method 3: Transfer Files from Mac to iPhone via iTunes File Sharing
Another simple way how to send files from MacBook to iPhone is through the File Sharing feature in iTunes. For this method, ensure that your Mac has the latest version of iTunes installed and has a reliable USB cable handy.
Here's how to get started:
Step 1 Connect your iPhone to your Mac using a USB cable.
Step 2 In most cases, iTunes will automatically launch when the devices are connected. If it does not, then you can do it manually. Now click on iPhone at the top, then File Sharing from the left menu.

Step 3 You will see a list of all the apps on your iPhone. Drag and drop the files from your Mac into the apps, such as Photos, to transfer them.

Method 4: Transfer Files from Mac to iPhone via Email
The next method on our list of how to transfer files from MacBook to iPhone is via email. This method is also pretty straightforward.
Let’s see how to go about it:
Step 1 Open up your email account on your Mac, either Gmail or any other app.
Step 2 Write a new email, attach the files you wish to transfer to your iPhone, and send that email to yourself.
Step 3 Open the email app on your iPhone, locate the email you sent, and download the attachments.
Step 4 You will be able to locate the downloaded files in the "Files" app on your iPhone.
Method 5: Transfer Files from Mac to iPhone via iCloud Drive
Another convenient method of exchanging files across wirelessly from your Mac to your iPhone is by making use of iCloud Drive. For this to happen, iCloud syncing has to be activated on both devices.
Here's how to do it:
Step 1 On your Mac, click the Apple menu and select “System Preferences > Your Name > iCloud.”

Step 2 Enable the toggle for “iCloud Drive” and click “Done.”

Step 3 With iCloud Drive now enabled, navigate to “Finder > iCloud Drive.”

Step 4 Drag and drop the files you want to transfer into the iCloud Drive folder.
Step 5 On your iPhone, open “Files > iCloud Drive.”

Step 6 Tap the three dots in the top-right corner and select “Select.”

Step 7 Click the file you uploaded from your Mac to iCloud Drive and select "Share," followed by an appropriate action depending on the type of file.

Method 6: Transfer Files from Mac to iPhone via Google Drive
We cannot forget the cloud storage solution, Google Drive. It supports transferring files across your iPhone to Mac and enjoys 15 GB of free storage for anyone with a Google account.
How to use it? Well…
Step 1 Launch Google Drive in Safari or your preferred browser on your Mac computer and log into your Google account.
Step 2 Click “New” in the top-left corner, select “Upload File,” and upload the files you want to transfer from your Mac to your iPhone.

Step 3 Download the Google Drive app on your iPhone from the App Store and save the uploaded files to your device.

Method 7: Transfer Files from Mac to iPhone via DropBox
Similar to Google Drive, Dropbox can also transfer files from a Mac to an iPhone. A popular cloud storage service, you can store, sync, and share files between devices, ensuring that you seamlessly move files from your Mac to your iPhone.
Here's how:
Step 1 From you Mac, go to the DropBox website and download the desktop app. Similarly, install the DropBox app on your iPhone from the App Store.
Step 2 Log in to Dropbox using your Apple ID or Google account.
Step 3 Open “Finder” on your Mac and go to the DropBox folder.

Step 4 Drag and drop the files you want to transfer into the Dropbox folder.
Step 5 Open the Dropbox app on your iPhone and sign in with the same account you used on your Mac.
Step 6 Navigate to the uploaded files and view, download, or share them directly from your iPhone.

Method 8: Transfer Files from Mac to iPhone in Clicks
All of the methods above are easy and effective. If you need a reliable solution with minimal risks of data loss, device glitches, or other problems, try Wondershare Dr. Fone!
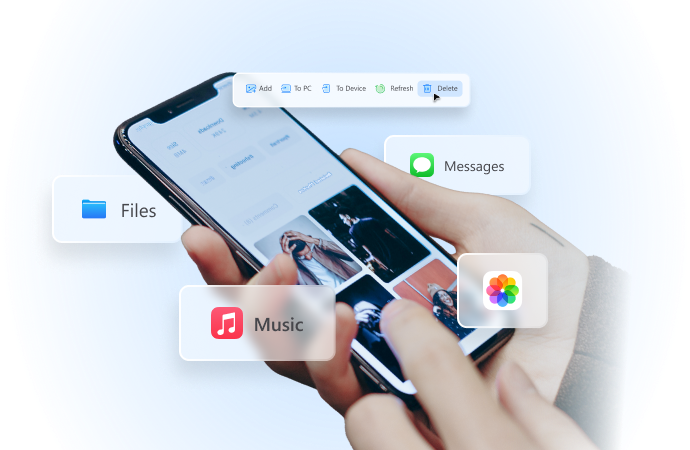
With this multi-functional device, transferring files from one device to another will be effortless irrespective of the operating system. You will be able to transfer a wide range of data from your Mac using Dr. Fone, such as contacts, messages, photos, and more, and transfer them easily and hassle-free to your iPhone.
Wondershare Dr.Fone
Transfer Files from Mac to iPhone in Clicks.
- Transfer, manage, export/import your music, photos, videos, contacts, SMS, Apps, etc.
- Back up your music, photos, videos, contacts, SMS, Apps, etc., to the computer and restore them easily.
- Transfer music, photos, videos, contacts, messages, etc., from one smartphone to another.
- Transfer media files between iOS devices and iTunes.
- Fully compatible with the newest iOS system.


Steps to Transfer Files from Mac to iPhone via Dr. Fone:
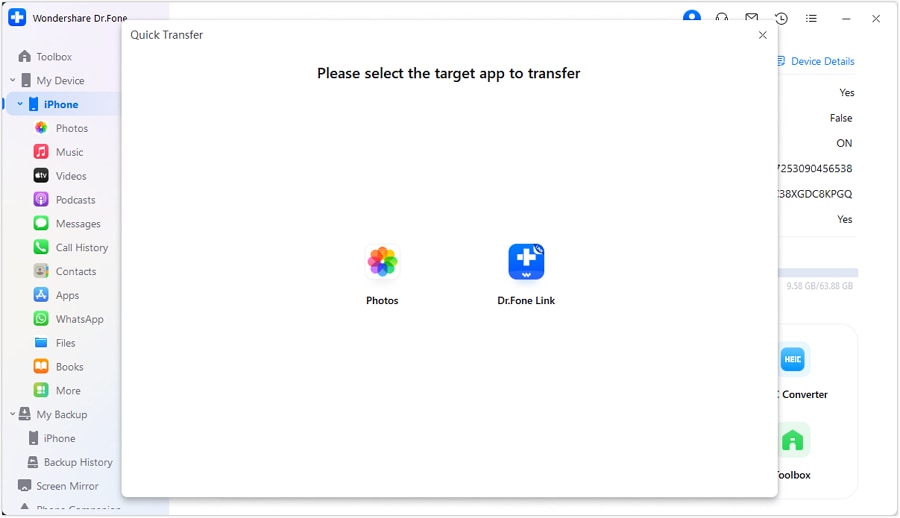
Step 1 Open Wondershare Dr. Fone and connect your iPhone to your computer. Once the tool detects your device, select “Quick Transfer” from the available options.

Step 2 A new window will appear. Click “Select Files” to choose the files you want to transfer from your Mac to your iPhone, or simply drag and drop them into the window.

Step 3 You will have the option to select the target app where you want to save the transferred files.
Step 4 The transfer process will begin, and you can monitor the progress through a progress bar.
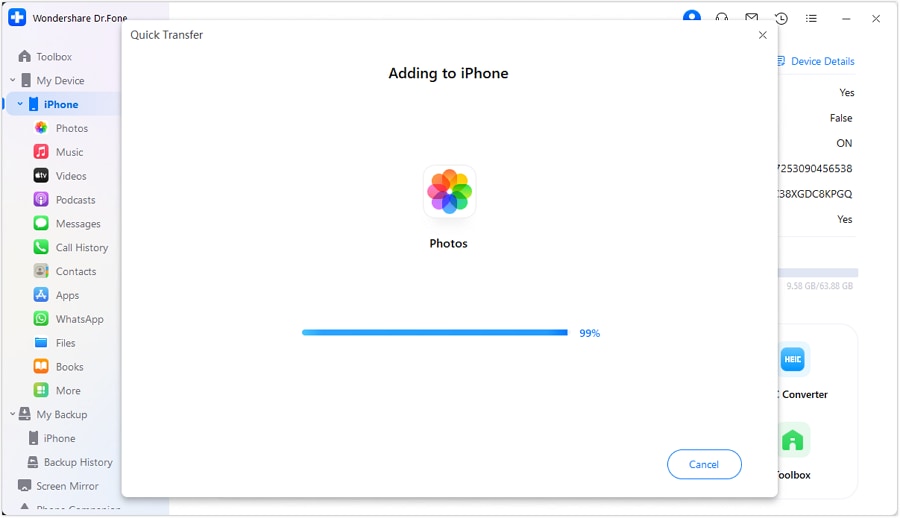
Step 5 Once the transfer process is completed, you can view the location of the files on your iPhone by clicking on the “i” icon.

Conclusion
If you’re searching for ways to transfer data from your Mac to your iPhone, you’re in luck! This guide covers 8 different methods how to transfer files from Mac to iPhone seamlessly.
If you have a method with 100 percent success chances that doesn't compromise on any potential glitch or devices crashing, use Wondershare Dr. Fone's iPhone transfer feature. It is not just simple but quick as well. The process can be completed in minutes!
FAQs
Dr.Fone Basic:
Better Control for Your Phone
Manage, transfer, back up, restore, and mirror your device


iPhone Data & Files
- iPhone File Managers
- 1. iPhone File Browsers
- 2. iPhone File Explorers
- 3. iPhone File Managers
- 4. Apps to Transfer File Wirelessly
- Transfer iPhone Files
- 1. Send Large Files For Free
- 2. Transfer File from iPhone to Laptop
- 3. Transfer Files from iPhone to Mac
- 4. Transfer Files from iPhone to PC
- 5. Transfer Files from Mac to iPhone
- 6. Transfer Files from PC to iPhone
- 7. Print Text Messages from iPhone
- 8. Transfer Files Over WiFi
- 9. iPhone File Transfer Without iTunes
- 10. Access iPhone Files Using a PC
- 11. Export Notes from iPhone to PC/Mac
- 12. Save iPhone Text Messages to Computer
- iPhone Manage Tools
- 1. iPhone Transfer Tools
- 2. Manage Apps On iPhone
- 3. Security Apps for iPhone
- 4. Call Forwarding Apps
- 5. iPhone Tracking Apps
- Manage iPhone Apps
- 1. Change Viber Number
- 2. iPhone Calls Apps
- 3. Block People in Facebook
- 4. Monitor Snapchat on iPhone
- 5. Snapchat Saver Apps
- Sync iPhone Data
- 1. Sync Notes from iPhone to Mac
- 2. Ford Sync iPhone
- 3. Sync iCal with iPhone
- 4. iPhone Calendar Not Syncing
- 5. Sync iTunes Library to iPhone
- 6. Unsync iPhone from Computer
- 7. Sync iPhone with Multiple Computers
- More iPhone File Tips
- ● Manage/transfer/recover data
- ● Unlock screen/activate/FRP lock
- ● Fix most iOS and Android issues
- Free Download Free Download Free Download


Alice MJ
staff Editor