How You Can Sync Notes From iPhone To Mac?-2026 Updated

Dec 31, 2025 • Filed to: Device Data Management • Proven solutions
Dr.Fone Basic:
Better Control for Your Phone
Manage, transfer, back up, restore, and mirror your device

If you use the Notes app on your iPhone and want an easy way to access those notes on your Mac computer, you're in luck! Syncing notes from your iPhone to your Mac is a breeze with iCloud.
In just a few simple steps, you can seamlessly transfer notes between devices and pick up right where you left off. Whether you have a MacBook Air, MacBook Pro, iMac or other Mac model, you can sync your iPhone notes across with no hassle. Read on to learn the quick and easy way to get all your notes synced up between iPhone and Mac!
Part I: Sync Notes From iPhone To Mac With iCloud
With iCloud set up on both your iPhone and Mac, you can sync Notes as well as photos, Mail, Contacts, Calendars, Reminders, Safari data, and other documents between devices. To enable iCloud Notes syncing on iPhone and Mac, follow these steps:

On your iPhone or iPad:
Step 1: Open the Settings app.
Step 2: Tap on your Apple ID, then select "iCloud."
Step 3: Turn on the switch for "Notes" under iCloud services.

Step 4: New Notes and any changes made to existing Notes will now automatically upload to iCloud and sync to your Mac using the same Apple ID login.
On your Mac:
Step 1: Open System Preferences, which is like the Settings app on an iPhone. Make sure you're signed in with the same Apple ID used on your iPhone.
Step 2: Click on "iCloud" in System Preferences.
Step 3: Enter your iCloud account information to sign in if prompted.
Step 4: Check the box next to "Notes" in the list of options. Notes will now sync from your iPhone to your Mac. Notes added on your Mac will even sync to your other iOS devices.
Part II: Sync Notes From iPhone To Mac With Gmail
You can sync notes from your iPhone to your Mac by connecting both devices to your Gmail account. To set this up, you'll need to have the same Gmail account added to your iPhone and Mac.

On your iPhone:
Step 1: Open the Settings app and tap on "Mail."

Step 2: Tap on "Accounts," then select your Gmail account under the Accounts list. If you don't have a Gmail account set up, tap "Add Account" and sign into your Google account.
Step 3: Turn on the switch next to "Notes" under your Gmail account settings. This enables notes syncing.
Any new notes created or edits made to existing notes in the iPhone Notes app will now automatically sync with your Gmail account online.
On your Mac:
Step 1: Open the Notes app.
Step 2: Click on "Notes" in the menu bar at the top left corner.
Step 3: From the dropdown menu, choose "Accounts."
Step 4: Select "Google" and sign into your Gmail account when prompted.
Step 5: Make sure "Notes" is checked under your Gmail account settings.
With your Gmail account now connected to the Notes apps on both your iPhone and Mac, any changes to notes will automatically sync between devices. So if you create a new note on your iPhone, you'll also see it in the Notes app on your Mac. Editing a note on your Mac can even sync the change to the iPhone version.
This allows seamless, automatic two-way syncing of your notes via your Gmail account. Your notes stay up to date on both iPhone and Mac with Gmail sync enabled.
Part III: Sync Notes From iPhone To Mac With AirDrop

Other than syncing all notes from iPhone to Mac in one hit, you can transfer one or two individual notes using AirDrop. To use this method, your first step is to enable AirDrop on iPhone and Mac, and then you have to ensure that Bluetooth and Wi-Fi are active in iPhone and Mac. Lastly, position your iPhone and Mac within about 30 feet, and follow these procedures to AirDrop Notes.
Step 1: In your iPhone, launch the Notes app.
Step 2: Open the Note from the iPhone that you wish to sync with Mac.
Step 3: On the upper right click on Options represented by a circle with three dots in it.
Step 4: Select “Send a Copy” and tap “AirDrop”.

Step 5: Select the Mac of your choice from the list provided. If the Mac is not listed, check if your Airdrop settings allow you to be found.
Step 6: Next, on your Mac, click “Accept” on the pop-up window to save Note in your Mac.
Step 7: When the process is complete, launch the “Notes” application on your Mac to verify synced files.
Note: One Note can be Airdrop at a time. If you wish to Airdrop several Notes follow the steps again.
Quickly AirDropping notes is a wonderful way of transferring one or two significant notes from your iPhone to your Mac. It enables differential sync instead of universal sync.
Part IV: Sync Notes From iPhone To Mac With Messages
You can also use Messages to sync notes from iPhone to Mac if you have iMessage set up on both devices using the same Apple ID. To do this:

Step 1: On your iPhone, open the Notes app.
Step 2: Long press on the note you want to send to your Mac and tap "Send a Copy."
Step 3: Select Messages, then enter your name or phone number to identify your Mac.
Step 4: Tap the upward arrow icon to send the note via iMessage.
Step 5: On your Mac, open the Messages app to access the note sent from your iPhone.
Using Messages is a quick, easy way to send individual notes from iPhone to Mac as needed. Since both devices have iMessage with the same Apple ID, the note will transfer seamlessly on demand through the Messages conversation. This provides an on-the-fly option to get specific notes to your Mac without needing ongoing syncing or transfers.
Part V: Easiest Way – Sync Notes From iPhone To Mac Using Dr.Fone
If you're looking for a simple, reliable way to sync iphone notes to your Mac, we recommend using Wondershare Dr.Fone. Dr.Fone is a versatile tool that makes it easy to backup your iPhone data and seamlessly transfer it to your Mac.
Dr.Fone - Phone Backup (iOS)
Sync Notes From iPhone To Mac in 3 minutes!
- One-click to backup the whole iOS device to your computer.
- Allow previewing and selectively export contacts from iPhone to your computer.
- No data loss on devices during the restoration.
- Works for all iOS devices. Compatible with the latest iOS version.


With Dr.Fone, you can export your iPhone data to your Mac with one click. Here's a quick overview of how to use Dr.Fone to sync notes from iPhone to Mac:
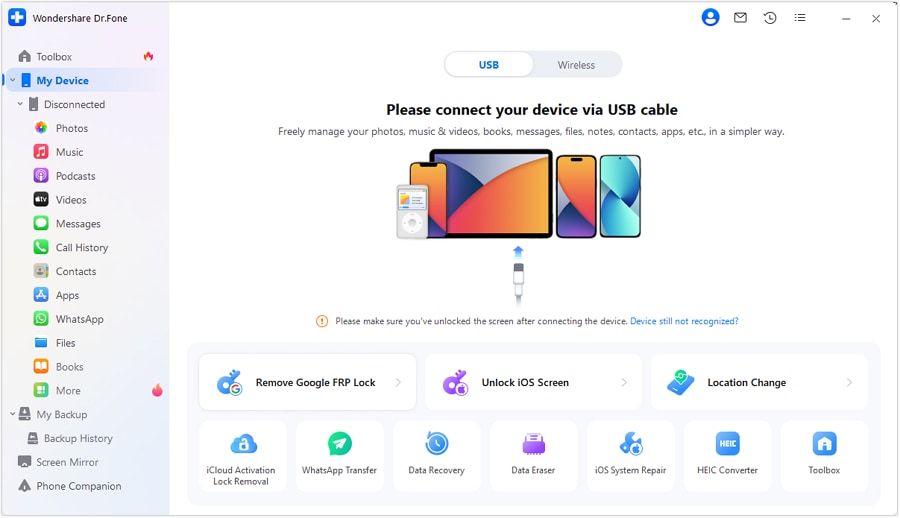
Step 1: Download and install Dr.Fone on your Mac. Launch the app.
Step 2: Connect your iPhone to the Mac via USB cable.
Step 3: In Dr.Fone, click on "Backup and Restore '' > "Backup". This will backup your iPhone data including notes.

Step 4: Once backup completes, click "Export to PC" and select notes. Choose export location on Mac.

Step 5: Dr.Fone will export the notes to your chosen folder on the Mac.

Step 6: Open the Notes app on your Mac and import the notes files from the folder.
That's it! Dr.Fone takes care of the entire process of securely backing up your notes on iPhone, exporting to Mac, and restoring into the Notes app.
If you want an efficient way to reliably sync iPhone notes to Mac, Dr.Fone is a great choice. It streamlines the entire process while keeping your notes safe and secure. Give Dr.Fone a try for easy iPhone-to-Mac note syncing.
Conclusion
Syncing notes from your iPhone to your Mac doesn't have to be a hassle. With built-in tools like iCloud and AirDrop, you can easily transfer notes between devices. iCloud provides automatic syncing between iPhone and Mac for seamless access to your notes anywhere. AirDrop allows quick on-demand transfers of specific notes via WiFi and Bluetooth.
Third party apps like Dr.Fone also offer a simple solution for iPhone to Mac note syncing. Dr.Fone can back up all your iPhone notes, allow you to export to Mac, and restore into the Mac Notes app. This streamlines the entire process of transferring notes without iCloud.
No matter which method you choose, syncing notes from iPhone to Mac is simple. Enable iCloud sync for automatic transfers in the background. Use AirDrop for quick wireless transfers of individual notes when needed. Or try Dr.Fone for secure and reliable sync minus iCloud. With these handy options, you can access your iPhone notes on your Mac with ease.
Dr.Fone Basic:
Better Control for Your Phone
Manage, transfer, back up, restore, and mirror your device


iPhone Transfer
- Data Transfer
- 1. Video from iPhone to External Drive
- 2. Transfer MP4 to iPhone
- 3. Put Wallpapers on iPhone
- 4. Move Photos to SD Card
- 5. Best Apps to Transfer from iPhone to Android
- iPhone to PC
- 1. Transfer Pictures From iPhone to PC
- 2. Transfer From iPhone to Computer
- 3. Transfer Album from iPhone to PC
- 4. Transfer Data from iPhone to PC
- 5. Copy Voice Memo from iPhone to PC
- 6. iPhone Camera Roll to Computer
- 7. Podcasts from iPhone to Computer
- 8. Transfer Notes from iPhone
- 9. Techniques Used in Mobile Phone Forensics
- 10. Facing Please Unlock iPhone Photos Error
- iPhone to Mac
- 1. Voice memos from iPhone to Mac
- 2. Synce Notes from iPhone to Mac
- 3. Export iBooks to PC and Mac
- 4. Transfer Photos from iPhone to Mac
- 5. Transfer Music from iPhone to Mac
- Computer to iPhone
- 1. AirDrop From Mac to iPhone
- 2. Use AirDrop from Mac to iPhone
- 3. Transfer Data from PC to iPhone
- 4. Transfer Videos from PC to iPhone
- 5. Unsync iPhone from Computer
- 6. Sync iPhone with Multiple Computers
- Transfer to iPhone
- 1. Switch Cards Between iPhones
- 2. Facetime for Android to iPhone
- 3. Transfer Data from Motorola to iPhone
- 4. Samsung to iPhone Transfer
- 5. Transfer iPhone Apps to iPhone
- 6. Clone iPhone/iPad to iPhone
- Transfer from iPhone
- 1. Transfer Video from iPhone to Laptop
- 2. Transfer Data from iPhone to Laptop
- 3. Transfer Notes from iPhone to iPad
- 4. Transfer Data from iPhone to Android
- 5. Switch from iPhone to Google Pixel
- 6. Switch from iPhone to Samsung S10
- 7. Switch from iPhone to Samsung
- 8. Transfer from iPhone to Samsung S20
- iPhone Transfer Tips
- 1. Ford Sync iPhone
- 2. Sync iCal with iPhone
- 3. iPhone Calendar Not Syncing
- 4. iPhone Transfer Software
- WhatsApp Transfer
- 1. WhatsApp from iPhone to iPhone
- 2. WhatsApp from iPhone to Android
- 3. WhatsApp from iPhone to Samsung S10
- 4. WhatsApp Messages to iPhone
- 5. WhatsApp from iPhone to Samsung S9
- iTunes Transfer
- ● Manage/transfer/recover data
- ● Unlock screen/activate/FRP lock
- ● Fix most iOS and Android issues
- Transfer Now Transfer Now Transfer Now


Daisy Raines
staff Editor