Beginner's Guide: How to use Root Explorer

May 19, 2026 • Filed to: Device Data Management • Proven solutions
 TL;DR:
Root Explorer is a paid Android file manager from the Google Play Store that requires root access to view, edit, and share hidden internal system files that native apps cannot display even after rooting.
● You must successfully root your Android device and back up your data before downloading and installing the Root Explorer APK.
● Directory navigation is controlled by tapping the "..." folder to move up a level, while the back button returns you to the original directory.
● File manipulation is executed by pressing and holding a file to access the context menu for editing or deleting, and the main Menu button enables multiple file selection and folder creation.
Ask AI for a summary
 ChatGPT
 Perplexity
 Gemini
 Claude
 Grok
Grok
Dr.Fone Basic:
Better Control for Your Phone
Manage, transfer, back up, restore, and mirror your device
In every Android device, there's a common app manager which can explore some sort of files like audios, videos, images etc. But what if you want to explore more? I mean if you have the desire to get root access in your device, then what will you do?
Yes, you can do that after rooting your device because app like Root Explorer can make your dream true!
This blog post is all about using Root Explorer . By reading this post, you'll come to know how to use this app.
Part 1: What is Root Explorer?
In a simple word, Root Explorer is a type of file manager available for Android device. There are many files which are not generally visible in an Android device though rooting and using this app can show those files.
This app is not free, you'll have to purchase it with a little fee from Google Play Store.
So this root file explorer app has great features about showing internal and intangible files. Using Root Explorer will give you full control over your Android device. You may have already known that rooting gives deep access to a device! Yes, it's right, but if you don't use a nice explorer or file manager to explore your device's data, then it will be very much hectic to have full access to your set.
The native file manager can't still show you hidden files after rooting. So using another reliable app is necessary.
Part 2: Why We Need Root Explorer
In this part, we will tell you the reasons for using this root file explorer.
It can be noted that it's not much convenient to use the native app manager that comes pre-installed in an Android device. There are some limitations using it such as you can't access many files through it. This gap is met up with Root Explorer (after rooting). So it improves the managing power of Android. Also, you don't have to learn technical things to use this app. In addition, it can share files over Bluetooth way too easily.
So these are the reasons why you should also use this root file explorer.
Part 3: How to use Root Explorer
So you've learnt many things about Root Explorer (APK). Now learn how to use this robust app.
First thing to do!
First of all, you'll need to root your device. So root your Android device following any of the safest methods available. Don't forget to back up your device data before rooting.
Then
Download and install the Root Explorer APK in your Android device. From the "All Apps" view, you can find the app installed. So launch it after getting on your device.
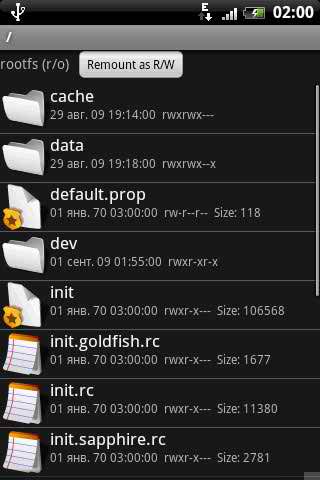
This app is very easy to use, so you won't have to know anything technical. There's folder mark "..." which is used for moving up to directory. Using the back button, you can go back to the original directory.
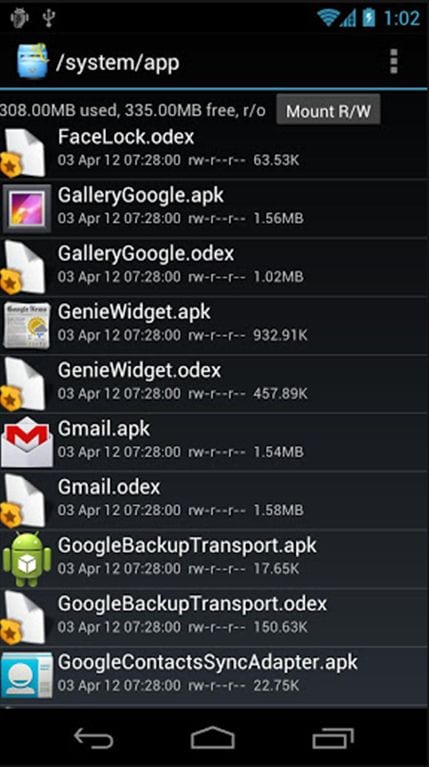
Like builtin app manager, you can use Root Explorer by pressing and holding any file. This will open the context menu for taking any further action like send, copy, edit, rename, delete, view properties etc.
Tapping on the back key will close the context menu. You can use the Menu button in order to open the main menu of this app. You can have the room for selecting multiple files, creating or deleting folders, searching etc.
Dr.Fone Basic:
Better Control for Your Phone
Manage, transfer, back up, restore, and mirror your device


Android Root
- Generic Android Root
- 1. Text Message Apps for Android
- 2. Root Android ONE Devices
- 3. Best Android Root File Managers
- 4. Get Root Access with Computer
- 5. Delete Preinstalled Apps on Android
- 6. Get Free In-APP Purchase
- 7. Wifi Hotspot Apps without Rooting
- 8. Get Root Access on Android
- 9.Root Android Devices
- 10.Root Android Phones and Tablets
- 11.Root Smartphone on Android
- 12.Why Root Android and How to Root it
- 13.Root Android 4 Series in Two Ways
- 14.Tools to Root Android Online
- 15.Root Android without PC
- Specific Android Root
- 1. Root Samsung Galaxy S7& S7 Edge
- 2. Root LG Devices with Root Script
- 3. Samsung Root Software to Root
- 4. Root Motorola Devices
- 5. 2 Solutions to Root ZTE Devices
- 6. Solution to Root Huawei P9 Safely
- 7. 2 Methods to Root Nexus 7 Easily
- 8. Solutions to Root Sony Devices
- 9. Root Any HTC Device in One Click
- Android Root Tools
- ● Manage/transfer/recover data
- ● Unlock screen/activate/FRP lock
- ● Fix most iOS and Android issues
- Free Download Free Download Free Download


James Davis
staff Editor