How to Screen Record on iPhone 6?

Jul 12, 2024 • Filed to: Mirror Phone Solutions • Proven solutions
Apple's iPhone is one of the most progressive brands of smartphones that have been introduced in the market for a decade or more. iPhone is known for providing a proficient list of features that have enabled users to have an exceptional experience in using smartphones and develop a proficient routine in covering all the daily operations and functions. As iPhone is known for operating across its own system, developers at Apple produced their own features and platforms to allow a diverse functioning. These features tempted millions of users across the globe and made iPhones a popular brand in terms of ease in utility. Screen recording is one of the many features that are offered by the iPhone. Introduced in the iOS 11 upgrade, screen recording became quite proficient and effortless for iPhone users. However, there are several aspects that are to be kept in mind to understand how to screen record on your iPhone 6 with ease. For this, this article features the best platforms and efficient guides that would help you in devising an appropriate method in terms of adequacy.
Part 1. How to record iPhone 6 with an official guide?
As the screen recording feature was added into the system in the iOS 11 upgrade, there has not been much that has changed ever since. iPhone users having an upgraded software greater than iOS 11 can directly utilize this service as an immediate feature. To understand the function of recording your screen on the iPhone 6, you need to simply look across the steps offered as follows.
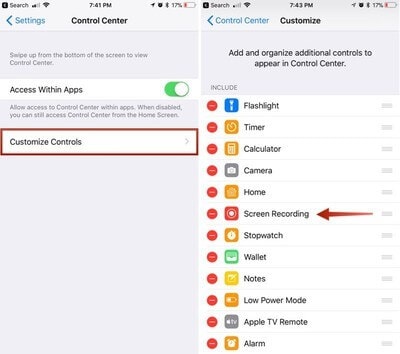
Step 1: Open your iPhone and access its 'Settings.' Look for the option of "Control Center" in the offered list on the next screen and tap to open it.
Step 2: You would discover the option of "Customize Controls" over the next screen. For iOS 14, the option has been duplicated into "More Controls." Tap the mentioned button to open a list of various applications.
Step 3: With a variety of applications present in the list, locate the option of “Screen Recording” and select + to include it in the options provided in the Control Center of your iPhone.
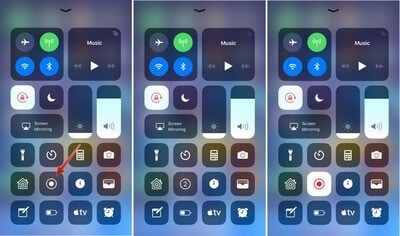
Step 4: Access the Control Center of your device by swiping up or down on your iPhone’s screen, depending on its model. Search for the icon that looks identical to ‘two nested circles.' Tapping this icon would initiate screen recording after an appropriate countdown. A red bar would be present on the top of the display, indicating the status of the screen recording.
Part 2. How to screen record on iPhone 6 with QuickTime?
Mac has been another product that has taken over the market with its effective characteristics and is regarded among the unique devices a user can encounter with. Mac users are offered their own system of allowing iPhones to record their screen with the aid of a platform. This platform, known as QuickTime, is a built-in video application that is associated with every Mac. Its utility is quite simple and effective, with impressive recording features with exceptional results. To record your iPhone's screen with QuickTime on your Mac, you need to simply follow the steps as displayed below.
Step 1: Connect your iPhone with the Mac through a USB connection and launch QuickTime Player across your Mac from the Applications folder.
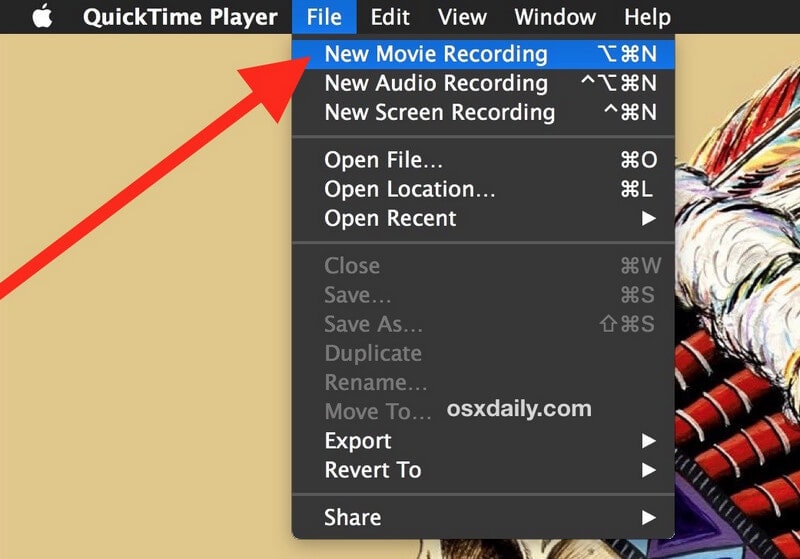
Step 2: Access the ‘File’ menu from the top toolbar and proceed with selecting ‘New Movie Recording’ from the drop-down menu.
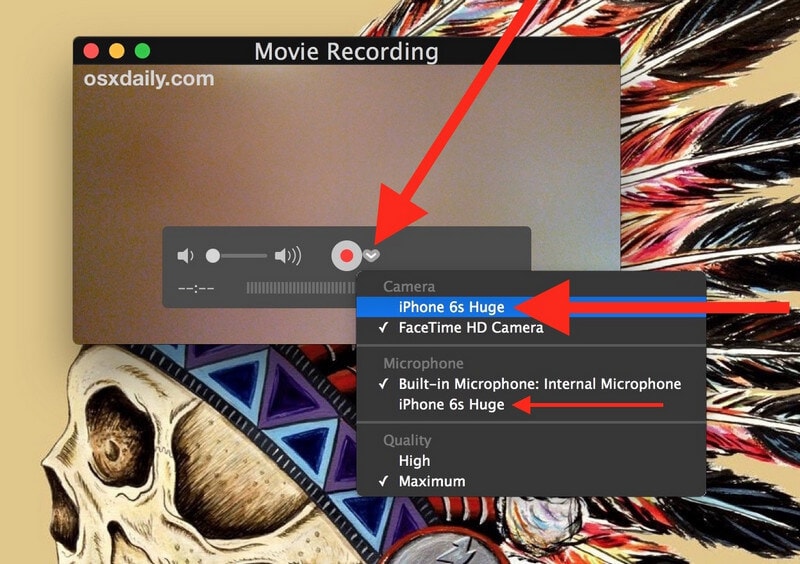
Step 3: With a new recording screen opened on your front, you need to hover your cursor across the screen to allow the recording controls to appear on the screen. Tap on the arrowhead appearing adjacent to the ‘Red’ button. This would display the camera and microphone settings for the recording.
Step 4: You need to select the iPhone from the list of devices appearing under the ‘Camera’ section along with the ‘Microphone’ settings. The recording screen would change into your iPhone’s screen, which then can be easily recorded by tapping on the ‘Red’ button present in the controls.
Part 3. How to screen record iPhone with third-party apps?
In cases where iPhone users may not have the direct screen recording feature present across their device, they can look for going to a third-party application to cater to their needs. Although the market is saturated with a very exceptional number of applications, there are a few platforms that provide efficient services in recording your iPhone's screen to perfection. Thus, the article discusses three of the best third-party platforms that can provide you the environment you may seek for screen recording in your iPhone.
Wondershare Dr.Fone
Wondershare Dr.Fone is one efficient solution to record iPhone screen on a Windows computer. There are several features stated below that make MirrorGo a choice that would not ever disappoint you.
MirrorGo - Wondershare Dr.Fone
Record iPhone screen and save on your computer!
- Mirror iPhone screen onto the big screen of the PC.
- Record phone screen and make a video.
- Take screenshots and save on the computer.
- Reverse control your iPhone on your PC for a full-screen experience.

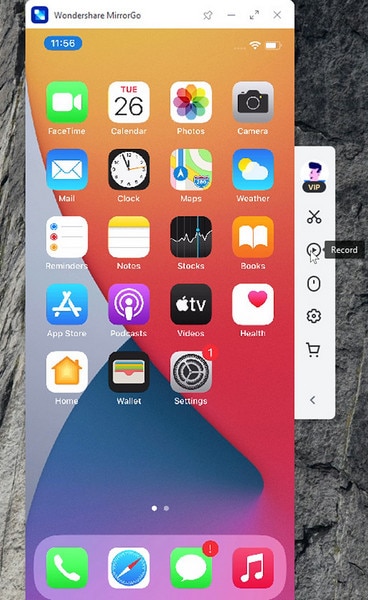
Step 1. Install MirrorGo on your PC.
Step 2. Connect your iPhone and your PC into the same Wi-Fi.
Step 3. Select 'MirrorGo(XXXX)' you see on MirrorGo interface under your iPhone's Screen Mirroring.

Step 4. Click 'Record' button. It counts down 3-2-1 and starts to record. Operate on your iPhone util you want to stop a recording. Click 'Record' button again.
AirShou
This screen recording platform allows you to record your iPhone’s screen to perfection without any jailbreak. While being compatible across all devices, you can effectively record the screen of your iPhone by seeking through the steps provided below.
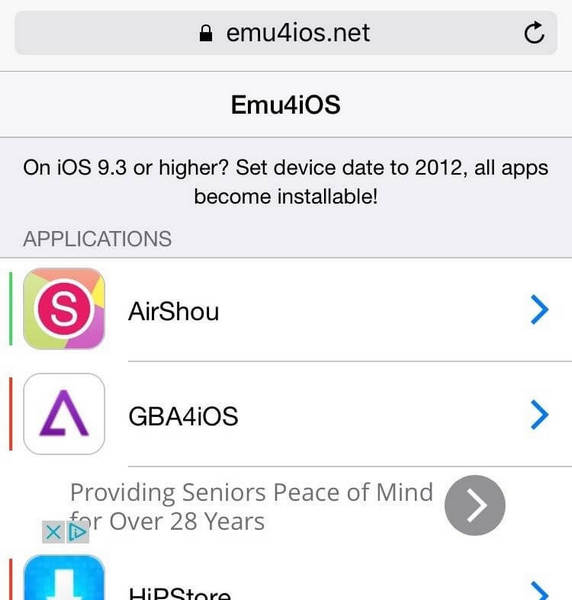
Step 1: This application is not available across the App Store, for which you need to download and install it from emu4ios.net. You can also consider approaching iEmulators.net for downloading AirShou across your iPhone.
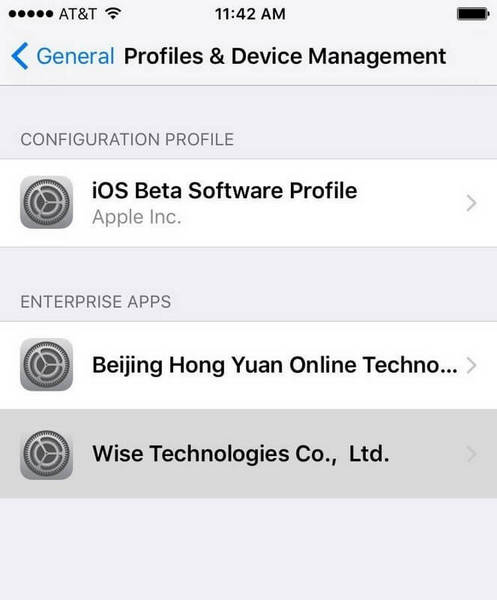
Step 2: The device may show an 'Untrusted Enterprise Developer' warning over installation, which can be easily copied by accessing the 'Settings' of your iPhone. Proceed into the "General" section following the "Profiles & Device Management" to trust the application across your iPhone.
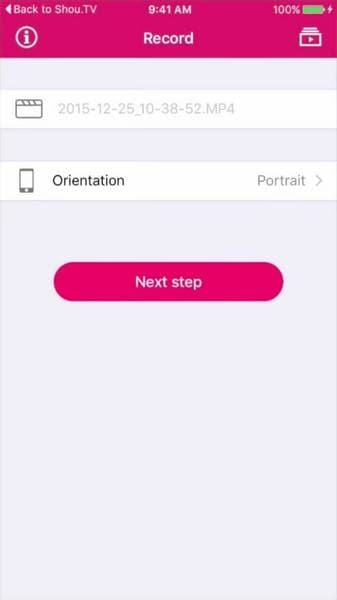
Step 3: Open the application and create a new account across it. Following this, you need to simply tap on the “Record” button from the main menu of the app and provide a name to the recording along with the preferred orientation for recording the screen.
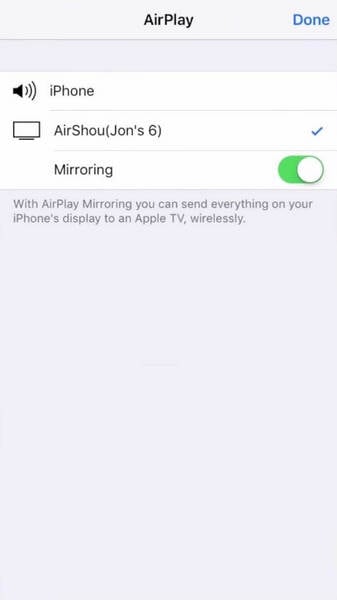
Step 4: However, you should keep in mind that your device is successfully selected in the AirPlay feature, which can be easily confirmed by accessing the "AirPlay" settings from the Control Center. Ensure that the 'Mirroring' option is toggled towards the green side. Easily "Stop" the recording from the menu of the application once complete.
Record It! :: Screen Recorder
The second platform is another proficient platform when it comes to recording your iPhone’s screen through a third-party application. ‘Record It!’ provides you with advanced recording features to allow the user to easily record their device without any repercussions. For this, you need to access the following steps as described below.
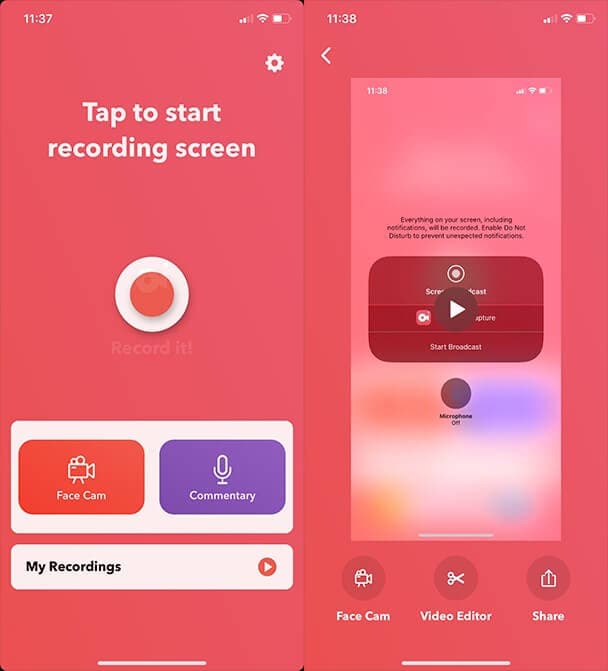
Step 1: Download the application from the App Store and successfully install it on your iPhone.
Step 2: To simply record your screen with the platform, open the 'Control Center' of your iPhone and long-press the recording button to lead into a new screen. Select 'Record It! Capture' from the available list and initiate your recording.
Step 3: Once you are done recording the video, you can edit and trim it across the platform with ease and provide effective outputs in the form of high-quality videos.
Part 4. How to record iPhone 6 without the Home button?
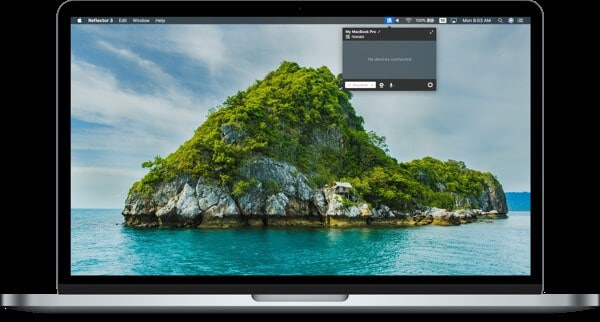
There are a variety of third-party applications that provide screen recording features to their users in variating procedures. Reflector is another third-party application that allows users to mirror their iPhone onto a computer for allowing them to record their screen without using the Home button of the device. To successfully utilize the platform, you need to consider the following steps.
Step 1: You need to download and install Reflector across your computer and ensure that your device and computer are connected across a similar Wi-Fi network.
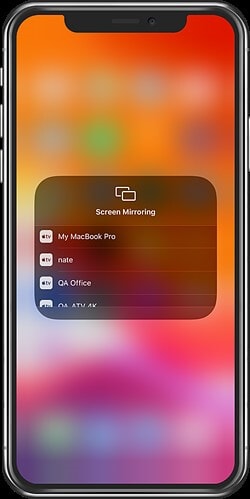
Step 2: Access Reflector across your computer and proceed to open the 'Control Center' on your iPhone. Tap the option of 'Screen Mirroring' and select the name of your computer within the list of receivers to successfully connect your device with the computer.
Step 3: Following the connection through Reflector, you will observe a camera icon above the screen that is visible across your computer. Simply tap the red button adjacent to it to initiate the recording of the screen.
Part 5. Bonus: Frequently asked questions
How long can you record a video on iPhone 6?
If you consider an iPhone 6 of size 64 GB, you can record 16 hours of video with 720p resolution.
How much space does a 30-minute video use on the iPhone?
A 30-minute video takes up 10.5 GB of space for 4K resolution.
Conclusion
Screen recording has been a considerably effective feature since its introduction in iOS 11. However, there are several platforms and methods that can be efficiently utilized for understanding its operation and record your screen successfully. For this, you need to look across the guide that has been discussed in detail.


Other Popular Articles From Wondershare
iPhone 4 to 6 Series
- iPhone 4 Series Tips
- 1. SIM Unlock iPhone 7(Plus)/6s(Plus)
- 2. iPhone 4/4S iCloud Bypass Guide
- 3. Unlock iPhone SE Sim Lock
- 4. Reset iPhone 4/4s to Factory Settings!
- 5. Print Notes from iPhone SE/6 (Plus)
- iPhone 5 Series Tips
- 1. Delete Apps on iPhone 5/5S/5C
- 2. Transfer from iPhone 5S to iPhone 8
- 3. Reset iPhone 5
- 4. Reset iPhone 5c
- 5. Factory Unlock iPhone 5 Sprint/AT&T
- 6. Unlock iPhone 5 without iTunes
- 7. Factory Reset iPhone 5/5S/5C
- 8. Reset iPhone 5s
- 9. Bypass iPhone 5/5S/5C Activate Lock
- 10. Turn Off Find My iPhone on iPhone
- 11. Jailbreak iPhone 5C
- iPhone 6 Series Tips
- 1. Unlock iPhone 6(Plus) and 6s(Plus)
- 2. Transfer from iPhone 6 to iPhone 8
- 3. Unlock iPhone 6 Without Passcode
- 4. Screen Mirroring iPhone 6
- 5. Screen Record on iPhone 6 Series
- 6. Recover Deleted Messages iPhone 6
- 7. Sell Old iPhone 6 Series
- 8. Factory Reset iPhone 6/6S/6 Plus
- 9. Siri Not Working On iPhone 11/X/8/7
- 10. Unlock iPhone 7/8 Without Passcode
- 11. Bypass iPhone 6/6S/7 Activate Lock
- 12. iPhone 6/7 Stuck On Apple Logo
- 13. iPhone 6/7/8 Won't Turn On
- 14. iPhone 6/7 Touch ID Not Working
- 15. iPhone 6/7/8 Black Screen
- 16. Back up Locked iPhone Data
- iPhone SE Tips
James Davis
staff Editor