

 TL;DR:
You can natively capture your iPhone screen on iOS 11 or later by adding the Screen Recording option to your Control Center via Settings and tapping the record button.
● To include external voice audio, long-press the record button in the Control Center and activate the microphone symbol, as direct internal system audio capture is restricted by iOS and requires a Mac connection via QuickTime.
● Turn on Do Not Disturb before starting to prevent private notifications from appearing on screen, and expect auto-blackouts or recording failures when using protected applications like Netflix, FaceTime, or banking tools.
● High-resolution recordings rapidly consume device storage, which can be mitigated by trimming the video duration in the native Photos app or utilizing MobileClean - Photo Cleaner to compress large videos and delete media clutter.
Ask AI for a summary
 ChatGPT
 Perplexity
 Gemini
 Claude
 Grok
Grok
iPhone's screen recording feature is highly practical. You can record a video call, save a game, or demonstrate how an app works. However, many people ask: how do I record my screen on my iphone? You can answer all that using this guide. Recording your screen is simple. No extra apps required. iPhone has a built-in record feature with or without audio.
However, a problem still exists: your phone can fill up after multiple recordings since video files are large. This causes "photo bloat," and your storage fills fast, so we require a smartphone cleaner tool after recording. This article will cover how to record screen and audio on iphone and more. We'll also cover iPhone screen recording, iPhone space cleanup, and common issues. Let's start with iPhone screen recording basics!
In this article
Part 1. What is Screen Recording on iPhone?
You may be wondering how to capture a video on your iPhone screen. Let's define screen recording before proceeding. Screen recording captures all iPhone screen activity. It videos what you do and see. App demos, game recordings, and video calls are common uses.
A. Definition and Capabilities
Every iPhone with iOS 11 or later features a screen recorder. No need to download an app. This is a native screen recorder. It suits most demands. There are third-party apps. Some offer filters or extended editing. The iPhone's screen recorder is sufficient for simple use.
Record with or without sound. It depends on your needs. Use the microphone to talk in the video. For app sound, use the system sound. System sound is turned off by default on iPhones. We'll explain alternatives later.
Don't worry about the iPhone screen and audio recording. Both alternatives will be shown soon. Apple iPhone 12 and later support 4K video. The video is brighter and better with HDR recording. There's no deadline. But your phone needs space. Longer videos require more room.
B. System Requirements
Screen recording requires iOS 11 or above on your iPhone. Most new phones have it. Check your settings for updates. Check your phone space before starting. HD and 4K videos use many GBs every hour.
You may be wondering how to record the iPhone screen without affecting storage. Simple answer: wipe your phone first. Get rid of old records, apps, and huge videos. Record worry-free.
Part 2. How to Record Your iPhone's Screen
Recording your iPhone screen is simple. Here's how to create tutorials, capture gameplay, and save video calls.
A. Enable the Screen Recording Control
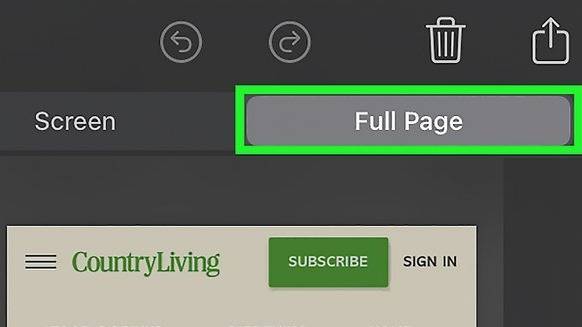
Before recording, ensure the Screen Recording option is available in your Control Center.
Step 1. Open the Settings application.
Step 2. Tap on "Control Center", then "Customize."
Step 3. Scroll down and select the "green plus (+)" icon next to "Screen Recording."
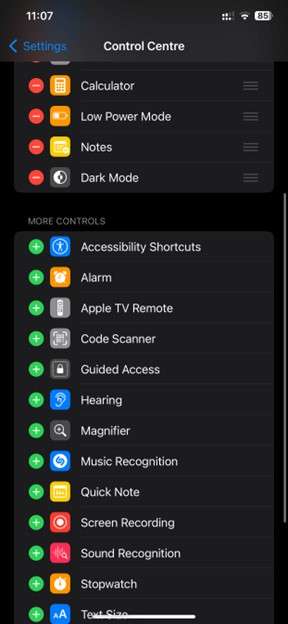
Step 4. This adds a Screen Recording icon to your Control Center for quick access.
B. Recording without Audio
To record your screen without including audio:
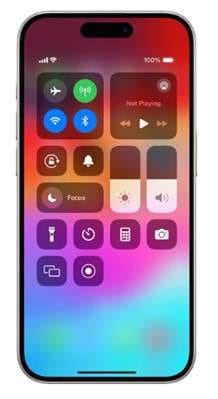
Step 1. Open the "Control Center."
Step 2. On iPhones with Face ID, swipe down from the upper-right corner.
Step 3. On iPhones with Touch ID, swipe up from the bottom edge.
Step 4. Tap the "Screen Recording" button (a circle inside a circle).
Step 5. After a three-second countdown, recording starts.
Step 6. To stop recording, hit the "red" bar at the top of your screen and select "Stop," or go back to the Control Center and tap the Screen Recording button again.

Step 7. Your recordings will be saved in the Photos app.
C. Recording Audio with A Microphone
If you wish to insert your voice or ambient sounds:
Step 1. Open the "Control Center."
Step 2. Tap and hold the Screen Recording button.
Step 3. To turn it on, tap the microphone symbol (it will turn red).
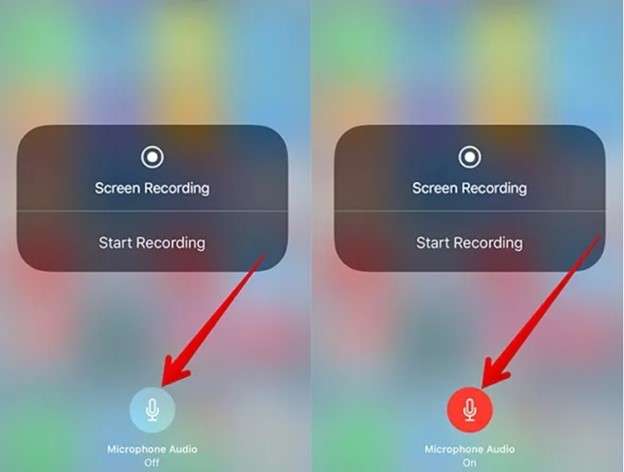
Step 4. Tap the Start Recording button.
Step 5. To stop, tap the "red" status bar and select "Stop," or go back to the Control Center and tap the Screen Recording button.
The recording and audio will be saved in your Photos app.
D. Recording in-app Audio (System Sound)
iOS prohibits direct recording of internal system audio owing to privacy concerns. To record in-app sounds:
- Connect your iPhone to the Mac, launch QuickTime, and select your iPhone as the recording device.
- Use third-party apps that enable internal audio recording.
Note: Some apps may still turn off audio recording due to limitations.
E. Recording for Many iPhone Models
Accessing the Control Center differs slightly across models:
- iPhones featuring Face ID (e.g., iPhone X and later):
Swipe down from the top-right corner to reach the Control Center.
- iPhones with Touch ID (iPhone 8 and prior models):
Swipe upward from the bottom border of the screen.
Once in the Control Center, follow the instructions above to begin or stop screen recording.
Bonus Tip: How to Free Up iPhone Storage in One Click
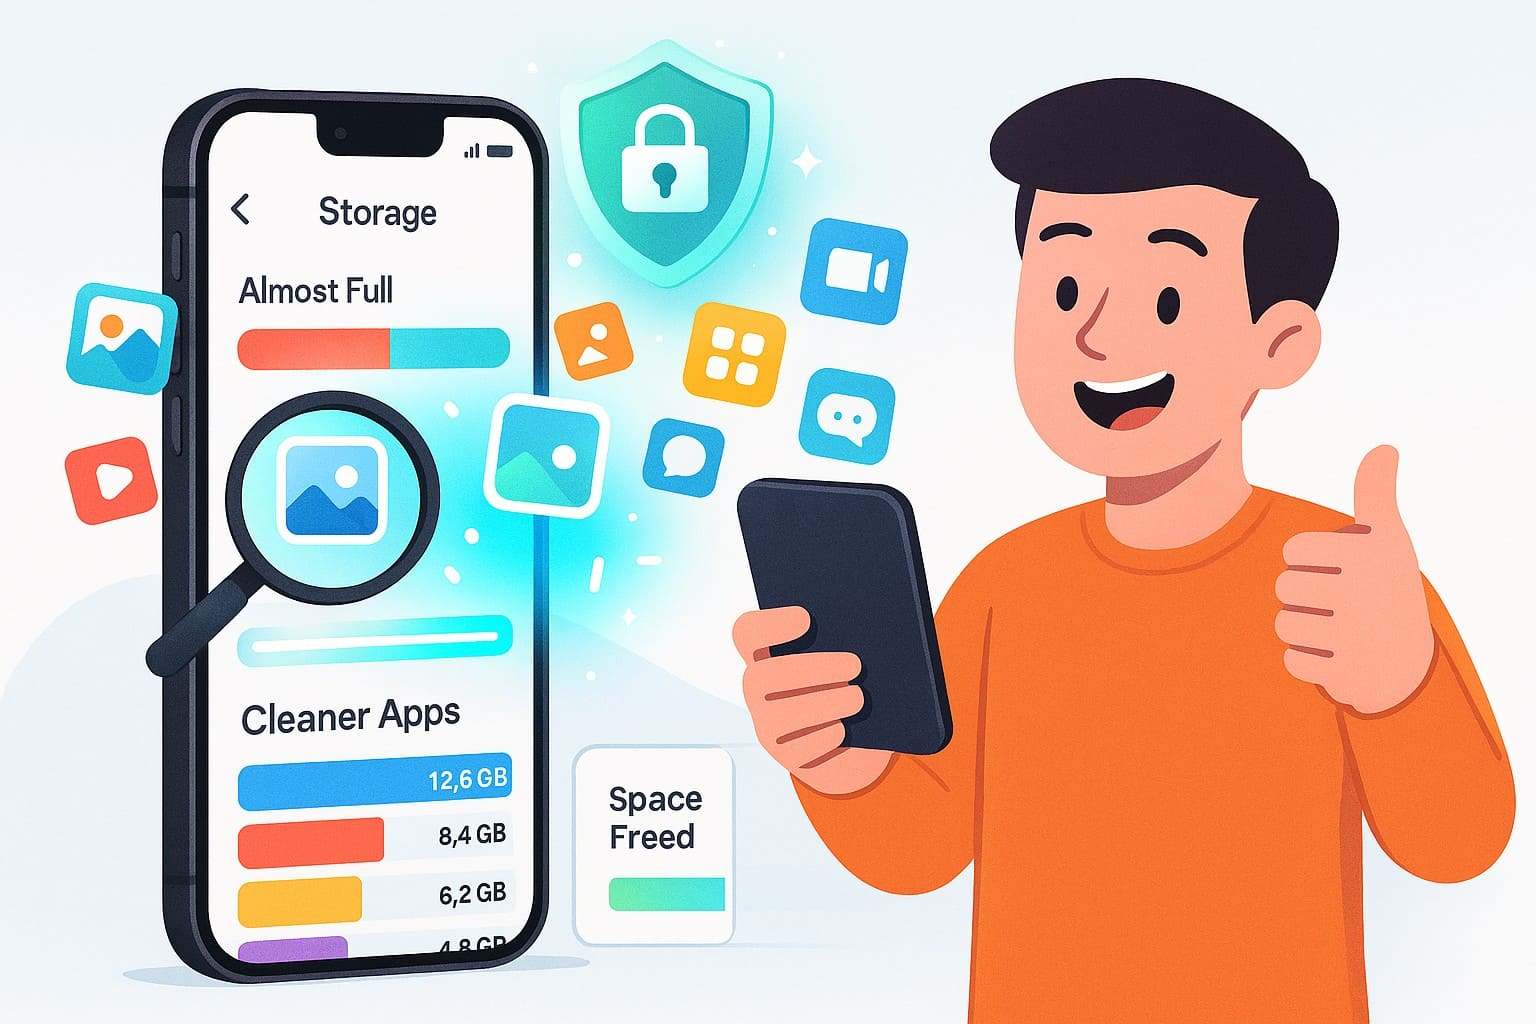
Screen recordings can quickly use your iPhone's capacity. To keep your device working efficiently, remove any unwanted files. The Photo Cleaner software is a great tool for accomplishing this.
Photo Cleaner is an app that helps you save space on your iPhone. It detects and deletes duplicate photographs, similar images, huge files, and other undesirable files. With its smart cleaning features, you can quickly manage your storage and keep your device in order.
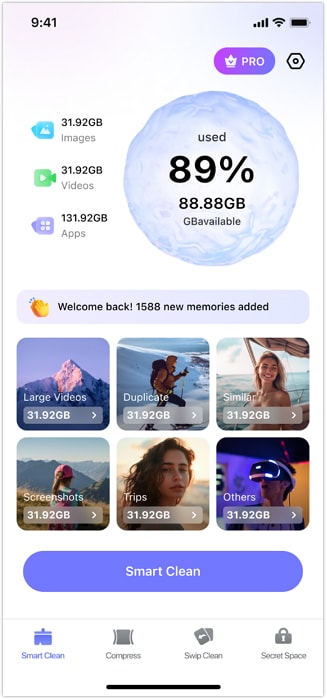
MobileClean - Photo Cleaner (iOS)
Deep Space Cleaning: Smartly Remove Media Clutter with One Tap
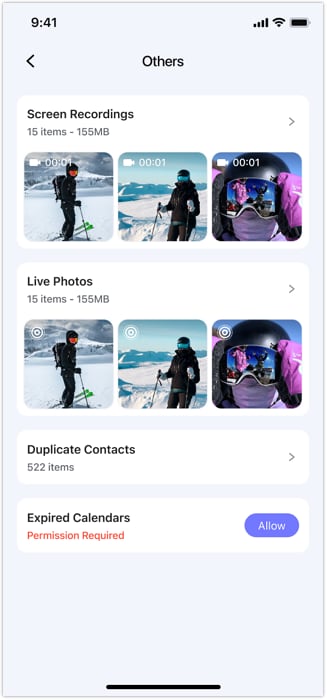
- Smart Clean: Auto-detect large videos, duplicate/similar photos, screenshots, Live Photos, and expired contacts.
- Compress: Reduce photo/video size without quality loss.
- Swipe Clean: Quickly review and batch delete unwanted photos.
- Secret Space: PIN-protected vault that hides private photos/contacts on your iPhone.


Step-by-Step Guide for Freeing Up Space Using Photo Cleaner
01of 04Download and open Photo Cleaner
Download the Photo Cleaner app from the App Store and launch it on your iPhone.
02of 04Use Smart Clean
Select the "Smart Clean" option. The program will scan your device and classify data such as duplicate photos, similar images, huge videos, screenshots, etc.
03of 04Review and delete unwanted files
Go through each category and choose the files you want to delete. You can preview files before deleting them to verify that nothing critical is removed. To remove them from your device, select them and then press "Delete."
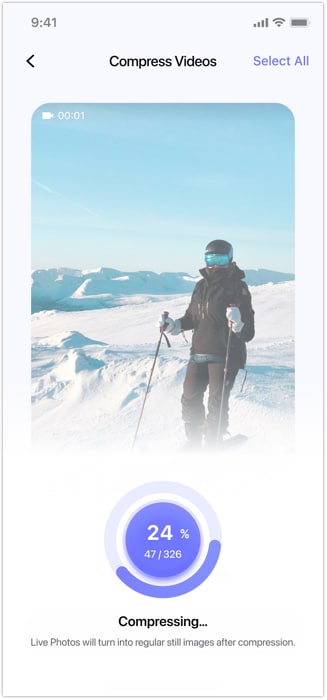
04of 04Compress large videos (optional)
If you wish to save large videos that take up too much space, use the "Compress" tool. This will reduce file size while maintaining quality.
Part 3. Editing & Sharing Screen Recordings
After understanding how to record your screen on an iPhone, you must understand how to successfully edit and share your recordings. Here's how to manage your screen recordings, whether you're removing extraneous elements or adding personal touches.
Trim in Photos App
If you're wondering how to take a screen recording on iPhone and make it brief, the Photos app provides a simple answer:
Step 1. Open the "Photos" app and pick the screen recording.
Step 2. Tap "Edit" in the upper-right corner.
Step 3. Drag the "sliders" at the bottom to change the starting and ending places.
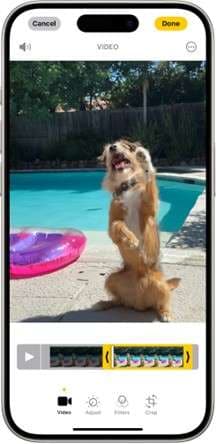
Step 4. Tap "Done," then select "Save Video" to save the new clip.
This method is ideal for anyone wondering, "How do I record my iPhone screen and edit it easily?"
Share directly
Once you've edited your recording, sharing it is easy.
Step 1. Open the edited video in the Photos app.
Step 2. Tap the "Share" icon (a square with an upward arrow).
Step 3. Select your preferred method: messages, email, Airdrop, YouTube, or social media channels.

Pro Tip: Use iMovie for advanced editing.
For those seeking more extensive editing features, iMovie is a fantastic tool.
Step 1. Open the iMovie app and create a new project.
Step 2. Import your screen recordings.
Step 3. Enhance your video with options such as split, trim, add transitions, and insert text.
Step 4. Once you're satisfied, export and share your project right from iMovie.
Part 4. Important Notes on Privacy & App Compatibility
1. Privacy Reminder
Always be careful when capturing your iPhone screen, especially with personal apps. Banking, messaging, health, and other apps may display critical data. Recording without understanding it may collect account numbers or confidential discussions. Avoid disclosing confidential information by double-checking the screen before recording.
2. Third-party apps
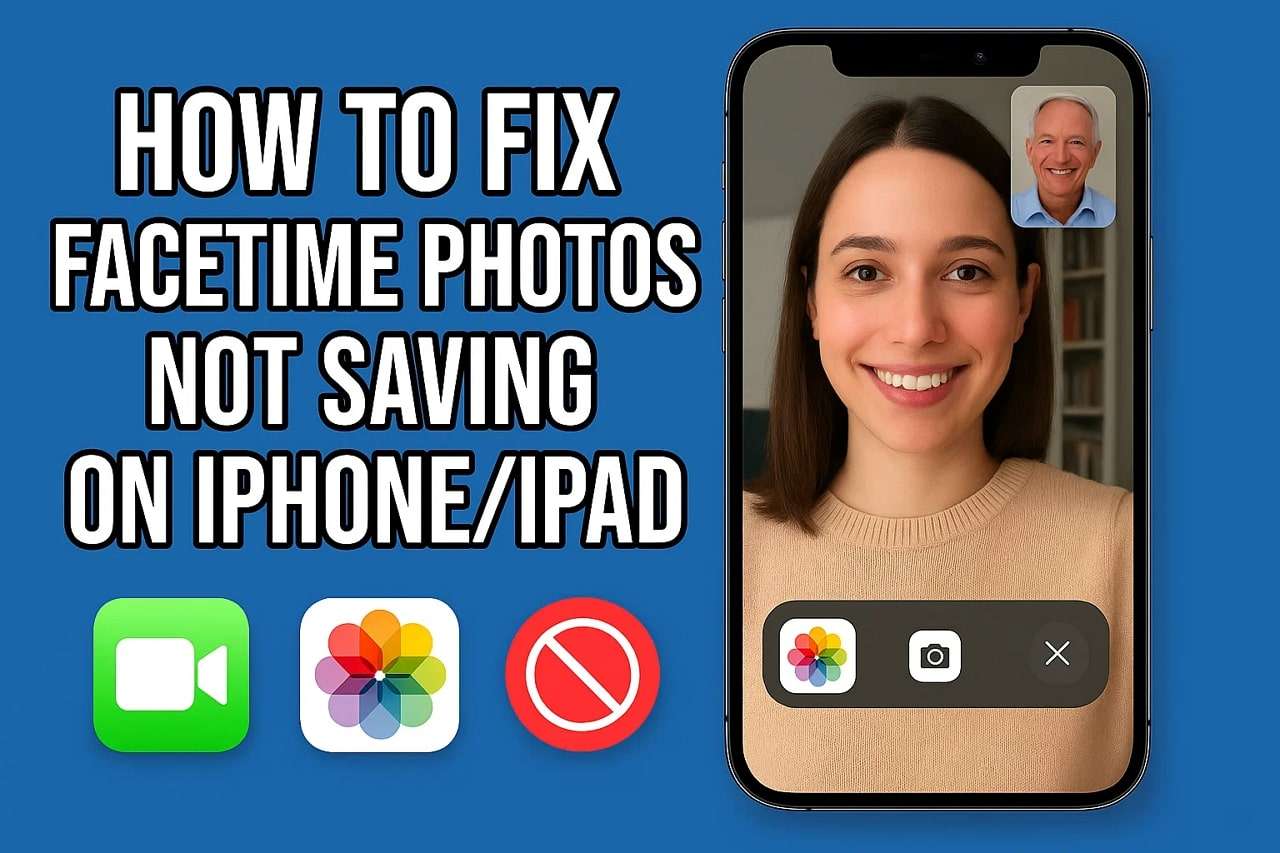
Some third-party apps block screen recording. Netflix, some banking applications, and FaceTime may black out or stop recording. Copyright and security policies cause this. Recording protected content may result in a blank screen or the program shutting down.
3. Notifications
No one wants a private message or email notice during a screen record. It can spoil a professional instructional or render content useless. Before recording, enable Do Not Disturb in the Control Center. Blocking calls and notifications with this easy step ensures a clean recording session.
Part 5. Troubleshooting Screen Recording
The following are some of the most common issues and fixes regarding how to record your iphone screen:
Issue: No Screen Recording button?
Fix: Go to Settings > Control Center > Customize Controls, then press the green + icon next to "Screen Recording." This will add the button to your Control Center. Swipe down from the top-right corner (or up on previous iPhones) to access and begin recording from there.
Issue: Audio not working?
Fix: First, go to Settings > Privacy > Microphone and ensure microphone access is enabled. To start a screen recording, long-press the record button in Control Center and hit the Microphone icon to activate it. Ensure that your volume is not muted while playback.
Issue: Low storage?
Fix: Use the Photo Cleaner program to free up space (see link above). It swiftly detects and removes duplicates, fuzzy images, and huge movies. Clear app caches and remove unnecessary apps from Settings > General > iPhone Storage to make way for new recordings.
Conclusion
No matter if you're searching for how to record your screen on iPhone or how to record screen with audio on iPhone, this tutorial has taken you step by step through the process. From turning on the screen recording functionality to recording sound, editing clips, even clearing up space afterwards—recording an iPhone screen is easier than ever. Just ensure you're considering privacy settings, storing wisely, and using Photo Cleaner when necessary. With these tricks, you're able to record tutorial guides, gameplays, video calls, and more—all from your iPhone.
Keep your storage clear, follow the instructions, and enjoy making useful screen recordings with ease. Happy recording!


Alice MJ
staff Editor
Generally rated4.5(105participated)