

Ever tried to upload a beautiful, high-resolution photo online — only to be hit with a frustrating "file too large" error? Whether you're sharing pictures on WhatsApp, uploading to a government form, or attaching files to an email, oversized images can slow you down or get rejected entirely.
If you've ever wondered how to shrink an image without losing quality, you're not alone. Many people face this exact issue, especially mobile users who snap 4K photos on powerful devices like the iPhone 15 Pro or Galaxy S24 Ultra. These crisp, vivid photos are fantastic for printing and social media, but they often come at the cost of huge file sizes (3MB–10MB or more!).
The challenge? Compressing those large images without ending up with blurry, pixelated results. That's where smart resizing and AI-powered tools come in.
In this guide, we'll show you:
- The reasons you might need to shrink an image
- What causes quality loss when compressing photos
- The best mobile and desktop tools to shrink an image without compromising sharpness
- A quick 4-step solution using MobileClean – Photo Cleaner on iPhone
- Pro tips for format selection, resolution control, and metadata trimming
So, whether you're a creator, professional, or everyday user, this step-by-step tutorial will help you reduce image size in seconds, without sacrificing the visual impact.
In this article
Part 1. Why You Might Need to Reduce Image Size
High-resolution images look amazing, but they can come with hidden drawbacks, especially when you're working with limited storage or strict upload guidelines. Here's why knowing how to reduce image size without losing quality is essential in everyday scenarios:
- Free up storage on mobile devices
Newer smartphones like the iPhone 15 Pro and Galaxy S24 Ultra capture ultra-HD images that can be 4–10MB each. Multiply that by hundreds or thousands of photos, and you're suddenly running low on space. Reducing image size can free up several gigabytes without deleting your best shots. - Meet size limits on forms, emails, and uploads
Many government portals, job application forms, or e-commerce platforms (like Shopify or Etsy) have strict image size requirements — often under 1 MB. Learning how to decrease image size without losing quality ensures your uploads don't get rejected or flagged. - Speed up uploads for websites and blogs
A bloated image file can slow down your WordPress site or blog, especially if you're uploading multiple product photos or galleries. Smaller image sizes = faster page load times = better SEO and user experience. - Share images easily over WhatsApp, Gmail, or AirDrop
Large images can be compressed automatically by messaging apps, often causing visible quality loss. But when you compress images smartly beforehand, you preserve quality and save time. - Improve performance in creative workflows
Whether you're editing photos in Canva, Figma, or uploading to platforms like Instagram or LinkedIn, lightweight images reduce lag and render more quickly, without hurting visual appeal.
Real-Life Scenarios That Need Quality Compression
Quality compression isn't just a technical concern — it's part of everyday digital life. Whether you're a student, professional, creator, or small business owner, here are real-world situations where knowing how to shrink an image without losing quality can save time, bandwidth, and frustration:
- E-commerce Store Owners (e.g., Shopify or WooCommerce)
Product images need to look crisp but load fast. Uploading 5MB images slows down your site, hurts SEO, and frustrates shoppers. Compressing images into lightweight WebP files improves performance without compromising quality. - Government or Job Applications
Many portals only accept images under 500KB to 1 MB. Whether you're submitting a digital passport photo, driver's licence scan, or academic certificates, you must know how to reduce image size without losing quality to meet these strict criteria. - Mobile Users Freeing Up Space
Captured hundreds of photos on a trip or during a family function? If your iPhone or Android phone is warning you about "Storage Almost Full," using a smart compression tool can save 2–3GB in minutes, all while keeping memories intact. - Creators and Influencers Posting Online
Influencers using the Galaxy S24 Ultra or iPhone Pro Max often deal with massive images that slow down Instagram Stories, Pinterest Pins, or website uploads. Compressing images before posting ensures they upload fast and retain their visual appeal. - Digital Nomads & Remote Workers
Travelling with a mobile hotspot or limited data plan? Compressing and resizing images before uploading to Google Drive or Dropbox saves time and bandwidth, especially when editing or sending visuals to clients.
Part 2. What Causes Quality Loss During Compression
Ever compressed an image and ended up with something blurry, washed-out, or downright unusable? That's because image compression, if done incorrectly, can dramatically degrade quality. Understanding what causes this quality loss is key to avoiding it.
Here are the most common culprits behind poor image results after compression:
- Shrinking the resolution too much
One of the biggest mistakes is reducing an image's dimensions (width × height) far below what the display or platform requires. For instance, shrinking a 4000px-wide image down to 800px might save space, but it also strips away detail, especially if it's meant for printing or full-screen viewing. - Using lossy formats like JPEG
JPEG is one of the most common image formats, but it's also lossy, meaning it throws away some data to reduce file size. Each time you save a JPEG file, more data is lost. This might be acceptable for casual photos, but it's not ideal for images with sharp edges, text, or graphics. - Re-saving the same file repeatedly
Every time you open a JPEG, make edits, and re-save it, the image quality deteriorates slightly. Over time, this leads to visible artifacts, blur, and discoloration. That's why professionals always save edits in lossless formats or use versioned backups. - Compressing without using smart tools
Basic resizing tools or online compressors without live previews don't optimise intelligently. They may simply reduce file size at the expense of color accuracy, contrast, and clarity, especially on mobile devices. Smart tools, on the other hand, balance size and quality using AI or modern algorithms.
Key Takeaways for Mobile Users
- Avoid JPEG for images with text, logos, or flat colors — use PNG or WebP instead.
- Never reduce resolution below the minimum required by your platform (e.g., 1080px for Instagram posts).
- Use smart tools like MobileClean or Squoosh, which adjust compression based on image type and preview.
- Prefer modern formats like WebP or AVIF — they offer better compression with little to no visible loss.
Part 3. How to Shrink Images Without Losing Quality on Mobile Devices
Let's break it down by platform:
1. For iPhone Users: Use MobileClean – Photo Cleaner App
Why MobileClean - Photo Cleaner?
- AI-powered photo compression
- Keeps your image sharp and clear
- Designed for non-technical users
- Compatible with iOS 13.0 and above
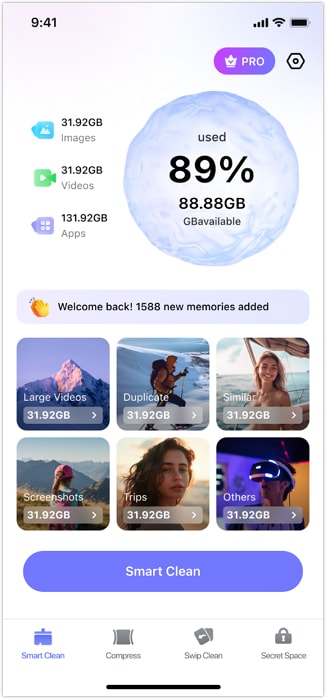
MobileClean - Photo Cleaner (iOS)
Deep Space Cleaning: Smartly Remove Media Clutter with One Tap
- Smart Clean: Auto-detect large videos, duplicate/similar photos, screenshots, Live Photos, and expired contacts.
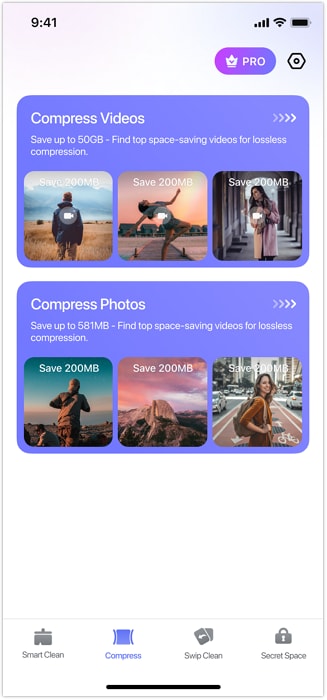
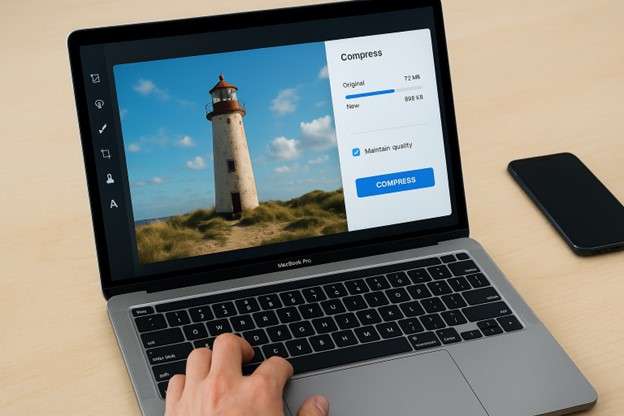
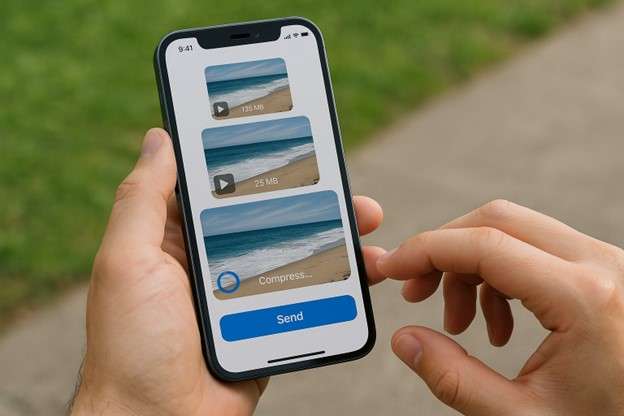
- Compress: Reduce photo/video size without quality loss.
- Swipe Clean: Quickly review and batch delete unwanted photos.
- Secret Space: PIN-protected vault that hides private photos/contacts on your iPhone.


Quick Navigation
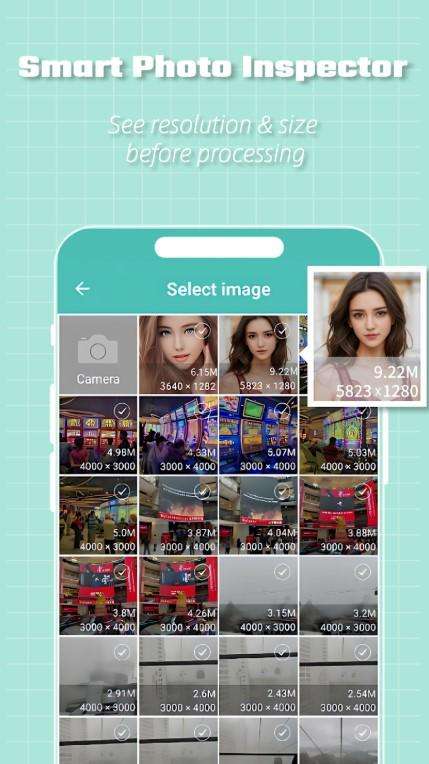
01of 04Open the MobileClean – Photo Cleaner app and tap compress
02of 04Select the photos from your album

03of 04Tap "Compress" to reduce the photo size while preserving quality
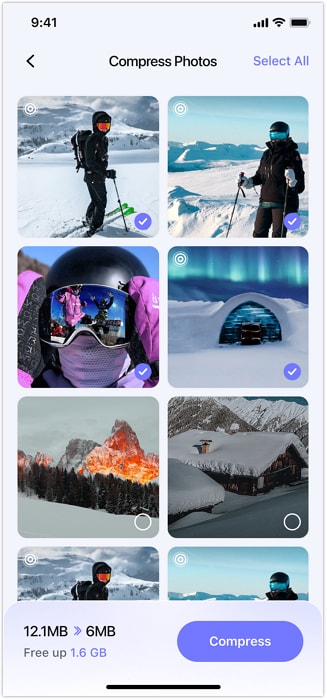
04of 04Delete original photos after compression to free up iPhone space

2. For Android Users: Use Squoosh or LitPhoto
If you're on Android, two quick and easy apps are:
- LitPhoto: Resize, compress, and convert
- Squoosh (Web App): Offers live preview and format conversion
Quick Navigation
Step 1 Download LitPhoto from Google Play or visit Squoosh
Step 2 Select your image
Step 3 Set output format to WebP or PNG and adjust the quality.
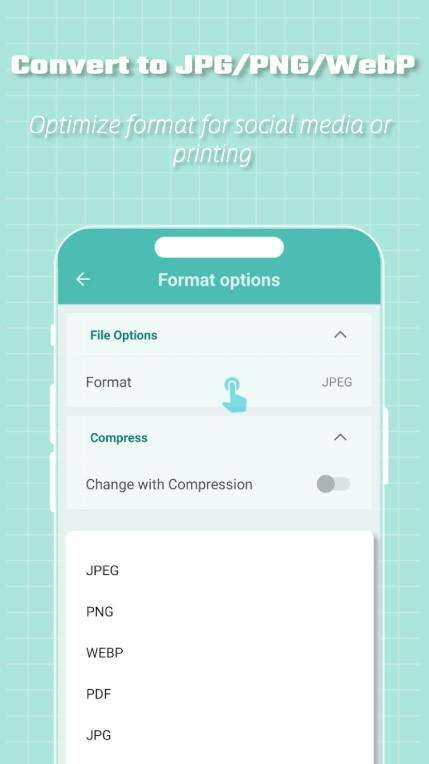
Step 4 Preview & save the image with the desired size.
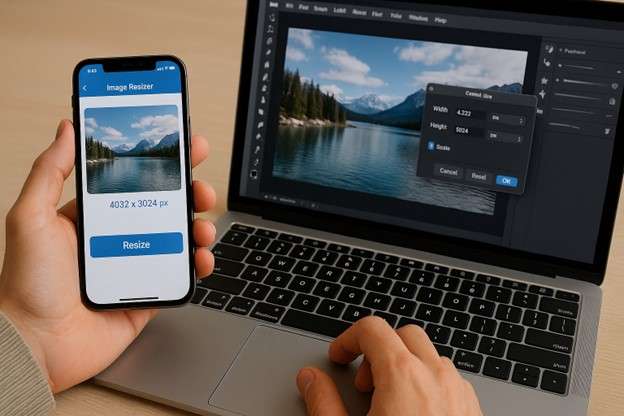
Part 4. How to Shrink an Image Without Losing Quality on Desktop
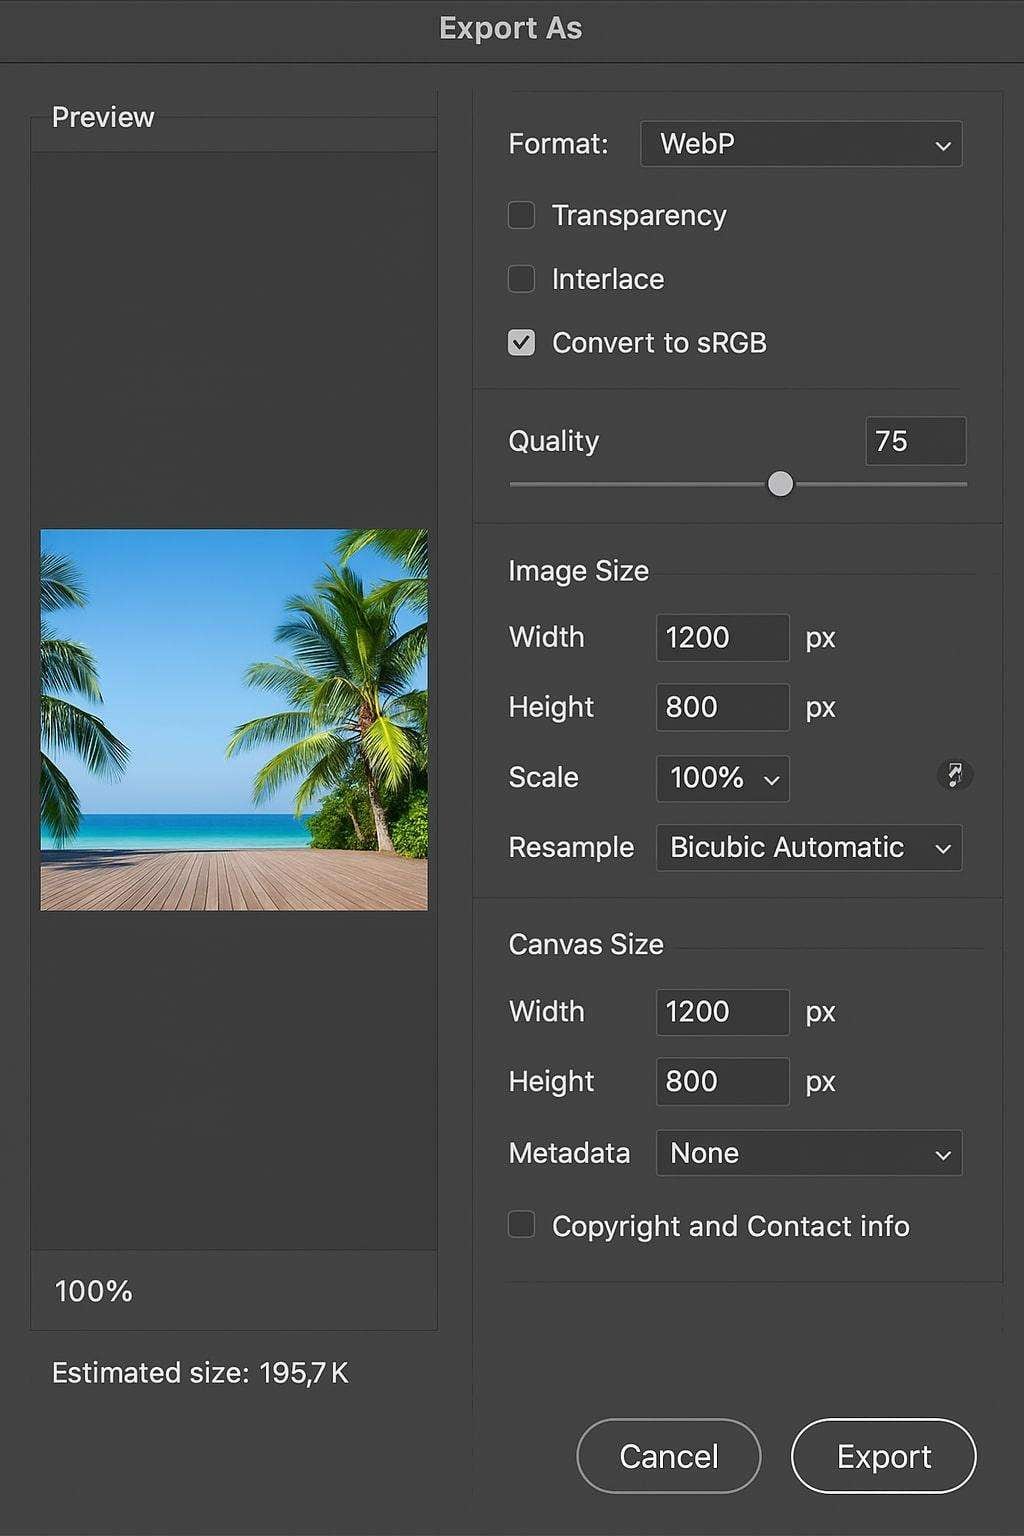
Prefer working from a PC or Mac? Here's what to do with PhotoShop:
Quick Navigation
Step 1 Open your image in Adobe Photoshop. For alternative tools, try GIMP (desktop) or Squoosh (online).
Step 2 Click "Export As" or "Save for Web."
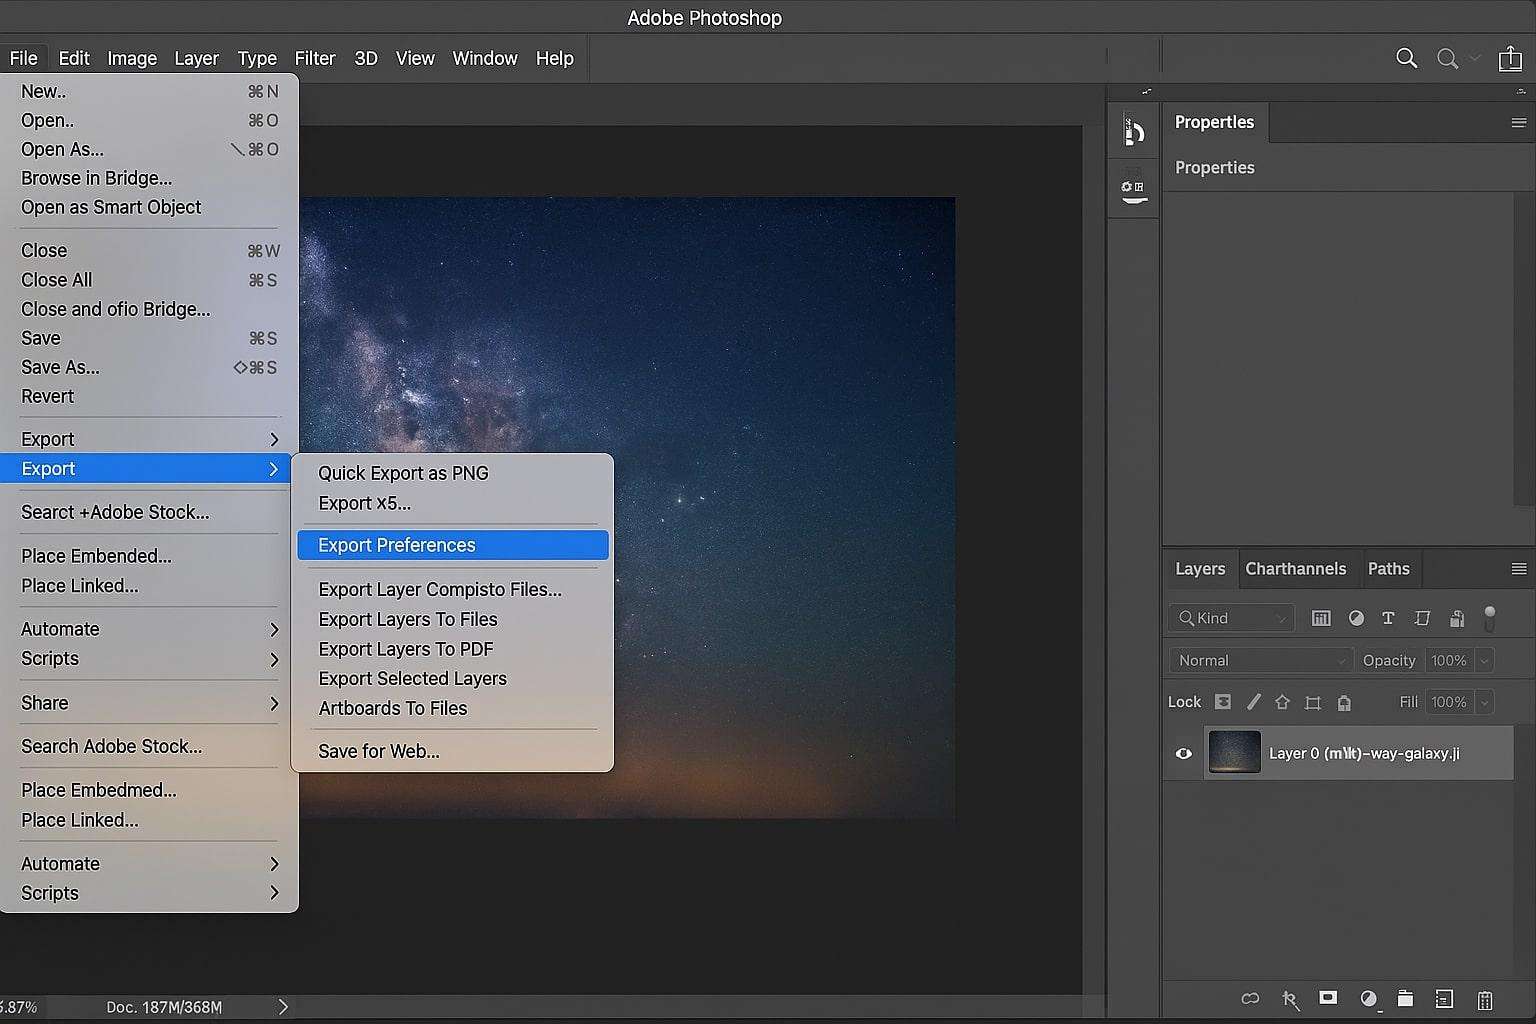
Step 3 Choose WebP or PNG format.

Step 4 Resize dimensions conservatively (don't overshrink)
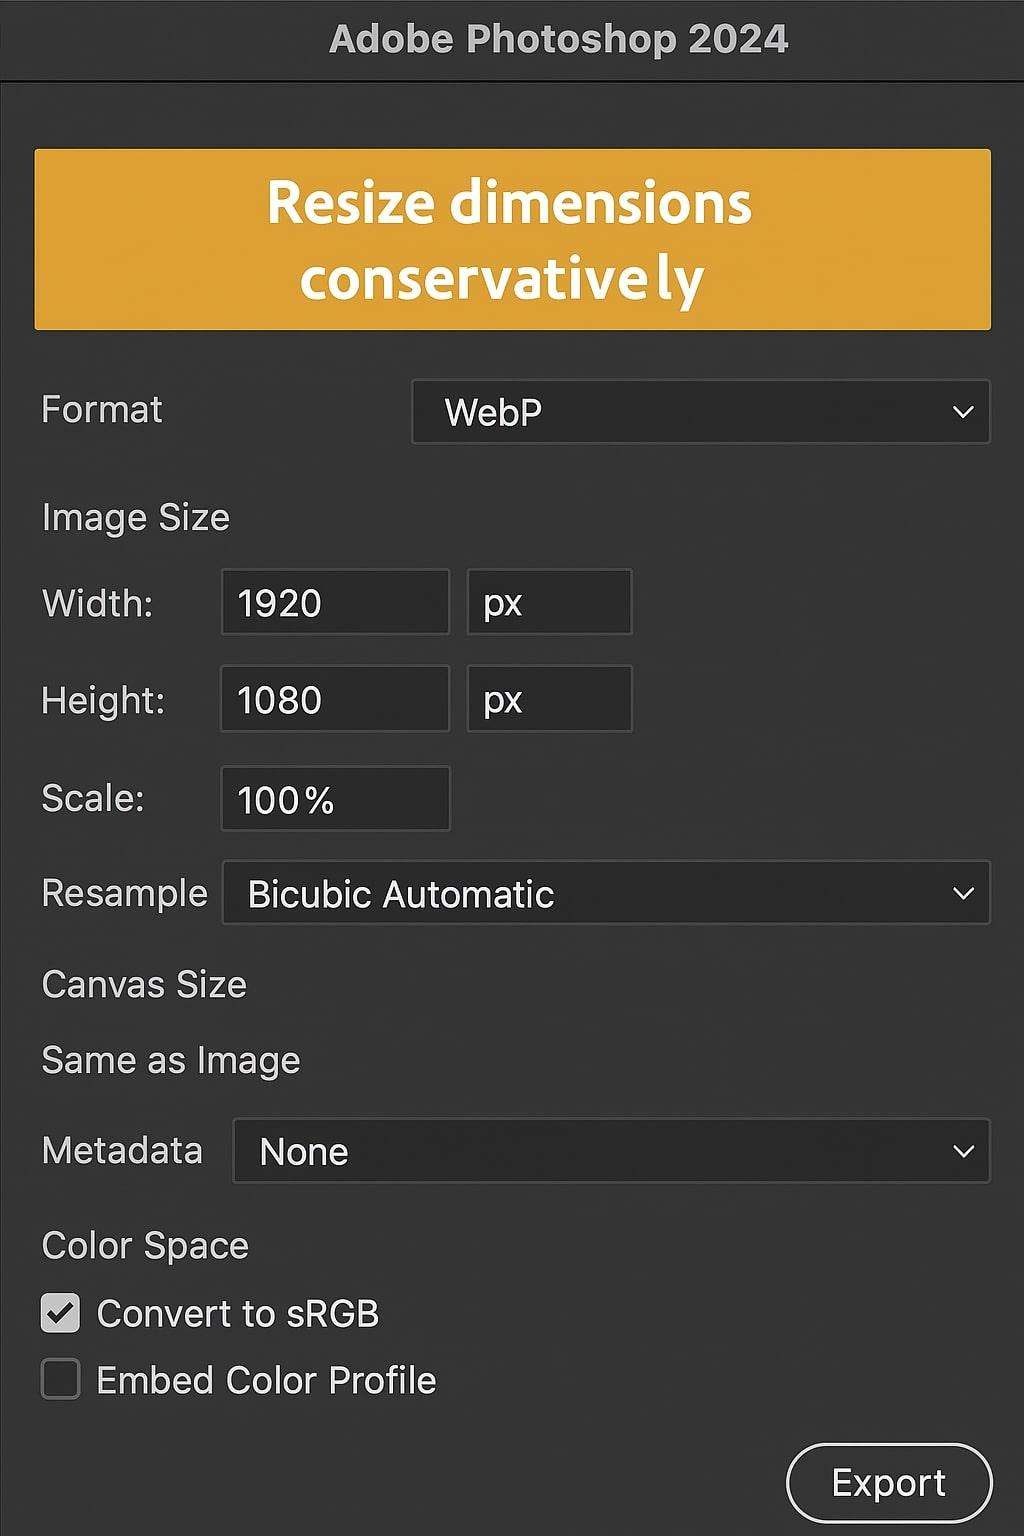
Step 5 Adjust the quality slider while using live preview.
Part 5. How to Downsize an Image Without Losing Quality – Pro Tips
To maintain quality even after compression, follow these golden rules:
- Keep the original as a backup
- Use tools with live preview (like MobileClean, Squoosh)
- Avoid repeated JPEG saves
- Remove metadata to shrink file size subtly.
- Resize according to platform needs (e.g., Instagram, Pinterest, etc.)
Highlights for Quick Readers
- Use WebP or AVIF for the best results
- Don't shrink beyond platform-recommended sizes.
- Always preview before saving the final image.
Conclusion
Shrinking an image doesn't have to mean sacrificing clarity or professionalism. Whether you're compressing photos for a passport application, resizing product images for Shopify, or just trying to clear storage space on your iPhone, preserving image quality while reducing file size is 100% possible — if you use the right tools and techniques.
Throughout this guide, we explored how to shrink an image without losing quality using both manual and smart solutions. From adjusting export settings on your desktop to using modern formats like WebP and AVIF, there are plenty of ways to downsize without degradation. But when speed and convenience matter — especially for mobile users — dedicated apps like MobileClean – Photo Cleaner stand out. With just 4 quick steps, even beginners can master photo resizing without needing technical skills. If you're serious about keeping your phone clutter-free, sharing images faster, or uploading hassle-free to any platform, give MobileClean a try today.
FAQ
-
Q: How do I shrink an image without losing quality?
A: Use smart tools like MobileClean or Squoosh to compress images using modern formats like WebP. These maintain sharpness while reducing file size.
-
Q: Can I compress images on my mobile device?
A: Yes, you can compress images directly on your mobile device using apps like MobileClean – Photo Cleaner. It reduces file size while keeping your photos sharp and clear.
-
Q: What format should I save in for best results?
A: For best results, save your images in WebP or PNG format. These formats offer excellent compression with minimal to no quality loss.
-
Q: How can I reduce image size for email or WhatsApp?
A: Use a compression tool like MobileClean – Photo Cleaner to reduce image size without losing clarity. Then share the compressed image directly via email or WhatsApp.
-
Q: Is MobileClean Photo Cleaner free to use?
A: Yes, MobileClean – Photo Cleaner is free to download from the App Store and offers basic compression features at no cost. However, some advanced tools and higher usage limits may require in-app purchases.


Sandra
staff Editor
Generally rated4.5(105participated)