

![How to Resize an Image on iPhone and Android [BEST WAYS]](https://images.wondershare.com/drfone/article/2025/06/how-to-change-width-and-height-of-image-1.jpg)
Resizing images can be tricky for some users, especially on mobile phones. People often face problems like losing image quality or making pictures look stretched. Many apps have confusing settings, and not everyone knows which size to use. These issues can make it hard to share or upload photos correctly. Resizing is also harder when using smaller screens or limited tools on mobile devices. That's why understanding how to change width and height of image is very important today.
Changing image size on your phone helps in many useful ways. It makes websites and apps load faster, saves data, and improves the viewing experience. Properly sized images also look better on different screen sizes, like tablets and smartphones. In this article, you'll learn how to change height and width of image on both iPhone and Android devices. Additionally, we'll show you simple tools and steps that work well. With the right image size, your content will look clean and load smoothly everywhere.
In this article
Part 1. When and Why You Should Resize Photos on Mobile?
Resizing photos on phones is helpful in many situations. Many users want to know how to change width and height of image to improve quality and fit. Whether sharing or saving, image size affects results. Mobile tools are limited, so resizing is a key skill. This section explains why photo resizing matters in everyday mobile use.
Part 2. How to Change Image Width and Height on iPhone?
To change image width and height on iPhone, several methods are available. Each method gives you different control depending on what your image needs are. You might just crop or resize for more precise pixel-level results. Learning how to change picture height and width helps save space and improve quality. So, let's get started!
Method 1: Using the Built-in Photos App (Crop Only)
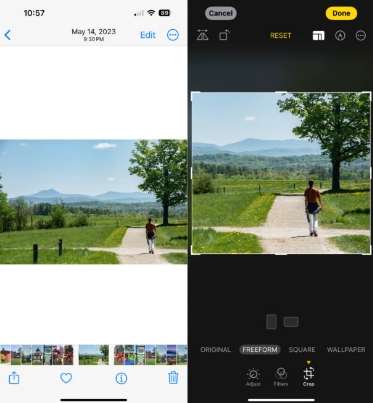
The Photos app on iPhone lets you crop images and adjust framing. This changes their visible width and height, not the pixel resolution or file size. Cropping is helpful when highlighting a subject, removing distractions, or adjusting framing. You can also crop freely by dragging corners for a custom layout. This doesn't allow exact pixel entry, but it's fast and always available.
Step-By-Step Guide:
Step 1 Open the Photos app, then select the image you want to crop.
Step 2 Tap Edit at the top right corner to open the editing menu.
Step 3 Tap the Crop icon located at the bottom of the screen interface.
Step 4 Tap the aspect ratio icon (stacked rectangles) for preset or Freeform crop mode.
Step 5 Tap Done to save and apply your crop to the selected image.
Method 2: Using the Shortcuts App (Resize with Custom Dimensions)
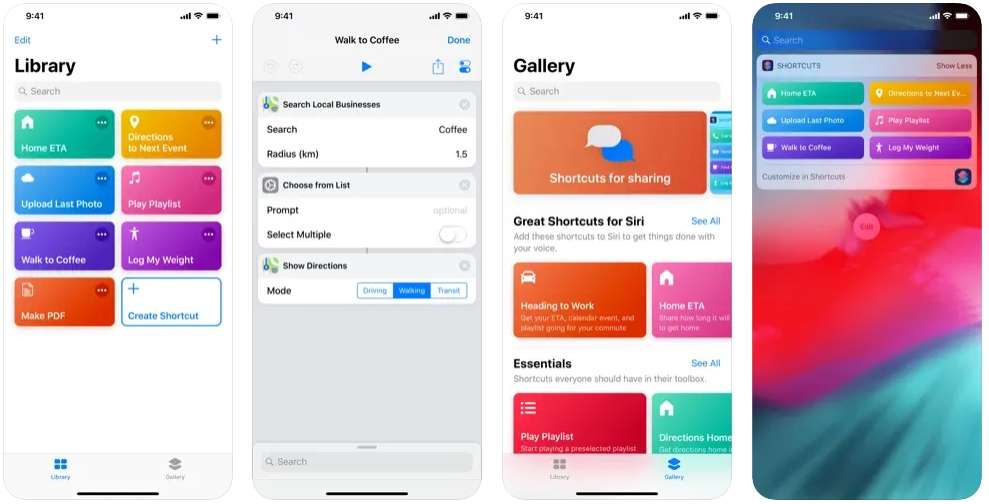
The Shortcuts app helps you resize images using automation workflows for precision. This method works best when full control over image dimensions is needed. You can enter width (and height) values, and images resize automatically. It's perfect for uploading photos that require specific image size settings. Once the shortcut is saved, it can be used anytime. This is useful for anyone learning how to change picture width and height.
Step-By-Step Guide:
Step 1 Open the Shortcuts app on your iPhone to begin creating a shortcut.
Step 2 Create or download one specifically designed for resizing your selected images.
Step 3 Go to Photos, pick your image(s), then tap Share from the menu.
Step 4 Scroll to find and tap the resizing shortcut you've installed or created.
Step 5 Enter your desired width and height in pixels when the prompt appears.
Step 6 The resized image will save to Recents automatically after the shortcut runs.
Method 3: Using Image Size App
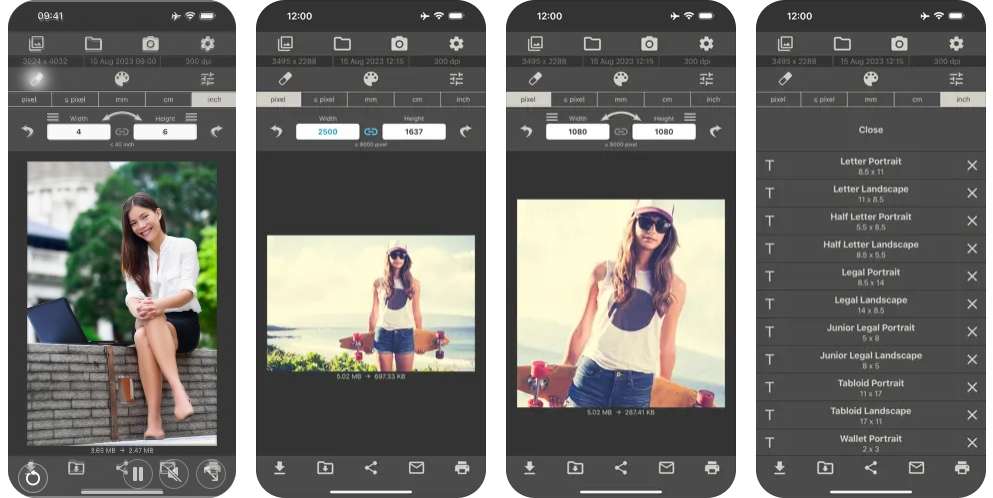
Image Size app allows uploading an image, adjusting dimensions, and then downloading again. It's fast and easy if you don't want to install anything else. It is free and doesn't need registration, making resizing simple and fast. This is one easy option to learn how to adjust width and height of image.
Step-By-Step Guide:
Step 1 Open the Image Size app on your iPhone to begin resizing.
Step 2 Tap the top-left image icon to select a photo from your library.
Step 3 If prompted, tap "Allow Access to All Photos" to continue.
Step 4 Choose your desired photo, then tap Choose in the bottom-right corner.
Step 5 Enter new width and height values; the image resizes automatically in real time.
BONUS TIP: How to Compress Images on iPhone with Photo Cleaner?
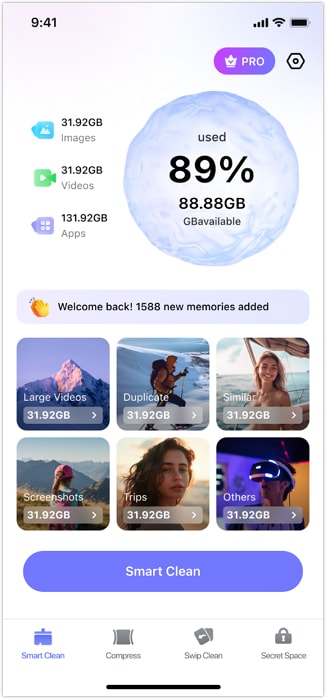
MobileClean - Photo Cleaner is an excellent solution for iPhone users needing space. It compresses images and helps free up storage on Apple mobile devices. Many users struggle with storage due to large photo and video files. This can slow down the iPhone and prevent capturing more precious memories.
Moreover, this app offers easy compression tools without reducing image quality. It's built exclusively for Apple and doesn't resize—only compresses photos and videos. Aside from learning how to resize an image on iPhone, using this app matters. Knowing how to manage storage with tools like this helps keep iPhones running smoothly.
MobileClean - Photo Cleaner (iOS)
Deep Space Cleaning: Smartly Remove Media Clutter with One Tap
- Smart Clean: Auto-detect large videos, duplicate/similar photos, screenshots, Live Photos, and expired contacts.
- Compress: Reduce photo/video size without quality loss.
- Swipe Clean: Quickly review and batch delete unwanted photos.
- Secret Space: PIN-protected vault that hides private photos/contacts on your iPhone.


Step-By-Step Guide:
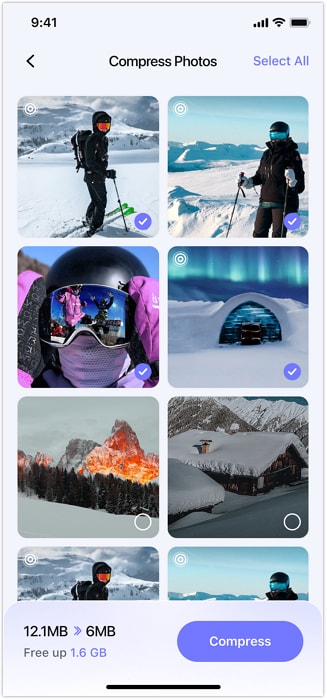
01of 04Open Photo Cleaner and Tap "Compress"
Launch Photo Cleaner, tap "Compress" at the bottom, then select "Compress Photos" to start reducing image size.
02of 04Select and Preview Photos
Pick the photos you want to compress and tap thumbnails to preview. It can help you avoid compressing important images.

03of 04Tap to Compress
Tap "Compress" at the bottom right; the app will reduce file size while keeping quality.
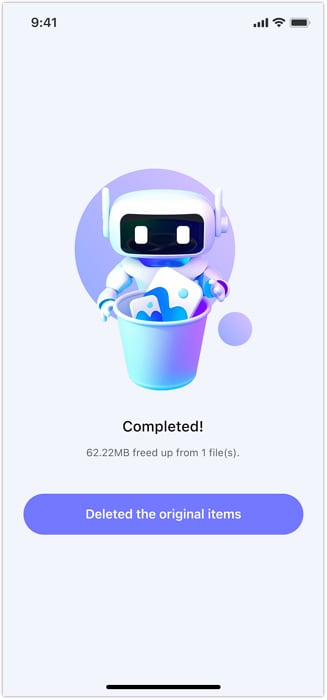
04of 04Delete Originals to Save Space
Enable "Delete the Original Items" to remove large files and keep compressed versions, freeing up storage.
Part 4. How to Change Image Width and Height on Android?
Aside from learning how to resize an image on iPhone, it is also very useful and practical to learn how to resize an image on Android. Both platforms are widely used, and knowing how to adjust image dimensions on each helps you optimize photos. Here are the methods on how to resize an image on Android.
Method 1: Change Width and Height of Image Using Built-in Gallery App
Most Android phones come with a Gallery app that includes basic photo editing features. One useful feature is the ability to resize images without needing any extra apps. This method is fast and convenient for users who want to adjust their photos before sharing or saving.
Step-By-Step Guide:
Step 1 Open the Gallery app and select the photo you want to resize.
Step 2 Tap the Edit icon (usually a pencil or slider symbol).
Step 3 Look for More options (three dots) and tap it.
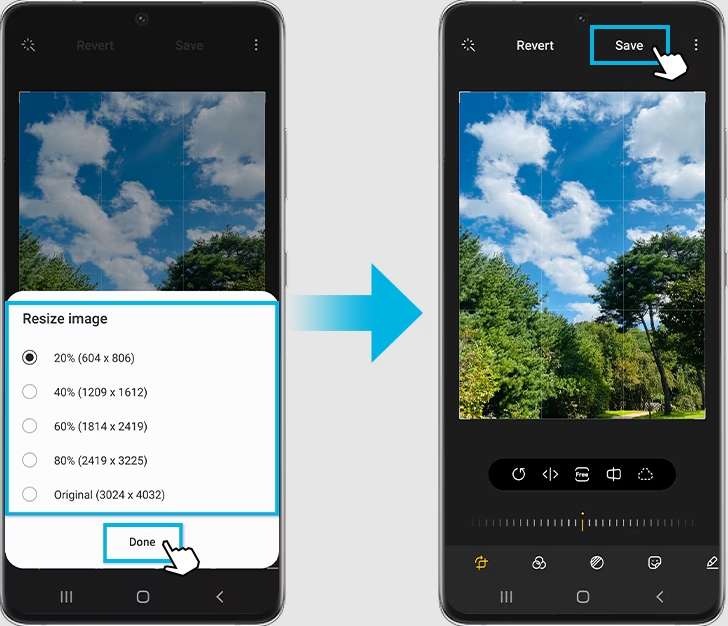
Step 4 Choose the Resize option from the menu.
Step 5 Select a resize percentage or preset size to adjust the image dimensions.
Step 6 Confirm by tapping Done or Apply to save changes.
Step 7 Save the resized image as a new file or overwrite the original.
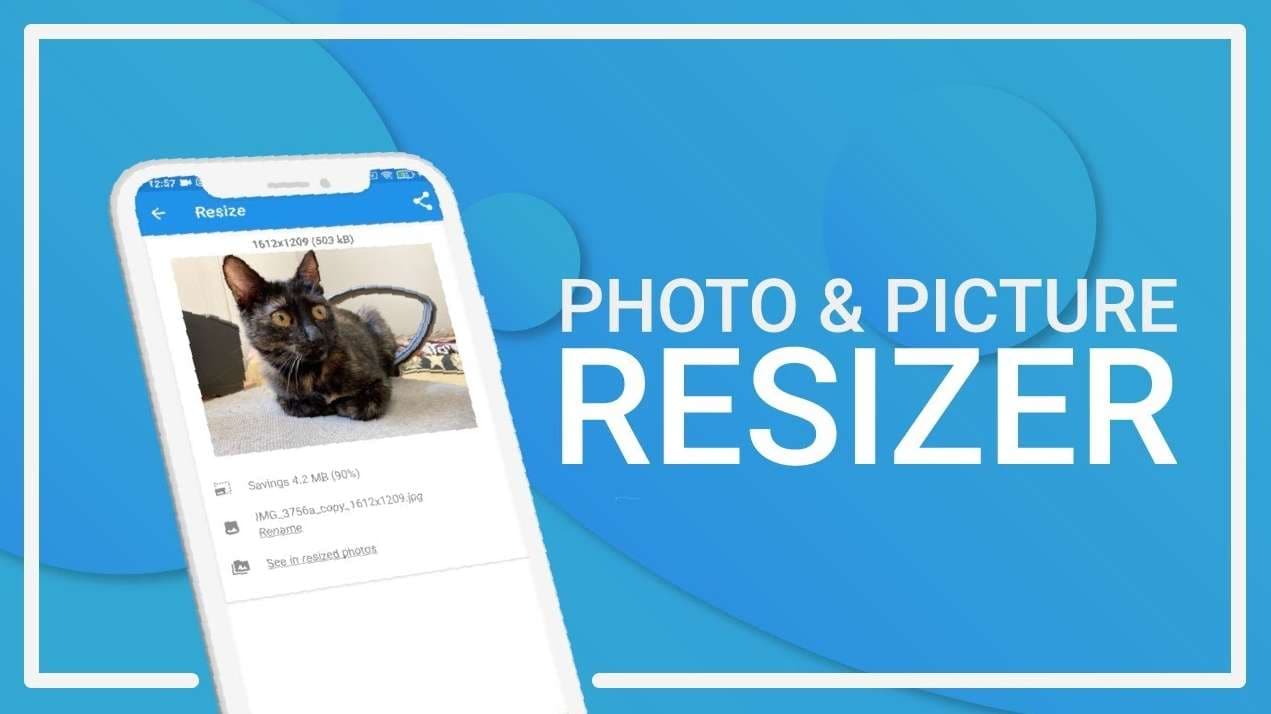
Method 2: Change Picture Height and Width with Photo & Picture Resizer
Photo & Picture Resizer is a popular and easy-to-use free app designed for resizing images on Android. You can enter exact width and height values or choose from preset sizes. The app also maintains image quality and aspect ratio, preventing distortion. This makes it ideal for preparing photos for social media, websites, or email attachments.
Step-By-Step Guide:
Step 1 Install and open the Photo & Picture Resizer app from Google Play Store.
Step 2 Tap Select Photos and choose the image you want to resize.
Step 3 Enter the new width and height values or pick from preset options.
Step 4 The app can keep the original aspect ratio to avoid distortion.
Step 5 Tap Resize to apply the new dimensions to the image.
Step 6 Save the resized image to your phone's gallery or share it directly.
Part 5. How to Adjust Image Size in HTML?
Another option for resizing an image is using CSS properties like max-width and height. Understanding how to adjust image size in HTML is key for a mobile-friendly website. Using CSS to resize images responsively helps them adapt smoothly to different screen sizes. This method is more flexible than fixed HTML attributes and keeps the image's aspect ratio intact.

Step-By-Step Guide:
Step 1 Use the tag to include the image in your HTML file:
img src="example.jpg" alt="Example Image".
Step 2 In your CSS file or within a "style" tag, set the desired width and height of the image. For example:
img src="example.jpg" alt="Example Image" style="width:300px; height:200px;".
Step 3 To make the image responsive so it scales with the parent container or screen size, use:
img {
  max-width: 100%;
  height: auto;
}
Step 4 Instead of styling all images, assign a class to your image in HTML:
.responsive-img {
  max-width: 100%;
  height: auto;
  border-radius: 8px;
}
Step 5 If you want the image to fit a specific box without distortion, use object-fit:
.fit-img {
  width: 300px;
  height: 200px;
  object-fit: cover; /* or contain */
}
Conclusion
Resizing photos on mobile helps save storage space and makes sharing easier. On iPhone and Android, you can learn how to change width and height of image using built-in editing tools or apps like MobileClean - Photo Cleaner. For websites, resizing images with CSS properties like max-width and height: auto keeps them responsive on all devices. So, if you are looking for the best page image compressor, MobileClean - Photo Cleaner is a perfect choice!


Alice MJ
staff Editor
Generally rated4.5(105participated)