How To Remove Your Apple ID From Your iPhone/iPad/iPod Touch?
Apple ID is one of the essential security barriers that provides an identity to the iDevice and keeps it protected from unauthorized use. However, at times you might forget your Apple ID and face issues of making your device useless.
If it is the case, Dr.Fone - Screen Unlock (iOS) comes as the savior to help you unlock your Apple ID in an accessible environment. Be aware that the process erases all the data from the iDevice while removing Apple ID from it.
Manage Your Phone Wherever You Go
Remove Apple ID From iPhone/iPad/iPod Touch
The provided guide will help you assess a comprehensive flow of unlocking Apple ID with ease. Follow the steps properly to unlock Apple ID and make your device operational:
Start by launching Wondershare Dr.Fone on your computer and continue under the path Toolbox > Screen Unlock > iOS to activate the particular feature of the platform.
* Dr.Fone Mac version still has the old interface, but it does not affect the use of Dr.Fone function, we will update it as soon as possible.

As you propagate onto the next window, find the option of Remove AppleID among the options to initiate the specific function of removing Apple ID.

With the iDevice connected to your computer, it will show a connectivity status on the next screen. Continue with selecting the Unlock Now button.

Following this, the platform will ask a few questions before proceeding with unlocking the Apple ID. Confirm whether you have a screen lock on your iDevice. However, make sure to have a screen lock on your iDevice and continue by clicking Yes.

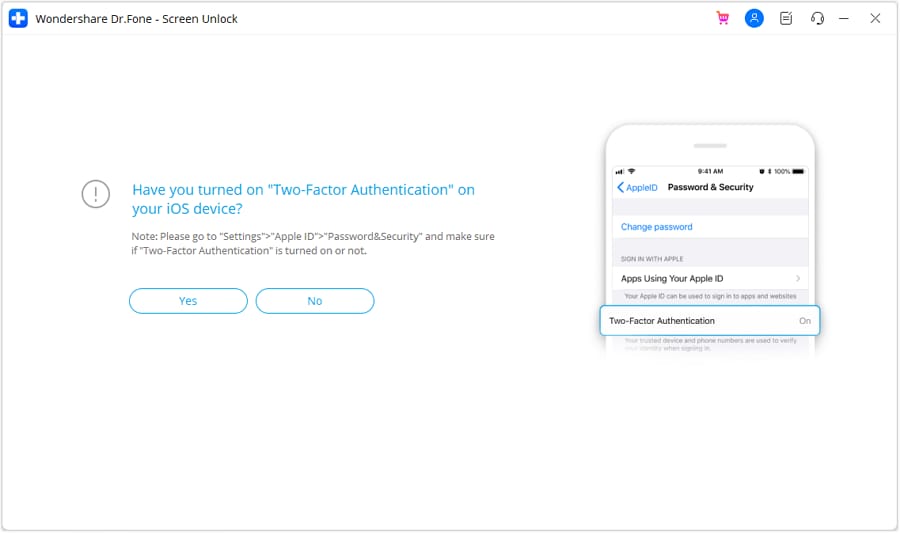
Next, confirm whether your iDevice has Two-Factor Authentication enabled across it. If not, turn it on and click Yes to continue unlocking the Apple ID.

After verifying these options, you will be prompted to a screen containing on-screen instructions to put your iDevice in Recovery Mode. Follow the instructions according to your iOS model, and if it does not work, click Try DFU Mode on the bottom-left of the screen. This will open the DFU Mode instructions, which can be followed to proceed with the unlocking process.

Once the device is put in Recovery Mode, its details are displayed on the next screen. With the Device Model recognized, you are only advised to select the System Version and click Start. However, if there are discrepancies in recognition, manually choose the details and proceed.

The respective iOS firmware starts downloading, with its progress displayed on the next screen. For platforms downloading firmware slowly, click the Copy button to copy the link to download iOS firmware directly.

Once the firmware downloads, it is verified by the platform, and its details are displayed on the next screen. Proceed by clicking Unlock Now to unlock your Apple ID.

A prompt confirmation window appears on the screen, asking you to enter a code to continue. Add the code and click Unlock to initiate the process.

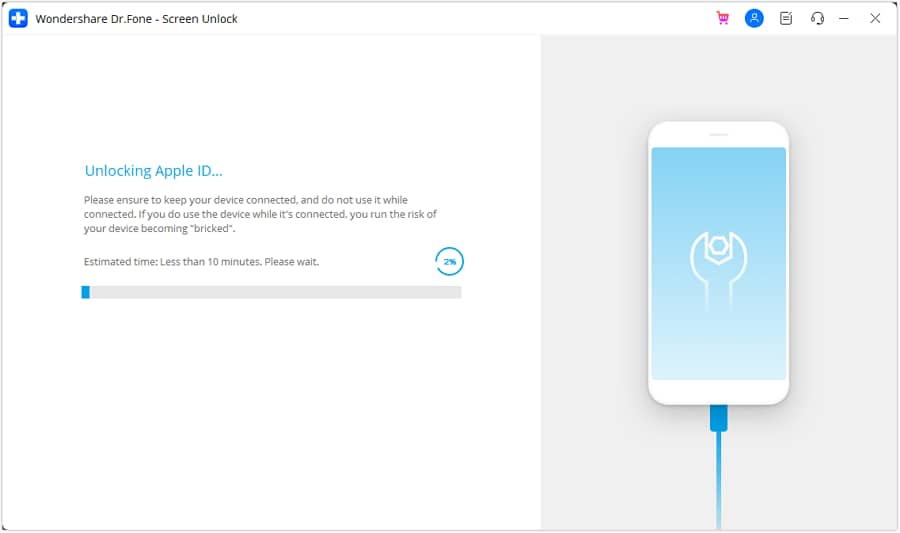
The progress of unlocking Apple ID is displayed on the next screen. Keep the device connected and avoid all forms of disconnection scenarios.

Once the Apple ID has been unlocked, the screen prompts its completion. Click Done to conclude the process if the Apple ID is unlocked. Otherwise, you might have to go for the Try Again option to repeat the process.

WHAT YOU'LL NEED

Dr.Fone provides a complete set of tools for solving all iOS/Android phone problems.
Need help?
You might find the answer to your question in the FAQ or additional information below:


