Transfer Music from iPad to iPad with Ease

Jul 12, 2024 • Filed to: Data Transfer Solutions • Proven solutions
Perhaps you've upgraded to a new iPad model, or you want to share your favorite songs with a friend. Nonetheless, transferring music from one iPad to another can be a bit tricky, especially without the assistance of a computer or iTunes.
Unlike photos, music files often come with copyright protection, making the process a bit more challenging. However, we have a few tricks that you can try to do in effortless ways. With or without a computer, transferring songs from iPad to iPad shouldn't be a hassle.
- Part 1. How to Transfer Music from iPad to iPad with iTunes
- Part 2. How to Transfer Music from iPad to iPad without iTunes

- Part 3. How to Transfer Music from iPad to iPad Without Computer
Part 1. How to Transfer Music from iPad to iPad with iTunes
When it comes to transferring music between iPads, using iTunes remains a common and reliable method, especially with the latest iPad models like the iPad Pro 6th Generation running on iPadOS 17.2.
iTunes provides a seamless platform for managing and syncing your music library across devices. While the app offers a systematic approach, it does come with certain limitations. For instance, the process may seem a bit intricate for some users, and the requirement of a computer adds an extra step to the transfer process. You also need to purchase the songs from the iTunes Store.
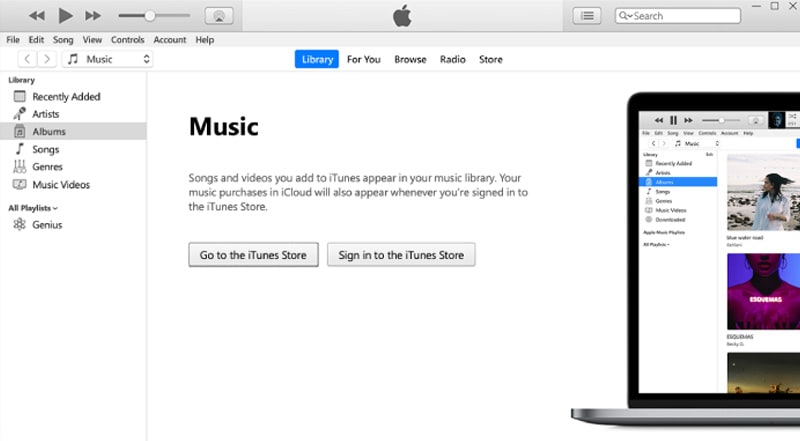
But if you don't mind, here's how to transfer music between iPads with iTunes:
- Step 1: Link your iPad to your computer. Make sure it has proper recognition.
- Step 2: Open iTunes and navigate to "File" > "Devices" > "Transfer Purchases from [your iPad name]” to transfer the music to your computer.
- Step 4: Connect your new or other iPad to the same computer. Then, click on the device icon and open the Music tab.
- Step 5: Select the “Sync Music” > selected playlist, and choose the playlist/purchased songs you want to transfer. Click Sync once you are ready.
Part 2. How to Transfer Music from iPad to iPad without iTunes
If the intricacies of using iTunes don't align with your preferences, there are alternatives that make transferring music from one iPad to another a breeze. One such user-friendly solution is the Wondershare Dr.Fone.
Dr.Fone offers a phone transfer feature, which can be a seamless solution for transferring music between iPads. With this easy-to-use software, you can sidestep the need for iTunes and effortlessly move your favorite songs between iPads.
How to transfer music from iPad to iPad without iTunes:
- Step 1: Open Dr.Fone’s Phone Transfer tool
Use a USB cable to make a connection between your iPad and your computer. Launch Wondershare Dr.Fone on your computer and navigate to Toolbox > Phone Transfer.

- Step 2: Specify the source and destination devices
After connecting to your iPad, the platform will identify the connected devices and load their data onto the platform. Choose the Source and Destination devices to set the transfer path. Use the Flip button if necessary to alter the transfer direction.

- Step 3: Choose music as data types for transfer
Proceed to select the types of data you wish to transfer. Checkmark the music category and click the Start Transfer button. If you want to remove existing data from the destination device, you can select “Clear data before copy.”

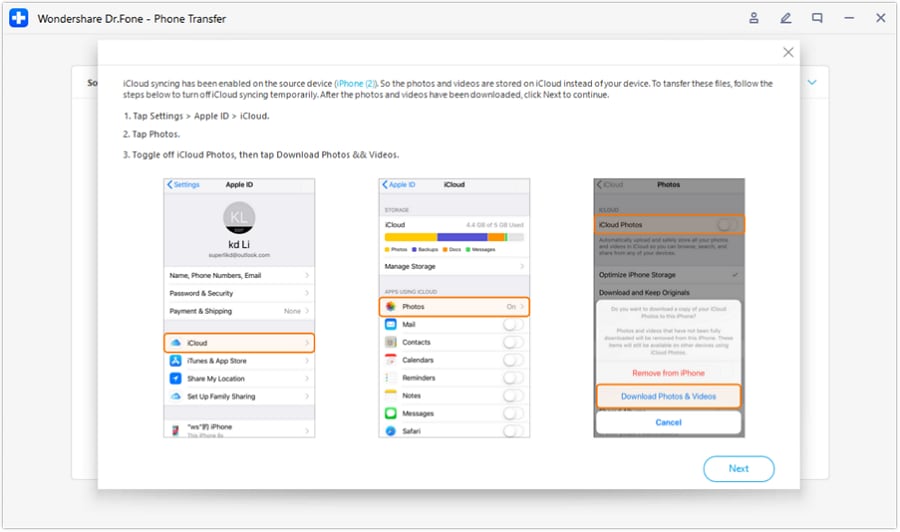
- Step 4: Disable iCloud syncing
Now, Dr. Fone's Phone Transfer tool should prompt a specific operation on the window. Follow the instructions to turn off iCloud syncing. Open your iPad Settings and select your name. Go to iCloud > Photos to disable the toggle for iCloud Photos.
- Step 5: Monitor music transfer progress
The progress of the data transfer will be displayed in a pop-up window. Once completed, click OK to conclude the process.

Part 3. How to Transfer Music from iPad to iPad Without Computer
In situations where you can’t access a computer, there are also various alternatives to transfer music from iPad to iPad without a computer. Through this section, we will explore multiple solutions that cater to different preferences and scenarios.
Solution 1. Using AirDrop
AirDrop is a wireless file-sharing feature available on Apple devices, including iPads. It allows you to transfer various types of files, including music, directly between compatible devices without the need for a computer or any additional software.
Before initiating the transfer, make sure that both iPads have AirDrop enabled and both devices have Bluetooth and Wi-Fi activated. While AirDrop is a convenient method, it does have limitations, such as working within a relatively short range. So, bringing the iPads close to each other is important to facilitate the seamless transfer process.
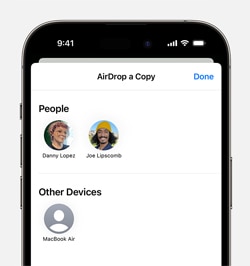
How to transfer music with AirDrop:
- Step 1: Open the music you want to transfer on your iPad.
- Step 2: Tap the three-dots icon to access additional options.
- Step 3: Select the Share icon, then choose your target iPad from the AirDrop options to initiate the song transfer.
- Step 4: Accept the incoming songs on your target iPad.
If your music files are stored in the Files app, navigate to Files, long-press the desired song, and select Share > AirDrop.
Solution 2. Sync Apple Music
Apple Music is an Apple music streaming service that provides an additional avenue for transferring music between iPads. It can also work as a good alternative to iTunes.. While this method may involve a subscription, it offers a comprehensive library and the flexibility to sync music across multiple devices.
To transfer music with Apple Music, you only need to ensure both iPads are signed in with the same Apple ID. Then, subscribe to Apple Music (if not already subscribed).
Follow the steps below:
- Step 1: Open the Apple Music app on the source iPad.
- Step 2: Locate the music you want to transfer and add it to your library.
- Step 3: On the target iPad, launch Apple Music and log in with the same Apple ID.
- Step 4: Your synced library will be available on the target iPad.

Solution 3. Using Dropbox
Dropbox serves as a versatile cloud storage solution that facilitates the sharing of various files, including music, across different devices. If you have songs with MP3, M4A, or similar format files on your iPad that you wish to transfer without a computer, Dropbox can be a good solution.
Since Dropbox is a cloud-based app, it allows you to store, organize, and access your music files on your devices as long as there is an internet connection. But before we begin, make sure that you have a Dropbox account. If not, you can sign up for your account.
Then, Install the Dropbox app on both the source and target iPads. Ensure that you are signed in to the same Dropbox account on both devices. Once you are ready, follow the steps here:
- Step 1: Open Dropbox on the Source iPad
Launch the Dropbox app on the iPad that contains the music files you want to transfer.
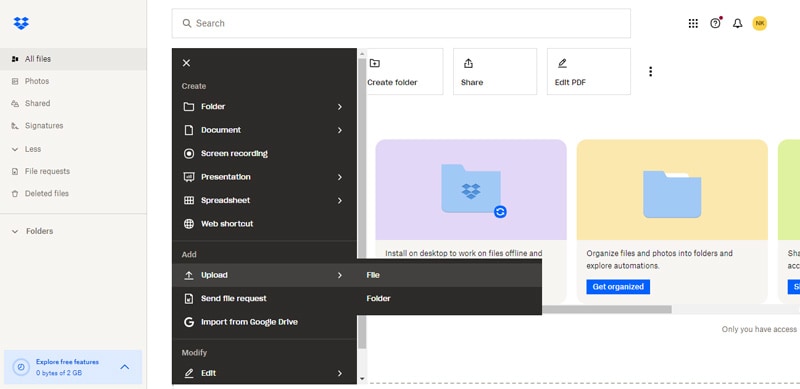
- Step 2: Upload songs to Dropbox
Navigate to the location of your music files within the Dropbox app. Select the music files and choose the option to upload or move them to your Dropbox storage.
- Step 3: Wait until the download is complete.
Allow the app to upload the selected song files to your Dropbox account. The time required depends on the file size and your internet connection speed.
- Step 4: Download the music files to target iPad.
Launch Dropbox on the target iPad. Then, select the music files you uploaded and download or save them to the device.
- Step 5: Access the song files.
Once the download is complete, you can access and play the transferred files directly from the music player on the target iPad.
Solution 4. Transfer via Email
The final method, and certainly not the least, is transferring songs from iPad to iPad via email. Email can serve as a straightforward and widely accessible method for transferring music files between iPads. You don't need to be tech-savvy to operate emails.
This method is particularly useful if you are dealing with smaller-sized files or a limited number of songs. By attaching the music files to an email, you can share them with ease.
How to transfer music via Email:
- Step 1: Open your email on the iPad that contains the music files you want to transfer. Compose a new email.
- Step 2: Attach your music files to the email.
- Step 3: Enter the email address associated with the account on the target iPad as the recipient. After making sure that the song files are attached, send the email.
- Step 4: On the target iPad, open the email and download the attached music files.
Conclusion
Transferring songs from iPad to iPad can be done through several methods, depending on your preferences and available resources. From the classic iTunes to the wireless AirDrop, the user-friendly Dr.Fone software, and cloud-based solutions like Dropbox, there's a method for everyone. Whether you're switching iPads, sharing tunes, or simply want an easy music transfer from iPad to iPad without a computer, these methods should cater to diverse needs.


Other Popular Articles From Wondershare
iPad Tips & Tricks
- Make Use of iPad
- iPad Tips and Tricks
- Smart Keyboard Folio VS. Magic Keyboard
- iPad Photo Transfer
- Transfer Music from iPad to iTunes
- Transfer Purchased Items from iPad to iTunes
- Delete iPad Duplicate Photos
- Download Music on iPad
- Use iPad as External Drive
- Transfer Data to iPad
- Transfer Photos from Computer to iPad
- Transfer MP4 to iPad
- Transfer Files from PC to iPad
- Transfer Photos from Mac to iPad
- Transfer Apps from iPad to iPad/iPhone
- Transfer Videos to iPad without iTunes
- Transfer Notes from iPhone to iPad
- Sync iPhone to iPad
- Transfer Photos from Android to iPad
- Transfer iPad Data to PC/Mac
- Transfer Photos from iPad to Mac
- Transfer Photos from iPad to PC
- Transfer Books from iPad to Computer
- Transfer Apps from iPad to Computer
- Transfer Music from iPad to Computer
- Transfer PDF from iPad to PC
- Transfer Notes from iPad to Computer
- Transfer Files from iPad to PC
- Transfer Videos from iPad to Mac
- Transfer Videos from iPad to PC
- Sync iPad to New Computer
- Transfer iPad Data to External Storage
Selena Lee
chief Editor