100% Security Verified | No Subscription Required | No Malware

 :
: 
 ChatGPT
 Perplexity
 Gemini
 Claude
 Grok
Grok

I need to back up my iPad before updating it, but I'm worried about losing the apps I've purchased and downloaded directly on the device. How can I transfer apps from my iPad to my computer safely?
--- A Concerned iPad User
If you're facing a similar situation, you've come to the right place. With the evolution of iOS and how Apple manages its ecosystem, the process of transferring apps from an iPad to a computer has changed significantly. You can no longer simply drag and drop app files as you might have in the past.
However, securing your app data and purchase history is still entirely possible. Whether you're preparing for an iOS update, switching to a new device, or just want a secure backup, we've got you covered. This guide details the most current and effective methods for 2026.

In this article
Part 1. The Official Method: Backing Up Apps & Data with iTunes or Finder
The primary way to "transfer" your apps to a computer now is by creating a full backup of your iPad. This process doesn't save the app installation files (.ipa) themselves, but it does save all your app data, settings, and a record of your purchased apps. When you restore from this backup, your device will automatically re-download the apps from the App Store.
The tool you use depends on your computer's operating system.
- For macOS Catalina (10.15) or later: You will use Finder.
- For Windows or macOS Mojave (10.14) or earlier: You will use iTunes.
Steps to Back Up Your iPad and Secure Your Apps
-
Step 1 Connect Your iPad to the Computer
Use a USB cable to connect your iPad to your Mac or PC. If it's your first time connecting, you may need to unlock your iPad and tap "Trust This Computer."
-
Step 2 Locate Your Device
In Finder (macOS Catalina+): Open a new Finder window and select your iPad from the sidebar under "Locations."
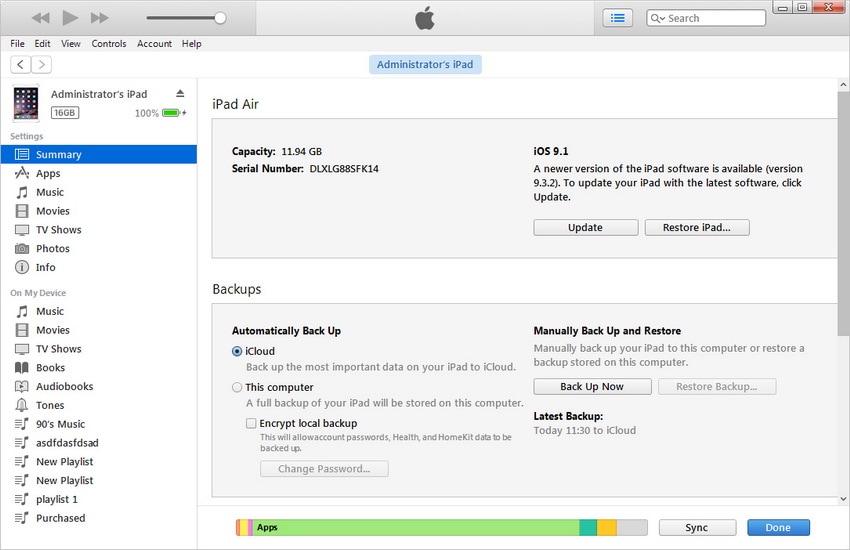
In iTunes (Windows/macOS Mojave-): Open iTunes. Click the small iPad icon that appears in the upper-left corner of the window.
-
Step 3 Initiate the Backup
In the main summary screen for your device, navigate to the "Backups" section. Select "Back up all of the data on your iPad to this Mac" (or "This Computer" in iTunes). For added security, we recommend checking the "Encrypt local backup" box, as this will also save sensitive data like saved passwords, Wi-Fi settings, and health data. Finally, click the "Back Up Now" button.

Once the process is complete, you'll have a secure backup on your computer containing all your app data. You can now safely update your iPad, and if anything goes wrong, you can restore from this backup.
A Flexible Alternative: Manage iPad Data with Dr.Fone - Phone Manager
While an iTunes or Finder backup is comprehensive, it's an all-or-nothing solution. You can't browse the backup or selectively restore data. For more granular control over your iPad's content, a dedicated tool like Dr.Fone - Phone Manager (iOS) is an excellent choice.
Instead of focusing on the non-transferable app files, Dr.Fone allows you to manage, export, and import the data that truly matters: your photos, videos, music, contacts, messages, and more. It provides a user-friendly interface to handle your files without the limitations of iTunes.
 Effortlessly manage data through preview, delete, export, etc.
- Transfer all data between devices.
- Robust backup solutions for reliable data protection.
- Mirror screens to PC for meetings, teaching, and control.

How to Manage Your iPad Data with Dr.Fone
-
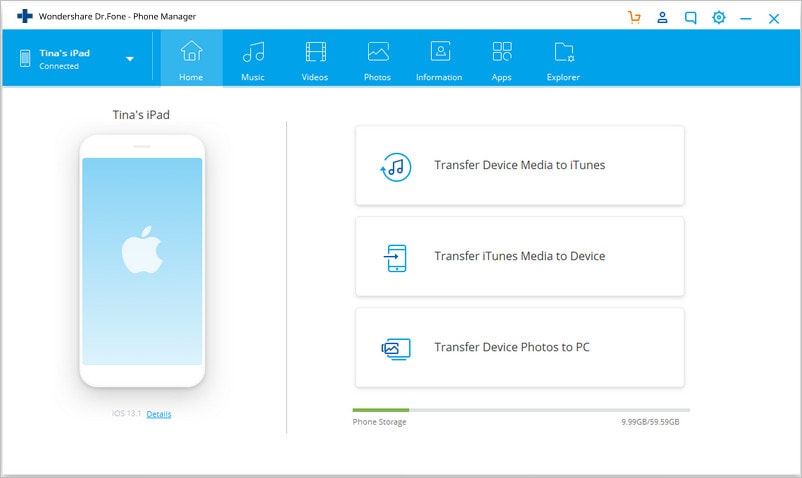
Step 1 Launch Dr.Fone and Connect Your iPad
Download, install, and open Dr.Fone on your computer. Select the "Phone Manager" module from the main screen. Connect your iPad to the computer with its USB cable, and the software will detect it automatically.
-
Step 2 Select and Transfer Your Data
Once connected, you'll see several data categories at the top of the window, such as Music, Videos, Photos, and Information (for contacts and SMS). Click on a category, for instance, "Photos." You can then browse all your photos, select the ones you want to back up, and click the "Export" button. Choose a folder on your computer to save them.
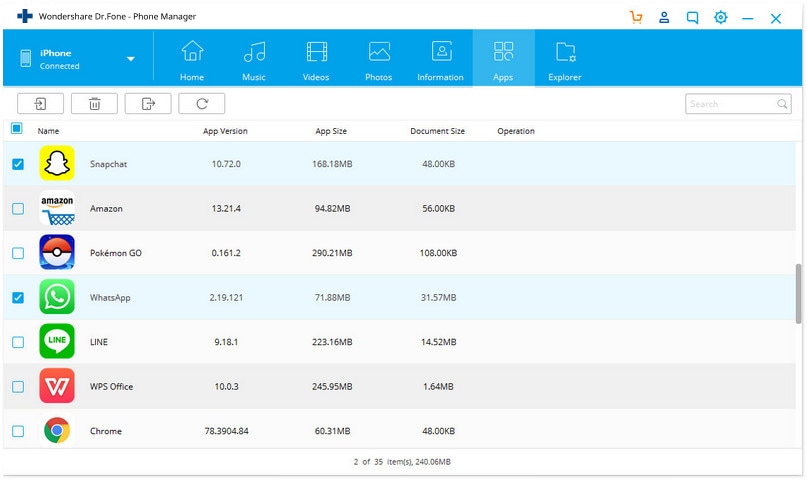
This process gives you complete control over which files are saved to your computer. Dr.Fone is an ideal solution for users who want to create selective backups or easily manage their media files without relying on iTunes.
Part 3. Exploring Other Third-Party iPad Transfer Tools
Beyond Apple's ecosystem and Dr.Fone, other third-party applications offer to help manage your iPad data. These tools often provide unique interfaces and feature sets that might appeal to different users. Here are a couple of well-known alternatives.
1. SynciOS
SynciOS presents itself as a comprehensive manager for iOS and Android devices. It allows users to transfer various data types like photos, music, videos, and more between their iPad and a PC. It aims to be a one-stop solution for device management and data backup.
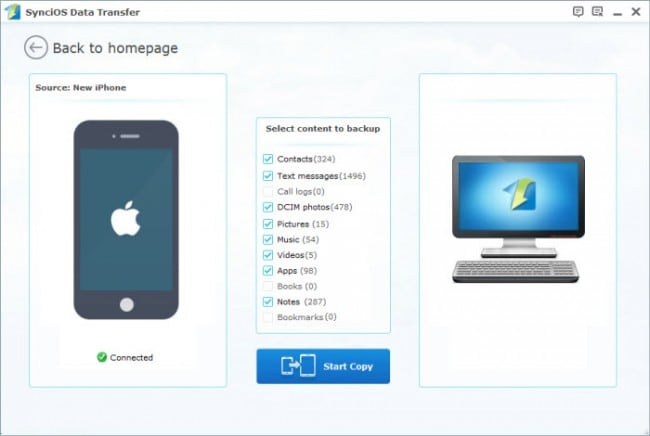
- Offers an all-in-one toolkit for media transfer.
- Supports a wide range of file formats.
- Clean and straightforward user interface.
- The free version has significant limitations.
- Some advanced features may require a paid upgrade.
2. CopyTrans
CopyTrans is a popular and fast tool designed specifically for managing content on iOS devices. It provides a simple way to transfer music, videos, photos, and other data between your iPad and PC, billing itself as a smart and safe alternative to iTunes.
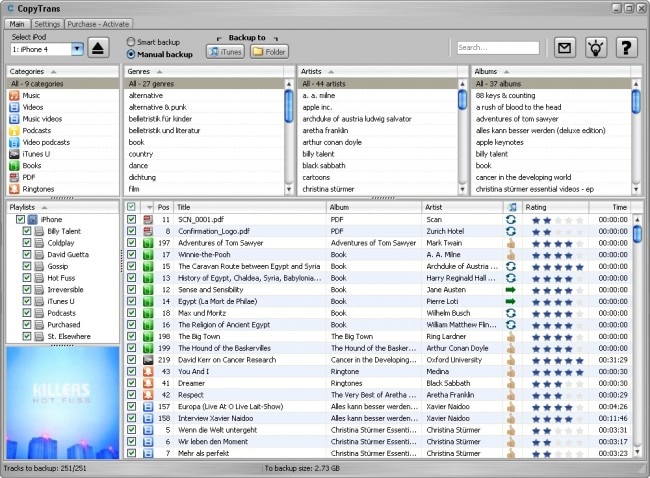
- Offers both smart and manual backup options.
- Clean interface with helpful guides and tips.
- Specializes in media file management.
- Primarily focused on media, less on other data types.
- The full suite of tools is not free.
More Articles:
| Feature | iTunes/Finder | Dr.Fone - Phone Manager | Other Third-Party Tools |
|---|---|---|---|
| Transfer Method | Full Device Backup | Selective File Transfer | Selective File Transfer |
| Control Level | Low (All or Nothing) | High (Granular Control) | Varies (Generally High) |
| Ease of Use | Moderate | Very Easy | Easy to Moderate |
| App Data Backup | (Via Full Backup Feature) | (Generally No) | |
| Cost | Free | Paid (with Free Trial) | Freemium Model |
Conclusion
While the days of directly transferring app files from your iPad to a computer are over, securing your valuable app data is more straightforward than ever. For a complete, fire-and-forget solution, Apple's built-in backup feature in Finder or iTunes is the official and most reliable method. It ensures that every piece of your app data is saved and can be restored.
For users who demand more flexibility and control over their files, Dr.Fone - Phone Manager provides a powerful alternative. It excels at managing photos, videos, music, and contacts, allowing you to create customized backups of your most important data without the restrictions of a full system backup. Ultimately, the best method depends on your specific needs for control, ease of use, and comprehensiveness.
FAQ
-
1. Can I still transfer the app .ipa file directly from my iPad to my computer?
No. Starting with iTunes 12.7 and modern versions of iOS, Apple removed the App Store section from iTunes and the ability to manage and sync app .ipa files. The current method focuses on backing up app data, not the installation files themselves. -
2. If I back up my iPad using Finder or iTunes, will it save my app progress and data?
Yes, absolutely. A standard backup saves all data and settings within your apps, including game progress, login information, documents, and preferences. When you restore the backup, all this information will be reinstated as you left it. -
3. Is it safe to use third-party software like Dr.Fone to manage my iPad data?
Yes, it is safe as long as you use reputable and well-known software. Wondershare Dr.Fone has a long-standing reputation for security and reliability. It communicates with your device using standard protocols and does not compromise your data's privacy or security. Always download software from the official website. -
4. What's the main advantage of using Dr.Fone over a free iTunes/Finder backup?
The primary advantage is selective control. With Dr.Fone, you can browse, preview, and selectively transfer specific files (like certain photo albums or contacts) to your computer. An iTunes/Finder backup is a single, large file that you cannot view or manage individually. Dr.Fone also offers many other features like phone-to-phone transfer and data recovery in its full toolkit.
 Add Wondershare Dr.Fone as a preferred source on Google