5 Best Ways to Transfer Photos from iPad to PC

May 18, 2026 • Filed to: Device Data Management • Proven solutions
 TL;DR:
To transfer photos from an iPad to a PC, choose Dr.Fone Basic Phone Manager for large libraries, a direct USB connection for manual offline copying, cloud services like iCloud or Google Drive for remote access, or Email for just a few files.
● Dr.Fone Basic Phone Manager bypasses the cumbersome iTunes sync process to securely transfer bulk files and all supported formats, whereas direct USB transfers via the Windows File Explorer DCIM folder require no third-party software but are highly time-consuming for large collections.
● Cloud methods require a stable internet connection and impose strict free data limits, with iCloud providing 5 GB of storage once Sync This iPad is enabled, and Google Drive offering 15 GB shared across all Google services.
● Alternative wireless methods include the Photo Transfer App, which requires installation on both the iPad and PC over a shared Wi-Fi network, and Email, which is strictly constrained by a 20 to 25 MB attachment size limit per message.
Ask AI for a summary
 ChatGPT
 Perplexity
 Gemini
 Claude
 Grok
Grok
Dr.Fone Basic:
Better Control for Your Phone
Manage, transfer, back up, restore, and mirror your device
Moving your images to your computer is essential for freeing up storage and backing up important memories. Having reliable transfer methods is crucial to ensure that your photos are not at any risk. Luckily, several solutions make moving pictures between devices simple and efficient. From using built-in features like iCloud to third-party tools, each method offers unique benefits.
Understanding these options allows you to choose the most effective and convenient way. This guide explores the 5 best ways to transfer photos from iPad to PC, helping you select the method that best fits your workflow. With the right approach, you can easily safeguard your memories and optimize your device’s storage without hassle. Read on to find the best option suited to your preferences and needs.

- Part 1. How to Transfer Photos from iPad to PC Without iTunes Using Dr.Fone Basic Phone Manager?
- Part 2. How to Transfer Photos from iPad to PC with a USB Cable?
- Part 3. How to Transfer Photos from iPad to PC Using the Photo Transfer App?
- Part 4. How to Transfer Photos from iPad to PC Using Google Drive?
- Part 5. How to Transfer Photos from iPad to PC Using iCloud?
- Part 6. How to Transfer Photos from iPad to PC Using Email?
Part 1. How to Transfer Photos from iPad to PC Without iTunes Using Dr.Fone Basic Phone Manager?
Since the aim is to ensure your images can be moved without any risks, the best option is to get a dedicated tool. While iTunes can help you with this task, the process is quite cumbersome. Among the best alternative options, the Dr.Fone Basic Phone Manager feature is the ideal choice. It is a powerful solution to simplify data transfer between devices.
Unlike iTunes, it offers a straightforward approach when it comes to how to transfer photos from iPad to PC. This tool eliminates compatibility issues and tedious sync processes, making it a popular choice. It ensures fast and secure transfers whether you're moving a few pictures or an entire photo library. Moreover, the program can move all the photo formats supported by your iPad.
Key Advantages of the Dr.Fone Basic Phone Manager Feature
- Enables users to select specific photos or files for transfer, avoiding unnecessary data movement.
- Offers high-speed data transfer, greatly reducing the time needed to move large photo libraries.
- Ensures that files are transferred without data loss, corruption, or quality reduction.
Wondershare Dr.Fone
1 Click iPhone File Transfer without iTunes
- Transfer, manage, export/import your music, photos, videos, contacts, SMS, Apps, etc.
- Backup your music, photos, videos, contacts, SMS, Apps, etc. to computer and restore them easily.
- Transfer music, photos, videos, contacts, messages, etc. from one smartphone to another.
- Transfer media files between iOS devices and iTunes.
- Fully compatible with all iOS versions that run on iPhone, iPad, or iPod touch.


Detailed Guide on How to Transfer Photos from iPad to PC via Dr.Fone Basic Phone Manager
It allows quick and effortless migration of images, videos, music, and other files without a complex setup. You can utilize the following elaborate instructions to learn how to transfer photos from iPad to computer:
Step 1. Approach the My Device Tab to Open Photos
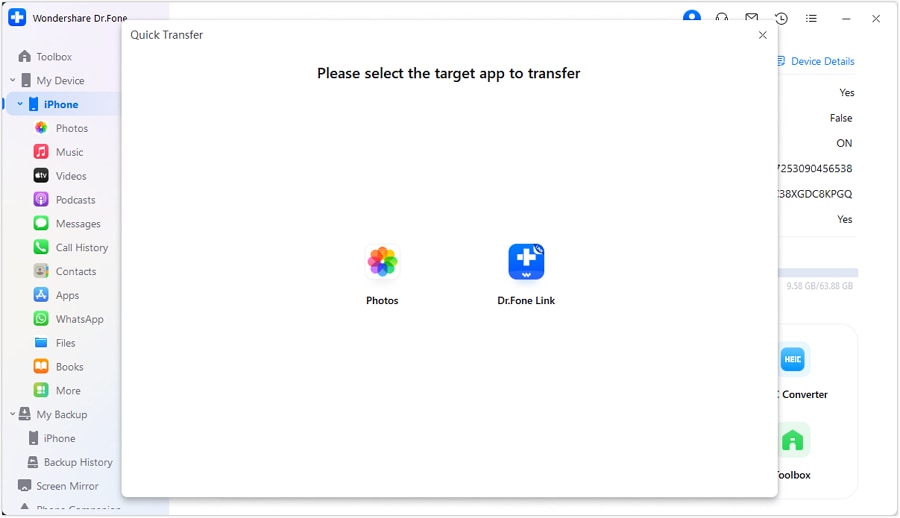
Proceed to install and launch Dr.Fone on your computer and attach your iPad using a suitable USB cable. Once the program detects the device, access the “My Device” tab from the left panel to select “Photos.” Here, you will see all your photos displayed within their respective categories or albums.
Step 2. Transfer the Selected Photos to the PC
Now, browse the images and choose the ones you wish to move to the computer. When needed, double-click any picture to preview it for confirmation. After making the selection, click “To PC” to start the transfer process and wait for it to complete.

The Dr.Fone Basic Phone Manager feature is designed with user security and simplicity in mind. Hence, it ensures a safe and effective migration process for everyone. Furthermore, the tool uses advanced security protocols to protect your data during transfers.
How To Manage iOS Devices From a PC?
Part 2. How to Transfer Photos from iPad to PC with a USB Cable?
When you do not want to use additional software, directly connecting your iDevice to the computer can also serve this purpose. This method is simple, requires no internet connection, and ensures data transfer without risking file loss.
By linking your device to your system, you can access your photo library through File Explorer and move images manually. Follow these steps to find out how to transfer photos from iPad to computer:
Step 1. To commence, use a reliable USB cable to attach your device to the PC and select “Trust This Computer” on the iDevice. Now, access the data of the attached device via File Explorer if the folder doesn’t open automatically.

Step 2. Following that, make your way to the “DCIM” folder and choose the photos or folders you wish to transfer. Lastly, use the right-click menu to “Copy” the selected data and “Paste” it to the desired location on your system.

Using a USB cable to move your images to your local machine is the most straightforward and accessible option. However, this method can become time-consuming when dealing with a large data size. That is because manually selecting and copying files may take extra effort and time.
Part 3. How to Transfer Photos from iPad to PC Using the Photo Transfer App?
For users seeking a wireless way to move images, dedicated apps offer both convenience and flexibility. The Photo Transfer App is a versatile solution for sharing pictures and videos between devices over a shared Wi-Fi network.
It permits users to move files wirelessly, eliminating the need for USB connections or iTunes. Use the following guide to answer how can I transfer photos from iPad to PC in bulk:
Step 1. After installing the apps on both Windows and iPad, launch the one on your iDevice. Here, tap “Send” and choose “To a computer” as the destination to proceed. Then, use the "Select" button to choose all the photos you wish to send to the computer.

Step 2. Next, press "Send Now" and move to launch the app on the desktop to click "Find Devices." After the app detects the device, select it to start the photo transfer procedure. It will take some time to finish as it ensures no harm comes to your precious pictures.

The Photo Transfer App offers several advantages, making it a convenient choice. Its wireless functionality eliminates the need for USB cables or additional hardware. However, the app relies on a stable Wi-Fi connection to function effectively. Transfer speeds may decrease and cause interruptions if the network is slow or unstable.
Part 4. How to Transfer Photos from iPad to PC Using Google Drive?
Cloud solutions are also a handy way to share your images across devices over great distances. This method lets users access their photos anytime or anywhere without relying on physical connections. Google Drive is a secure cloud storage service that lets users store and access data across multiple devices. Using this method via these steps can answer how do I transfer photos from iPad to computer:
Step 1. Access the App Store on your device to install Google Drive and launch the app after installation. Now, sign in using your Google account and tap the “+” icon to “Upload” the selected “Photos and Videos.”

Step 2. Afterward, move to a web browser on your PC to approach the Google Drive website and sign in using the same account. Finally, make your way to the targeted photos and choose “Download” after pressing three dots to store them on your machine.

Using Google Drive for this task offers significant advantages due to its cloud-based system. The main benefit is the ability to access your photos from any device with an internet connection, providing flexibility. However, its key limitation is that it only shares 15 GB of free space across all Google services.
Part 5. How to Transfer Photos from iPad to PC Using iCloud?
As for the built-in options, Apple’s own cloud service can work as a way to move pictures across devices. iCloud automatically syncs photos and videos across the ecosystem, making data movement easier. Moreover, this method eliminates the need for manual transfers and preserves the original quality. Described below are the detailed steps to get a hang of how do I transfer photos from iPad to PC:
Step 1. To make sure iCloud Photos is enabled, access device settings and tap your Apple ID from the top. On the subsequent screen, press “iCloud” to access the “Photos” tab and toggle on “Sync This iPad.”

Step 2. Now, move to your PC to visit the iCloud website using a secure web browser. Then, sign in using the same Apple ID and click the “Photos” option from the home page.

Step 3. Here, select the photos you want to transfer and click the “Download” icon to store them on your system. Finally, move the downloaded photos into appropriate folders for easier access.

Using iCloud to transfer photos is an excellent choice for users already invested in the Apple ecosystem. This method continuously backs up photos for convenient access, providing security. However, the free iCloud plan only provides 5 GB of storage, which can quickly fill up. Plus, syncing large amounts of data depends on a stable internet connection that impacts upload and download speeds.
Part 6. How to Transfer Photos from iPad to PC Using Email?
It is a quick and simple way of sharing pictures when you need to share a couple of files. By attaching images to an email and sending it to yourself, you can easily download the photos on your computer. It works well for sending a few high-quality images quickly when you don’t have access to cloud storage or transfer apps. Here is how do you transfer iPad photos to a computer via email:
Step 1. On your iDevice, open the Mail app and proceed to create a new message by pressing the related icon. Now, enter your own email address in the recipient field and tap the “Camera” icon to add targeted photos by choosing the “Photo Library” option.

Step 2. Once pictures are added, hit the "Send" icon to deliver the mail with targeted data. Afterward, access the same email account on your PC and open the email you received to "Download" the photos.

Email is an excellent option for quickly transferring a small number of photos from your iPad to your PC. It's simple, requires no additional apps or tools, and allows users to send images instantly by attaching them. However, this method is not suitable for transferring large photo collections due to limits in email attachment size. Depending on the email provider, this limit typically ranges between 20–25 MB.
Conclusion
In summary, the ability to transfer photos from iPad to PC is vital for managing your device storage. It can be done efficiently through various methods, ranging from email to cloud services. Among these, the Dr.Fone Basic Phone Manager feature stands out for its speed and bulk transfer capabilities. Moreover, its flexibility makes it ideal for easily managing large photo libraries.
Choosing the right method depends on individual needs, whether prioritizing speed, simplicity, or wireless convenience. Regular photo backups are essential to prevent data loss. Start your hassle-free transfer journey today with the Dr.Fone Basic Phone Manager feature.
More related articles:
Dr.Fone Basic:
Better Control for Your Phone
Manage, transfer, back up, restore, and mirror your device


iPad Tips & Tricks
- Make Use of iPad
- iPad Tips and Tricks
- Smart Keyboard Folio VS. Magic Keyboard
- iPad Photo Transfer
- Transfer Music from iPad to iTunes
- Transfer Purchased Items from iPad to iTunes
- Delete iPad Duplicate Photos
- Download Music on iPad
- Use iPad as External Drive
- Transfer Data to iPad
- Transfer Photos from Computer to iPad
- Transfer MP4 to iPad
- Transfer Files from PC to iPad
- Transfer Photos from Mac to iPad
- Transfer Apps from iPad to iPad/iPhone
- Transfer Videos to iPad without iTunes
- Transfer Notes from iPhone to iPad
- Transfer Photos from Android to iPad
- Transfer iPad Data to PC/Mac
- Transfer Photos from iPad to Mac
- Transfer Photos from iPad to PC
- Transfer Books from iPad to Computer
- Transfer Apps from iPad to Computer
- Transfer Music from iPad to Computer
- Transfer PDF from iPad to PC
- Transfer Notes from iPad to Computer
- Transfer Files from iPad to PC
- Transfer Videos from iPad to Mac
- Transfer Videos from iPad to PC
- Sync iPad to New Computer
- Transfer iPad Data to External Storage


James Davis
staff Editor