How to Enable USB Debugging on OPPO F1/F1 Plus/F3/F3 Plus?

Jul 12, 2024 • Filed to: Mobile Repair Solutions • Proven solutions
If you use an Android phone and you've searched forums for solutions to problems, you've probably heard the term "USB Debugging" every once in a while. You may even have seen it while looking through your phone's settings. It sounds like a high-tech option, but it really isn't; it's quite simple and useful.
USB Debugging Mode is one thing that you cannot skip to know if you are an Android user. The primary function of this mode is to facilitate a connection between an Android device and a computer with Android SDK (Software Development Kit). So it can be enabled in Android after connecting the device directly to a computer via USB.
1. Why I need to enable USB Debugging Mode?
USB Debugging grants you a level of access to your device. This level of access is important when you need system-level clearance, such as when coding a new app. It also gives you much more freedom of control over your device. For example, with Android SDK, you gain direct access to your phone through your computer and that allows you to do things or run terminal commands with ADB. These terminal commands can help you restore a bricked phone. You are also able to use some third-party tools to better manage your phone (for example, Wondershare TunesGo). So this mode is a useful tool for any adventurous Android owner.
Now, please follow these steps to debug your OPPO F1/F1 Plus/F3/F3 Plus.
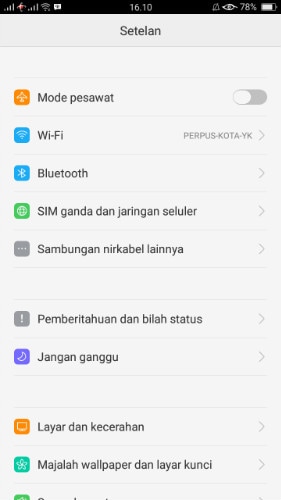
Step 1. Unlock your phone and go to Settings.
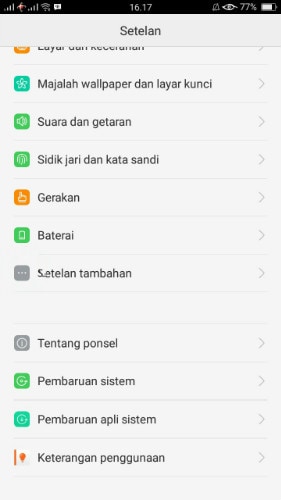
Step 2. Under General, scroll down and open About phone.
Step 3. Under About phone, find Build Number and tap seven times on it.
Step 4. After tapping seven times on it, you will get a message on your screen that "you are now a developer". That's it you have successfully enabled developer option on your OPPO F1 or F1 Plus.
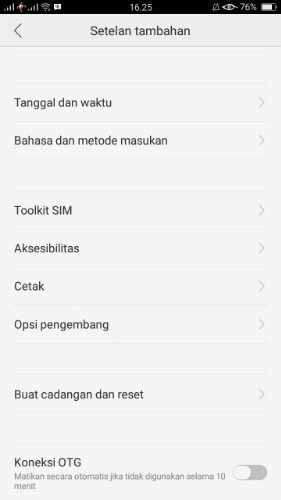
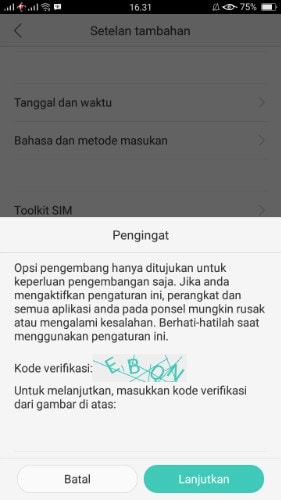
Step 5. Select on the Back button and you will see the Developer options menu under General, and select Developer options.
Step 6. Slide the "USB debugging" button to "On" and you're ready to use your device with developer tools.
Step 7. After finished all these steps, you have successfully debuged your OPPO F1. Next time you connect your phone to computer using a USB cable, you will see a messages "Allow USB Debugging" for allow a connection.


OPPO Manage
- OPPO Unlock
- 1. Unlock OPPO A53
- 2. Unlock OPPO A37
- 3. Unlock OPPO A3s
- 4. Unlock OPPO CPH 2127
- 5. Unlock OPPO Phone Tips
- 6. OPPO Screen Unlock Tools
- 7. Bypass OPPO FRP with FRP Code
- 8. Bypass FRP OPPO Without PC
- OPPO Reset
- 1. Hard Reset OPPO A3s
- 2. Hard Reset OPPO A5s
- 3. Hard Reset OPPO A15
- 4. Hard Reset OPPO A37
- 5. Hard Reset OPPO A53
- 6. Hard Reset OPPO Full Guide
- 7. Reset OPPO Without Password
- 8. Reset Privacy Password in OPPO
- OPPO Problems
- 1. Unresponsive OPPO Screen
- 3. Android App Not Installed Error
- 4. Bricked Your Android Phone
- 5. Encryption Unsuccessful Error
- 6. Android Stuck in Download Mode
- 7. Flash Dead Android Phone Safely
- OPPO Tips
- ● Manage/transfer/recover data
- ● Unlock screen/activate/FRP lock
- ● Fix most iOS and Android issues
- Manage Now Manage Now Manage Now Manage Now
James Davis
staff Editor