100% Security Verified | No Subscription Required | No Malware
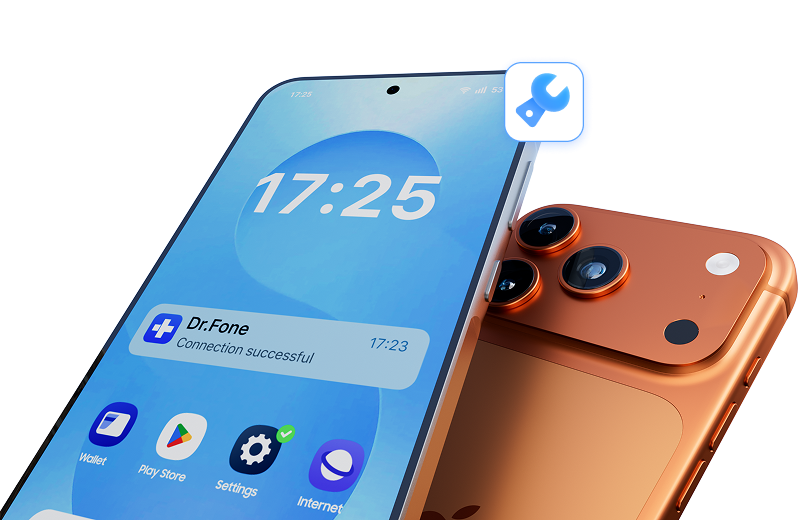

 :
: 
 ChatGPT
 Perplexity
 Gemini
 Claude
 Grok
Grok

My Samsung phone suddenly went black and won't turn on or respond to anything. Is it a bricked phone? What can I do to fix it and get my photos back?
A Concerned Android User
The term "bricked phone" is a dreaded phrase for any smartphone owner. It describes a device that has become completely unresponsive, effectively turning into a useless "brick." This can happen due to severe software corruption or hardware failure. When your phone is bricked, it might fail to power on, get stuck in a repeating boot loop, or simply show a black, lifeless screen, preventing any normal interaction.
While the situation may seem dire, it's crucial to understand the underlying causes and available solutions. Many bricked phones can be revived, and powerful data recovery tools exist to help you rescue your precious information from an otherwise inaccessible device. This comprehensive guide will explain what a bricked phone is, differentiate between its types, and provide clear, actionable methods to fix your device and retrieve your data.

In this article
Part 1. What Is a Bricked Phone: Understanding Soft vs. Hard Brick
A brick cell phone refers to a device rendered completely non-functional, unable to boot up or operate as intended. While the root cause is often software-related, not all bricked devices are the same. They are primarily classified into two types: soft brick and hard brick. Each has unique symptoms and recovery potential. The table below provides a detailed comparison to help you identify which issue your phone is facing.
| Aspect | Soft Brick | Hard Brick |
|---|---|---|
| Definition | A state where the phone cannot boot correctly due to software errors but is generally recoverable. | A severe, often permanent state where the device is unresponsive due to hardware or firmware corruption. |
| Common Causes | Interrupted software updates, flashing incorrect custom ROMs, or flawed rooting processes. | Physical damage (water, drop), critical bootloader corruption, or motherboard failure. |
| Device Behavior | Stuck in a boot loop, frozen on the manufacturer's logo, or automatically boots into recovery mode. | Completely lifeless. No screen activity, no vibration, no sound, and not recognized by a computer. |
| Recoverability | High chance of recovery using software tools, recovery mode options, or by flashing the correct firmware. | Very difficult to recover without professional intervention and specialized hardware tools like JTAG. |
| Recovery Mode Access | Recovery Mode or Download/Fastboot Mode is typically accessible. | These modes are almost always inaccessible, making standard software fixes impossible. |
| Repair Tools | Software like Dr.Fone, official flashing tools, or ADB commands can often resolve the issue. | Requires professional servicing or advanced hardware repair equipment. |
| Risk Level | Low risk of permanent damage if you apply the correct fix. | High risk that the device is permanently unusable without expensive repairs. |
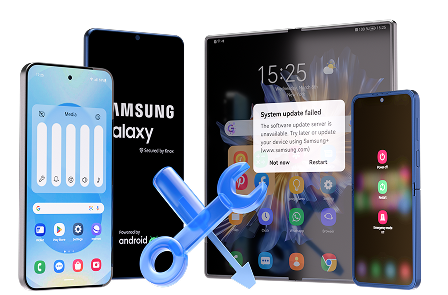
Part 2. Common Reasons Why Your Android Phone Got Bricked
A brick mobile phone issue can feel sudden and disastrous, but it's typically the result of specific actions or system errors. Knowing the common culprits can help you avoid this problem in the future and diagnose what went wrong. Here are the main reasons your Android device might become bricked:
1. Interrupted or Failed System Updates
This is one of the most frequent causes. If your phone loses power, disconnects from Wi-Fi, or is manually shut down during an official OS update, critical system files can become corrupted. This leaves the operating system in an incomplete state, preventing it from booting up properly.

2. Incorrect Rooting or Custom ROM Installation
Rooting your Android device or installing a custom ROM can unlock new features, but it's a risky process. Using an incompatible ROM for your specific phone model, skipping a crucial step, or an error during the flashing process can corrupt the bootloader or essential partitions, turning your device into a brick.
3. Flashing Incompatible Firmware
Every phone model has firmware specifically designed for its hardware. Attempting to flash firmware meant for a different model, carrier, or region can cause a fundamental conflict with your phone's system architecture, leading to an immediate boot failure.
4. Malware and Malicious Apps
Installing apps from untrusted sources can introduce malware that targets core system files. A severe virus or malicious script can damage the operating system to the point of collapse, preventing the phone from functioning at all.
5. Severe Overheating or Physical Damage
While bricking is often a software issue, hardware problems can be the cause. Extreme overheating can damage the processor or motherboard. Likewise, significant physical damage from a drop or water exposure can cause critical components to fail, mimicking the symptoms of a hard brick.

6. Faulty OS Downgrade Attempts
Trying to roll back to a previous Android version using unofficial tools or incompatible firmware can be dangerous. This process can conflict with the device's bootloader security, leading to irreversible firmware damage and a bricked state.
Part 3. Top 3 Proven Methods to Fix a Bricked Phone in 2026
Discovering you have a Samsung brick phone or any other unresponsive Android device can be alarming, but it's often not a permanent problem. Many bricked phones are recoverable with the right approach. The key is to correctly diagnose the issue and apply a suitable solution. Here are the most effective ways to unbrick your phone and restore its functionality.
Method 1. Use Dr.Fone - System Repair (Android) to Fix Any Bricked Android Phone
When you need a reliable fix, professional software offers the safest and most straightforward path to recovery. Dr.Fone - System Repair (Android) is a leading solution designed to resolve complex system issues that cause bricking. This powerful tool can fix firmware problems behind both soft and hard bricks, supporting a vast range of Android brands and models without requiring any technical expertise.
 Fix Android instantly – no skills needed.
- Solve boot loop, black screen, won’t turn on, etc.
- High success rate for all system issues.
- User-friendly interface with easy-to-follow steps.
By automating the complex repair process, Dr.Fone – System Repair eliminates the guesswork and risk of manual fixes. Follow these detailed steps to unbrick your phone quickly and safely:
-
Step 1 Launch Dr.Fone and Select System Repair
Download and install Wondershare Dr.Fone from the official website. Launch the application, connect your bricked Android phone to your computer, and navigate to the "Toolbox" section. From there, select the "System Repair" module.

-
Step 2 Enter Your Device Information
Choose "Android" as your device type and click "Start." You will then be prompted to provide accurate information about your phone, including its Brand, Name, Model, Country, and Carrier. This ensures the correct firmware is downloaded for your device. Check the agreement box and click "Next."

-
Step 3 Enter Download Mode and Start the Repair
Follow the clear on-screen instructions to put your phone into Download Mode. Once the device is in the correct mode, the tool will automatically download the appropriate repair firmware. After the download is complete, click "Fix Now."

-
Step 4 Confirm and Complete the Fix
A confirmation prompt will appear. Enter the displayed code to proceed and click "Confirm." Dr.Fone will then begin the system repair process. This will take a few minutes, after which your phone should restart in normal working condition.

Method 2. Perform a Data and Cache Wipe via Recovery Mode
If your phone is soft-bricked and stuck in a boot loop or frozen on the logo, wiping its data and cache can resolve the issue. This method clears out corrupted temporary files or system conflicts causing the boot failure. Be aware that this process will erase all personal data on your device.
-
Step 1 Boot into Recovery Mode
First, power off your phone completely. Then, press and hold the specific key combination to enter Recovery Mode. This is typically "Volume Up" + "Power" or "Volume Down" + "Power," but it can vary by manufacturer.

-
Step 2 Wipe the Cache Partition
Once in the recovery menu, use the Volume buttons to navigate to the "Wipe Cache Partition" option. Press the Power button to select it. Confirm your choice on the next screen. This removes temporary system files without deleting your personal data and can sometimes fix the issue on its own.

-
Step 3 Perform a Factory Reset
If wiping the cache doesn't work, navigate to "Wipe Data/Factory Reset" and select it. Confirm your choice to erase all data. After the process is complete, select "Reboot System Now" to restart your phone. It should now boot up as a new device.

Method 3. Seek Professional Help from the Manufacturer or a Repair Shop
If your phone is hard-bricked or if software solutions fail, it's time to seek professional assistance. Manufacturers and certified repair centers possess specialized diagnostic tools and proprietary firmware that can fix severe issues. Contact the manufacturer's customer support through their official website to explain your situation.
Alternatively, take your bricked Android phone to an authorized service center. Technicians there can diagnose the root cause, whether it's a corrupted bootloader or a hardware failure. They can perform advanced repairs like JTAG flashing or component replacement, which have a high success rate and minimize the risk of causing further damage.
Part 4. How to Effortlessly Recover Data From a Bricked Phone
Losing access to your photos, contacts, and messages on a bricked phone is often more distressing than the device malfunction itself. While fixing the phone is the primary goal, recovering your data is a top priority. Fortunately, specialized tools can retrieve your files even from a device that won't turn on.
Dr.Fone - Data Recovery (Android) is an industry-leading solution for this exact scenario. It's engineered to access and extract valuable information from unresponsive or damaged devices. With its user-friendly interface, you don't need any technical expertise to perform the recovery. It supports a vast range of Android models and various file types, using advanced scanning algorithms to bypass software corruption and access the phone's internal storage directly.
- Scan Android phones and tablets directly.
- Preview and recover only what you want.
- Supports WhatsApp, photos, videos, contacts, and more.
- Works with 6000+ Android devices.
Key Features of Dr.Fone - Data Recovery (Android)
- Versatile Recovery: Retrieves data from various scenarios, including system crashes, black screens, failed updates, and accidental deletion.
- Broad Compatibility: Works with over 6,000 Android devices from brands like Samsung, Google, Huawei, Xiaomi, and more.
- High Success Rate: Employs advanced scanning technology to ensure the maximum possible recovery of your inaccessible files.
- Selective Preview: Allows you to preview all recoverable files before saving them, so you only retrieve what you need.
Step-by-Step Guide to Recover Data From a Bricked Android
Dr.Fone ensures a safe recovery process that doesn't overwrite existing data or cause further damage. Follow this guide to retrieve your essential files:
-
Step 1 Select Recover from Broken Phone
Launch Dr.Fone on your computer and connect your bricked phone. From the main screen, go to "Toolbox" > "Data Recovery." Select "Android" as the device type, then click "Recover from Broken Phone." Choose the issue that best describes your phone's state and provide your Device Name and Model.

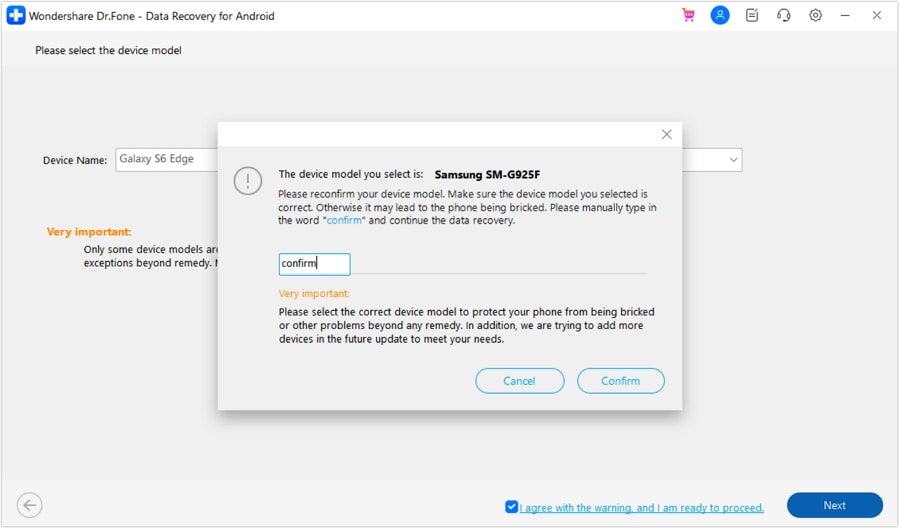
-
Step 2 Enter Download Mode
A warning prompt will appear. Type "confirm" to agree and proceed. Follow the on-screen instructions precisely to put your bricked device into Download Mode. This allows the software to access the phone's storage.
-
Step 3 Preview and Recover Your Data
Once your phone is in Download Mode, Dr.Fone will begin scanning it for all recoverable data. After the scan, all found files will be displayed in organized categories. You can preview photos, read messages, and check contacts. Select the files you wish to save and click "Recover to Computer."

Conclusion
Encountering a bricked phone is undoubtedly a stressful situation, but it's often not the end for your device or your data. By understanding the difference between a soft and hard brick and exploring the available solutions, you can take control of the situation. For software-related issues, trying a factory reset or seeking professional help are viable options.
However, for a comprehensive and safe solution, Dr.Fone - Data Recovery (Android) and Dr.Fone - System Repair (Android) stand out. These tools provide a powerful, user-friendly way to either fix your bricked Android device or recover your invaluable data from it. With their high success rates and broad compatibility, they offer peace of mind when you need it most.


FAQ
-
1. Can flashing a custom ROM really fix a bricked phone?
Yes, but it's an advanced technique for soft bricks only. It requires an unlocked bootloader and a pre-installed custom recovery tool like TWRP. If done incorrectly, it can make the problem worse. For most users, a dedicated repair tool is a much safer option. -
2. What is the biggest risk of trying to fix a bricked phone myself?
The biggest risk is accidentally turning a recoverable soft brick into a permanent hard brick. This can happen if you flash the wrong firmware, interrupt the repair process, or use incorrect commands. Using a reliable, automated tool minimizes this risk significantly. -
3. Does performing a factory reset always fix a soft-bricked phone?
Not always. A factory reset can fix issues caused by corrupted apps or system settings, but it cannot fix problems with the core operating system files or the bootloader. If the firmware itself is damaged, a factory reset will fail, and you will need to re-flash the firmware. -
4. Can I recover data from a truly hard-bricked phone?
Data recovery from a hard-bricked phone is extremely difficult and often impossible for the average user. A hard brick usually implies hardware failure (e.g., a dead motherboard or memory chip). In such cases, the storage itself may be inaccessible. Professional data recovery services with specialized hardware are the only potential option, and they can be very expensive.
 Add Wondershare Dr.Fone as a preferred source on Google