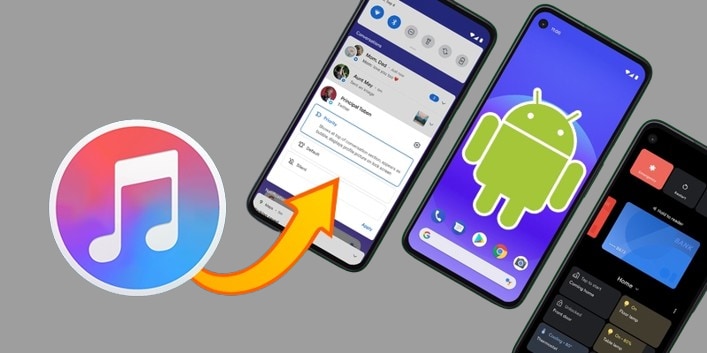
A Complete Guide on How to Sync iTunes to Android [2026]-Samsung S20 Supported

Dec 31, 2025 • Filed to: Device Data Management • Proven solutions
Dr.Fone Basic:
Better Control for Your Phone
Manage, transfer, back up, restore, and mirror your device
Have you switched from iPhone to Android? Are you a music lover and want to sync iTunes to Android as well? If yes, then we have got you covered!
Although music streaming apps have taken over the market, many music lovers still prefer to download and listen to music locally. No doubt, iTunes is one of the most commonly used platforms for this purpose.
In this article, you will find the answers to "Can you get iTunes on Android." And if it's possible, how can you do that?
Let's figure it out together!
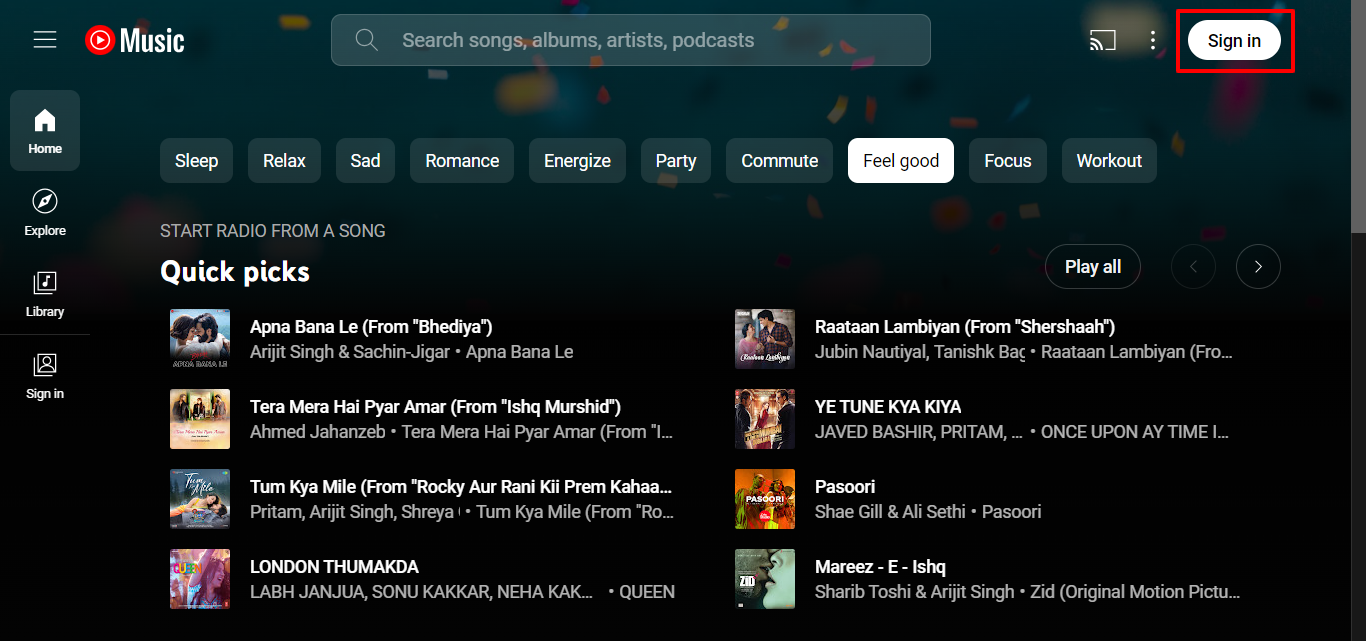
Part 1. Can You Get iTunes on Android?
Being a music lover, the first thing that comes to mind after switching from iPhone to Android is, "Can I get iTunes on Android?" Well, the answer is simple: iTunes is not available on Android. Apple designs and keeps its services within its own hardware.
Therefore, you need to get it done using an alternative way. There are various methods available that can help you sync iTunes to Android. You can explore them and see which one is best and convenient for you. Let's explore them together! In next section, we are going to explore some methods to sync iTunes to Android. You can follow their step-by-step guides and get it done. Let's get started!
Part 2. Sync iTunes to Android With Apple Music
There indeed is no iTunes for Android, but Apple has an Apple Music app for Android users as well. You can leverage this option and use this app to sync iTunes to Android. But before trying this option, make sure that your computer and Apple Music app are logged in with the same Apple ID. Plus, you must have a subscription to Apple Music. You can follow the instructions given below to use Apple Music to transfer iTunes to Android:
Step 1: Download and open iTunes on your computer. Also, download the Apple Music app on your Android phone. Then, sign in with your Apple ID.
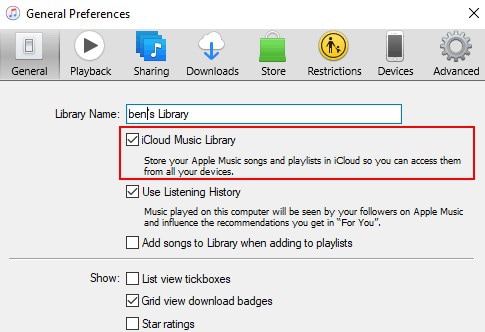
Step 2: Now, on your iTunes homepage, click " "Edit" " > " "Preferences.""

Step 3: Here, go to the “General” tab and see if the “iCloud Music Library” option is turned on. After that, tap “OK” to confirm.
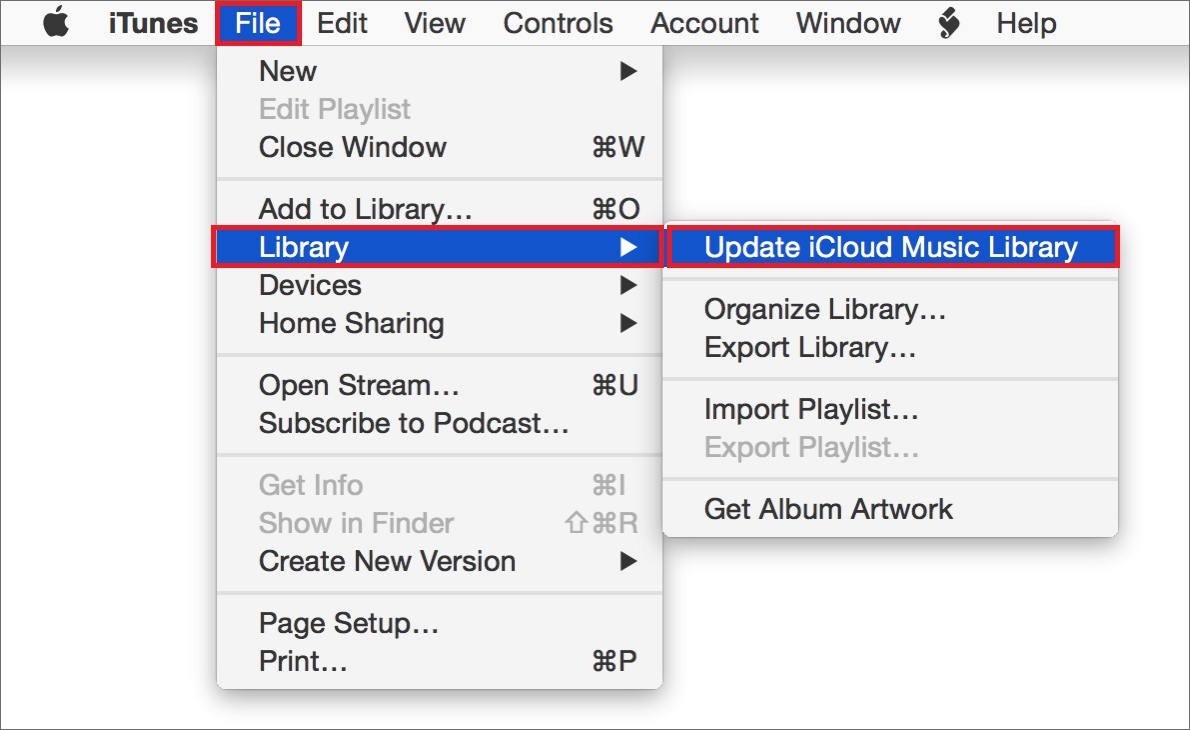
Step 4: To start syncing music to your iCloud storage, go to “File” > “Library” > “Update iCloud Music Library”.
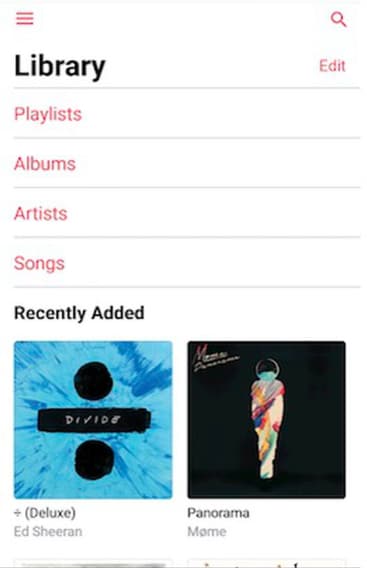
Step 5: After your iTunes music library is synced to iCloud, open the Apple Music app on your Android phone. Click the “Library” tab. Your iTunes music library will be listed here.
So, this is how you can sync iTunes to Android using the Apple Music app. However, if you are not sure about this method, you can try the next one.
Part 3. Sync iTunes to Android With YouTube Music
Apart from Apple Music, you can also use YouTube Music to sync iTunes to Android. It is also a cloud storage platform with an upload limit of up to 100,000 songs. You can access it from both your desktop and computer and enjoy music free of cost.
YouTube Music only supports DRM-free songs from your iTunes music library. Moreover, you might need an internet connection to play the music. But you can also download the songs and listen to them offline. Here is how you can transfer music from iTunes to Android using YouTube Music:
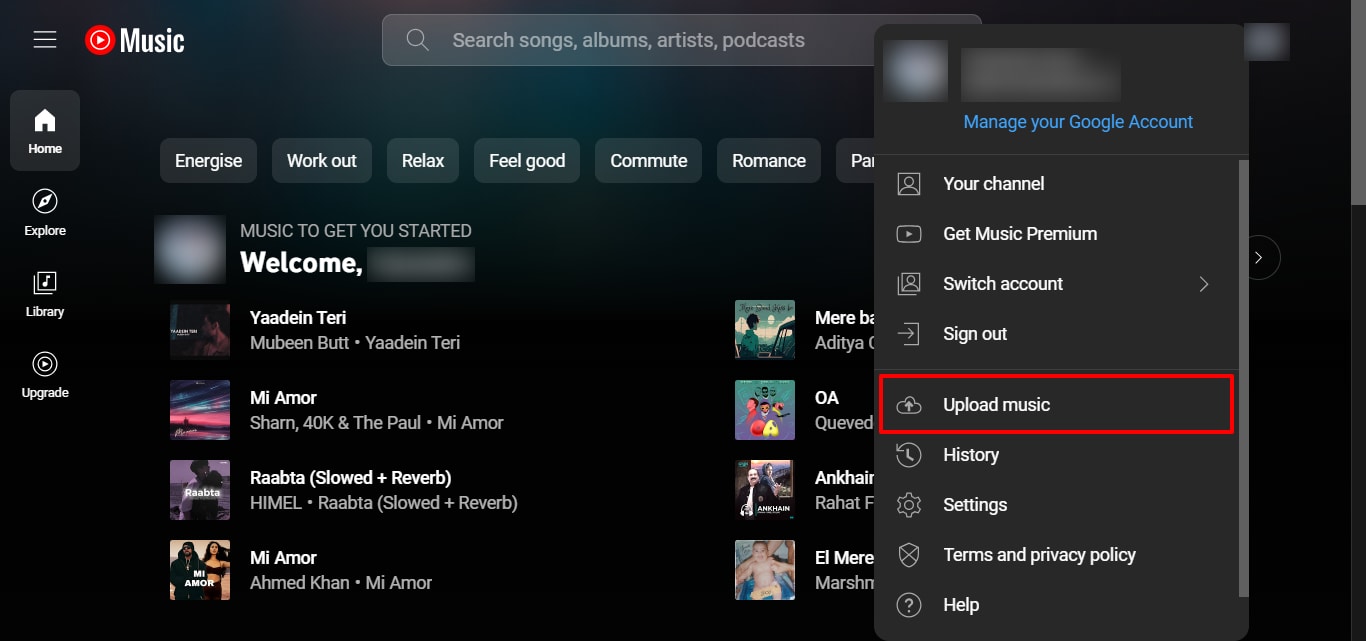
Step 1: Go to the YouTube Music official website and Sign in with your Google account.
Step 2: Tap on your profile in the top right. Then, click the "Upload Music" option.
Step 3: Now open "Music" in your computer's files. Go to "iTunes" > "iTunes Media" > "Music" (by default).
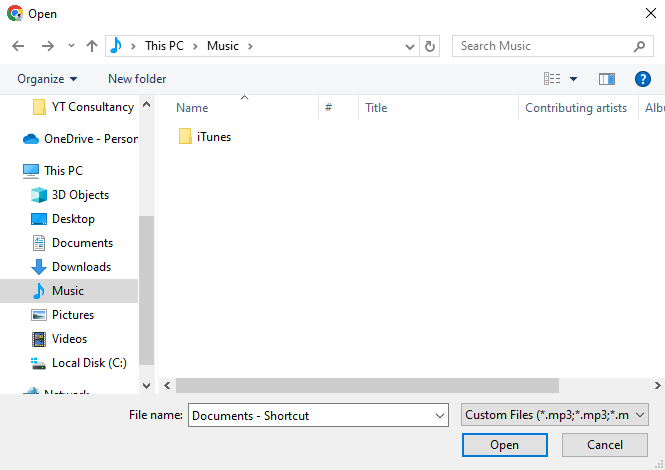
Step 4: Select the songs you want to transfer and click “Open.”
After some time, the songs will be uploaded, and you can enjoy them in your music library. However, YouTube Music is free for a month only, and after that, you have to buy its subscription. So, if you want to sync iTunes to Android for free, try the next method.
Part 4. Manually Sync iTunes to Android
This method is for those who prefer a hands-on approach. Manually syncing iTunes to Android allows complete control over your music transfer. There are various methods to do so. You can either use a USB cable or upload data on the cloud drive. Here, we will see how to get iTunes on Android using a USB cable.
You can follow the instructions given below to sync iTunes to Android manually:
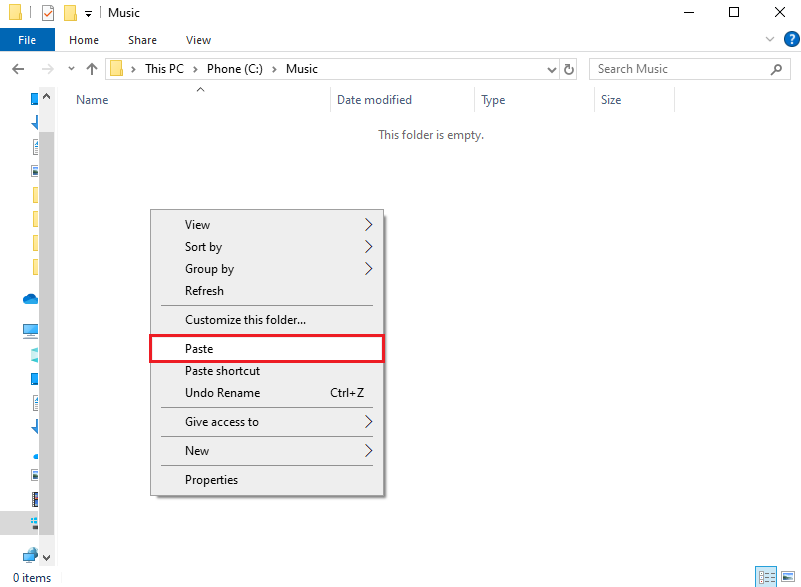
Step 1: Connect your Android device to the computer or laptop via a USB cable. Go to “My Computer” > "Music" and find the iTunes folder.
Step 2: Right-click on the folder that contains your music. Select "Copy" and then go to your Android device's music folder.
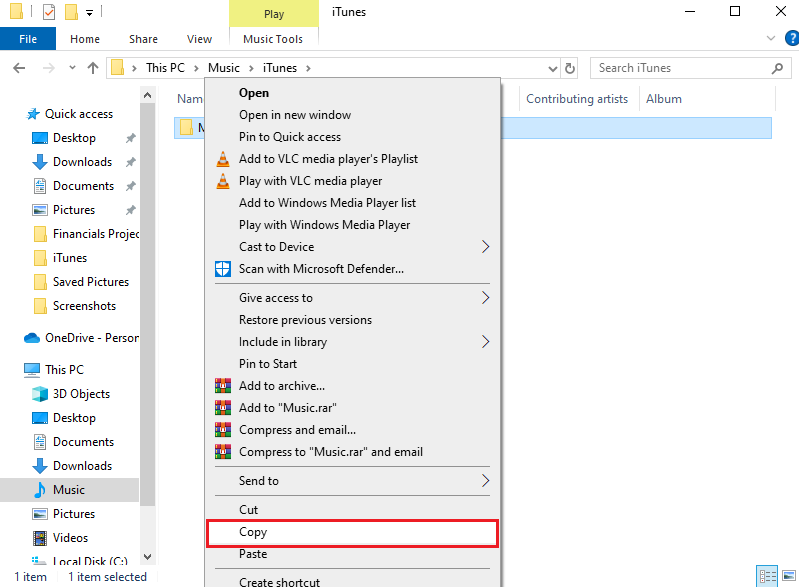
Step 3: Here, right-click again and select ""Paste."" All your music files will be pasted into your Android phone's music folder.
So, this is how you can sync iTunes to Android manually. However, this process can take longer than usual. Plus, there are chances that some files get corrupted during the transfer process.
But don't worry! We have got you one more way to sync the iTunes music library to Android.
Part 5. Sync iTunes to Android Using Dr.Fone (Quick & Easy)
We always find easy and quick ways whenever we need to do something like this. Nobody likes to try temporary alternatives or go through daunting steps.
This is where Wondershare Dr.Fone comes in! It is the most hassle-free and efficient way to sync iTunes to Android in no time. You don't need to log in anywhere or pay anything to listen to your favorite songs. With Dr.Fone, you will get the job done in just a few clicks.
The best part of Dr.Fone? It is a complete package with many other useful features. You can also manage your data, unlock your phone, recover your lost data, and more. Plus, no technical skill is required.
Dr.Fone - Phone Manager (iOS)
Sync iTunes Library to Android in Few Clicks
- Transfer, manage, export/import your music, photos, videos, contacts, SMS, Apps, etc.
- Back up your music, photos, videos, contacts, SMS, Apps, etc., to the computer and restore them easily.
- Transfer music, photos, videos, contacts, messages, etc., from one smartphone to another.
- Transfer media files between iOS devices and iTunes.
- Fully compatible with the newest iOS system.


Steps to Sync iTunes to Android Using Dr.Fone
First, make sure to download and install the Dr.Fone app on your Laptop. Then, follow the instructions given below:
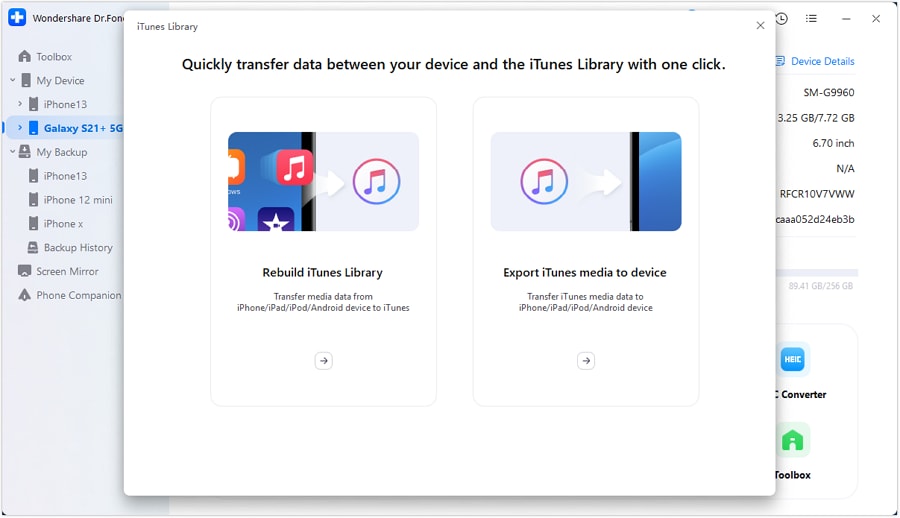
Step 1: Launch Dr.Fone, and connect your Android and iOS devices via a USB cable or wireless connection. Once you see it on the left panel, click it to access the homepage. Here, you will find and click "iTunes Library."

Step 2: Now, you will be redirected to a new window. Select the "Export iTunes media to device" option. This option will help you sync iTunes media, including music, to an Android device.
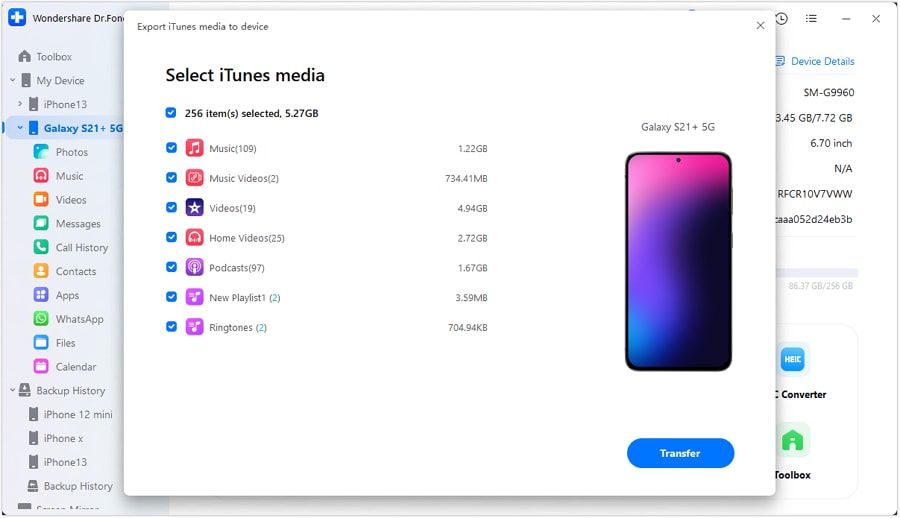
Step 3: On the next screen, you need to select the file types that you want to transfer. Checkmark music only or all types that you want on your Android phone. Once done, click "Transfer" and proceed.
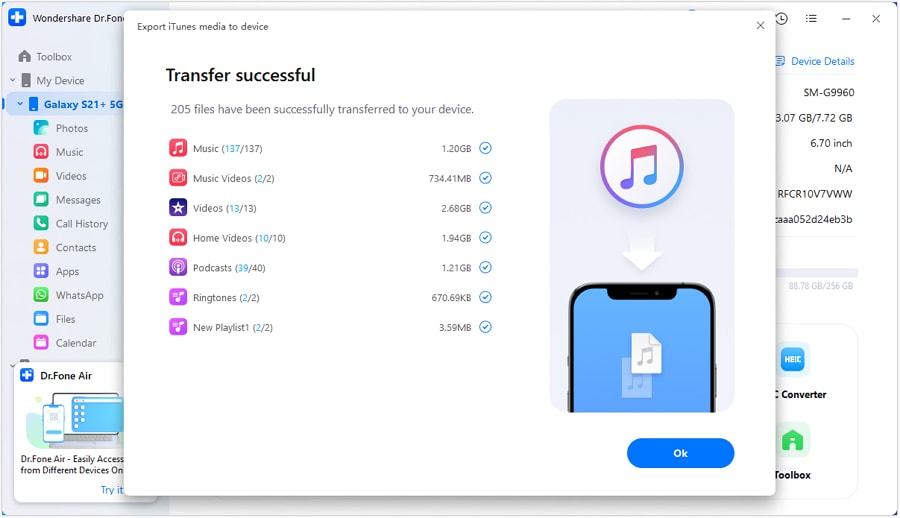
Step 4: You can see the progress bar in Dr. Fone's app. Once the process is completed, you will see the below interface. Click "OK" and you are done.
Did you see how easy it is to sync iTunes to Android using Dr.Fone? Similarly, in just a few clicks, you can also do other things like restoring your data, unlocking your phone and more.
Part 6. FAQs
FAQs
Conclusion
So, syncing iTunes to Android is not an impossible thing in today's world. This article has explored various methods to sync iTunes to Android. You can either use YouTube Music, Apple Music, or a manual method to do so.
However, if you want a simple and quick approach to transferring your iTunes media to your Android, then Dr.Fone is recommended. It is a one-stop solution for many of your Android and iOS-related issues. Download and give it a try now!
Dr.Fone Basic:
Better Control for Your Phone
Manage, transfer, back up, restore, and mirror your device


Samsung Tips
- Best Samsung Phones
- 1. Samsung Galaxy Note 20
- 2. Samsung Galaxy S22
- 3. Top 10 Samsung S22 Tips
- 4. Samsung S9 Tips
- 6. Tips for New Samsung S22
- Samsung Alternatives
- 1. Royole vs. Samsung Galaxy Z Fold
- 2. Samsung Galaxy S21 vs. Xiaomi Mi 11
- 3. Huawei P50 Vs Samsung Galaxy S22
- 4. iPhone 13 VS Samsung S22
- 5. Samsung Galaxy S10 vs. Huawei P20
- 6. Samsung vs. iPhone
- Samsung Useful Tips
- 1. Transfer Photos from Galaxy S9
- 2. Transfer Photos from Samsung
- 3. Samsung Kies 2 Free Download
- 4. Use Samsung Kies for Samsung Note
- 5. Samsung Kies Download for Windows
- 6. Samsung Kies Not Working
- 7. Use Samsung Kies for Samsung
- 8. Transfer Contacts from Samsung
- 9. Sync iTunes to Android
- 10. Turn on Phone without Power Button
- 11. Move Old Phone Data to Samsung
- 12. Fix Samsung Phone Got Bricked
- 13. Play Flash on Samsung
- 14. PC Suites for Samsung
- 15. Track and Lock Samsung Lost Phone
- 16. Top 10 Samsung Music Players
- 17. Take Screenshots on Samsung
- 18. Video Calling Apps for Samsung
- 19. Remove Google Account Bypass
- 20. Bypass Samsung Lock Screen


Alice MJ
staff Editor