Back Up Social App Data on iOS/Android Devices
Backup, as a process, is a critical process that needs to be carried out for every usable device to protect the data within it. While many methods back up device data, few offer dedicated social app backup options. Wondershare Dr.Fone is here to provide a proficient feature to help you back up WhatsApp Android and iOS.
Manage Your Phone Wherever You Go
Index
Part 1: Back Up WhatsApp Data on iOS Devices
You have to start the process by connecting your iDevice with Dr.Fone using a cabled connection. If you are connecting the device for the first time, you will have to use a USB cable. However, if the device is connected to Dr.Fone first, the connection can be established wirelessly.
After connecting the device in the My Device section on the left panel, it leads to WhatsApp in the same panel. If you are backing up your iPhone for the first time, proceed to click Start Backup to initiate the process of backup WhatsApp iOS.
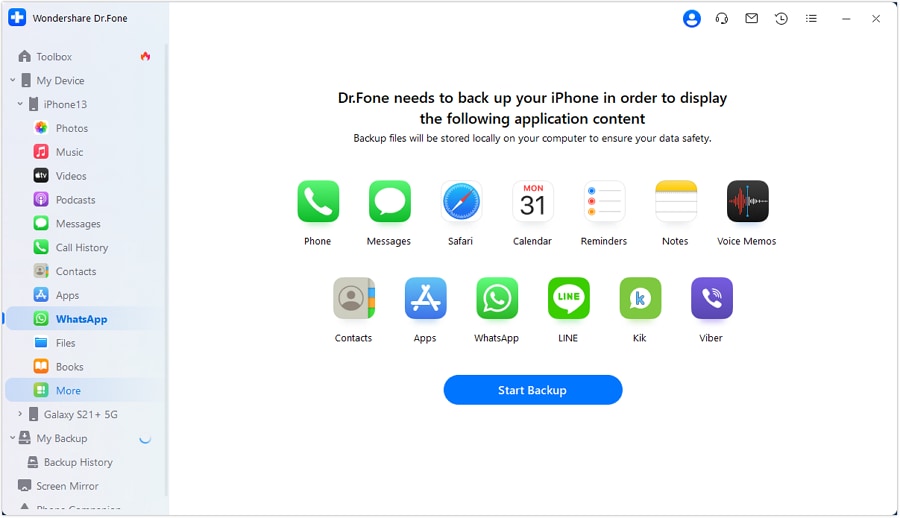
* Dr.Fone Mac version still has the old interface, but it does not affect the use of Dr.Fone function. We will update it as soon as possible.
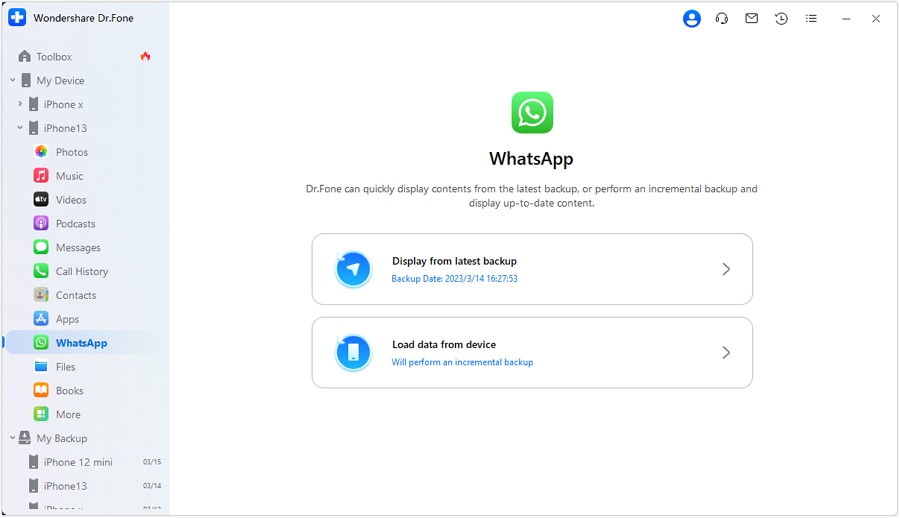
For the old users who have previously backed up their iPhones on Dr.Fone, they will view another screen on selecting WhatsApp. To view the latest backup saved on the platform, select Display from the latest backup. Conversely, you can also consider selecting Load data from the device for practicing an incremental backup.
As you select the appropriate backup option, the backup process starts and is displayed with a progress bar on the next screen.

Once your WhatsApp is backed up, the data will be displayed on the same screen. You can navigate through the data and manage it according to your requirement. Dr.Fone allows you to export, print, and search for your WhatsApp data through its platform.

Part 2: Back Up LINE & Kik & Viber Data/Attachments on iOS Devices
The process to back up LINE, Kik, and Viber is the same on Dr.Fone, apart from their navigation, which can be found in the More section. Considering we are backing up LINE data and attachments on iOS, connect your iDevice to the computer successfully. Continue to More > LINE to access the respective section. Click Start Backup if you will back up data for the first time.

You will find this screen on your front if you have backed up LINE data and attachments. Select Display from the latest backup to view previous backups. Conversely, you can select Load data from the device to initiate an incremental backup.

The backup process of LINE data starts and will be displayed with a progress bar.

All messages and respective media are displayed on the platform once the data is backed up. You can easily export and print your required chats from Dr.Fone.

To view specific attachments retrieved from LINE, navigate to LINE Attachments in the same section. You can export particular attachments by selecting the data of your choice.

Part 3: Back Up WhatsApp Data on Android Devices
To back up WhatsApp Android, connect your Android device to Dr.Fone by cabled or wireless connection. After connecting your Android device in the My Device section, lead to WhatsApp in the same section. First-time users will come to this screen, from where they have to select Start Backup.

Users who have backed up WhatsApp on Dr.Fone before will observe the following screen on their device. Select Display from the latest backup to view previous WhatsApp backups. Conversely, they can try to select Load data from the device to try incremental backups.

The data backup process starts, and the progress is displayed on the next screen. The backup process will take some time. Don't disconnect your Android device, and don't use the device or delete any data on the phone during the backup process.

A new window opens, asking you to turn off the end-to-end encrypted backup of WhatsApp on your Android device. Follow the on-screen instructions by launching WhatsApp and going to the Chat backup option. Look for the End-to-end encrypted backup option and turn it off. After performing it, click the Backup button to back up all WhatsApp data on the device.

Following this, you will have to turn on end-to-end encryption on your WhatsApp on your Android device. As per the on-screen instructions, open WhatsApp and go to Settings by clicking on the three-dotted icon on the top right.
Continue to Chats > Chat backup to access the backup settings of WhatsApp. Continue to turn on the End-to-end encrypted backup option and lead to another window. Select the Use 64-digit Encryption Key Instead button to go to the following settings. Once done, click Next on Dr.Fone's window to proceed further.

On your Android device, you will have to select the Turn On button on the next window and continue to choose to Generate Your 64-digit Key button. A 64-digit key will be generated on the screen, and you have to wait until it is generated. Once done, click the Scan button on your Dr.Fone's screen to proceed.

Continuing with your Android screen, select I Saved My 64-Digit Key > Create to create an end-to-end encrypted backup for your device. Select Back Up on your Android device and continue to tap Next on your computer's screen.

The screen showing the WhatsApp backup's progress will continue and will conclude several minutes later.

The backed-up data of WhatsApp will be displayed on the same screen. Navigate through the data and sections appearing on the screen. You can easily export and print the WhatsApp data of your choice.

Part 4: Restore Social App Data to Devices
In the left panel of the interface, go to My Backup. Here, you’ll see a list of all your available backup files. Select your preferred Social App (e.g., WhatsApp, LINE, Viber) from the options. Then click the Restore to Device.

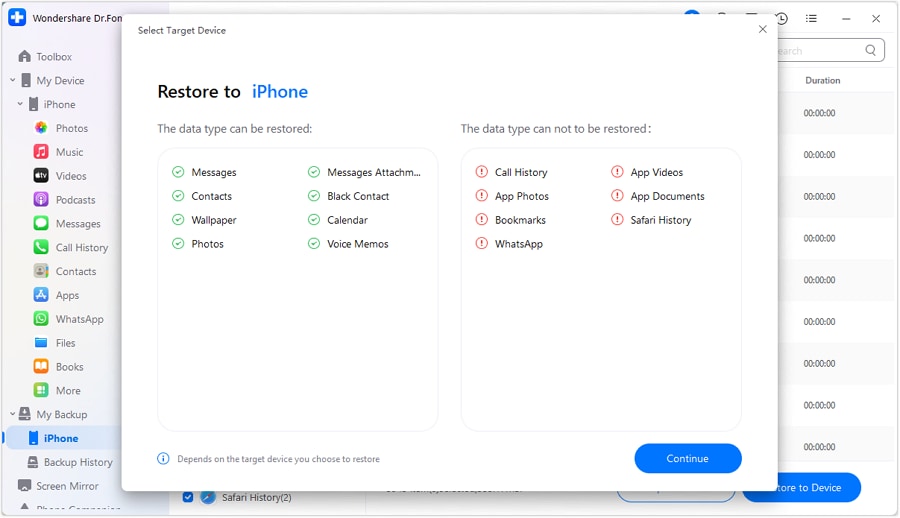
A new window opens containing the list of file types that will restore and cannot be restored to the device. Click the Continue to process.
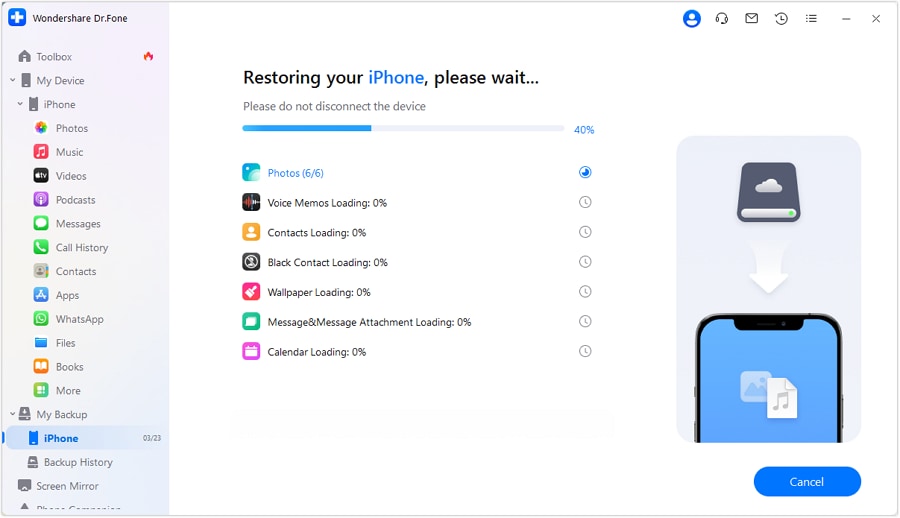
The restoration will now begin. A progress bar on the screen will display the ongoing process, so you can monitor its completion.
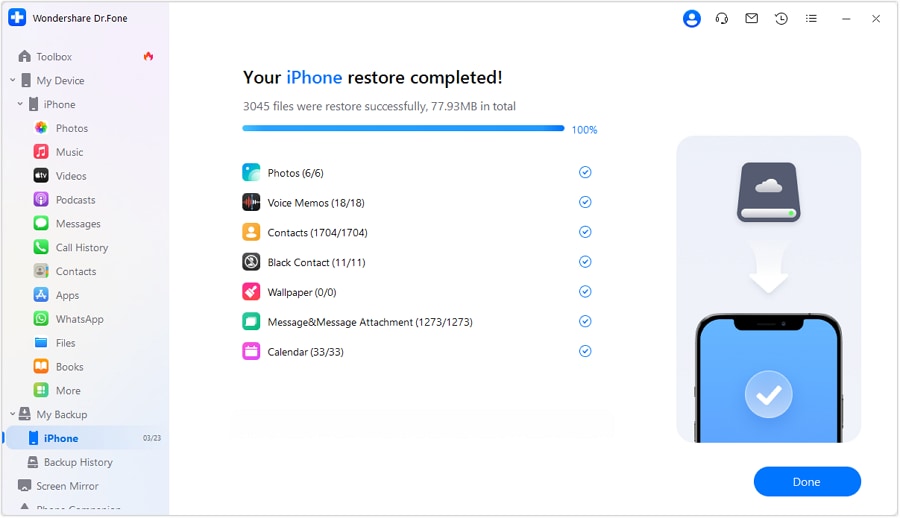
When the restoration is finished, review the summary carefully to ensure everything you need has been successfully restored. Finally, click Done to close the window and complete the process.
WHAT YOU'LL NEED

Dr.Fone provides a complete set of tools for solving all iOS/Android phone problems.
Need help?
You might find the answer to your question in the FAQ or additional information below: