How to Manage Android Devices From a PC?
When it comes to managing your Android devices, the procedure is considered hefty if there is no tool to assist you. In such cases, the existence of Dr.Fone comes in handy for those who intend to manage data on Android. This guide will provide an overview of how Dr.Fone will help you with this purpose.
Index
Part 1: Android Data Manage
The entire management process involves an associated connection of the Android device with the computer through a cable connection. It can be wirelessly connected by installing Dr.Fone Link app on your Android. Scan the QR code and connect your device to the platform successfully. All this can be done across the My Device section.

Once connected, multiple functions can be performed to manage the data of the Android device:
1. Photos Manage
After connecting your Android, head into the Android Device > Photos from the left-hand panel. Click Add to import more images into the device. Use the To PC option to export selected pictures to the computer. Furthermore, make use of the Delete option to delete specific images for managing your gallery.
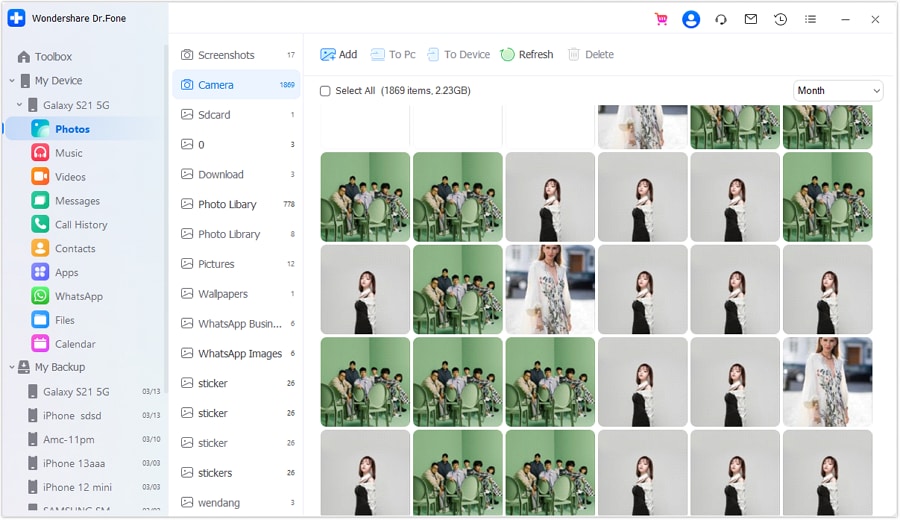
* Dr.Fone Mac version still has the old interface, but it does not affect the use of Dr.Fone function. We will update it as soon as possible.
Select a particular image and open it to preview. It opens up a new window where you can rotate and zoom according to your requirements.

2. Video Manage
To manage your videos, navigate through Android Device > Videos from the left panel to access your device's videos. You can import videos of your choice and export them according to your liking. Similarly, refresh the video list if they get updated and delete them according to your requirements.
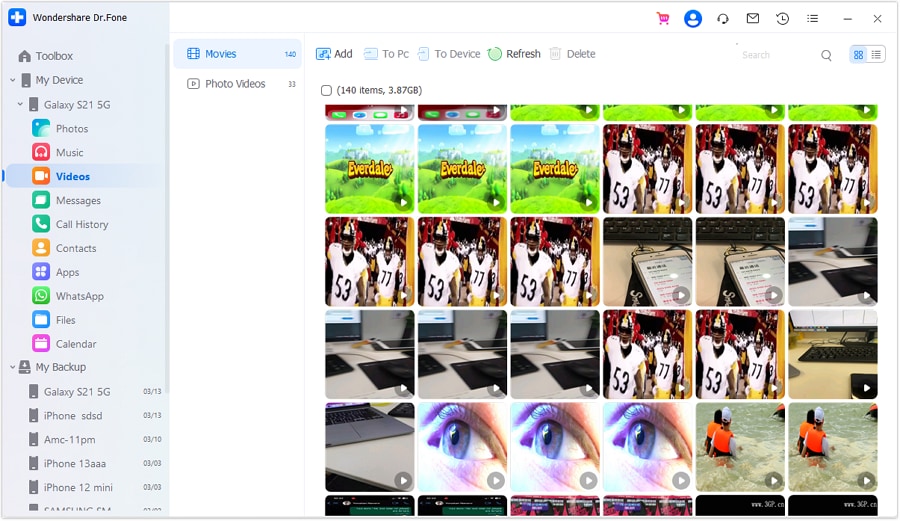
You can change the viewing aspect of the videos with the help of Album View and List View options on the top-right side of the window.

3. Messages Manage
Look into the details of the messages detected on your Android device from the Messages section in the left panel. In All Messages, discover the chats made on your Android device. You can import data, export entire chats, print chats according to your liking, and delete them with ease. Preview in the window present on the right to read out the chats, if needed.

As you progress into the Attachments section, select the data of your choice and export it to your computer according to your liking.

4. Call History Manage
To view the history of your call logs detected in the Android device, navigate to the Call History section to open the details. Export and print the details of your call history using the right set of options, if needed.

5. Files Manage
You can easily access the files of your Android device after connecting your device to the computer. For that, lead into the Files section from the left panel. On the screen that opens, you can manage the data across the phone and SD card with ease. To import data into this section, take the help of the Add File button.
Conversely, use the New Folder button to add a new folder to the device's file system. Search, export, and delete data according to your requirements.

6. Calendar Manage
Access the calendars saved across your Android device on Dr.Fone from the Calendar section on the left. As the details appear on the front, select the important details saved against multiple dates. The complete calendar of the Android device can be easily exported or printed. Furthermore, you can set the date viewing filter from the top.

Part 2: Music Manage & Deduplicate
To discover the music collection of your Android and manage Android from your PC, find the Music section from the left under your device. As you access the list of music in your Android, navigate through the files to manage them accordingly. Use the Add button to import files according to your liking, export to PC, and delete, if required.
You can manage a variety of music files within the platform, which includes music, ringtones, recordings, and voicemails.

To change the view of your music files, use the Album View or List View buttons.

If you intend to remove the duplicated music files on your Android device, look for the Deduplicate button on the top. A new window opens that automatically detects duplicate files under multiple filters, such as Name, Artist, and Album. Checkmark the files that are not required and click Delete Duplicates to remove the files from the list.

Part 3: Contacts Manage & Deduplicate
To manage your contacts, Dr.Fone provides a dedicated option under Android Device > Contacts. On accessing the section, navigate through multiple sub-sections made against the contact list saved in your Android. Add new contact vCard, entire CSV files, or import Windows or Outlook address books.
Similarly, you can also export the contacts under similar formats from your device with the Export button. Select any contact to view its details on the right panel.

For deleting multiple contacts from your phonebook, select the Deduplicate button on the top. This will open a new window that will search for duplicate contacts.

A new window opens, showing multiple contacts and their details. You can define the matching types under the Select a match type option. To merge a contact, select the Merge button on the screen. If you wish to merge all contacts shown on the screen, use the Merge Contacts button on the bottom right.

Part 4: Apps Manage
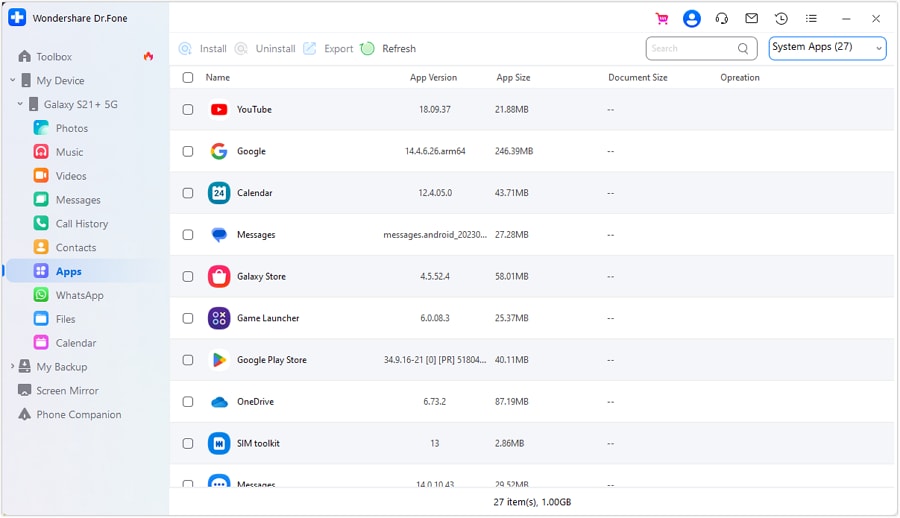
Manage applications on Dr.Fone is also possible for your Android device. Look for the Apps section on the left panel and observe the comprehensive list of apps installed on your Android. You can install new applications on your Android with ease. Use the Uninstall button on the top to uninstall an app from your Android. Export any particular app and its settings using the Export button.
Part 5: WhatsApp Manage
Access Messages on Your WhatsApp
Look for the WhatsApp section in the left panel and open the details about your WhatsApp account and its data on the adjacent screen. If you stand in the Messages section, you can easily export your required chats and print them as PDF files.

To manage your WhatsApp photos, lead to the Photos sub-section and export photos according to your liking.

If you want to perform similar functions for managing your Android's WhatsApp videos, lead into the TV Video sub-section.

For setting the music and audio saved on your WhatsApp, discover the Audio sub-section and export them to your computer.

Any other data that is available in your WhatsApp can be accessed from the Others sub-section. Manage the data across this section according to your desire.

WHAT YOU'LL NEED

Dr.Fone provides a complete set of tools for solving all iOS/Android phone problems.
Need help?
You might find the answer to your question in the FAQ or additional information below: