Restore iCloud Data to Android/iOS
iCloud is one of the most convenient ways to back up our iOS devices. But when we need to restore the iCloud backup to iPhone/iPad/Android devices, you'll find it’s not that convenient anymore. You can only restore the whole iCloud backup during the iOS device setup process, and the iCloud backup cannot be restored to Android devices. So here it comes with iCloud Manager, which enables you to selectively restore any content from iCloud backup to iPhone/iPad/Android devices without affecting the existing data on the device. Find out how to easily restore iCloud backup data to iOS or Android.
Index
Part 1: Restore iCloud Backup to iOS Device
Launch Wondershare Dr.Fone after downloading and installing it on your computer successfully. Continue to connect your iDevice with a cabled connection. If you have previously connected the device, it can be connected wirelessly.
Once the connection is established, go to the iCloud Manager button on the home screen.

A window pops up, asking you to sign in with your iCloud account. Provide the appropriate credentials to the iCloud account.
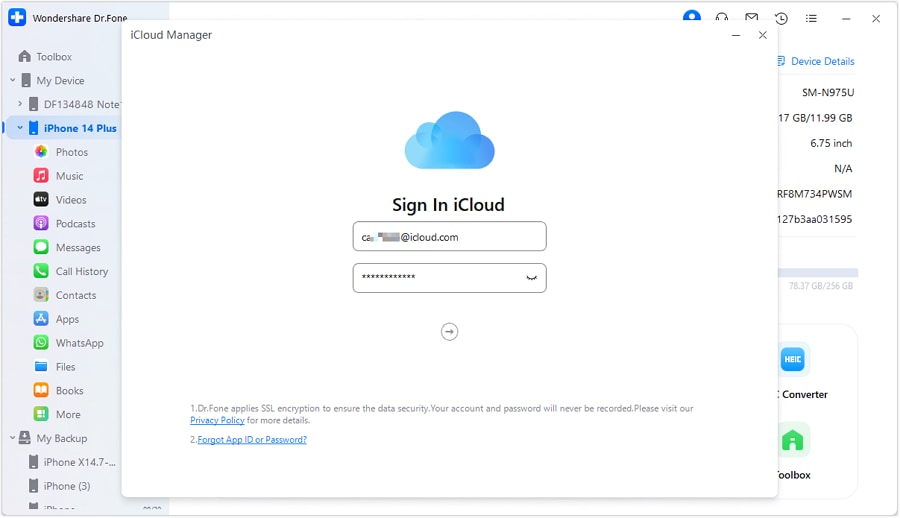
* Dr.Fone Mac version still has the old interface, but it does not affect the use of Dr.Fone function. We will update it as soon as possible.
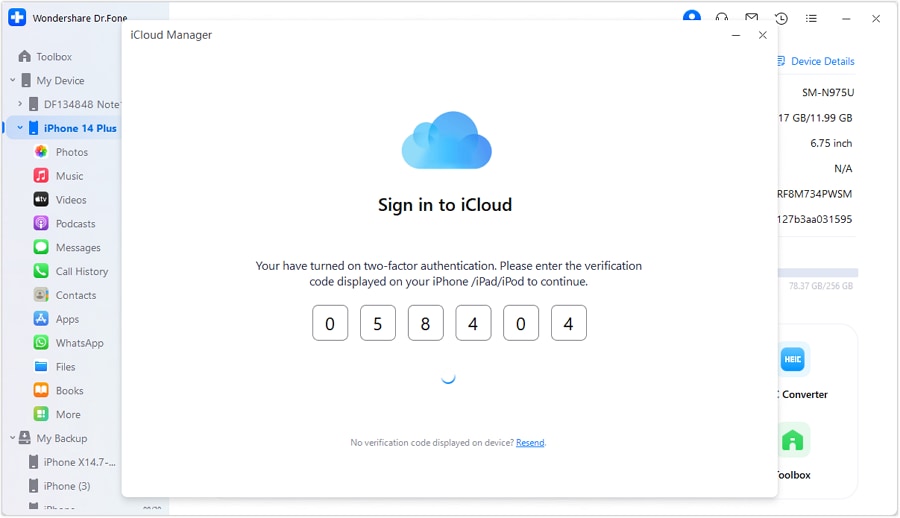
If you have turned on two-factor authentication for your iCloud account, you will receive a verification code. Enter the verification code and wait for Dr.Fone to verify.
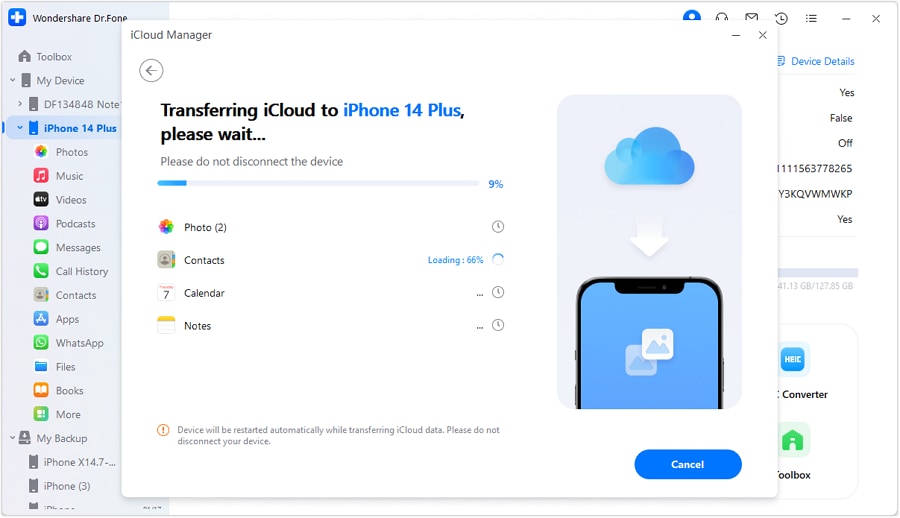
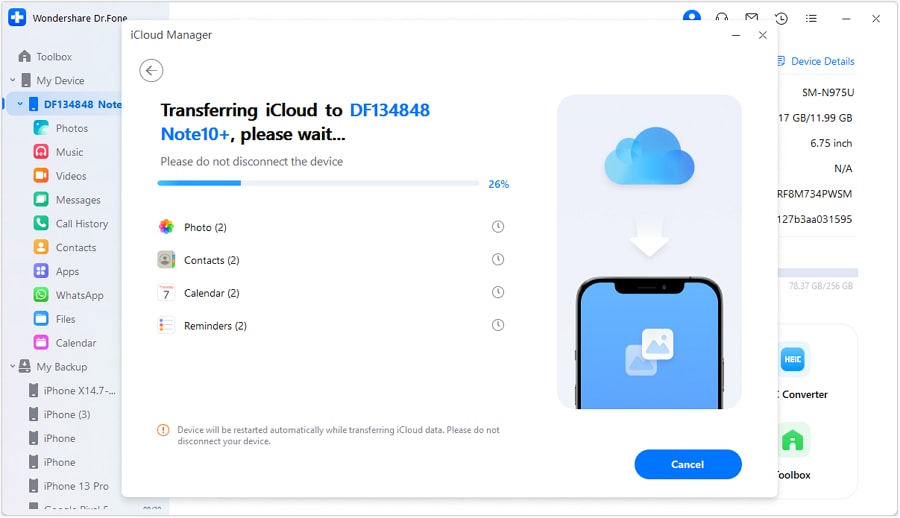
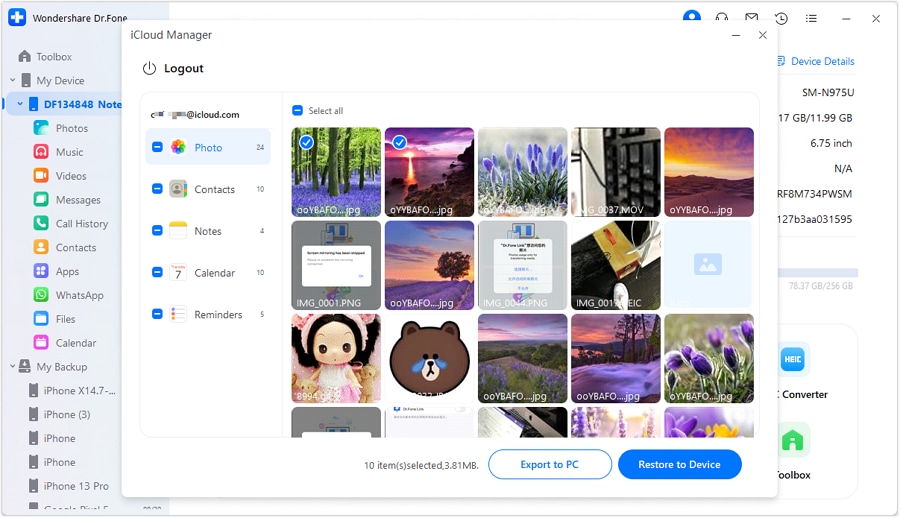
On the next window, select the data that is available in the iCloud account and has been backed up before. After selection, continue to select the Restore to Device button to initiate the process. Click Start to proceed toward the restoration.

The progress bar on the next window shows the completion of the entire process. Wait until the data is transferred back to the iDevice. If you wish to cancel the complete procedure, tap Cancel.
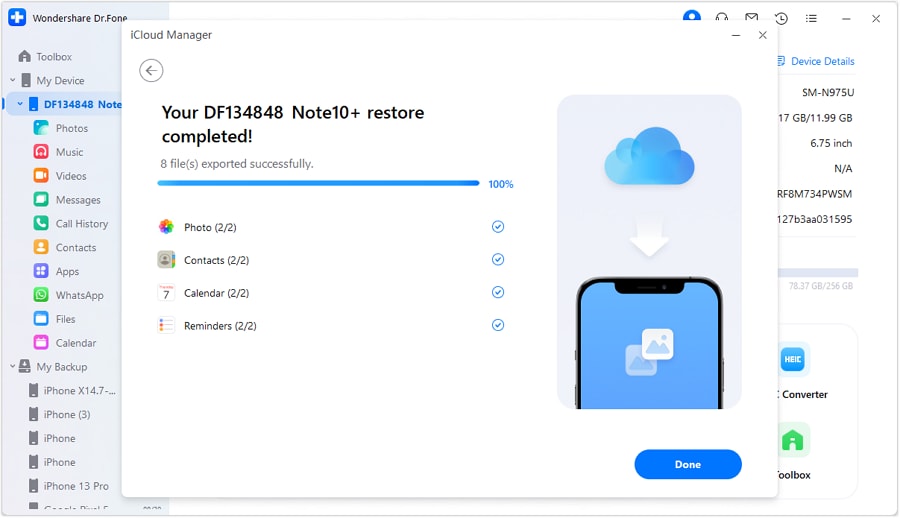
The following window preview shows the completion of the restoration. Click Done to conclude the process and enjoy the restored data on your iDevice.

Part 2: Restore iCloud Backup to Android Device
For an Android, you will also have to sign in with your iCloud account to restore iCloud backup data to Android. Once you have surpassed all sign-in activities, continue to select Restore to Device to proceed with data restoration. On the next screen that proceeds, click Start to initiate data restoration.

As the restoration of iCloud data continues in your Android, it will be displayed as a progress bar. Click Cancel if you intend to stop the process.
Once the data is restored, the platform prompts the completion on the next screen. Select Done to conclude the restoration.
Part 3: Export iCloud Backup to PC
If you wish to export the iCloud backup data to your computer, sign in with your iCloud credentials after launching iCloud Manager from Wondershare Dr.Fone. Once you have signed in, proceed to select the data that you wish to export to the computer.

Once you have selected all the data, proceed to tap the Export to PC button on the bottom.
Browse the location of the iCloud backup data where you wish to export it. On selecting the location, click OK to proceed toward the conclusion of the process.

A pop-up window appears showing the progress of the data export. Once it is done, you can select the Open Folder option to view the location of the iCloud backup. Conversely, click OK to close down the process.

WHAT YOU'LL NEED

Dr.Fone provides a complete set of tools for solving all iOS/Android phone problems.
Need help?
You might find the answer to your question in the FAQ or additional information below: