100% Security Verified | No Subscription Required | No Malware

 :
: 
 ChatGPT
 Perplexity
 Gemini
 Claude
 Grok
Grok
The new iPhone 17 lineup has arrived, and setting it up correctly is the first step to a great experience. A smooth iPhone 17 setup ensures all your precious data, from photos to critical app information like WhatsApp chats, moves over securely and without loss. Many users worry about eSIM activation problems or getting stuck during data restoration, turning an exciting moment into a frustrating one.
This comprehensive guide provides a clear, step-by-step workflow to eliminate the guesswork. We'll cover everything from preparing your old device and choosing the best data transfer method to troubleshooting common errors. With detailed checklists and actionable advice, you'll complete your iPhone 17 setup quickly and confidently.
In this article
Part 1. Pre-Setup Checklist: Preparing Your Old Phone and Backups
Proper preparation is the key to avoiding nearly all headaches during your iPhone 17 setup. Before you even turn on your new device, completing these crucial steps on your old phone will ensure a seamless data transfer and restoration process.
Essential Preparation Checklist
- Update Your Old Device: Ensure your old iPhone or Android is running the latest available operating system to maximize compatibility.
- Perform a Full Backup: This is your safety net. Create a complete backup of your old phone.
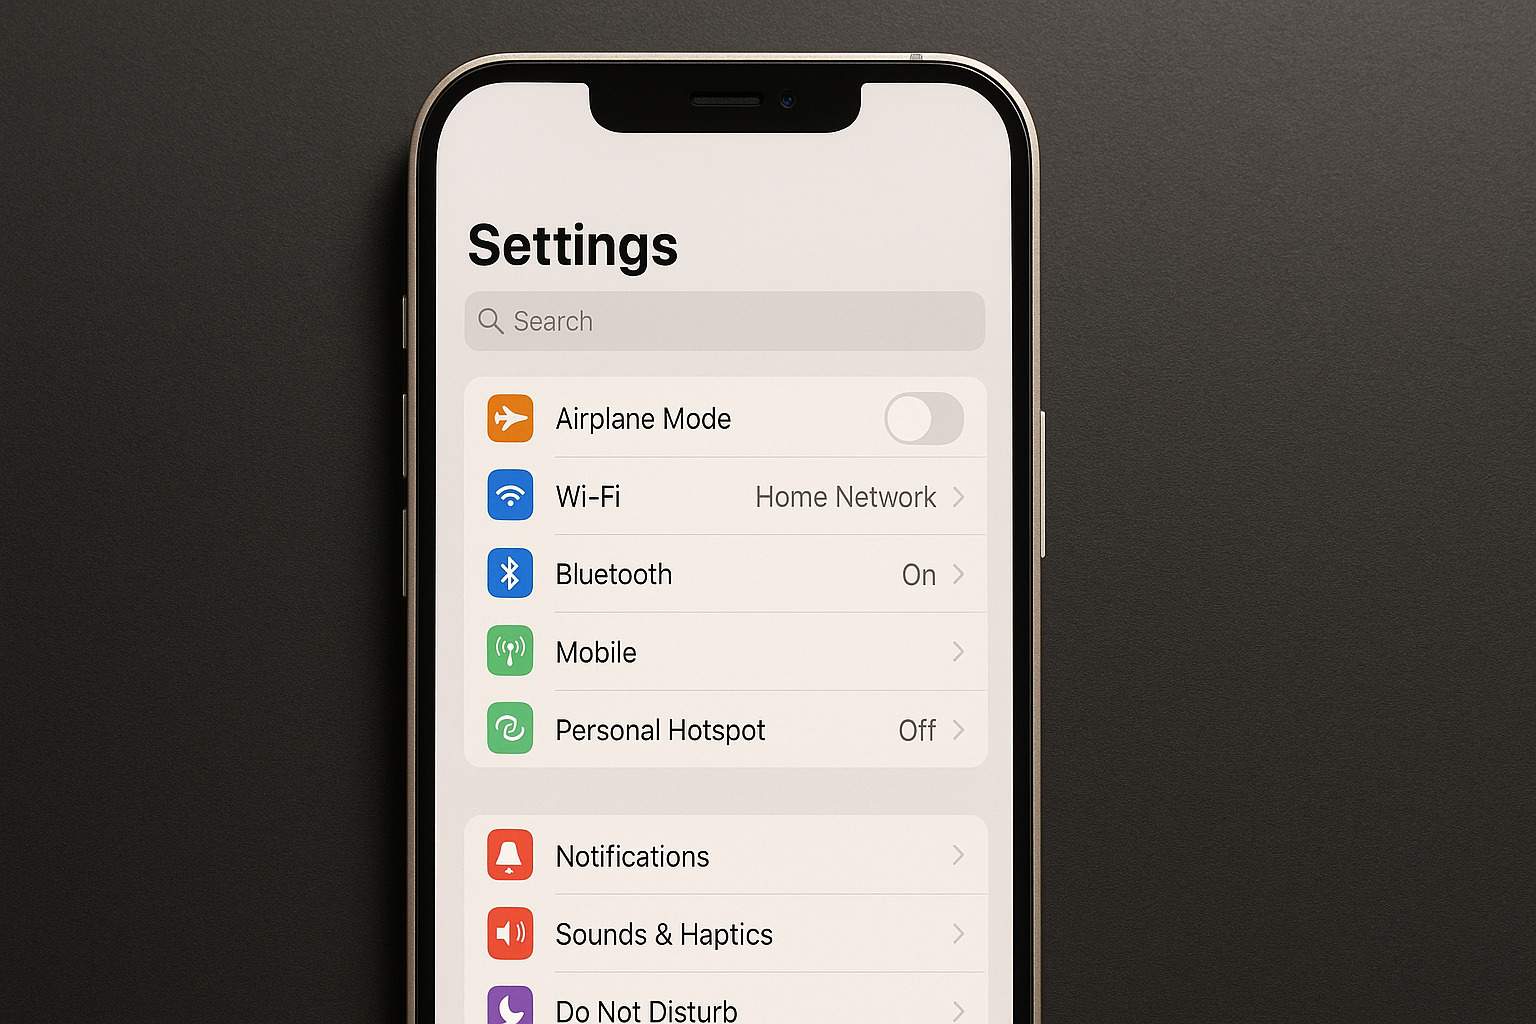
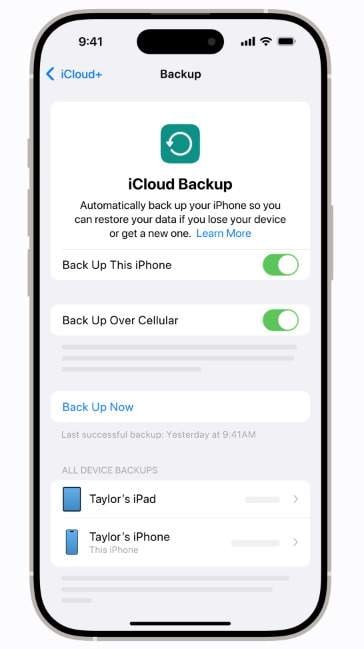
- For iPhone users: Navigate to Settings > [Your Name] > iCloud > iCloud Backup and tap 'Back Up Now'. Alternatively, connect your iPhone to a Mac (using Finder) or a PC (using iTunes) and select 'Back Up Now.' Encrypting your backup is recommended to save Health and Keychain data.
- For Android users: Use your Google account to back up essential data. Check your device settings for additional local backup options.
- Manage WhatsApp Data: Open WhatsApp and go to its settings to create a fresh backup of your chats and media.
- Check Your SIM/eSIM: Identify if your old phone uses a physical SIM or an eSIM. If your new iPhone 17 is eSIM-only in your region, contact your carrier beforehand for instructions on how to transfer your service.
- Gather Physical Items: Make sure both your old and new phones are charged to at least 50%. Have a compatible USB cable and a computer ready if you plan on performing a wired data transfer.
A Step-by-Step Guide to Your First-Time iPhone 17 Setup
The initial setup process on your iPhone 17 is guided by iOS, but paying close attention to certain steps, particularly security and eSIM activation, will ensure everything is configured correctly from the start. Follow this sequence for a smooth launch.
Step 1 Power On and Begin
Press and hold the side button on your new iPhone 17 until the Apple logo appears. When the 'Hello' screen is displayed, select your preferred language and region to proceed.
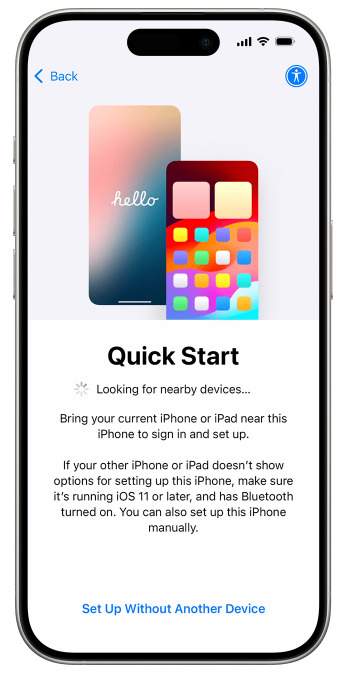
Step 2 Choose Your Setup Method
If you have an old iPhone nearby, a 'Quick Start' prompt will appear. This is an easy way to transfer data. If you prefer not to use it or are coming from Android, select 'Set Up Manually'.
Step 3 Connect to Wi-Fi and Activate
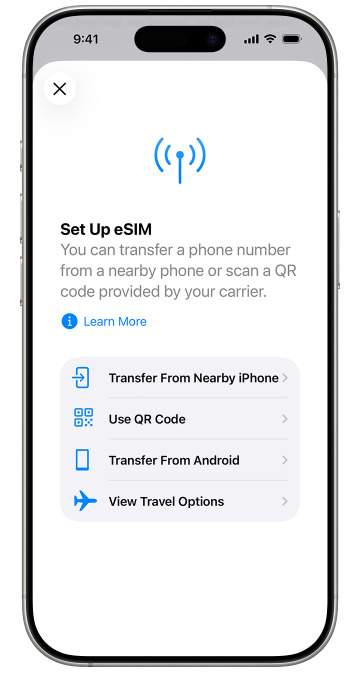
Connect to a stable Wi-Fi network. This is essential for iCloud restores and app downloads. Your iPhone will then proceed with carrier activation. If you're using an eSIM, you will be prompted to set it up now.
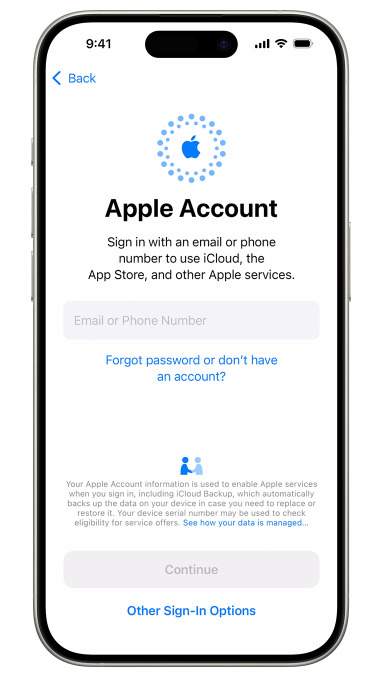
Step 4 Set Up Security and Apple ID
Sign in with your Apple ID and password. This links your device to iCloud, the App Store, and other Apple services. Follow the on-screen instructions to configure Face ID and create a passcode. You will also be prompted to set up Apple Pay.
Step 5 Select Data Transfer Method
This is a critical step. You'll be presented with several options: 'Restore from iCloud Backup,' 'Restore from Mac or PC,' 'Transfer Directly from iPhone,' or 'Move Data from Android.' We cover these in detail in the next section.
Step 6 Finalize Settings and Wait
Configure remaining settings like Location Services and Screen Time. Once you reach the Home Screen, keep your iPhone connected to Wi-Fi and power as your apps and media finish downloading in the background.
Critical Details for eSIM Activation
Many new iPhone 17 models are now eSIM-only in various regions. Understanding how to activate it is essential.
- Check Compatibility: Confirm with your carrier that your plan supports eSIM and verify if your region's iPhone 17 model requires it. For example, models in the US, Canada, and Japan are often eSIM-only.
- Activation Process: Go to Settings > Cellular > Add eSIM. You can either scan a QR code provided by your carrier or use your carrier's app to install the eSIM profile directly.
- Manage Your Lines: If you use two lines (e.g., work and personal), be sure to label them clearly. You can also designate a default line for calls and messages, and another for cellular data.
- Troubleshooting Failed Activation: If the activation fails, the first step is to contact your carrier's support team. They can often resend the eSIM profile to your device remotely.
How to Transfer and Restore Data to Your New iPhone 17
Choosing the right data transfer method depends on your previous device (iPhone or Android), the amount of data you have, and the tools at your disposal. Here's a breakdown of each option with clear instructions.
Option 1: Quick Start (Wireless iPhone to iPhone)
Best for: Migrating from an old iPhone when both devices are physically present.
Quick Start is Apple's most straightforward method. Simply power on your new iPhone 17 and place it next to your old one. A prompt will appear on your old device; tap 'Continue' and follow the on-screen instructions to scan an animation. You can then choose to transfer data directly. Keep both phones close and connected to power until the process is complete. However, be aware that this method can sometimes stall with very large backups or unstable Wi-Fi.
Option 2: iCloud Backup and Restore
Best for: When you have a recent iCloud backup and a fast, stable Wi-Fi connection.
During the iPhone 17 setup, select 'Restore from iCloud Backup' on the 'Apps & Data' screen. Sign in with your Apple ID and choose the most recent backup file. Your settings and data will be restored, and apps will begin downloading in the background. The primary limitation of this method is the need for sufficient iCloud storage and its potentially slow speed for large photo and video libraries.
Option 3: Finder (Mac) or iTunes (PC) Restore
Best for: A complete, wired transfer that includes sensitive data like saved passwords and Health information.
First, connect your old iPhone to your computer and create an encrypted backup using Finder or iTunes. Once the backup is complete, connect your new iPhone 17 and choose to restore from that backup. This method is generally faster and more reliable than wireless options, especially for large amounts of data.
Option 4: The Most Reliable Method for Any Scenario - Dr.Fone - Phone Transfer
Best for: Transferring from Android, moving large WhatsApp histories, or when other methods fail.
Native tools like 'Move to iOS' for Android can be unreliable and often fail to transfer important app data. For a guaranteed seamless transition, Dr.Fone – Phone Transfer is the superior solution. It handles cross-platform transfers (Android to iOS and vice-versa) flawlessly and ensures your complete WhatsApp history, including attachments, migrates intact.
 Move data between iOS to Android and vice versa.
- Transfer contacts, SMS, photos, videos, music, and more types.
- Available with all phones with Android and iOS versions.
- Simple, click-through process.
How to Transfer Data to Your iPhone 17 with Dr.Fone
Step 1 Launch Dr.Fone and Connect Your Phones
Open Dr.Fone on your computer and select the 'Phone Transfer' module. Connect both your old phone (source) and your new iPhone 17 (destination) via USB cables. The software will automatically detect them.
Step 2 Select the Data to Transfer
A list of transferable data types, such as contacts, messages, photos, and music, will appear. Check the boxes next to the data you wish to move to your new iPhone 17.
Step 3 Begin the Transfer Process
Click the 'Start Transfer' button. Dr.Fone will securely copy the selected data from your source phone to your new iPhone 17. Keep both devices connected until the process is complete.


Comparison of Data Transfer Methods
| Scenario | Recommended Method | Key Advantage |
|---|---|---|
| Simple iPhone-to-iPhone migration with both devices present | Quick Start | Extremely easy and wireless |
| Need to transfer WhatsApp or move from Android | Dr.Fone – Phone Transfer | Highest reliability and cross-platform support |
| Want a full, encrypted backup with passwords and Health data | iTunes/Finder (Computer) | Most comprehensive backup possible |
| Old phone is not available, but you have a cloud backup | iCloud Restore | Convenient but requires good Wi-Fi and storage |
Post-Transfer Verification Checklist
After the data is transferred, run through this quick checklist to ensure everything is working as expected:
- Sign In and Verify: Go to Settings and confirm you are signed into your Apple ID. Check that iMessage and FaceTime are activated.
- Check Mail and Calendars: Open the Mail and Calendar apps to ensure all your accounts have synced correctly. You may need to re-enter some passwords.
- Configure Apple Pay: Open the Wallet app to re-add your credit and debit cards and verify them with your banks.
- Test Key Apps: Launch important apps like WhatsApp, your banking app, and social media to make sure your data and logins have been restored.
Optimizing Your iPhone 17 After Setup
Once your iPhone 17 is up and running, a few simple tweaks can significantly improve its battery life and day-to-day performance.
- Review Storage Usage: Go to Settings > General > iPhone Storage. This screen shows what's taking up space. You can offload unused apps or delete large files you no longer need.
- Manage Background App Refresh: Navigate to Settings > General > Background App Refresh. Turn this feature off for apps that don't need to constantly update in the background. This is a major battery saver.
- Adjust Location Services: In Settings > Privacy & Security > Location Services, review which apps have access to your location. For many apps, setting this to 'While Using the App' is sufficient and prevents constant tracking.
- Customize Mail Fetch Settings: If you don't need instant email notifications, go to Settings > Mail > Accounts > Fetch New Data. Changing this from 'Push' to 'Fetch' (e.g., every 30 minutes) or 'Manually' reduces power consumption.
Troubleshooting Common iPhone 17 Setup Problems
Even with careful preparation, you might encounter an issue. Here’s how to quickly diagnose and fix the most common iPhone 17 setup problems.
Quick Fixes for Setup Issues
| Problem | Common Cause | Effective Solution |
|---|---|---|
| Quick Start is stuck or fails to complete. | Unstable Wi-Fi/Bluetooth or a very large amount of data. | Cancel the transfer, restart both iPhones, and try again with a wired connection if possible. If it persists, use Dr.Fone - Phone Transfer. |
| iCloud restore is extremely slow or stalled. | Poor Wi-Fi connection or insufficient iCloud storage for the backup. | Connect to a faster Wi-Fi network and ensure the device is charging. If it doesn't improve, your best bet is to use a computer-based restore. |
| WhatsApp chats are missing after moving from Android. | The 'Move to iOS' app does not reliably transfer WhatsApp data. | This requires a specialized tool. Use Dr.Fone – Phone Transfer, which is designed for this specific task. |
| eSIM activation fails. | A carrier-side provisioning error or a regional restriction. | First, contact your carrier's customer support. You can also try adding it manually via Settings > Cellular > Add eSIM. |
| Apps are not downloading after the restore is complete. | An issue with your Apple ID sign-in or a regional App Store conflict. | Sign out of your Apple ID in Settings, then sign back in. Go to the App Store > [Your Profile] > Purchased to manually restart downloads. |
Conclusion
Completing your iPhone 17 setup successfully hinges on three key elements: thorough preparation, selecting the most appropriate data transfer method for your situation, and knowing how to troubleshoot minor issues. For those moving from another iPhone, Apple's built-in Quick Start and computer-based backups are solid choices. However, for the most challenging scenarios—such as migrating from Android, transferring a large WhatsApp history, or when other methods have failed—a dedicated tool is invaluable.
Dr.Fone – Phone Transfer provides the most reliable, comprehensive, and efficient solution, ensuring no data is left behind. By following the checklists and step-by-step instructions in this guide, you can transition to your new iPhone 17 with total confidence and peace of mind.
FAQ
1. How long should the iPhone 17 setup and data transfer take?
The duration varies significantly based on the method and data size. Quick Start can take anywhere from 30 minutes to a few hours. An iCloud restore can take even longer depending on your Wi-Fi speed. A wired transfer using a computer is typically the fastest, often completing within an hour.2. Can I complete the iPhone 17 setup without a Wi-Fi connection?
You can complete the initial setup steps using cellular data, but a Wi-Fi connection is required to restore from an iCloud backup. If you don't have access to Wi-Fi, your best option is to use a computer (Mac or PC) to perform a wired backup and restore.3. What data will not be transferred when moving from Android to iPhone?
While contacts, photos, calendars, and messages usually transfer with the 'Move to iOS' app, other data often does not. This includes app data (especially from apps not available on iOS), saved passwords, and most notably, your WhatsApp chat history. To transfer WhatsApp, a tool like Dr.Fone - Phone Transfer is necessary.4. What should I do if my new iPhone gets stuck on the Apple logo during setup?
If your iPhone 17 is stuck on the Apple logo for an extended period, you may need to perform a force restart. Press and quickly release the volume up button, press and quickly release the volume down button, then press and hold the side button until the screen turns off and the Apple logo reappears. If the problem persists, you may need to restore the device using a computer.
 Add Wondershare Dr.Fone as a preferred source on Google