Transfer Photos from an Android to a Computer: A Step-by-Step Guide

Jul 12, 2024 • Filed to: Manage Device Data • Proven solutions
We found many people looking for ways on how to transfer photos from Android to their laptop or computer. This need arises from various motives, such as creating backups or dealing with limited storage space on their mobile devices.
No matter the reasons, learning how to transfer pictures from Android to a computer is pretty important. Luckily, we've got a few methods to help you move those pictures to your PC. It's easy, and your photos will be safe on your computer in no time.
Part 1: How to Transfer Photos from Android to Computer with USB
Using a USB cable is the most direct and widely known approach to transferring photos or files from an Android to a computer. A USB cable Image names both devices and can quickly move numerous pictures.
The primary advantage here is the consistent and secure data transfer. However, this method may take longer compared to other data transfer solutions. Additionally, it will only be effective if your computer's USB ports function correctly.
Regardless, here's how to transfer pictures to a computer from Android using a USB cable:
Step 1: Connect your Android phone to the PC using an authentic USB cable.
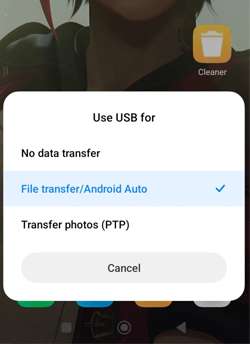
Step 2: Tap the USB notification on your phone's notification screen and choose "File transfers."
Step 3: Click on your device's name disk on your computer to access the internal storage. Navigate to open the DCIM folder.
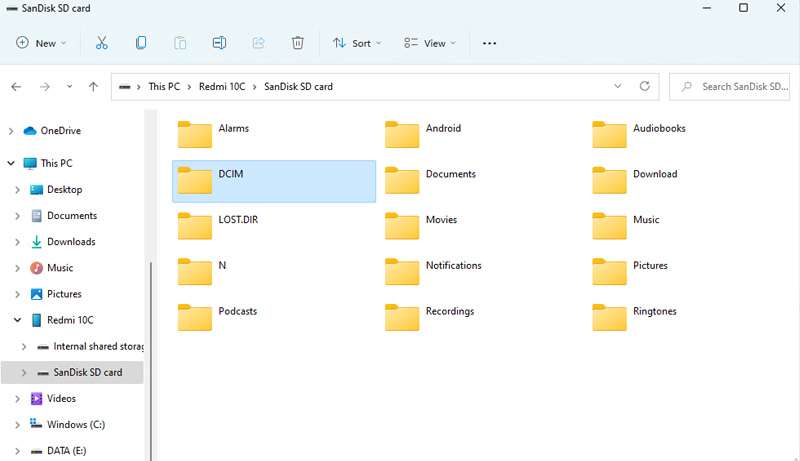
Step 4: Select the desired photos and transfer them to any location on your PC.
While transferring files from your Android phone to a computer using a USB cable is as simple as described above, unfortunate circumstances can lead to connection issues. If you find yourself unable to transfer photos from Android to a laptop, consider troubleshooting with these tips:
1. The computer doesn't recognize Android phones.
If your computer fails to recognize your Android phone, a quick fix is to restart both devices, minimizing the chance of overload. You should also ensure your USB cable is free from faults, as a faulty connection won't allow for a successful transfer.
2. The computer recognizes the Android device but can't access the phone's memory
When your computer recognizes the Android device but can't access its memory, try restarting either the phone, the computer, or both. Updating your phone is also a good idea, as software bugs might be causing the issue. If your computer's operating system is outdated, consider updating it to ensure compatibility with Android OS.
3. Nothing happens after connecting an Android phone
If connecting your Android phone yields no results, use the debugging mode. Navigate to Settings, then Developer Options on your Android phone, and enable USB debugging. The connection will likely work once you plug in your device after debugging.
Part 2: How to Transfer Photos from Android to Computer Wirelessly
If you tried the methods mentioned before, but your computer's USB isn't working, or you have no USB cable around. You might start to wonder how to transfer pictures from an Android phone to a computer without wires.
Thankfully, there are two different ways to do that. You can choose the one that works best for you. Let's check them out.
1) Using Google Photos
One of the simple methods to answer how to transfer Android phone pictures to the computer is using Google Photos. Google Photos allows you to automatically upload photos from your phone to the cloud. Hence, retrieving them on your computer would be easy. You only need an active internet connection to do this.
To set this up, allow Google Photos to upload your pictures to the cloud automatically. Then, follow the guides below on how to transfer photos from Android to your laptop using Google Photos:
Step 1: Open Google Photos.
Step 2: Tap your profile picture.
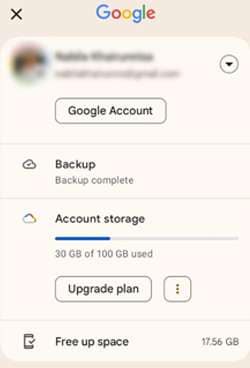
Step 3: If it says “Backup is off,” tap Turn on Backup.
Now, retrieving your photos on your computer is easy once your photos are back up in the cloud. Make sure you're logged in with the same Google account on both devices.
Next, follow the steps below to learn how to transfer photos from an Android phone to a laptop using Google Photos:
Step 1: Open Google Photos in a web browser to view all your synced Android photos.
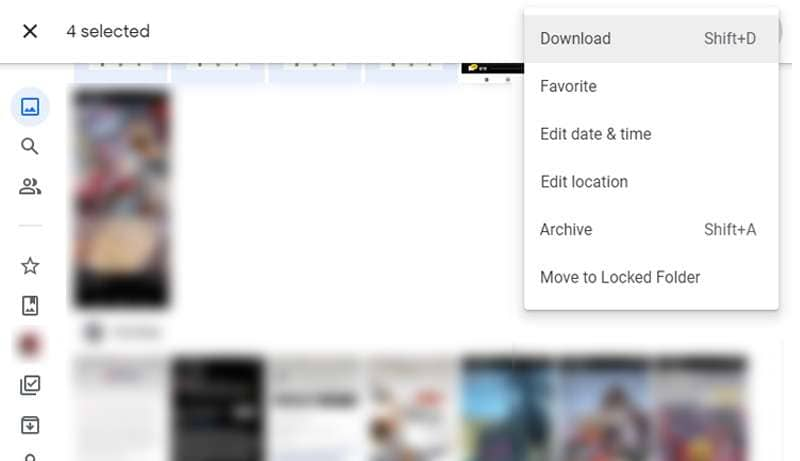
Step 2: Select all the pictures you want to transfer to your computer.
Step 3: Once you have selected them, click the three dots button to open a drop-down menu, and select “Download.” Once finished, all the photos will be saved and transferred to your computer.
2) Using Bluetooth
Bluetooth is a traditional method for transferring files between Android and PC. It also offers convenience in accessibility. While it's suitable for moving various types of files, some limitations exist due to its outdated technology.
Bluetooth can be a handy choice, especially for transferring a few pictures. Bluetooth doesn't require a cable and can work smoothly. However, it has relatively slow transfer speeds, making it less efficient for larger photo transfers.
To set up Bluetooth sharing on your computer, follow these steps:
Step 1: Open Windows Settings.
Step 2: Click on Bluetooth & devices.
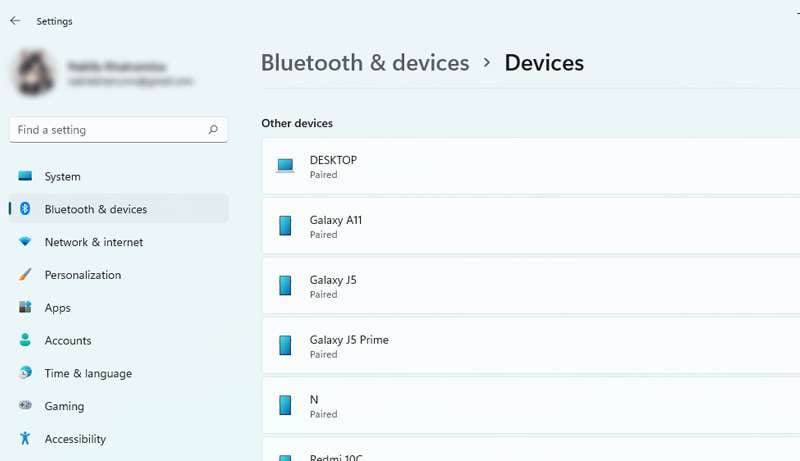
Step 3: Select Devices.
Step 4: Click on Send or Receive Files via Bluetooth under the related settings section.
Step 5: Choose Receive files.
After completing the steps above, proceed to share your photos from your phone:
Step 1: Open your Android phone's Gallery app.
Step 2: Locate the photos you want to transfer. If there's more than one image, press and hold the first images and slide your finger over the others to select them.
Step 3: Tap the Share button > Bluetooth. Then, tap your computer's name to start the transfer.

Step 4: If you haven't paired your devices yet, you'll receive a prompt on your phone and computer. Accept it on both to establish the pairing.
Step 5: After both devices are paired, you can start sending the photos again via Bluetooth. If prompted, accept the inbound transfer on your computer.
Wait until it finishes the transfer. Then, the transferred pictures will be accessible through your computer at the designated location.
Part 3: How to Transfer Photos from Android to Computer Quickly with Easy Software
If you are looking for a complete Android phone manager, try Dr. Fone's Export All Data feature. Dr.Fone provides a one-click solution for your devices, including data transfer between a computer and an Android device in no time. Since it has a user-friendly interface, you won’t have trouble transferring your photos.
Dr.Fone - Basic
One - Stop Solution to Manage and Transfer Data&Files on Android Phone
- Transfer files between Android and computer, including contacts, photos, music, SMS, and more.
- Manage, export/import your music, photos, videos, contacts, SMS, Apps, etc.
- Transfer iTunes to Android (vice versa).
- Manage your Android device on the computer.
- Fully compatible with the newest Android system.


Here are some benefits that you can have with this tool:
- Comprehensive data transfer, including contacts, photos, music, SMS, and more
- You can manage your Android device on the computer
- Supports over 3000 Android devices
Now, you can learn how to transfer pictures from an Android phone to a computer by following these steps:
Step 1: Launch Dr.Fone and connect your devices with a USB cable.
Start by Image nameing your iPhone device to the computer via a USB connection. Launch Dr.Fone and select "Export all data" in the My Device section.

Step 2: Choose file types for export
When a new window appears, select the specific file types you wish to transfer. Besides Photos, you can also transfer videos, voice notes, messages, and more. Then, click "Export" at the bottom of the screen to initiate the process. Choose the preferred location on your Mac to save the exported data.

Step 3: Make a password for the backup file
Next, you will be asked to create an encrypted password for the backup file to be stored on the computer. Set a password, confirm it, and click "Done" to execute the process.

Step 4: Monitor the progress
Your iPhone will start exporting its data to the computer through Dr.Fone. You can wait and monitor the progress on the screen.

Step 5: Successful export of data to the computer
After successful completion of exporting the data, a window will appear on your computer screen. Click "Open" to review the exported data at the specified location.

Conclusion
Learning how to transfer photos from an Android phone to a laptop is important. Using USB provides a direct and secure transfer, but troubleshooting tips may be necessary in case of connection issues.
If USB isn't an option, wireless methods like Google Photos offer convenience by automatically uploading photos to the cloud. Alternatively, Bluetooth provides a cable-free option, though it may have slower transfer speeds.
Above all, you can also consider using Dr.Fone ’s Export All Data feature for a quick and efficient transfer. This comprehensive tool simplifies the process, allowing you to manage various data types seamlessly between your Android device and computer.


Android Manage
- Android to iTunes/iCloud
- Android to Mac
- 1. Transfer Data from Android to Mac
- 2. Transfer Videos from Android to Mac
- 3. Transfer Files from Android to Mac
- 4. Connect Android with Mac
- 5. Transfer Photos from Android to Mac
- 6. Sync Android with Mac OS X
- Android to PC
- 1. Transfer Files Using USB Cable
- 2. Share Apps for Android to PC
- 3. Transfer Photos to Windows 10
- 4. Transfer Contacts to PC
- 5. Transfer Photos from Android
- 6. Transfer Files from Android to PC
- 7. Backup and Transfer SMS
- 8. Transfer Photos from Android to PC
- 9. Transfer Videos from Phone to Computer
- 10. Best MoboRobo Alternative to Manage and Transfer Data
- iCloud to Android
- 1. Tips to Sync Data to Android
- 2. Set Up iCloud Account on Android
- 3. Transfer iCloud Contacts
- 4. Transfer iCloud Photos to Android
- iTunes to Android
- 1. Transfer iTunes Audio Books
- 2. Sync iTunes Music with Google Play
- 3. Copy iTunes Playlists to Hard Drive
- 4. Transfer Music from iTunes
- Mac to Android
- 1. Transfer Files from Mac to Android
- 2. Send Files from Mac to Android
- 3. Transfer Music from Mac
- 4. Transfer Photos from Mac
- PC to Android
- 1. Transfer Files to Android Wi-Fi
- 2. Transfer Pictures from Computer
- 3. Transfer Files from PC to Android
- 4. Transfer data from Acer device
- Manage Tips
- ● Manage/transfer/recover data
- ● Unlock screen/activate/FRP lock
- ● Fix most iOS and Android issues
- Manage Now Manage Now Manage Now
Alice MJ
staff Editor