How to Factory Reset iPhone X/XR/XS (Max): Step-by-Step Guide
Aug 27, 2025 • Filed to: Data Wipe Solutions • Proven solutions
iPhones have revolutionized the smartphone industry and the world in general in ways that people could never have imagined just 20 years ago. As an iPhone user yourself, you know you probably use the device every single day to carry out all different things to help you get stuff done, to entertain yourself, and to help you stay connected to everyone else.

However, the chances are you underestimate exactly how much you use your phone, and you’ll probably only realize how much you use, and how much important data it has, once something goes wrong.
While things going wrong on your phone are designed to be kept to a minimum, that doesn’t mean it doesn’t happen. Fortunately, there are plenty of solutions out there; one of the most popular being to factory reset your phone and start anew.
Today, we’re going to explore everything you need to know when it comes to factory resetting your iPhone X, XR, or you’re XS device, helping you to get your device back into the full working order.
Part 1. Factory reset iPhone X/XR/XS (Max) without iTunes
Easily the best and most effective way to factory reset your iPhone X/XR/XS device is using a third-party software application known as Dr.Fone - Data Eraser (iOS). This software runs on your computer, and you can easily plug in your phone and reset with the click of a button.
This is an excellent choice if you don’t like using Apple’s iTunes service because it’s slow or bulky, or you simply have trouble using it.
This makes things very easy for you, and there’s an extremely slim chance that something could go wrong during the process due to your own human mistake. Some of the other benefits you’ll get to enjoy include;

Dr.Fone - Data Eraser
Factory reset iPhone X/XR/XS (Max) in one click
- The easiest software to learn how to use and extremely user-friendly
- Supports to factory reset all iOS devices, not just X/XR/XS
- Can delete specific content on your device using tickboxes and search features
- A dedicated service to help speed up your phone and remove unwanted bulk files
A Step-by-Step Guide on How to Factory Reset iPhone Using Dr.Fone - Data Eraser (iOS)
Dr.Fone - Data Eraser (iOS) is one of the most accessible phone data management tools on the internet, and you can get started in just a few clicks. However, to ensure you get the best experience, here’s a step-by-step guide talking you through the entire process.
Step 1 - Head over to the Dr.Fone website and download the software to either your Mac or Windows computer. Double-click the downloaded file and install the software to your computer by following on-screen instructions.
Once installed, open the software from your desktop, and you’ll find yourself on the homepage/main menu.

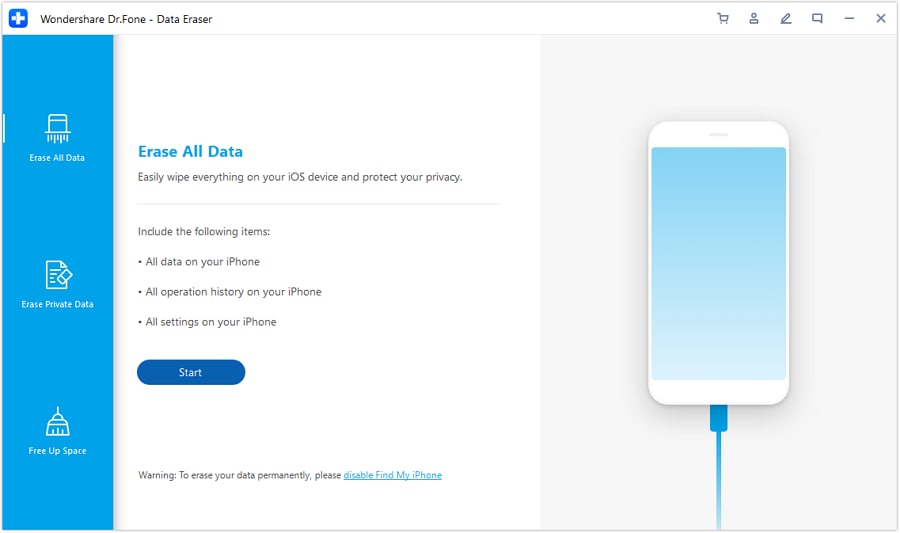
Step 2 - From here, tap the Data Erase option, followed by the ‘Erase All Data’ option from the left-hand menu. Connect your iPhone to your computer using the lightning USB cable, and click the Start button.
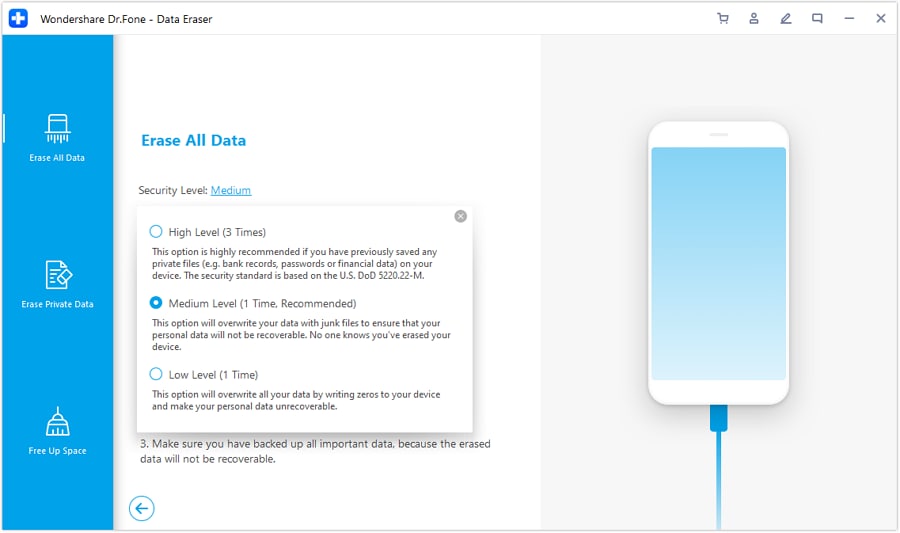
Step 3 - You’ll now be able to choose which kind of security level you want to erase too. For a standard erase, you’ll want to select Medium level. However, if you know what you’re doing, you can choose another option based on the descriptions offered.
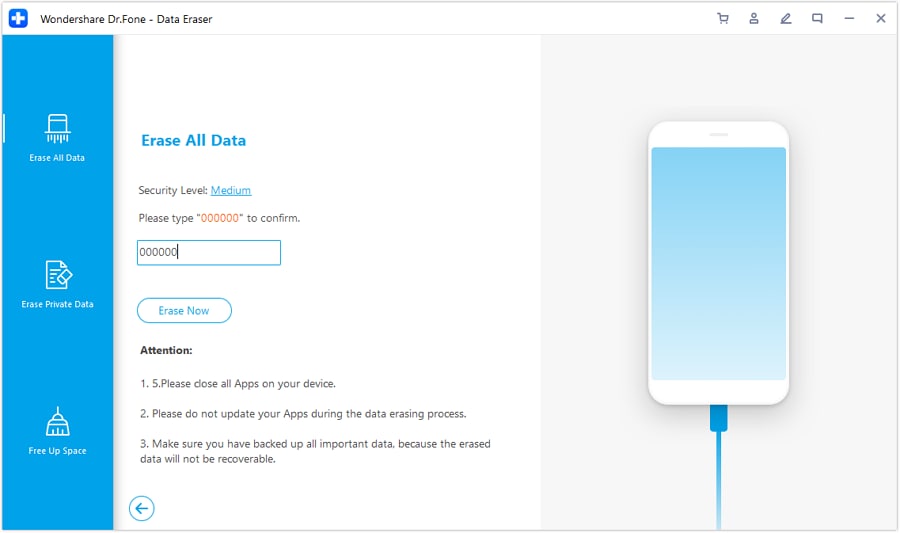
Step 4 - To confirm this erase process, you’ll need to type the ‘000000’ code into the text box, and then confirm the erasing process. Click "Erase Now" button.Now to begin the process.
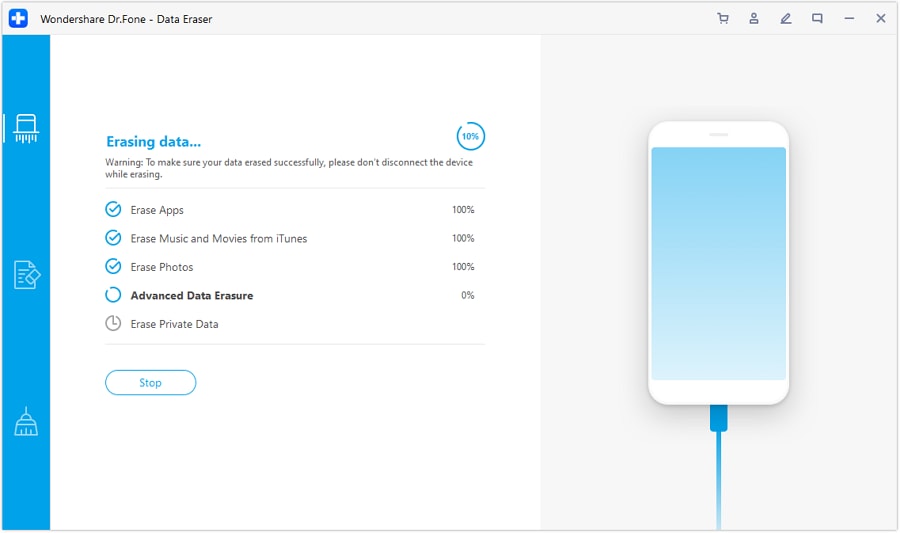
Step 5 - Now, you just need to wait for the software to do its thing. This can take several minutes depending on how data you’ve got on your phone to erase. Make sure your computer stays on, and your iPhone stays connected the entire time not to have problems.
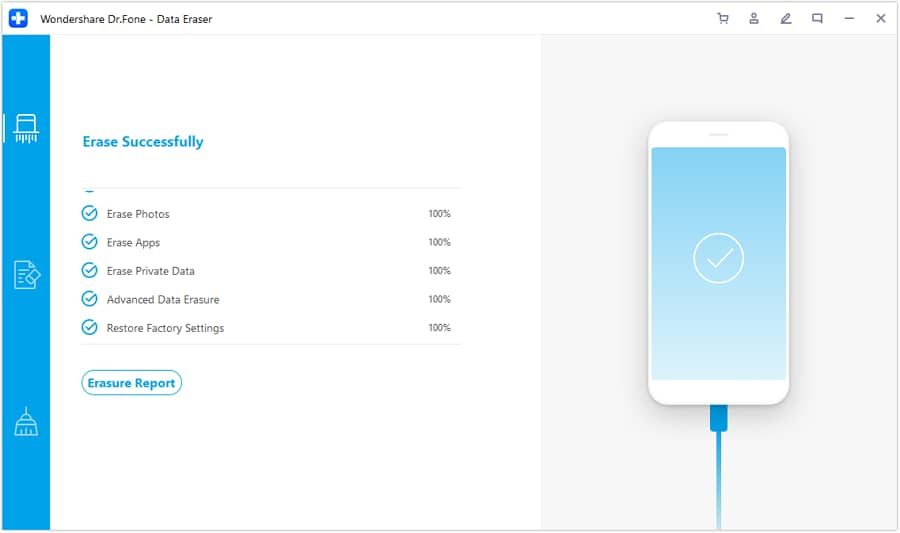
Step 6 - Once the process is completed, you’ll be notified within the software window, where you can then disconnect your device and start using as normal.
Part 2. Factory reset iPhone X/XR/XS (Max) with iTunes
As you probably know, Apple iPhones, including the X, XR, and XS models, all operate using the iTunes software; especially when they connect to a computer. Built into this software is the option to factory reset your device. Here’s how.
Step 1 - Open iTunes and make sure you’re running the latest version. Connect your iPhone device to your computer using the lightning USB cable. iTunes will notify you this is done.
Step 2 - On the iPhone tab of iTunes, click the Restore button to begin the factory reset process. You will be able to choose here whether you want to back up your personal files first, which is always recommended if you don’t want to lose anything.

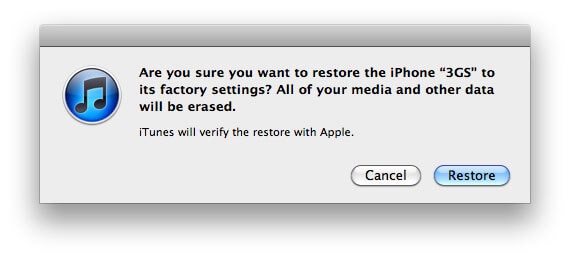
Step 3 - When you’re ready, click the Restore button in the pop-up window. Now, set back and make sure your computer stays on and your iPhone stays connected. When the process is complete, you’ll be notified, and you’ll be able to disconnect your device and use it as new.
Part 3. Factory reset iPhone X/XR/XS (Max) using settings menu
If you don’t want to use a computer application to factory reset your device, you can use the settings menu of the device itself. However, it’s worth noting this could cause problems if the device becomes faulty or runs out of battery halfway through the process.
Here’s how to factory reset your iPhone X using the Settings menu.
Step 1 - From the main menu of your iPhone, select Settings > General > Reset. Select the Erase All Content and Settings option.
Step 2 - Confirm this is the action you want to take, and your phone will start deleting the data and starting your phone from a factory fresh state. You can monitor the process on the screen. Your device may restart several times during this process.

Part 4. Factory reset iPhone X/XR/XS (Max) in recovery mode
If you’re still having problems after you’ve tried factory resetting your device using iTunes or the Settings Menu, one option you always have is putting your iPhone device into Recovery Mode, and then factory reset it from here.
Recovery Mode, sometimes known as Safe Mode, is an excellent solution if you’re unable to use your phone, if it’s bricked, or if you simply can’t use any of the other methods. Here’s how it works;
Step 1 - Connect your iPhone to your computer and launch the iTunes software. Now press and release the volume up button, followed quickly by the volume down button.
Step 2 - Now hold the side power button and keep it held until you see the Apple logo show up on your screen. Your device will now enter Recovery Mode, where you’ll be able to factory reset directly from your iTunes software.
Part 5. Factory reset iPhone X/XR/XS (Max) without passcode
One of the biggest problems you may have is not being able to use your iPhone because you’ve forgotten the passcode for it. This is a common problem and can happen for any number of reasons. You might want to factory reset the device to start again without a passcode.
Fortunately, this has been made possible thanks to another software application known as Dr.Fone - Screen Unlock (iOS). This is a very simple-to-use tool similar to the Dr.Fone - Data Eraser (iOS) software we spoke about above, expect this can factory reset your device, even when you have a passcode.

Dr.Fone - Screen Unlock (iOS)
Factory reset iPhone X series without passcode
- Removes every type of lock screen, even FaceID, and fingerprint locks
- Used by over 50 million customers around the world
- One of the most user-friendly applications available today
- Can unlock your phone in just a few clicks
- Software compatible with both Windows and Mac operating systems
Step 1 - Download and install the Dr.Fone - Screen Unlock software onto your computer by going to the website and following the on-screen instructions. When you’re ready, connect your iPhone device using the USB cable and open the software to the main menu.
Now select the Unlock option.

Step 2 - Choose the Unlock iOS screen icon, and then boot your phone in DFU/Recovery mode, by following the steps in the section above.

Step 3 - Confirm the details of your iPhone device, and click Confirm to lock in the settings.

Step 4 - Let the software do its job! All you need to do is pick the Unlock button, and the software will take care of the rest. Just wait until the software says the process is done, and you’ll be able to unplug your phone and start using it without a lock screen.
You’ll need to make sure your computer stays on, and your phone stays connected throughout the process to ensure you don’t run into any technical difficulties along the way.
Conclusion
As you can see, when it comes to factory resetting your iPhone device, no matter whether it’s your X, XR, or XS range, there are plenty of options out there for you to explore, and you’re sure to find the one that’s right for you!
iPhone X Series
- iPhone X Backup
- iPhone X Problems
- 1. iPhone SE/X/XR Won't Turn On
- 2. iPhone X/XR Stuck on Black Screen
- 3. iPhone 11 Frozen Screen
- 4. iPhone XR/11/12 Won't Turn Off
- 5. iPhone X Screen Not Responding
- 6. iPhone X Siri Not Working
- 7. iPhone XS Screen Not Responding
- 8. IPhone XS Won't Turn On
- 9. iPhone SE/X Keep Restarting
- 10. iPhone SE/X Won't Charge
- iPhone X Transfer
- 1. Put Music to iPhone X/8 (Plus)
- 2. Music from iTunes to iPhone X
- 3. Music from Mac to iPhone XS
- 4. Data from Computer to iPhone
- 5. Transfer from iPhone 6 to iPhone 8
- 6. Message from Android to iPhone XS
- 7. Data from iPhone to iPhone XS
- 8. Messages from iPhone to iPhone XS
- 9. Sync Music from iTunes to iPhone XS
- iPhone X Unlock
- 1. Unlock iPhone X/XR from Carrier
- 2. Unlock iPhone X/XR Lock Screen
- 3. Unlock iPhone XS without Face ID
- 4. Unlock iPhone XS without Passcode
- 5. Bypass iPhone X Activate Lock
- iPhone X Tips
- 1. Factory Reset iPhone X/XR/XS (Max)
- 2. Save Text Messages on iPhone
- 3. Screen Record on iPhone X
- 4. Screen Record on iPhone XR
- 5. Screen Record on iphone XS
- 6. Sell Old iPhone X Series Online
- 7. iPhone XR Screen Mirroring
- 8. Screen Mirror iPhone X
- 9. iPhone Photo Printers
- 10. Enter & Exit DFU Mode on iPhone X
- 11. Add Ringtones to iPhone XS


James Davis
staff Editor