Resolve common problems and system crashes on both iPhone and Android devices.

 100% Security Verified | No Subscription Required | No Malware

 :
: 
 ChatGPT
 Perplexity
 Gemini
 Claude
 Grok
Grok
It's a moment of pure frustration: you press the side button on your iPhone SE, X, or XR, but the screen remains stubbornly black. When your device won't turn on, it can feel like you're cut off from your digital life. This issue can arise from numerous causes, ranging from a completely depleted battery to complex software glitches or even hardware damage.
Before you panic or book a costly repair appointment, there are several reliable troubleshooting methods you can try yourself. This guide provides a comprehensive walkthrough of the most effective solutions to diagnose and resolve the iPhone XR won’t turn on problem. We'll start with the simplest fixes and progress to more advanced techniques to get your device back in working order.

In this article
Part 1. Why Won't My iPhone SE/X/XR Turn On? Common Culprits
To effectively fix the problem, it's crucial to understand what might be causing it. An iPhone's failure to power on can be attributed to several factors, from simple power issues to deep-seated system corruption. Here are the most common reasons your iPhone X won’t turn on:
1. Drained or Faulty Battery
The most straightforward reason is a completely drained battery. If the battery has been depleted for a long time, it might need more than a few minutes of charging to respond. In other cases, an old or degraded battery may no longer hold a charge, preventing the iPhone from turning on.
2. Software Glitches or System Crashes
The iOS operating system can sometimes crash or freeze, making the device unresponsive. A failed software update, a buggy app, or a system-level conflict can cause the screen to go black and prevent the iPhone from booting up normally.
3. Charging Issues or Faulty Accessories
The problem might not be your iPhone but the accessories you're using. A damaged Lightning cable, a faulty power adapter, or a dirty charging port can prevent electricity from reaching the battery. Without a proper charge, your iPhone will not turn on.

4. Physical or Liquid Damage
Accidents happen. A significant drop can dislodge internal components, such as the battery connector or display cable. Likewise, exposure to water or other liquids can cause short circuits on the logic board, leading to a complete power failure, which may not be immediately apparent.
5. Firmware Corruption
Firmware is the core software that allows your iPhone's hardware to run. If an iOS update is interrupted or a file becomes corrupted, it can leave your device stuck in a non-functional state, often referred to as a boot loop, or prevent it from turning on at all.
Part 2. 6 Essential Methods to Fix an Unresponsive iPhone
Now that you know the potential causes, let's move on to the solutions. These basic troubleshooting steps can often resolve the issue without needing a trip to a repair shop. Here are the top six methods to try when your iPhone SE won’t turn on:
Solution 1. Force Restart Your iPhone
A force restart is the electronic equivalent of a reboot and can resolve many software freezes and glitches. It doesn't delete any data but forces the device to shut down and start again. This is often the first and most effective step for an unresponsive iPhone.
Instructions: Quickly press and release the Volume Up button. Immediately after, quickly press and release the Volume Down button. Finally, press and hold the Side button until the Apple logo appears on the screen, then release it.

Solution 2. Charge Your iPhone Correctly
If the battery is completely dead, your iPhone won't respond instantly. It's essential to ensure your device is receiving power correctly. This is a crucial diagnostic step before attempting more complex solutions.
- Use an Apple-certified (MFi) charging cable and a reliable power adapter.
- Connect your iPhone to the charger and leave it for at least 30-60 minutes. Don't be discouraged if nothing happens immediately.
- Check the charging port for any lint, dust, or debris. Gently clean it with a soft, dry tool like a toothpick if necessary.
- If a charging icon appears, let it charge fully. If not, try a different cable, adapter, and wall outlet to rule out faulty accessories.

Solution 3. Check for Overheating Issues
iPhones have a built-in safety feature that shuts the device down if it gets too hot to prevent damage to internal components. If your device feels unusually warm and your iPhone SE won't turn on, overheating could be the culprit.
To resolve this, move your iPhone to a cooler, shaded environment. Remove its case to help dissipate heat more effectively and let it sit for at least 15-20 minutes before attempting to turn it on or charge it. Avoid exposing it to direct sunlight or leaving it in a hot car.

Solution 4. Update iOS in Recovery Mode
If a software crash or failed update is the cause, Recovery Mode can help. This mode allows you to connect to iTunes or Finder and reinstall iOS. Choosing the "Update" option attempts to fix the system without erasing your personal data.
-
Step 1 Connect to a Computer
Open the latest version of iTunes (on older Macs/PCs) or Finder (on macOS Catalina and later). Connect your unresponsive iPhone using a USB cable.
-
Step 2 Enter Recovery Mode
Press and quickly release the Volume Up button, then the Volume Down button. Next, press and hold the Side button. Continue holding it even after the Apple logo appears, until you see the Recovery Mode screen (a computer and cable icon).

-
Step 3 Update or Restore
A dialog box will appear on your computer offering to "Update" or "Restore" your iPhone. Select Update first. This will attempt to reinstall iOS without deleting your data. If updating fails, you may need to repeat the steps and choose Restore, which will erase all data.

Solution 5. Reinstall Firmware Using DFU Mode
DFU (Device Firmware Update) mode is a deeper level of restoration than Recovery Mode. It allows your iPhone to communicate with iTunes/Finder without loading the operating system, making it useful for fixing severe firmware corruption when your iPhone X won’t turn on. Note that this process will erase all data on your device.
-
Step 1 Connect and Prepare
Connect your iPhone to your computer and open iTunes or Finder. Ensure the iPhone screen is black.
-
Step 2 Enter DFU Mode
Press and release Volume Up, then press and release Volume Down. Press and hold the Side button until the screen goes black. While still holding the Side button, press and hold the Volume Down button for 5 seconds. After 5 seconds, release the Side button but continue holding the Volume Down button for another 10 seconds. The screen should remain black if you've entered DFU mode correctly.
-
Step 3 Restore Your iPhone
iTunes or Finder will detect a device in recovery mode. Click OK and then follow the on-screen prompts to Restore your iPhone. This will install the latest version of iOS.

Solution 6. Inspect for Hardware Damage
If none of the software-based solutions have worked, the problem may be hardware-related. Physical damage, faulty components, or internal malfunctions can prevent your device from powering on. Carefully inspect your iPhone for any visible signs of damage like cracks on the screen or back, dents in the frame, or signs of water damage inside the charging port. If you suspect a hardware issue, it's best to contact Apple Support or visit an authorized service provider for a professional diagnosis.
Part 3. Advanced Repair for All iOS System Issues Without Data Loss
Are you tired of complex button combinations and troubleshooting steps that don't yield results? When your iPhone XR won’t turn on due to a deep-seated system error, a dedicated iOS repair tool can be a lifesaver. Dr.Fone - System Repair (iOS) offers a professional-grade solution to fix over 150 iOS system issues, including the black screen of death, boot loops, and devices stuck in recovery mode.
Unlike restoring with iTunes, which erases all your data, Dr.Fone's Standard Repair mode can fix most system problems without any data loss. It automatically detects your device model, provides the correct firmware, and guides you through a simple, click-through repair process. This makes it an efficient and safe alternative for users who want to fix their iPhones without technical expertise.
Key Advantages of Dr.Fone - System Repair (iOS)
- Repairs your iOS system to normal without causing any data loss in most scenarios.
- Fixes a wide range of issues, including an unresponsive device, being stuck on the Apple logo, and more.
- Simplifies the process of upgrading or downgrading iOS without needing to jailbreak your device.
- High success rate thanks to advanced repair algorithms designed to tackle complex system errors.
 Fix iOS issues, no data loss.
- One-click repair for all iOS problems.
- Solve recovery mode, Apple logo, black screen, etc.
- Upgrade or downgrade iOS without iTunes
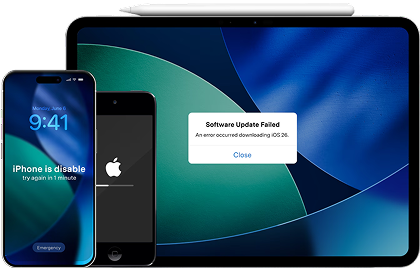
Step-by-Step Guide to Fixing Your iPhone with Dr.Fone
Follow these simple steps to repair your device when your iPhone X won’t turn on and bring it back to life without data loss:
-
Step 1 Launch Dr.Fone and Select System Repair
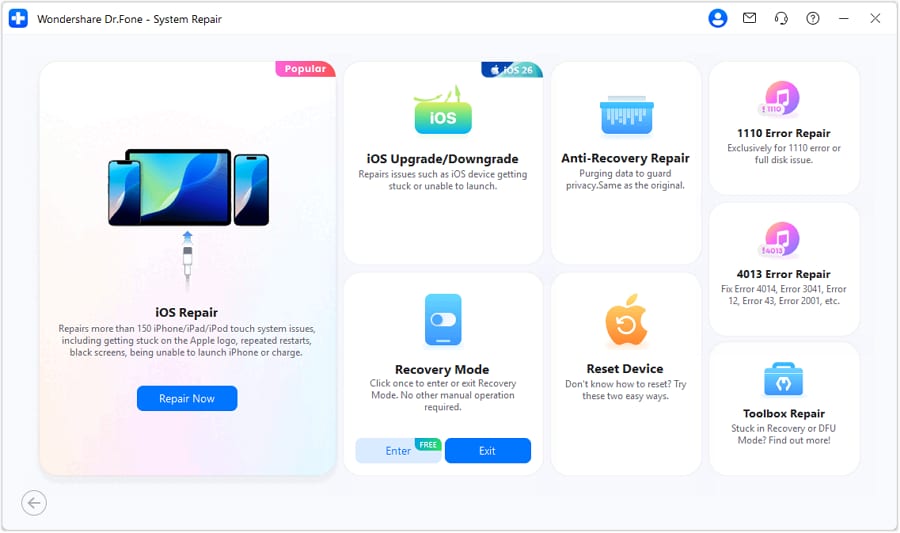
Download and install Dr.Fone on your computer. Launch the application and navigate to Toolbox > System Repair. Connect your iPhone to the computer and select "iOS" to specify your device type. On the next screen, click "iOS Repair."
-
Step 2 Choose Standard Repair and Enter Recovery Mode
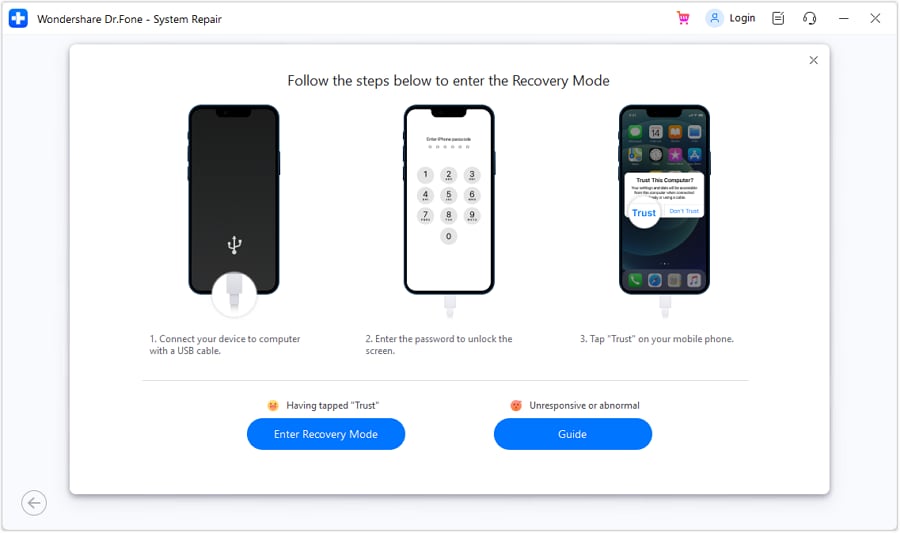
Select "Standard Repair" to fix your iPhone without losing data. The software will then prompt you to put your device into Recovery Mode. Follow the on-screen instructions for your specific model to proceed.
-
Step 3 Download Firmware and Start Repair
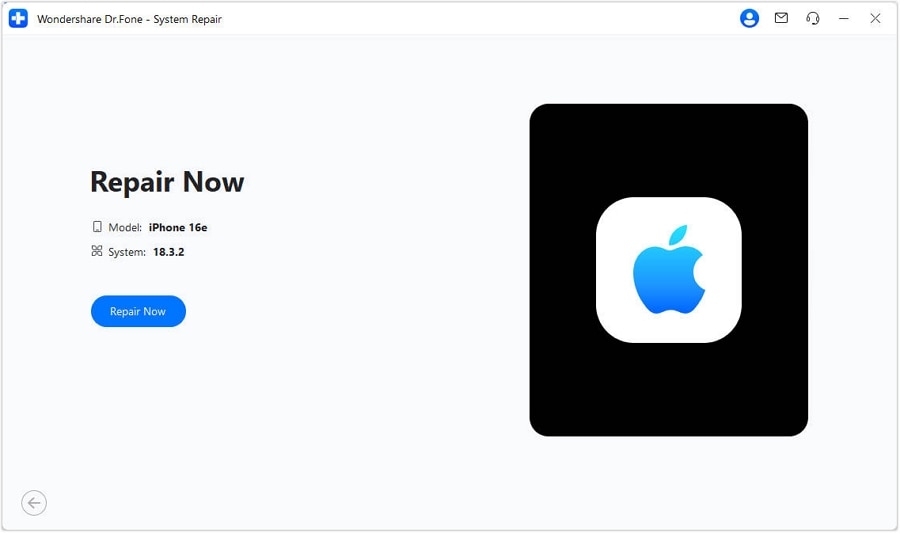
Once your device is in Recovery Mode, Dr.Fone will automatically detect the appropriate iOS firmware. Click "Download" to get the firmware package. After the download is complete and verified, click "Repair Now" to begin the system repair process. Once finished, your iPhone will restart and should function normally.




Conclusion
In conclusion, facing an iPhone SE that won’t turn on can be alarming, but the issue is often solvable. The problem can stem from simple causes like a dead battery to more complex system failures. By following the troubleshooting steps outlined—from a force restart and proper charging to using Recovery Mode—you can address many of the common culprits. For persistent system-level issues, manual methods can be complex or lead to data loss.
This is where Dr.Fone - System Repair (iOS) provides a significant advantage. It offers a secure, user-friendly, and effective way to fix deep-seated iOS problems without erasing your valuable data. Instead of struggling with complicated fixes, let this powerful tool restore your iPhone and bring it back to life with confidence and ease.
FAQ
-
1. What's the difference between a force restart and a regular restart?
A regular restart is done through the software interface when the phone is responsive. A force restart is a hardware-level function that cuts power to the components, forcing the device to reboot. It's used when the screen is frozen or black, and you cannot perform a regular shutdown. -
2. Will I lose my data if I use Recovery Mode to fix my iPhone?
It depends on the option you choose. When you enter Recovery Mode, iTunes/Finder gives you two choices:• Update: This attempts to reinstall iOS without affecting your personal data. It's the recommended first choice.• Restore: This erases all your data and settings, installing a fresh version of iOS. Only use this if the "Update" option fails. -
3. My iPhone still won't turn on after charging for an hour. What should I do?
If charging for an hour with a known-good cable and adapter doesn't work, the issue is likely not just a drained battery. Try a force restart while it's plugged in. If there's still no response, proceed with using Recovery Mode or DFU Mode. If these fail, it may indicate a hardware problem, such as a faulty battery or charging port. -
4. How do I know if the problem is the battery or a software issue?
A good indicator is the device's behavior. If a force restart works, it was likely a software glitch. If the phone only shows a low battery icon but never powers on, it could be a faulty battery or charging issue. If none of the basic steps (charging, force restart) work, and the phone is completely unresponsive, it points towards a more severe software corruption or a hardware failure. Using a tool like Dr.Fone can help rule out software issues definitively.
 Add Wondershare Dr.Fone as a preferred source on Google