Is There a Recycle Bin on iPhone to Save your Lost Data?

Jul 12, 2024 • Filed to: Data Wipe Solutions • Proven solutions
Have you noticed the “Recently Deleted” album on your Photos? It works like a recycle bin in iPhone 13.
When you delete a photo from your iPhone, it typically goes into this "Recently Deleted" album rather than an immediate and permanent deletion. This setup acts as a precautionary step in case you unintentionally delete important photos.
In today's exploration, we will learn how to use this Recently Deleted album and other alternative approaches to recover deleted files from your iPhone. These approaches involve using iTunes backups and employing dedicated recovery software.
Every method possesses its own unique advantages, ultimately enhancing the likelihood of successfully recovering those seemingly lost photos. Let's get started!
Part 1: Recover iPhone Photos from Recycle Bin
The recycle bin in iPhone photos goes by the “Recently Deleted" album. Items in this album remain there for a specific period (usually 30 days), during which you can recover them.
After that time period, the photos are automatically removed from the album. They are no longer recoverable unless you have a backup stored elsewhere, such as in iCloud or on your computer.
How to access Recently Deleted Album and recover iPhone photos:
- Step 1: Launch your iPhone Photos app.
- Step 2: Open Albums > Recently deleted. There, you can see your photos/videos that were recently deleted.
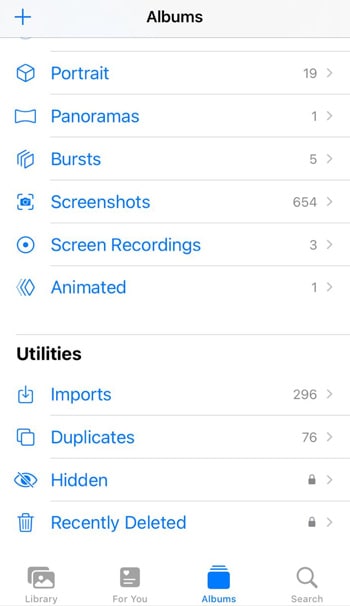
To recover the photos, you can select them and click “Recover.” This action will restore your photos back to your Photos album.

Part 2: How to Recover Deleted Files from iTunes
Apart from using the “Recently deleted” album to recover deleted files on iPhone, iTunes also provides an alternative solution for recovering deleted files. If you have been regularly backing up your iPhone to iTunes on your Mac, you can use these backups to retrieve lost data via computer.
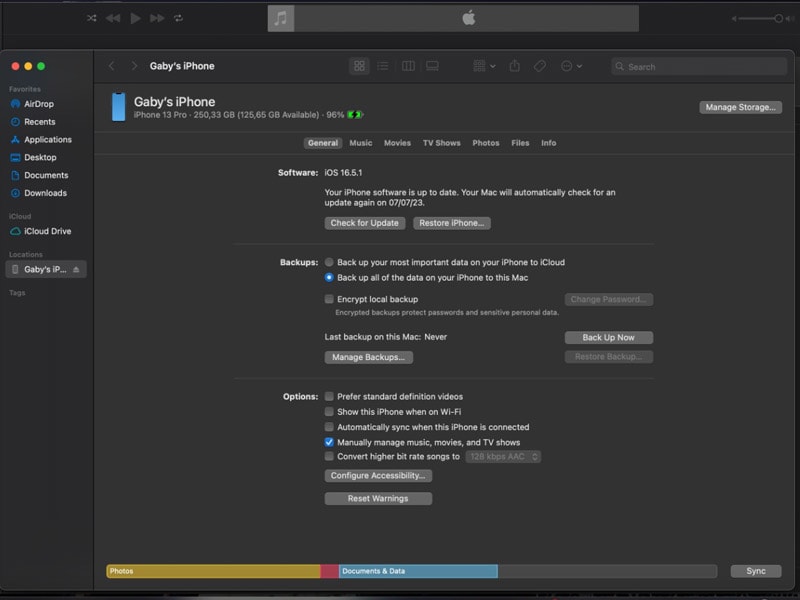
- Step 1: Open the iTunes application on your computer and connect your iPhone.
- Step 2: Within the iTunes interface, locate and click on your iOS device, usually found in the upper-left corner of the window.
- Step 3: Navigate to the Backups section on the right-hand panel and click "Restore Backup."
After that, your iOS device's screen will display a "Restore in Progress" message, while iTunes will display a progressing bar.
Wait for this bar to complete and for the device to restart before using or detaching your iPhone. Once it’s done, all your previously lost data will be successfully recovered on your iPhone.
Advanced Solution: How To Recover Deleted Files With Powerful Data Recovery Tool
If you're in a situation where you've lost important files from your iPhone and are desperately seeking a reliable solution to recover them, there's still another effective method you can employ.
In fact, let’s get to know a truly versatile tool and an all-in-one solution to cater to every need of your iPhone device.
Key features:
- Capable of retrieving many data formats, such as messages, contacts, photos, notes, and additional file types.
- Allows you to preview and recover exclusively the desired data, conserving both device storage and time.
- Ensures a secure recovery process, preventing any data loss or overwriting during the restoration procedure.
How to recover deleted files with Dr.Fone Data Recovery tool:
- Step 1: Launch the Dr.Fone Data Recovery Tool
Start by opening the Dr.Fone software on your computer once it has been successfully installed. Proceed to the "Toolbox" section, and then select "Data Recovery."

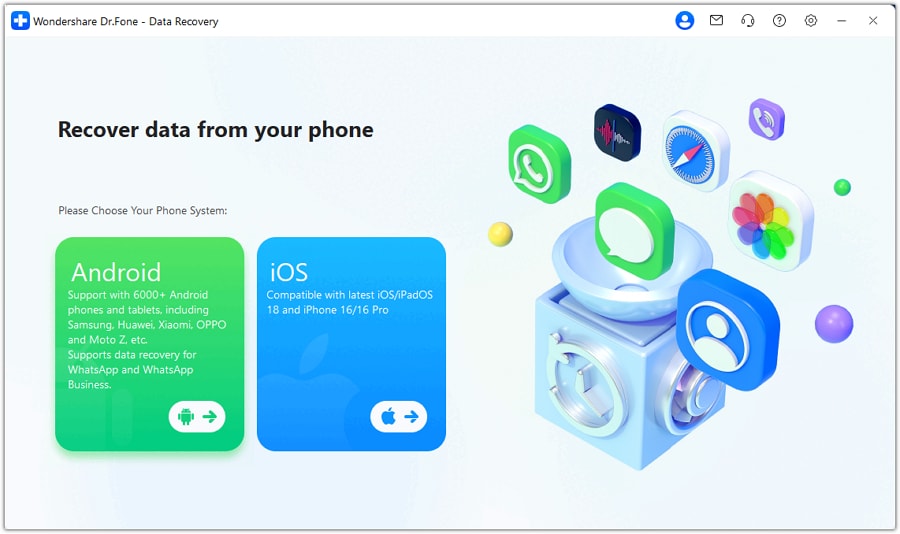
- Step 2: Choose the iOS Device Category
On the next screen, choose the iOS device category since you will start the data recovery process on your iPhone.
- Step 3: Start the Data Recovery Process
Upon being redirected to the next screen, choose the "Recover Data from an iOS Device" option from the available choices.

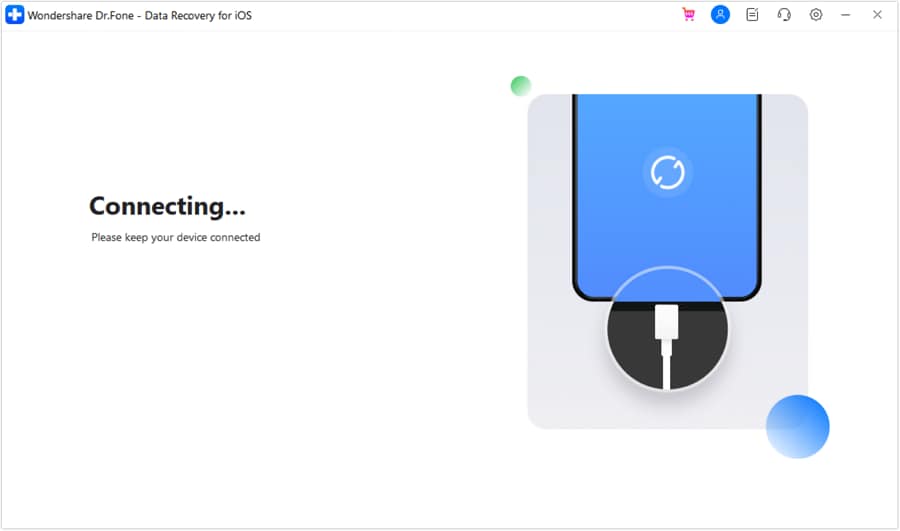
- Step 4: Connect Your iPhone
Next, you will need to connect your iPhone using a USB cable. Make a connection and allow the platform to detect it automatically.
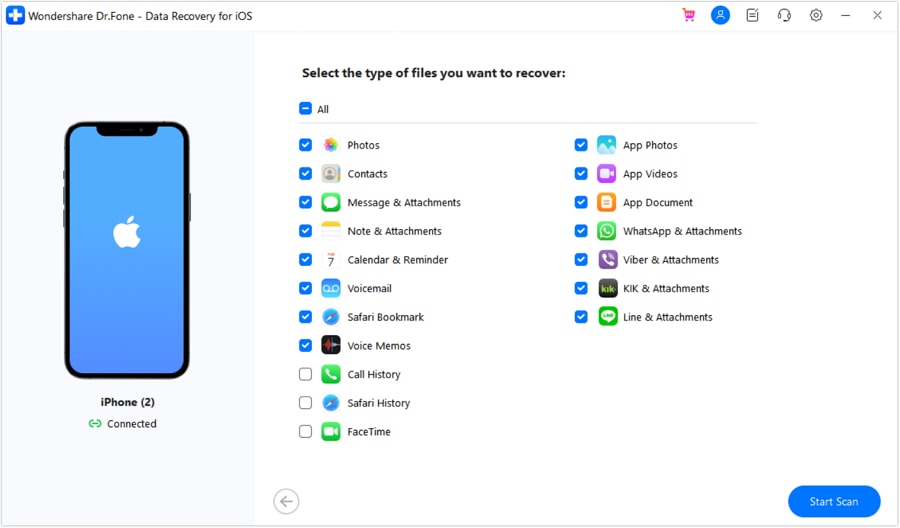
- Step 5: Select Desired File Types for Recovery
Once Dr.Fone has detected your device, the ensuing screen will present a list of recoverable file types. You have the flexibility to choose specific file types for recovery or to exclude certain ones. Click the "Start Scan" button after selecting them.
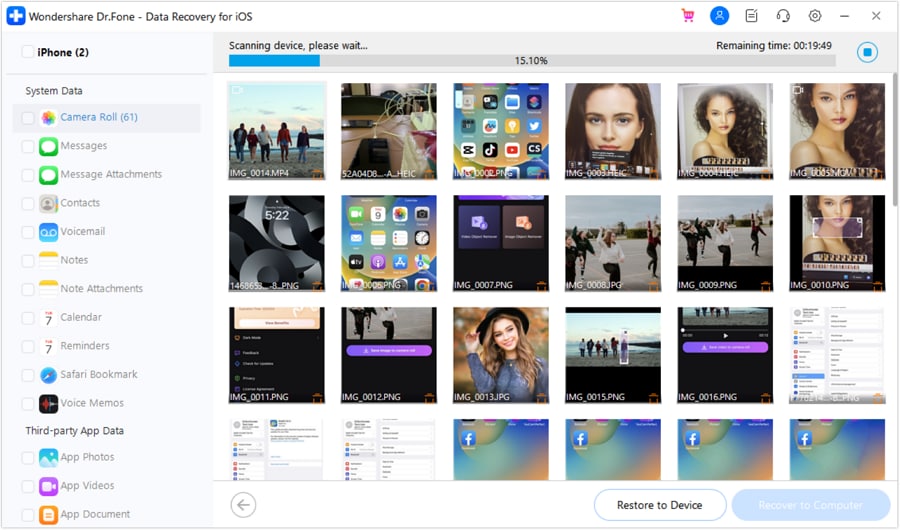
- Step 6: Allow the Platform to Scan Data
Now, you should see a preview of the data being recovered from your iOS device. Let the platform complete the scanning process while you can also preview all the recovered data.
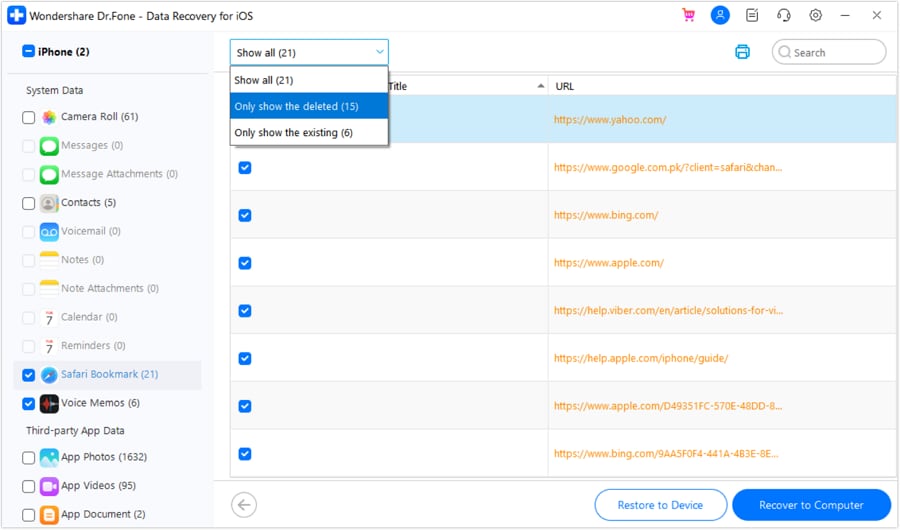
- Step 7: Preview and Initiate the Restoration
After it has done the scanning, you can preview individual data items that you intend to recover. To streamline the displayed results, use the tabs at the top to specify whether you wish to view all data, existing data, or deleted data.
Next, select the data you wish to recover and proceed by clicking the "Restore to Device" button.
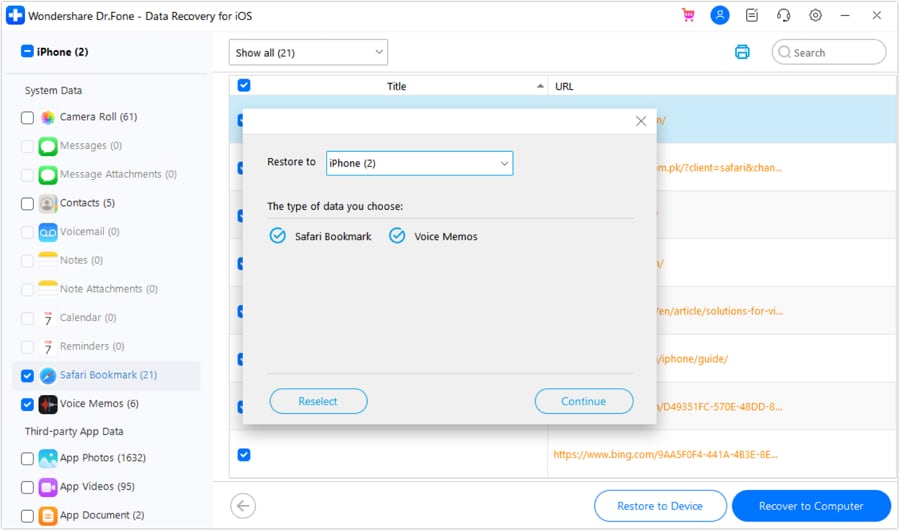
- Step 8: Choose the Device for Restoration
Now, a new window will prompt you to pick the specific device to which you want to restore the recovered data. Review the recoverable data for the chosen device and continue by clicking the "Continue" button.
- Step 9: Disable Find My Service
For successful data restoration to your iPhone, you'll need to deactivate the Find My service. Once you have disabled it, confirm by clicking "OK."
You are done! After completing the above steps, the data restoration process will be successful, and a confirmation will be displayed on your screen.
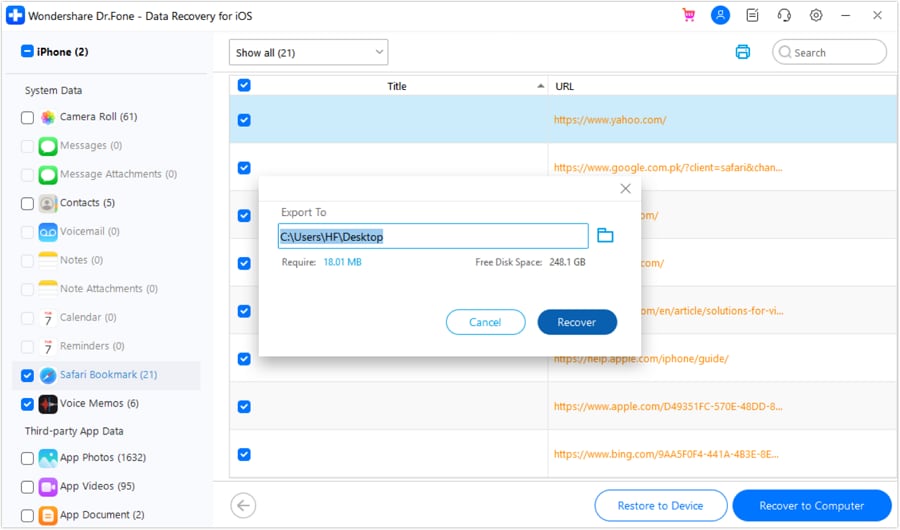
In case you want to recover your iPhone data to your computer:
If you opt to retrieve the data back to your computer, select the desired data and click on "Recover to Computer." A prompt will appear, allowing you to designate a location for the recovered data. Define the location and initiate the recovery process by clicking "Recover."
Conclusion
The "Recently Deleted" album on an iPhone serves as a digital recycle bin for photos. When a photo is deleted from the main camera roll, it gets moved to this album, providing a safety net against accidental deletions.
Now that you know how to get back deleted photos from this album, you've got a handy trick up your sleeve. There are also other methods, such as using iTunes or powerful data recovery software like Dr.Fone. Learning these methods gives you the power to keep control over your special memories and digital stuff.


iPhone Recovery
- Deleted Data Recover
- 1. Recover HEIC Photos on iPhone
- 2. Recover Deleted Calendar Event
- 3. Retrieve iPhone Deleted Reminders
- 4. Retrieve iPhone Deleted Voicemail
- 5. Recover iPhone Deleted Photos
- 6. Recover iPhone Deleted Note
- 7. Recover Call History from iPhone
- 8. Recover iPhone Deleted Contacts
- 9. Recover iPhone Voice Memos
- 10. Recover Deleted iOS Files
- iPhone Passwords Recover
- 1. Retrieve iPhone Email Password
- 2. See iPhone Saved Password
- 3. Access iPhone Password
- 4. Get iPhone Password Back
- 5. iPhone Passcode Requriement Pops
- 6. Find iPhone Wi-Fi Password
- iPhone WhatsApp Recover
- 1. Recover WhatsApp Messages Apps
- 2. Recover Deleted WhatsApp Messages
- 3. Recover WhatsApp Messages Online
- 4. Retrieve Deleted WhatsApp
- Recover from Stolen iPhone
- Recover from Broken iPhone
- 1. Recover Data from Broken iPhone
- 2. Water Damaged iPhone Data Recovery
- 3. Recover Data from Dead iPhone
- iPhone Recovery Tips
- 1. GT Recovery Undelete Restore
- 2. Recover Data from Memory Card
- 3. Recover iPhone Lost Data
- 4. Recycle Bin on iPhone
- 5. Recover Data on iPhone in Recover Mode
- 6. Recover Data from iPhone in DFU Mode
- 7. iTunes Data Recovery
- 8. Recover iPhone Data Without iTunes
- iPhone Recovery Tools
- ● Manage/transfer/recover data
- ● Unlock screen/activate/FRP lock
- ● Fix most iOS and Android issues
- Recover Now Recover Now Recover Now
Selena Lee
chief Editor