 Permanently erase all iOS & Android data—completely unrecoverable.

 100% Security Verified | No Subscription Required | No Malware

 :
: 
 ChatGPT
 Perplexity
 Gemini
 Claude
 Grok
Grok
As smartphones capture higher resolution photos and store larger applications, storage space becomes a precious commodity. Many users who recently switched from Android to iOS find themselves facing a completely different interface, often wondering how to manage their device's memory. One of the most common questions that arises when storage inevitably runs full is: how do you empty trash on iPhone?
Unlike desktop operating systems, iOS handles deleted files through individual application structures rather than a universal bin. If you are desperate to clear out space and permanently remove unwanted data, you are in the right place. Our complete 2026 guide will show you exactly how to empty trash on iPhone across all essential applications, ensuring your device remains fast, responsive, and clutter-free.
In this article
- Part 1. What is the trash in the iPhone?
- Part 2. One-click way to empty trash on iPhone
- Part 3. Empty email trash on iPhone
- Part 4. Delete trash photos on iPhone
- Part 5. Delete trash notes on iPhone
- Part 6. Empty trash on Voice Memos
- Part 7. Empty trash in iPhone Files app
- Bonus tip: How to undo trash on iPhone (retrieve deleted data)
Part 1. What is the trash in the iPhone?
Users who are entirely new to the Apple ecosystem often search endlessly for a main iPhone trash folder. However, there is no single, centralized location—like a Mac Trash or a Windows Recycle Bin—where all deleted files from your phone are stored together. The iOS architecture approaches deletion on a per-app basis to protect users from accidental data loss.
Instead of a global bin, a dedicated trash section is built directly into native apps like Photos, Contacts, Notes, Mail, and Files. Whenever you hit the delete button on a photo or a document, it doesn't immediately vanish from your storage. The item simply moves to that specific app's "Recently Deleted" or "Trash" folder and sits there in a holding pattern, usually for a standard period of 30 days. Only after this countdown expires does the iOS system permanently purge the data. Understanding this workflow is the first essential step when figuring out how to empty trash on iPhone effectively.
Part 2. One-click way to empty trash on iPhone
 Permanently erase all data on iOS & Android — completely unrecoverable.
- Military-grade wiping to fully protect your privacy.
- Generate verified erasure reports to boost device resale value.
- Selectively erase private data and remove junk & large files.
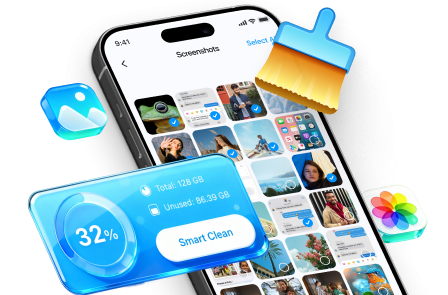
If you are struggling with a cluttered iPhone and don't have the time to manually search through every single app to clear out the trash, Dr.Fone - Data Eraser is your ultimate one-click solution. Going into each app's Recently Deleted folder can be highly tedious and sometimes leaves hidden cache files untouched.
With Dr.Fone, you can easily enhance your device's overall performance by permanently deleting hidden junk files, unnecessary app caches, and unneeded temporary logs. This prevents background bloatware from draining your battery or taking up critical memory limits. Are you ready to optimize your device and instantly reclaim massive amounts of space? Follow the structured steps below.
Step 1 Connect your device
Download and launch the software on your computer. Connect your iPhone to the system via a certified Lightning cable. On the main interface, select the Data Eraser module.

Step 2 Choose the optimization options
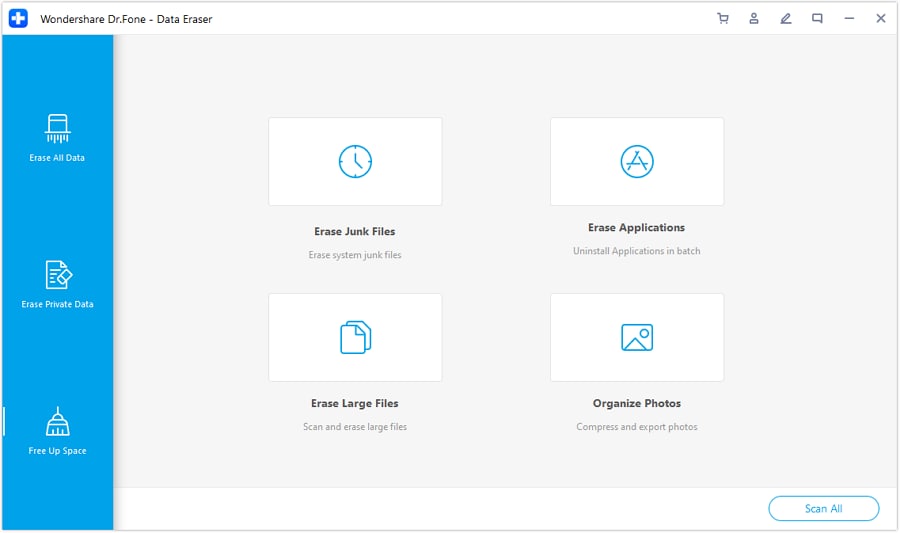
Select the "Free Up Space" feature from the menu. You will be greeted with multiple optimization categories on the screen. Tick the checkboxes for the elements you need removed, such as Erase Junk Files, and initiate the procedure by tapping Scan All.
Step 3 Review the scan results
The program will quickly scan your iOS file system to locate accumulated junk. Once concluded, the results are meticulously displayed, breaking down the exact megabytes taken by useless apps, log files, and cached data.
Step 4 Clean up your iPhone
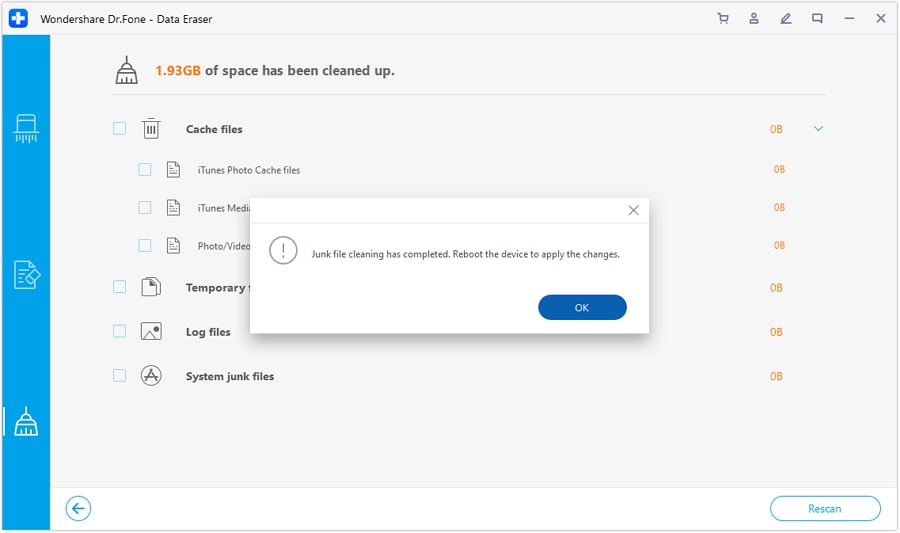
Tap on the Clean button at the bottom of the interface. Since the application lists the precise memory size of every file next to its name, you can make informed decisions on what to permanently purge. Your iPhone may reboot during the optimization cycle. Do not disconnect the cable until the success prompt appears on your screen.




Part 3. Empty email trash on iPhone
A significant chunk of digital clutter comes from accumulated promotional emails, newsletters, and outdated messages. If you are looking to clear out the space heavily occupied by useless emails, you will have to dive into the native Mail app. Deleting them from your inbox isn't enough; you must empty the actual trash folder to regain storage.
If you have been wondering how do you empty trash on iPhone when it comes to Mail, follow these instructions:
- Step 1: Launch the Mail app from your iPhone's home screen. On the main Mailboxes view, tap on the specific email account you wish to organize.
- Step 2: Scroll down the folders list and tap on the "Trash" folder (sometimes labeled "Bin"). Once inside, tap the "Edit" button positioned at the top right corner.
- Step 3: You will notice a selection circle next to every single email. You can manually tap these circles to select individual emails, or simply hit "Select All" at the top left to grab everything simultaneously.
- Step 4: After highlighting the intended emails, tap the "Delete" or "Trash" command at the bottom right corner of the screen.
- Step 5: A final confirmation pop-up will emerge, verifying if you want to permanently erase the selected messages. Tap "Delete" to confirm. Keep your screen awake, as mass deletion may take several moments to process.

Part 4. Delete trash photos on iPhone
Because high-definition videos and Live Photos consume enormous amounts of space, cleaning up your photo library is the fastest way to relieve storage pressure. Similar to the email structure, media files deleted from your main library are relegated to a "Recently Deleted" folder hidden within the Photos app, waiting for their 30-day grace period to expire.
To force an immediate storage cleanup, use the following method to empty trash on iPhone:
- Step 1: Open your Photos application and navigate to the "Albums" tab at the bottom. Scroll to the very bottom under Utilities and select "Recently Deleted." (You may be required to authenticate with Face ID or Touch ID).
- Step 2: Once the grid of deleted media is displayed, locate the "Select" button on the top right. You can either tap individual media thumbnails to delete them selectively, or tap "Delete All" (usually at the bottom left) to wipe the entire folder instantly.

Part 5. Delete trash notes on iPhone
Over time, the Notes app can become cluttered with old grocery lists, outdated drafts, and forgotten reminders. Deleting a note doesn't eradicate it immediately; it functions on the same Recently Deleted mechanism as Photos, persisting in your system's background.
Here is how you can completely empty the trash on my iPhone for the Notes app:
- Step 1: Access the Notes app and navigate to your main folders list. Swipe left on any obsolete notes and hit the trash icon to move them into the "Recently Deleted" folder.
- Step 2: Return to the Folders menu and tap on "Recently Deleted." Briefly scan the list to ensure no important information was mistakenly removed. Then, tap "Edit" in the top right corner and choose "Delete All" located at the bottom right.

Part 6. Empty trash on Voice Memos
Audio recordings, especially long lectures or meetings, take up considerable space. The Voice Memos app also features a deferred deletion protocol that holds files back from true erasure.
To properly empty trash on your iPhone's Voice Memos application, follow these straightforward steps:
- Step 1: Open the Voice Memos app. Locate the specific voice memo you no longer need, swipe on it (or tap it), and hit the "Trash" icon.

- Step 2: Tap the back arrow to view the main folder screen, and select the "Recently Deleted" category.
- Step 3: Tap "Edit" on the top right. You can now manually select the files or just tap "Delete All" to clear them out permanently.

Part 7. Empty trash in iPhone Files app
The Files app is where most of your downloaded documents, PDFs, and third-party app exports end up. Unsurprisingly, deleting a document here also sends it to a temporary holding zone. If you frequently download heavy files, clearing the Files trash is crucial.
To empty trash in the Files app and regain substantial storage:
- Step 1: Locate and open the Files app from your App Library or Home Screen.

- Step 2: Ensure you are on the "Browse" tab found at the bottom of the screen.
- Step 3: Under the Locations list, spot and open the "Recently Deleted" folder.

- Step 4: Tap the circle with the three dots (More icon) in the upper-right corner, then tap "Select."

- Step 5: Highlight the specific folders or documents you wish to destroy, or choose "Delete All" at the bottom of your screen to execute a full purge.

As you have seen, without the aid of intelligent utility software, you are forced to go through a highly repetitive and hectic process app by app just to clear your device. Relying on professional software like Dr.Fone saves significant time and effort.
Bonus tip: How to undo trash on iPhone (retrieve deleted data)
- Recovers data after deletion, crashes, or device damage.
- Supports photos, messages, contacts, WhatsApp, and more.
- Supports all major iPhone, iPad, and iPod models.
- Preview and recover only what you need.

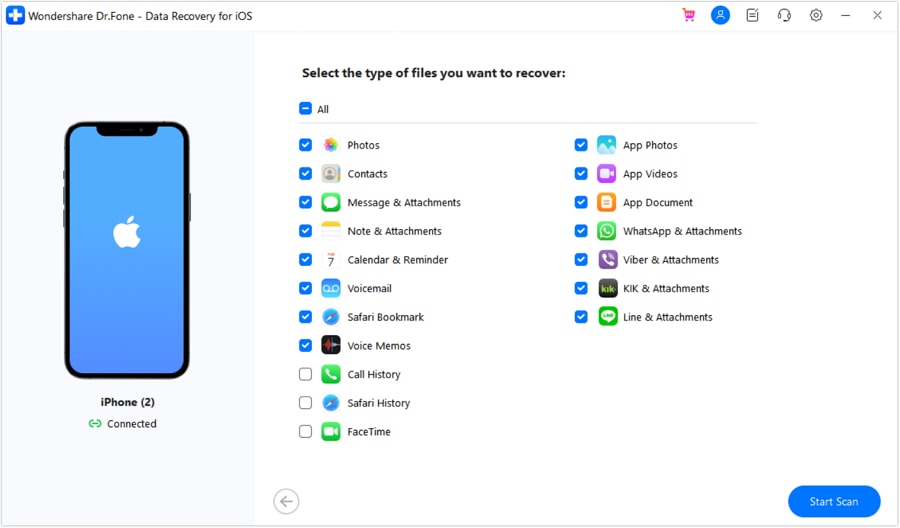
Inevitably, errors occur. Sometimes users get too aggressive with their space-saving techniques, failing to double-check their trash folders before hitting the empty button, and ending up losing critically important files forever. In the native iOS ecosystem, there is no official undelete button once the trash is emptied.
Fortunately, you can rely on the iOS data recovery tool for Dr.Fone. As a comprehensive safety net, this utility allows iPhone users to dive deep into the device's unallocated storage to retrieve all kinds of permanently deleted data. Whether extracting directly from the device hardware, scanning iTunes archives, or pulling selectively from an iCloud backup, Dr.Fone seamlessly restores the deleted files right back to your phone or computer securely.
Conclusion
If you arrived here questioning, "how do I empty the trash on my iPhone?", you now have a comprehensive understanding of the iOS file structure. As you have witnessed throughout this guide, hunting down deleted files app-by-app is a tedious and highly fragmented process. To save immense time and guarantee the absolute erasure of system junk, it is highly recommended that you employ specialized tools to perform deep memory cleanups. And remember, if an emergency strikes and important data vanishes after a frantic purge, reliable data recovery software is your ultimate safety net to bring those memories back.
FAQ
1. Is there a universal iPhone trash folder for all my deleted data?
No, Apple's iOS does not operate with a central trash bin like a computer. Instead, deleted items are securely stored within individual application folders (such as Photos, Mail, and Files) under the label 'Recently Deleted.'2. How do I empty trash on iPhone automatically?
You do not need to take any action if you are patient. Most native Apple apps, like Photos and Notes, automatically permanently delete items from their respective 'Recently Deleted' folders exactly 30 days after the initial deletion.3. Will emptying the iPhone trash folder free up my iCloud storage?
Yes. Because your iPhone actively syncs with iCloud (particularly Photos and Notes), permanently emptying the local trash folders will subsequently remove those cached files from iCloud, directly freeing up cloud space as well.4. Can I recover my videos after I empty trash on iPhone?
Once you manually empty the "Recently Deleted" folder, the native iOS interface offers no way to revert the action. You will require specialized third-party data recovery software or a previously established iTunes/iCloud backup to successfully salvage the data.
 Add Wondershare Dr.Fone as a preferred source on Google



