Recuva Software for iOS: How to Recover Deleted iOS Files

Jun 11, 2026 • Filed to: Data Wipe Solutions • Proven solutions
 TL;DR:
Recuva can only recover deleted files from older devices like the iPod, iPod Nano, and iPod Shuffle, requiring users to switch to an alternative like Dr.Fone - Data Recovery (iOS) for data retrieval on modern iPhones, iPads, and iPod Touch.
● Recuva is strictly incompatible with the iPhone, iPad, and iPod Touch, and cannot process iOS systems, limiting its recovery scope to external media cards and older iPod models.
● Dr.Fone - Data Recovery (iOS) provides full compatibility for modern Apple devices on both Mac and Windows, allowing extraction directly from the device internal storage, iTunes backups, or iCloud accounts.
● If no prior backup exists, users attempting direct internal storage recovery on an iPhone 5s or a newer model will face a lowered success rate specifically for retrieving deleted music and video files.
Ask AI for a summary
 ChatGPT
 Perplexity
 Gemini
 Claude
 Grok
Grok
Piriform’s Recuva iOS iPhone recovery software essential in recovering down the files lost in the system. By using this program, users can fetch down the deleted pictures, audios, videos etc. Also, it can relocate misplaced data from external memory, recycle bin or digital camera card too. While its main forte is to recover data this tool can retrace files from a limited scope of devices like iPod, iPod Nano or iPod shuffle. However, if you’re trying your luck with retrieving files from iPhone, iPod touch or iPad, you may get disappointed a bit. As, Recuva is not crafted to meet these needs.
Part 1: How to Use Recuva to Recover Deleted files from iPod, iPod Nano, or iPod Shuffle?
Users who have accidentally deleted their favorite streak of music from their iPods can use Recuva. As, it is capable of recovering deleted audio files from your iPod, iPod Nano or iPod Shuffle respectively. In this section, we will understand the functionality of using Recuva for recovering the deleted files from PC, respectively.
Note: Do ensure to follow the steps in the said order.
- Step 1. Download the program from an authenticated source. A welcome screen will prompt, just tap on “Next” for commencing further.
- Step 2. Over the following screen, the files types will showcase. Simply, tick mark the ones you’re wanting to recover. In this case, we will require “music” to get music back on your iPod, respectively.

- Step 3. Now, opt for the desired location where you intend to retrieve files from. Preferably, in this situation, users can opt for “On my media card or iPod”. However, if you wish to have a specific location on PC, tap “Browse”.

- Step 4. After location is decided, tap on “Start” button of the following screen. In case your files are not scanned, then only use the facility of “Deep Scan”. Also, by selecting this feature, one may need to wait for an hour to complete its process of scanning.
- Step 5. The scanning will be executed. Just, tap on “Recover” button placed next to file and March ahead.

- Step 6. Opt, for the folder where you want your deleted file to get stored in.
- Step 7. In order to scan for the deleted music, simply tap on “Switch to advance mode” button located at top right section.
- Step 8. In the advanced mode, users have the leverage of selecting any kind of drive or media types featuring in the drop-down section. For selecting language, view mode, secure overwriting and other scanning features, use “option”.
Part 2: Best Recuva for iPhone Alternative: Recover from Any iOS devices
Recuva is a renowned tool but, certainly takes a backseat for our Mac lovers as it cannot promise to recover files in iOS systems that efficiently. But, worry not! You can always trust on Dr.Fone - Data Recovery (iOS) for it is a much refined version than Recuva software for iPhone. It is equipped to meet the needs of the users who fret about losing upon their data in common scenarios like system crashes, jailbreaks or when they find difficulty in synchronizing with their backup. Dr.Fone – Data Recovery (iOS) is modelled to fetch data directly from device or from the backups you maintain. Moreover, you can bid bye to the age-long manual methods because of its 1-click technology of recovering files!
Dr.Fone - Data Recovery (iOS)
Best alternative to Recuva to recover from any iOS devices
- Designed with the technology of recovering files from iTunes, iCloud, or phone directly.
- Capable of recovering data in serious scenarios like device damaging, system crash or accidental deletion of files.
- Fully supports all the popular forms of iOS devices such as iPhone, iPad, iPod Touch.
- Provision of exporting the files recovered from Dr.Fone to your computer easily.
- Users can speedily recover selective data types without having to load the entire chunk of data altogether.
2.1 Recover Deleted Files from iPhone Internal Storage
Note: If you haven't backed up your phone's data before and your iPhone's model is iPhone 5s and later, the success rate of recovering music and video from iPhone will be lowered. Other types of data won't affect by this.
- Step 1. Draw connection of device with computer.
Begin using Dr.Fone - Data Recovery (iOS) by installing the service over your PC respectively. In the interim, connect device with computer by using a good USB cable. Open program and opt for “Data Recovery” > “iOS”.

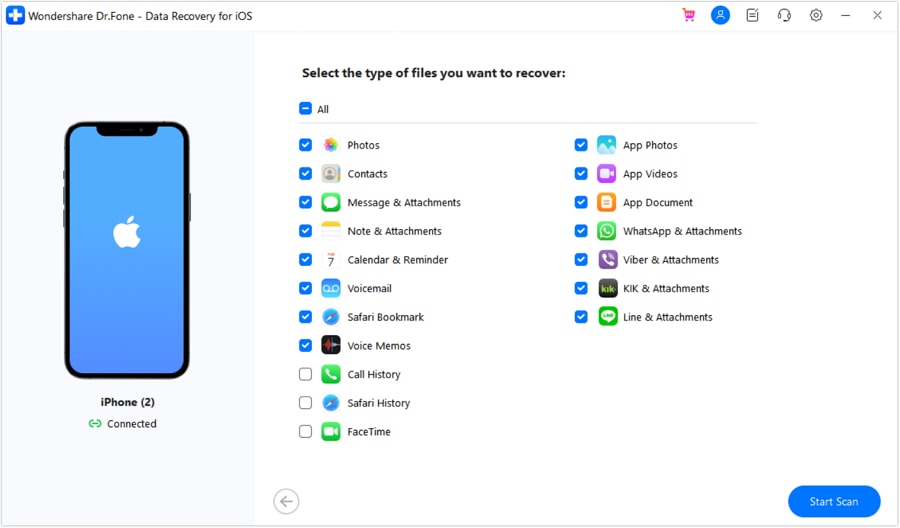
- Step 2. Select files that you wish to recover.
Now, ensure that you’re in the “Recover Data from iOS Device” mode, then tick mark the files and data types that have been lost over your system. Once you’re satisfied with your selection, perform an in-depth scanning of deleted or lost data by pushing the “Start Scan” button.
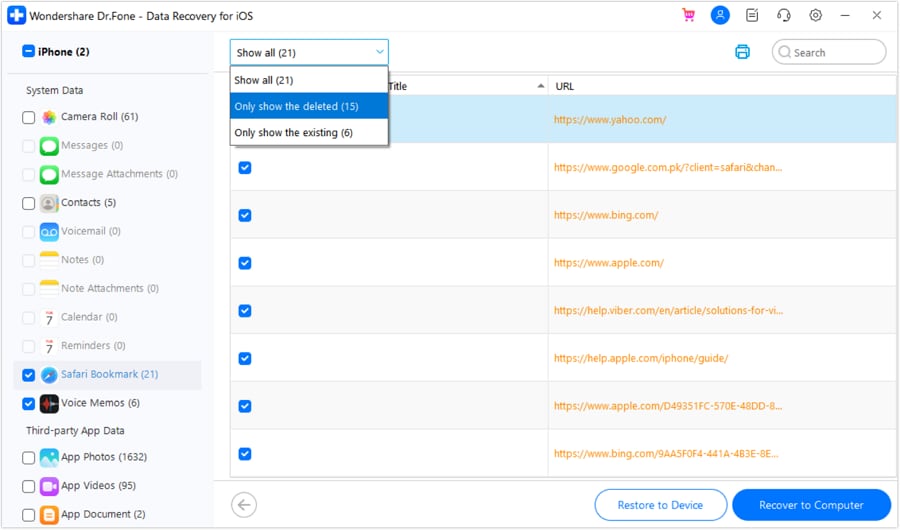
- Step 3. Glance at files by Preview and Recover.
The files will be showcased. Select the ones you require and then press on “Recover to Computer” to retrieve files in a hassle-free manner. For concise view, tap on “Only Display the deleted items” option.
2.2 Recover Deleted Files from iTunes
In this section, we will understand the means of recovering the deleted files from your iTunes backup by using this amazing alternative of Recuva software for iPhone i.e., Dr.Fone - Data Recovery (iOS)!
- Step 1. Select “Recover Data from iTunes”.
Download software on your working system. Ensure to connect your device with the PC. Open the program and tap on “Data Recovery” mode, respectively. Over the following screen, just opt for the “Recover Data from iTunes” option.
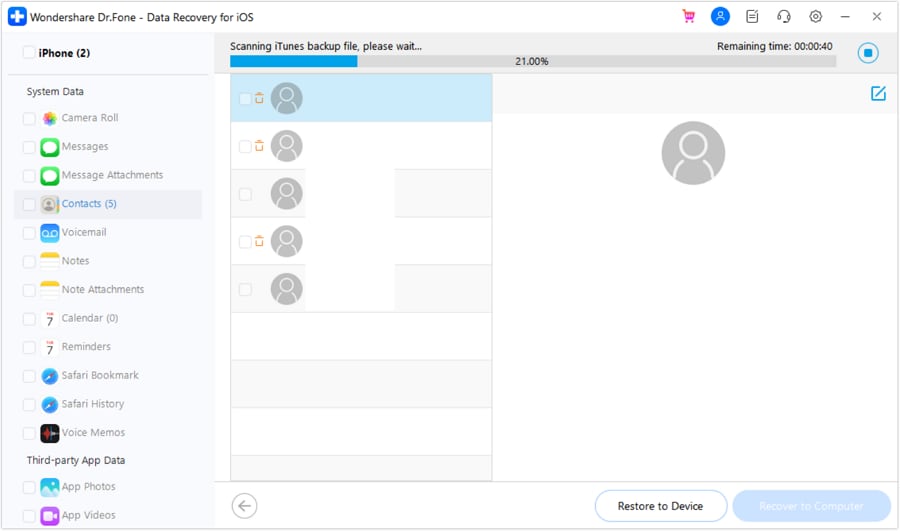
- Step 2. Scan data from iTunes backup file.
The program will progress further. Users have to make use of “Recover from iTunes backup” to proceed with recovery of data from iTunes backup. Just select the backup you need from the list of available backups appearing over the program and tap on “Start Scan”.
- Step 3. Gain Preview of the files and recover.
At last, gain a full-fledged view of the files by previewing selections. If satisfied, just press on the “Recover” button placed at the bottom. In a blink of an eye, your files will be recovered from iTunes backup.
2.3 Recover Deleted Files from iCloud
If you’ve maintained your backup in iCloud, then you can use it for speedily recovering your deleted files and much more effectively from Recuva! Follow the steps mentioned below-
- Step 1. Download software on PC.
Launch Dr.Fone - Data Recovery over your working PC. Once installed, start with opting for “Data Recovery” option.

- Step 2. Connect Device and enter “Recover iOS Data” mode.
Use an authenticated USB cable to get your device connected to your PC, respectively. Then, from program, tap on “Recover iOS Data” mode.
- Step 3. Login to iCloud
From the following screen, you need to opt for the “Recover from iCloud backup file” mode and just sign in to your account using your iCloud credentials.

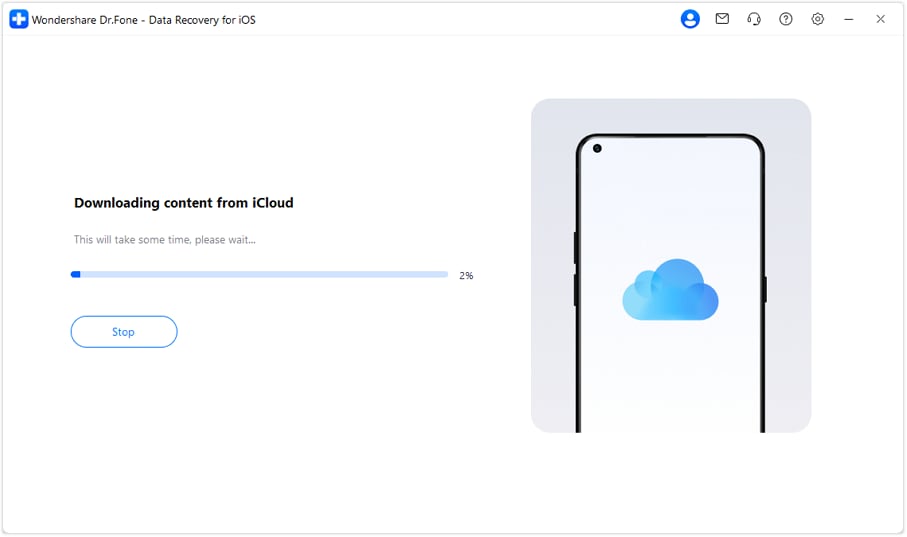
- Step 4. Download iCloud Backup File.
Select the desired iCloud backup files enlisted in the program and download the backup file by tapping “Download” button next to that particular backup.
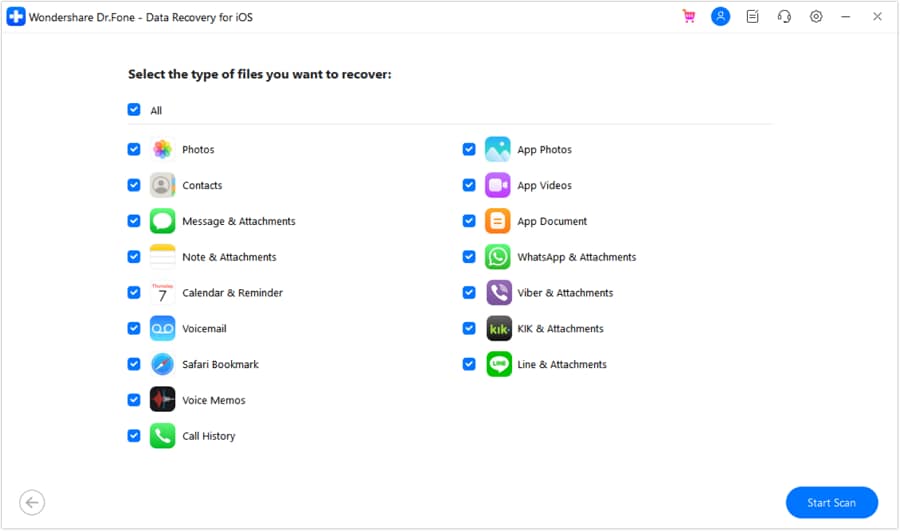
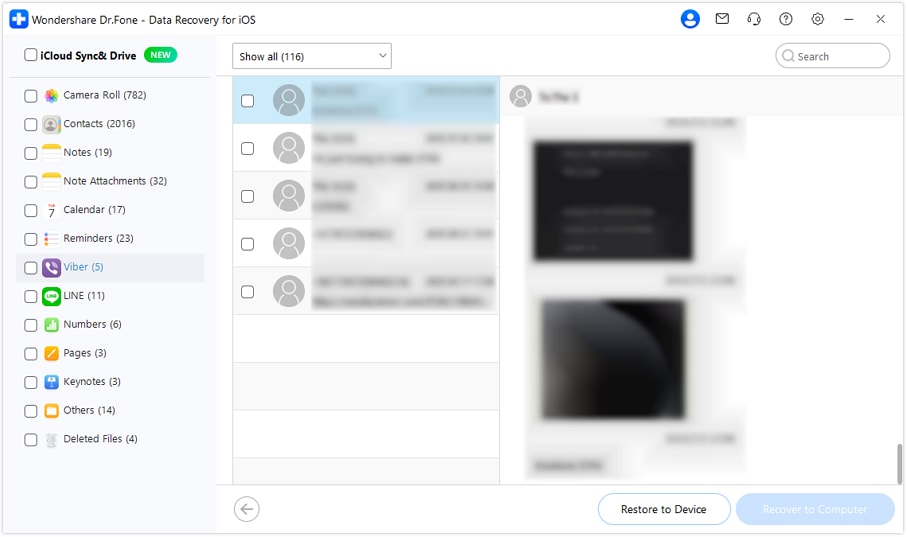
- Step 5. Choose desired files
You can now select the file types that you wish to recover. By default, all the options will be checked already. Manually unpick the ones that are not needed and click on “Next”.
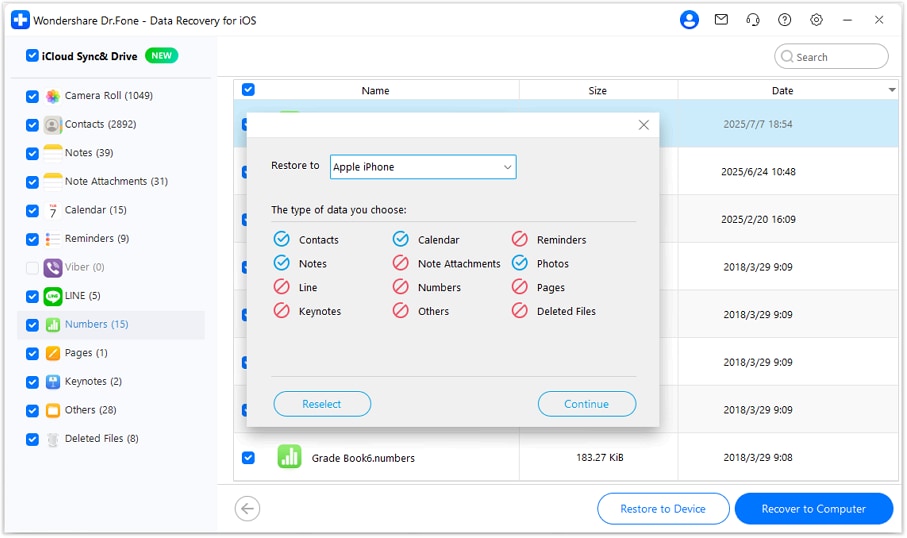
- Step 6. Thoroughly Preview data and recover
After the desired items are downloaded, just preview the data selected by you and then execute recovery. Depending upon your need, select the “Recover to Computer” or “Recover to your device” option.
Conclusion
Data loss can be a distressing experience, but with the right tools, you can effectively recover your precious files. Recuva is a viable option for iPod, iPod Nano, or iPod Shuffle users, while Dr.Fone - Data Recovery (iOS) offers a more comprehensive solution for all iOS devices. With Dr.Fone's user-friendly interface and versatile recovery capabilities, you can retrieve lost data from iPhones, iPads, and iPod Touch, regardless of the cause of data loss. Be prepared for any data loss situation by having Dr.Fone - Data Recovery (iOS) as your reliable data rescue companion.


iPhone Recovery
- Deleted Data Recover
- 1. Recover HEIC Photos on iPhone
- 2. Recover Deleted Calendar Event
- 3. Retrieve iPhone Deleted Reminders
- 4. Retrieve iPhone Deleted Voicemail
- 5. Recover iPhone Deleted Photos
- 6. Recover iPhone Deleted Note
- 7. Recover Call History from iPhone
- 8. Recover iPhone Deleted Contacts
- 9. Play GamePigeon 8 Ball on iMessage
- 10. Recover Deleted iOS Files
- iPhone Passwords Recover
- 1. Retrieve iPhone Email Password
- 2. See iPhone Saved Password
- 3. Access iPhone Password
- 4. Get iPhone Password Back
- 5. iPhone Passcode Requriement Pops
- 6. Find iPhone Wi-Fi Password
- iPhone WhatsApp Recover
- 1. Recover WhatsApp Messages Apps
- 2. Recover Deleted WhatsApp Messages
- 3. Recover WhatsApp Messages Online
- 4. Retrieve Deleted WhatsApp
- Recover from Stolen iPhone
- Recover from Broken iPhone
- 1. Recover Data from Broken iPhone
- 2. Fix iPhone Fell in Water
- 3. Water Damaged iPhone Data Recovery
- 4. Recover Data from Dead iPhone
- 5. Recover Photos From Broken iPhone
- iPhone Recovery Tips
- 1. GT Recovery Undelete Restore
- 2. Recover Data from Memory Card
- 3. Recover iPhone Lost Data
- 4. SD Card Recovery for Mac
- 5. Clear Safari History
- 6. Recover from iPhone in DFU Mode
- 7. iTunes Data Recovery
- 8. Recover iPhone Data Without iTunes
- iPhone Recovery Tools
- ● Manage/transfer/recover data
- ● Unlock screen/activate/FRP lock
- ● Fix most iOS and Android issues
- Free Download Free Download Free Download

Selena Lee
chief Editor