Recover photos, messages, WhatsApp, and more — no backup
needed.
Recover photos, messages, WhatsApp, and more — no backup
needed.

 100% Security Verified | No Subscription Required | No Malware

 :
: 
 ChatGPT
 Perplexity
 Gemini
 Claude
 Grok
Grok

I accidentally deleted my entire to-do list on the Reminders app. Is there a safe way to retrieve deleted reminders on iPhone quickly, even if I forgot to back them up?
Recent iOS User Query
Missing urgent tasks or important appointments is largely a thing of the past for iOS users, thanks to Apple's native ecosystem. Most of us today have become much more capable of maintaining a highly structured routine despite our extremely hectic schedules. We owe a big thanks to Apple's Reminders app. This powerful built-in task management software is indeed making our modern lives remarkably manageable. By far, it is fair to say that the Reminders app is doing a real work of art when it comes to personal productivity.
Entrusting our major timetables to the Reminders app is inarguably a wise move. It is well-equipped and efficient enough to keep our engagements in the precise order. But regardless of its reliability, we are still not in full control of digital mishaps. Suppose we delete the important entries in our Reminders app by mistake, or the reminders mysteriously vanish into thin air following a software update. That is definitely a nightmare for anyone relying on their schedule. But do not sweat it. If you are struggling with missing tasks, there are several highly effective methods to recover deleted reminders on iPhone.
In this comprehensive guide, we will explore the core functions of the Reminders app on your iPhone and discuss its robust abilities. Most importantly, we will provide a step-by-step tutorial on how to retrieve deleted reminders on iPhone seamlessly in 2026. Read on to learn exactly what to do when your lists go missing.
In this article
Part 1. The Important Role of iPhone's Reminders App in Your Daily Grind
The Reminders app on your iPhone is quite similar to the Notes app in a few specific areas. You can seamlessly use them both to create a quick to-do checklist or jot down crucial notes throughout your day. However, Reminders is much more particular with precise dates, geolocation, and schedules since this app is deeply integrated with the Apple Calendar. It can give you real-time alerts about your scheduled meetings or errands you definitely do not want to miss. Therefore, opting for the Reminders app is the best choice if you wish to stay ahead of your time-sensitive plans.
Apple has consistently revamped the Reminders app over the years, rolling out new and highly useful features in every major iOS update up to 2026. If it happens that you have not explored them fully yet, check out the list of capabilities below and try them out to maximize your efficiency.
Include URLs in the reminders
The Reminders app allows you to add as many rich details as you need in a single reminder entry. That includes direct URLs, location tags, and extra descriptive notes. It comes as a remarkably handy feature, especially at times when you need to save a particular web link for upcoming meetings, online reservations, or virtual appointments.
Use subtasks to further organize your reminders
Organizing your diverse tasks for each day can be challenging if you have a lot on your plate. Thus, the Reminders app allows you to create multiple nested subtasks and categorize them according to your specific workflow. It is a very efficient way to consolidate all your complex assignments, groceries, or project phases in one centralized place.
Ask Siri to create reminders for you
Let's say you get caught up in a very hectic schedule, like driving or carrying heavy items. At this point, you do not have the extra time or free hands for menial tasks like manually typing reminders into the app. What is the best thing to do? Well, simply ask Siri for help. The voice assistant can save the reminders for you instantly. Just provide a clear command like 'Remind me to call John at 5 PM', and review the Reminders app afterward.
Create collaborative reminders
Did you know that you can actually share your customized reminder lists with other people? Yes, it is entirely possible. You can easily bring your teammates, family members, or friends into the loop and share the list with them through an iCloud invitation via email, SMS, or even social media platforms, ensuring everyone stays on track.
Part 2. Why the Reminders on iPhone Sometimes Disappear?
Deleting the reminders by mistake is absolutely the main reason behind sudden data loss. It is a very common scenario that happens to most of us when hastily clearing out old tasks. However, the reminders on your iPhone can also go unexpectedly missing due to underlying internal factors related to your device's software environment. Maybe the iOS bumps into an unforeseen glitch during an update, or the Reminders app suddenly stops working due to syncing conflicts. Either way, it is an unusual occurrence that needs immediate fixing. Below are some of the primary software-related reasons why iPhone reminders disappear.
You sign in to a different iCloud account
It is entirely possible that your reminders are not actually missing permanently. They might still be safely stored on Apple's servers. However, you are having a hard time viewing them because you probably switched to another iCloud account or logged out accidentally. So, go to your iPhone's Settings immediately and check if you are currently using your primary and official iCloud account linked to your data.
Result of iOS glitch
Though it is rarely the case with newer iOS versions, system glitches or temporary problems on iOS might directly affect the performance of native mobile apps. They can suddenly act up, crash, or temporarily lose connection to important data on their local databases. So when you experience this exact problem, take the necessary actions immediately to recover deleted reminders on your iPhone by troubleshooting the system.
The Reminders app sync option is disabled
Is it your strict habit to save everything on your iCloud backup account? If so, this is perhaps exactly why your reminders do not currently appear in the app. Do not worry. It does not necessarily mean that the reminders are gone or permanently deleted. You simply cannot view them because they are stored online and not fetched locally to your device. To avoid this inconvenience, you just need to re-enable the Reminders app sync option in the iCloud settings.
Part 3. Effective Techniques How to Retrieve Deleted Reminders on iPhone
Nobody wants to lose important schedule data on their iPhones. Such unfortunate incidents can indeed stir up serious troubles in our professional or personal lives. Whether the root cause is natural system behavior or intentional deletion by mistake, you should strive hard to bring your vital files back. Below is a comprehensive list of some highly effective methods on how to retrieve deleted reminders on iPhone.
Method 1: Restart Your iPhone
If your reminders suddenly evaporate without warning, it is probably a clear sign that your iPhone is having a minor system conflict. Such cases are often considered minor memory glitches and can be fixed easily with a simple device restart. Well, it is best to try it first and see what will happen before moving to complex solutions. Here is how to do it.
-
Step 1 Initiate the Power Off Sequence
For users of the iPhone X or later, hold the Power and (either Up or Down) Volume buttons simultaneously. Alternatively, hold the Power button alone if you are using an iPhone SE or older model with a Home button.
-
Step 2 Slide to Power Off
Drag the Power-off slider to the right once it appears clearly on the screen to shut down the device.

-
Step 3 Turn the iPhone Back On
Once the screen turns completely black and the device vibrates to signify shutdown, turn on your iPhone once again. Press and hold the Power button until the Apple logo materializes on the screen, then check your Reminders app.
Method 2: Enable the Reminders App Sync Option
Maybe you just need to recalibrate your syncing settings to access your reminders securely from iCloud across all your iOS devices. Do not worry; that is as easy as pie. Resolving sync issues is often the quickest fix. Here is how to enable the Reminders app sync option.
-
Step 1 Open Settings
Go to the native Settings app on your iPhone's home screen.
-
Step 2 Access Apple ID
Click your name or iCloud account profile banner at the very top of the Settings menu.

-
Step 3 Navigate to iCloud
Click on iCloud to view the list of apps utilizing the cloud service.
-
Step 4 Toggle Reminders
Find Reminders among the list of synced applications. Toggle on the radio switch beside it so it turns green, initiating the sync process.

Method 3: Retrieve Deleted Reminders From iCloud via the Web
Do you regularly back up your iPhone using iCloud services? If so, you do not have to worry excessively if you delete the reminders by mistake. Apple keeps an archive, meaning you can easily access and restore them again directly via the iCloud web server. Here is how to do it.
-
Step 1 Access iCloud Online
Go to icloud.com using a desktop browser. Click Sign in.

-
Step 2 Log in to Your Account
Log in securely to your iCloud account using your Apple ID credentials and two-factor authentication.
-
Step 3 Enter Account Settings
Once you are in the main dashboard, click on Account Settings or the Settings icon.
-
Step 4 Find the Restore Option
Under the Advanced section located at the bottom-left corner of the window, find and click Restore Calendars and Reminders.

-
Step 5 Select an Archive
Choose the specific iCloud backup archive timestamped prior to the deletion that you want to recover. And then click Restore.
-
Step 6 Confirm Restoration
In the next popup window, click Restore once again to proceed. This will overwrite your current reminders with the archived version.
Method 4: Recover Deleted Reminders From iTunes Backup
The same logic applies if you have local iTunes backups stored on your computer. You can easily recover the deleted reminders on your iPhone with just the snap of a finger by loading a previous system state. Here is a complete guide on how to do it safely.
-
Step 1 Open iTunes
Launch the latest version of the iTunes app (or Finder on newer macOS) on your computer.
-
Step 2 Connect the Device
Connect your iPhone directly to your computer with an original Lightning or USB-C data cable. Wait until iTunes recognizes your device successfully.
-
Step 3 Select Your iPhone
Click on the small device icon once it prominently appears in the upper-left area of the iTunes windows.
-
Step 4 Go to Summary
Click on the Summary tab located on the left-side navigation panel.
-
Step 5 Initiate Backup Restoration
Go to iTunes' main dashboard section labeled Backups. Click Restore Backup.

-
Step 6 Choose the Correct File
Select the most relevant backup file that contains the deleted reminders you want to recover based on the date and time.
-
Step 7 Restore
Finally, click Restore and wait for the process to transfer data back to your iPhone. Remember, this will replace current device data with the backup contents.
Method 5: Recover Deleted Reminders on iPhone Using Wondershare Dr.Fone
 Recovers data after deletion, crashes, or device damage.
- Supports photos, messages, contacts, WhatsApp, and more.
- Supports all major iPhone, iPad, and iPod models.
- Preview and recover only what you need.

The big question is: How to recover deleted reminders on iPhone without an iCloud or iTunes backup? Restoring from older backups often overwrites your existing data, which is highly inconvenient. Well, you are in luck because Wondershare Dr.Fone can help you with that seamlessly. It is fully equipped with a robust and highly intelligent data recovery feature that can help you bring your files back with or without prior backups, avoiding unnecessary data erasure. Here is exactly how to use it in simple, easy steps.
-
Step 1 Install the Software
Download Wondershare Dr.Fone from its official website. Install it properly on your desktop or Mac computer.
-
Step 2 Launch the Toolkit
Launch the newly installed Wondershare Dr.Fone software. Wait until the interface fully loads.
-
Step 3 Select Data Recovery
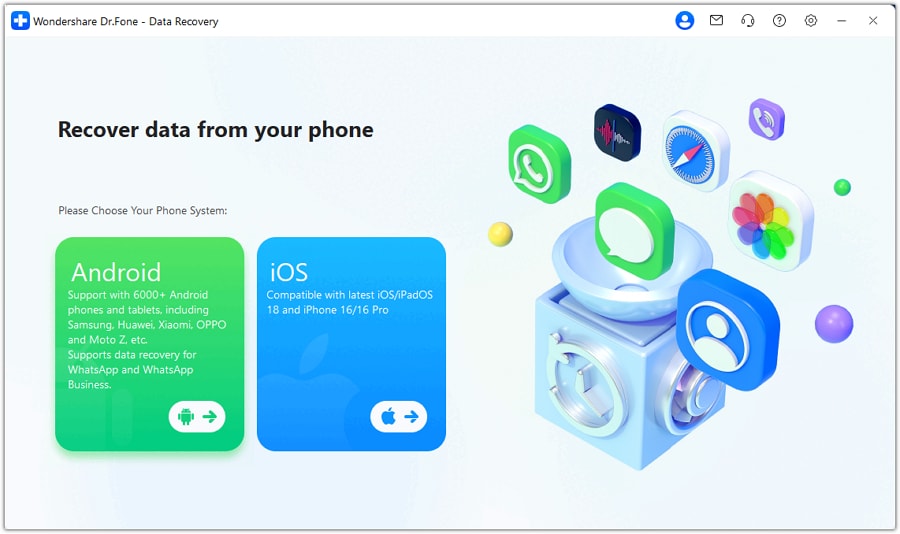
Click Toolbox on the left side panel. Right after, head over to the main dashboard and click Data Recovery.

-
Step 4 Choose iOS Platform
Since you are trying to recover deleted reminders on your iPhone, accurately select iOS from the provided device options.
-
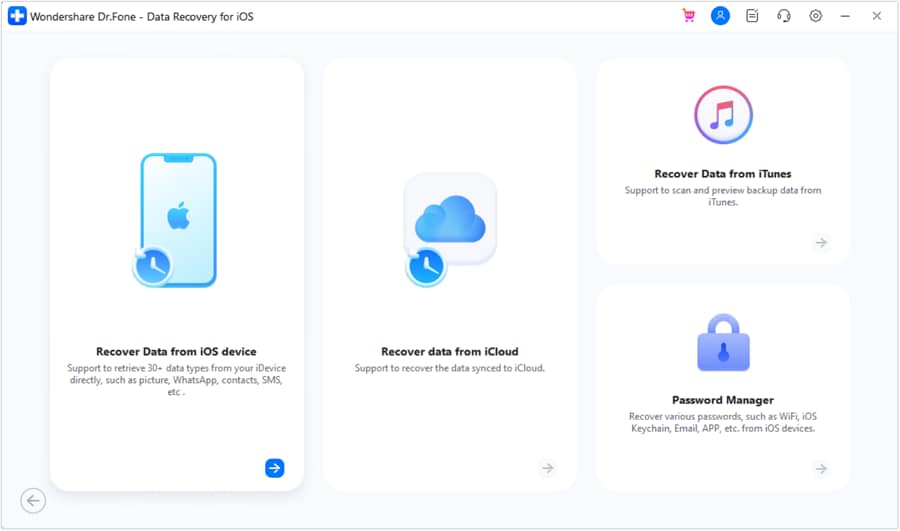
Step 5 Opt to Recover from Device
Click Recover Data From iOS Device to initiate the direct scanning protocol.
-
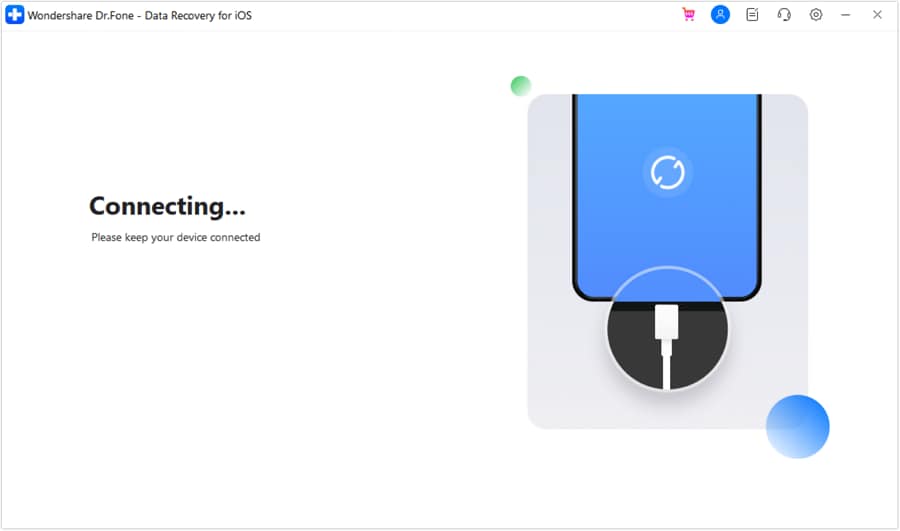
Step 6 Link the iPhone
Link your iPhone to your computer using an authorized data cable. Secure the connection firmly to avoid unnecessary interruption during the critical data extraction process.
-
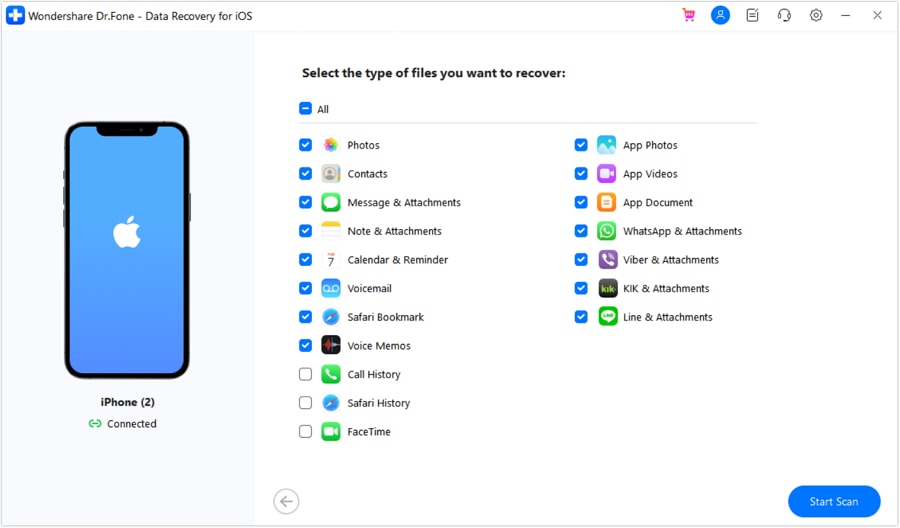
Step 7 Select Reminders for Scanning
Once your iPhone is safely detected and recognized, the potential file sources from your device will dynamically show up on the screen. Check the tickbox beside Calendar & Reminder. You may conveniently unselect other items you do not want to recover to speed up the process.
-
Step 8 Start the Scan
Right after finalizing your selection, click Start Scan. Wondershare Dr.Fone will systematically browse the selected sources and immediately preview the files that have been fetched up successfully. Wait patiently until the deep scan process is done.
-
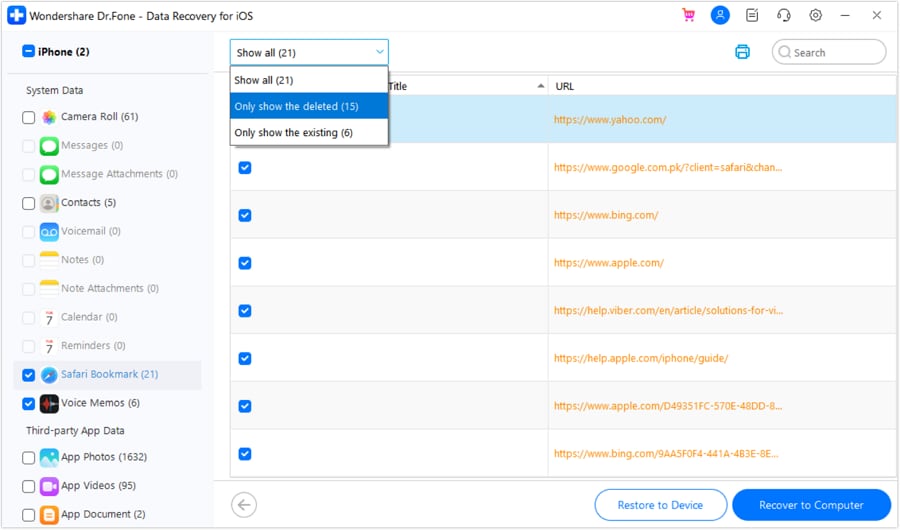
Step 9 Preview and Restore
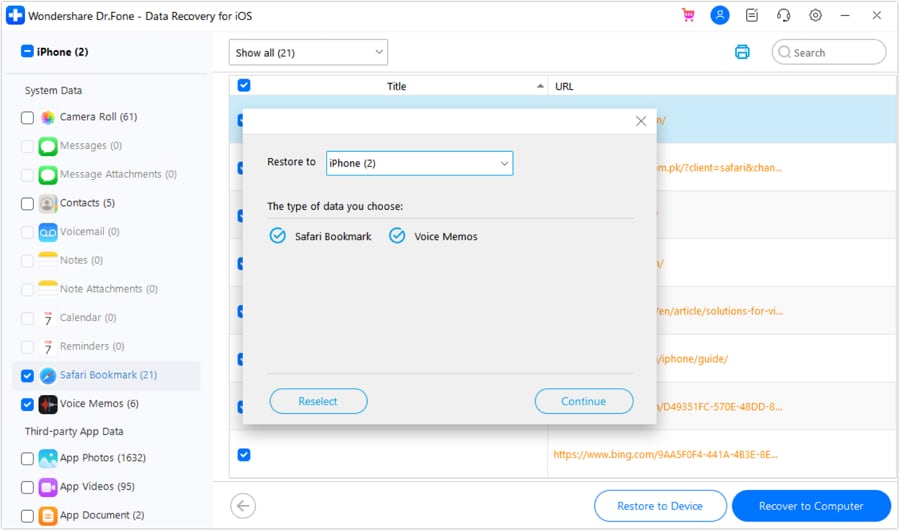
Select the specific files you genuinely want to recover. In this case, closely inspect the list, find and choose the deleted reminders you want to recover. And then click Restore to Device or save them to your PC.
-
Step 10 Confirm Restoration Details
Confirm your target device and review the exact reminders you want to recover. Right after, click Continue to write the data.
-
Step 11 Turn Off Find My
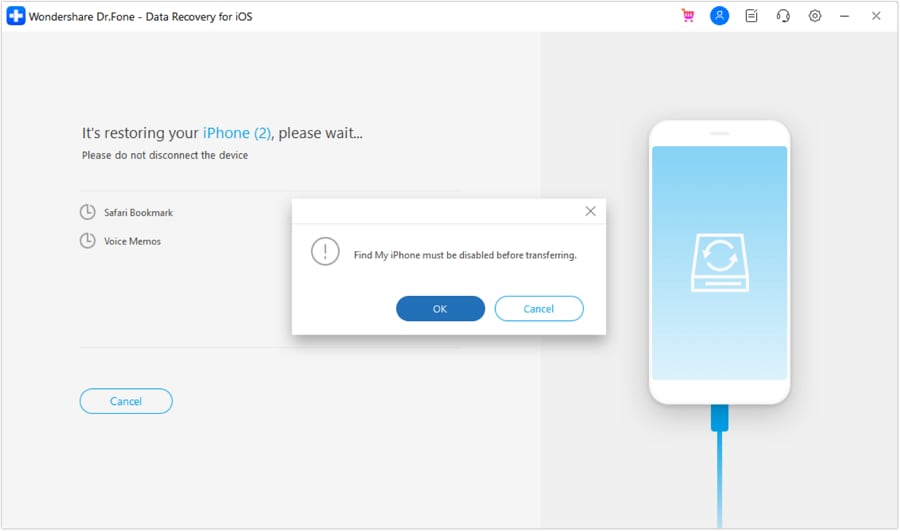
If you are currently using the Find My iPhone service, you will be prompted to disable it temporarily within your device settings to successfully complete the recovery process without system interference.
-
Step 12 Restoration Complete
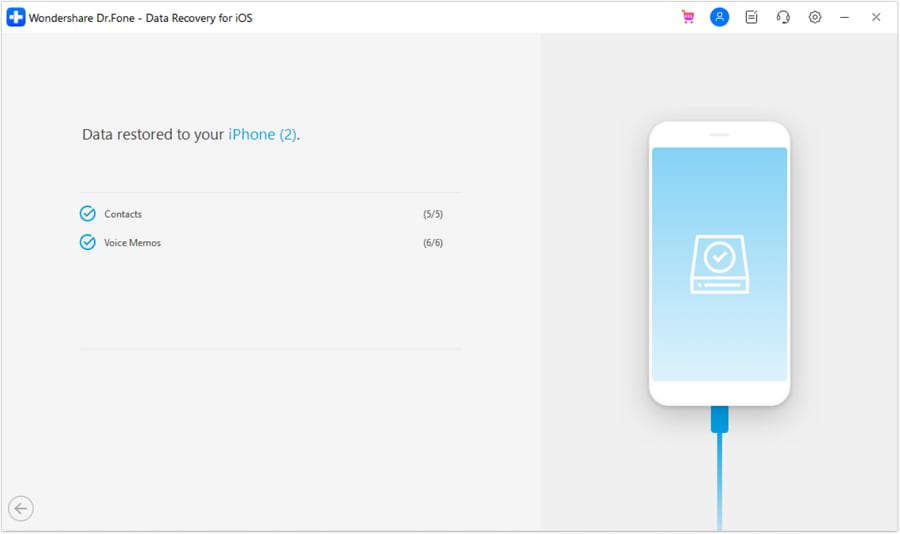
A success window officially confirming the complete restoration of your deleted reminders and other selected files will actively appear after the process concludes. Your tasks are now back!




Conclusion
It is without a doubt that Apple's Reminders app is indeed a powerful native tool that can help us tremendously in managing modern chaotic workflows. We can effortlessly use it to stay accurately updated with our complex schedules or precisely keep track of our daily tasks. So if things ever go south with the Reminders app and data goes missing, we should address and fix it straightaway without second thoughts. The above-mentioned techniques detailing how to retrieve deleted reminders on iPhone are all thoroughly tested, proven, and highly effective for iOS users. Just carefully choose the best method that perfectly suits your specific data loss situation. Moreover, we highly recommend that you download Wondershare Dr.Fone on your computer for comprehensive and professional assistance. This all-in-one smart mobile solution can effectively help you recover deeply lost data, fix system crashes, or securely back them up to a safe offline location, keeping your digital life intact.
FAQ
-
1. Can I recover deleted reminders on iPhone without a computer?
Yes, you can retrieve deleted reminders on iPhone without a computer if you rely on iCloud. You can simply ensure the Reminders sync is turned on in your iPhone settings, or log into iCloud.com via a mobile browser and access the data restoration panel to bring back archived calendars and reminders. -
2. How long does iCloud keep my deleted reminders?
iCloud typically retains archives of your calendars and reminders for about 30 days. This means if you realize you need to retrieve deleted reminders on iPhone within a month of the deletion, you have a high chance of restoring them directly from the iCloud web portal before they are permanently overwritten. -
3. Will restoring reminders from an iCloud backup overwrite my current data?
Yes. When you use the 'Restore Calendars and Reminders' feature on iCloud.com, it replaces your current live reminders and calendars across all your synced iOS devices with the data from the chosen archive date. Any new reminders created after that backup date will be lost unless you save them elsewhere first. -
4. Why is Wondershare Dr.Fone better than iTunes for recovering reminders?
Wondershare Dr.Fone is highly advantageous because it allows you to selectively preview and retrieve deleted reminders on iPhone without forcing a complete factory reset or blindly overwriting your existing device data. iTunes, on the other hand, enforces a full backup restoration, replacing all current phone data with older contents.
 Add Wondershare Dr.Fone as a preferred source on Google